How to DIY a Cute Boho Top for Spring and Summer

This stunning off the shoulder boho top is easy to make with my free blouse sewing pattern.
It comes in five sizes, XS to XL, and I made mine from a square of leftover viscose.
It’s also suitable for any similar lightweight fabric. It’s suitable for all levels of sewist from confident beginner up to the most advanced.
So let’s get started!
Tools and materials:
- Boho blouse sewing pattern
- Paper for pattern and pattern drafting
- Masking tape
- 60 by 60 inches (150 cm by 150 cm) viscose or similar lightweight fabric
- Narrow elastic cord
- Half inch (1 cm) wide elastic
- Fabric marker
- Safety pin
- Measuring tape
- Ruler
- Pen
- Scissors
- Pins
- Iron
- Sewing machine
- Serger (optional)

1. Cut out the fabric
Print out the pattern and tape it together as shown, if needed.
Redraw the top pattern onto a larger piece of paper.
Add 1.6 inches (4 cm) to the width at the center front.

Lengthen the pattern by 3 inches (8 cm) at the neckline and optionally increase the length of the blouse to 24 inches (60 cm). I used the longer length in my tutorial.
Use the same pattern for the sleeve.
Cut two sleeves on the fold, one back on the fold and two front pieces.

2. Join the front and back
Finish the raw edges at the center front.
Place the two front pieces together with the right sides facing.
Mark the depth of the neckline 8 inches (20 cm) at the center front.
Pin and sew the front together from the mark to the bottom of the blouse.

Place the back on top with the right sides facing. Pin and sew the side seams.
Finish the raw seam edges.

3. Elasticate the sleeves
Fold the sleeves in half lengthways.
Measure 8 inches (20 cm) up from the lower edge along the fold.

Draw a diagonal line from the mark to the bottom of the sleeve seam.
Cut along the line to shape the bottom of the sleeve.

Mark 8 inches (20 cm) from the cut edge on the fold.
Draw a line straight across the sleeve at this point.

Cut a piece of the narrow elastic to fit around your bicep.
Pin it to each end of the line you just drew on the sleeve.

Sew it to the line along the length of the elastic using a straight stitch and stretching the elastic to fit.
Repeat for the second sleeve.

4. Insert the sleeves
Pin and sew the sleeve seam together from the underarm to the bottom edge, with the right side inside.
Turn the sleeves right side out.

Pin and sew them to the blouse with the right sides together, from the armhole seam up each side of the curve. Leave the top of the sleeve unsewn.
Finish the raw edges of the neckline and the top of the sleeves.

5. Neckline
Turn the edges of the center front opening to the inside. Sew along each side and across the bottom of the opening.

Fold the neckline and sleeve tops to the wrong side by 1.6 inches (4 cm) and pin.
Sew along the bottom edge.

Make another line of stitching 0.7 inches (1.5 cm) above the first to make a casing for the elastic.

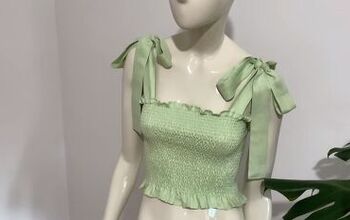
6. Neck ties
Cut two strips of fabric 19.5 inches (50 cm) long.
Fold them in half lengthways with the right side inside and sew the long edges and one short edge.

Turn them right side out and press flat.

Cut a length of the wider elastic to fit around your shoulders less than 4 inches (10 cm).
Pin and sew the ends to the open edges of the ties.

Feed one tie and the elastic through the channel in the neckline.

Pull it through so that the elastic is hidden and the ties are an equal length.
Stitch the ties to the ends of the casing to secure them.

7. Finishing
Turn up a narrow double hem at the bottom of the blouse and the end of each sleeve, and sew in place.

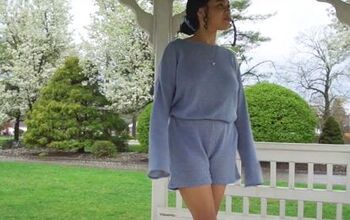
DIY boho top
This style is very much a favorite of mine. I love the flowing sleeves and the neckline that can be worn on or off the shoulders.
It looks great worn loose over a flowing skirt or tucked into jeans. It’s also much easier to make than it appears, with the help of my free pattern.
Please let me know in the comments what you think of it. If you have any questions, I’d be very happy to answer them.
The author may collect a small share of sales from the links on this page.


Comments
Join the conversation