Awesome Upcycle Tutorial: DIY a Super Easy Metallic Leather Jacket

Here’s an easy DIY metallic leather jacket upcycle. Follow along and I’ll show you how to take an already awesome leather jacket and, truly, make it even more awesome!
Ready to upcycle your leather jacket from ordinary black to a fabulous new color? Then let’s start!
Tools and materials:
- Old leather jacket
- Small jar of metallic paint
- Medium craft paint brush
- Coconut oil
- Soft cloth
1. Paint your jacket
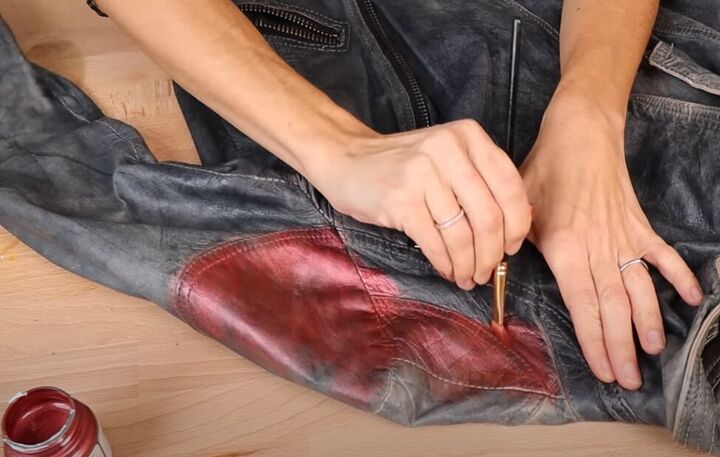
With your chosen metallic color and a medium craft brush, begin painting your jacket.
Work in small sections at a time, and if your paint dries quickly, then make sure you are buffing the edges as you paint so you don’t get any lines showing through.
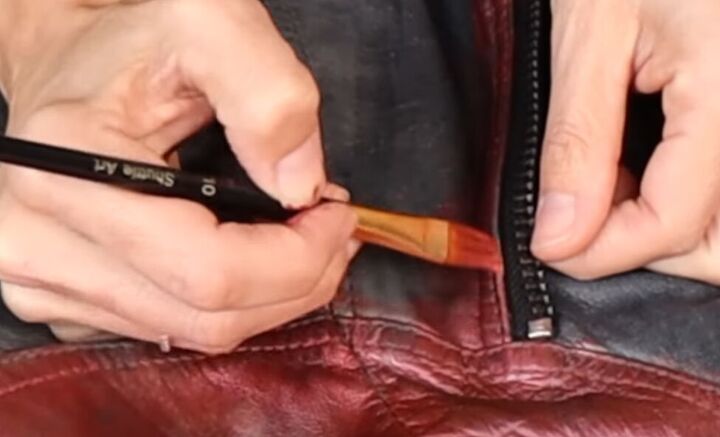
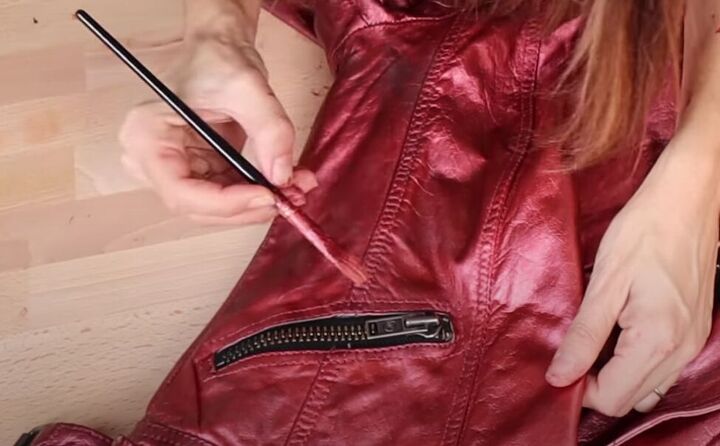
Tip for crisp edges: When you are working on crisp edges where you really need to control the application of the pain, like next to a zipper, then it is helpful to use more paint and the flat end of your brush. Go very carefully and slowly.
Tip for seams: When you are painting over areas of your jacket with seams or stitches, stipple the paint to push it into the threads, seams or indentations, for even coverage.
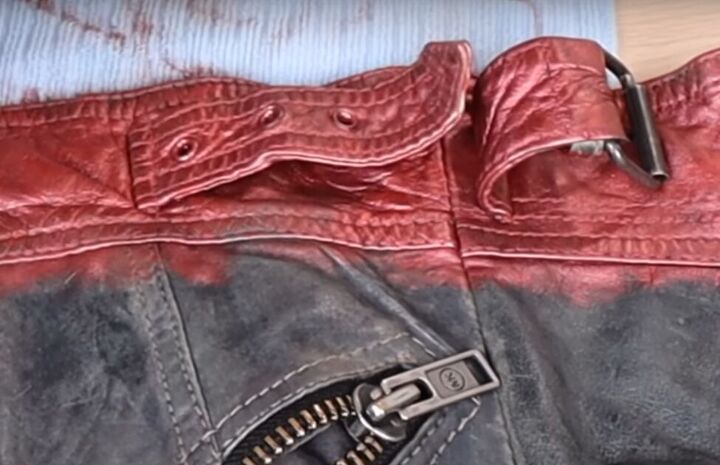
What do you do with the jacket hardware?
It’s really up to you. I decided to paint the smaller hardware, like the gromets on the belt tab, but leave the large hardware, light the belt buckle, in their original metallic state.
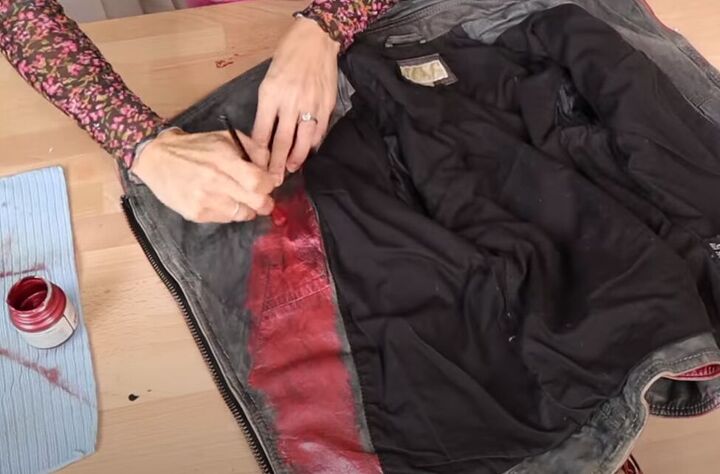
Don’t forget to paint any leather that’s on the inside of your jacket, as well.
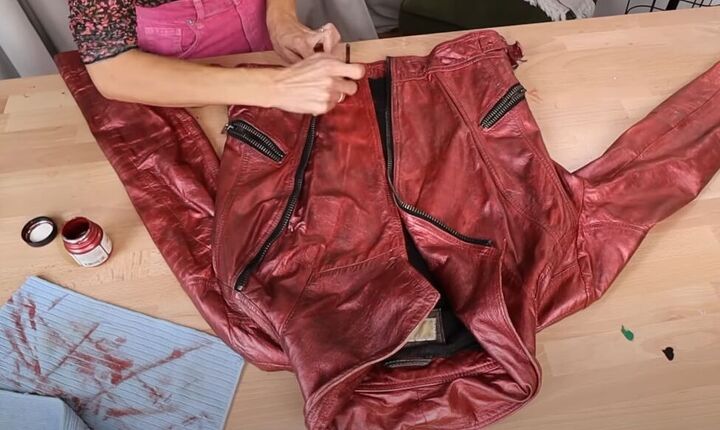
2. Apply a second coat of paint
Once you have one coat of paint fully applied, you can decide on whether you want a second coat.
I liked a little of the original black showing through the first coat, but I did a test patch with a second coat and decided I liked that even more.
If you do decide on a second coat, the paint will go on much faster than the first coat, and buffs much more easily.
3. Let the metallic paint dry, then touch up
Let the painted jacket dry for several hours.
Then look over your whole jacket with fresh eyes for any areas that may need a little touch-up.
Watch for any black showing through, seams or stitches not fully covered, or any edges that aren’t as crisp as you’d like.
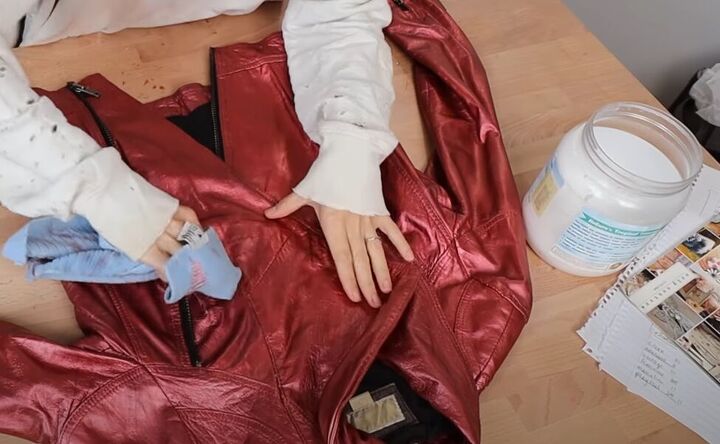
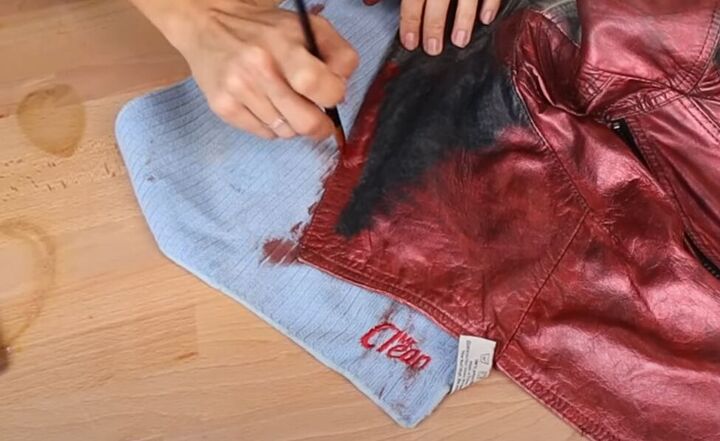
4. Buff your jacket
Use a soft cloth, with coconut oil, to buff all the leather on your jacket. This step will leave your leather well-conditioned and very soft and supple.
The coconut oil will also bring some sheen to your jacket.
Your jacket will feel kind of slippery for a few hours after buffing in the coconut oil, but eventually the oil will soak into the leather.
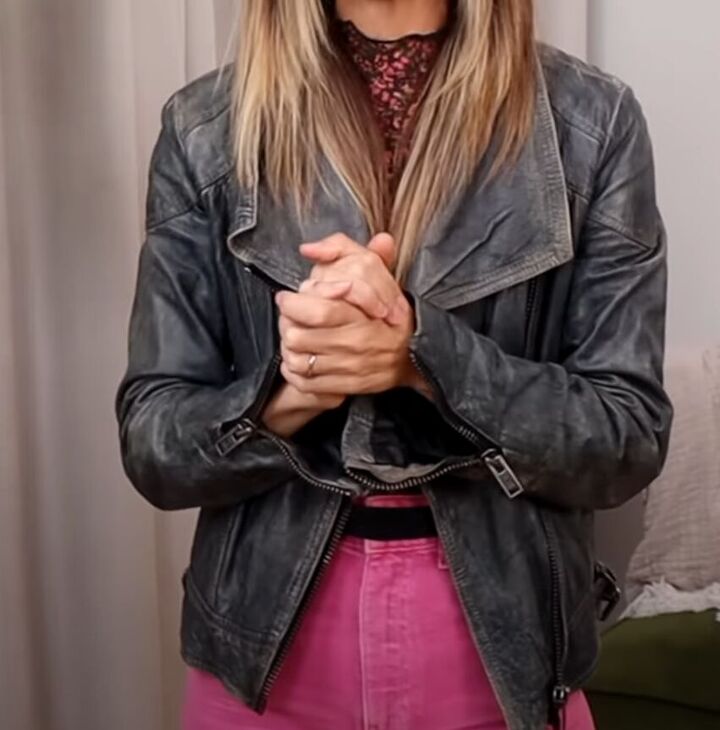
Can you believe this leather jacket upcycle started with this already great black leather jacket.
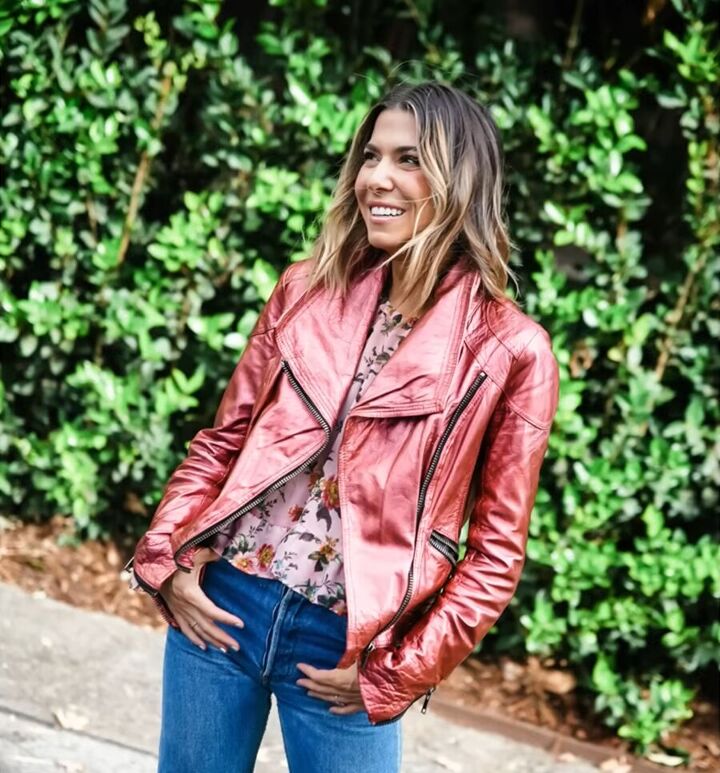
And turned it into this fabulous metallic leather jacket?
DIY metallic leather jacket
Give this a try! You’ll learn how to paint leather and give yourself a new jacket that looks just like the really expensive metallic leather jackets that you might not want to spend the money on.
If you do make your own upcycled metallic leather jacket, please leave a comment to let me know how it turned out!
If you enjoyed this DIY, check out my post on How to Create a Crystal Embellished Denim Jacket.
The author may collect a small share of sales from the links on this page.


Comments
Join the conversation
Great idea but then all your ideas are great, you're very artistic.