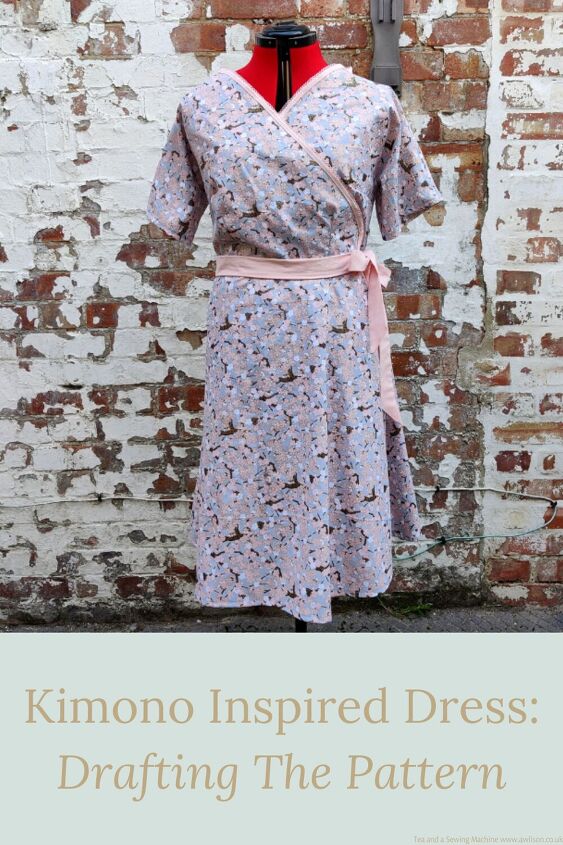
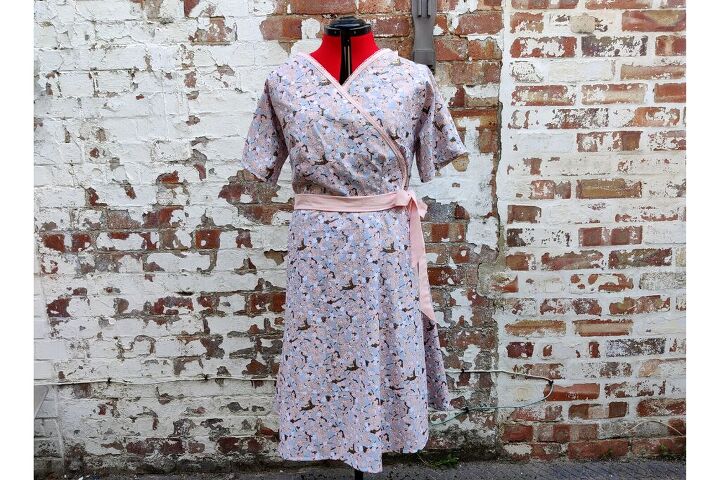
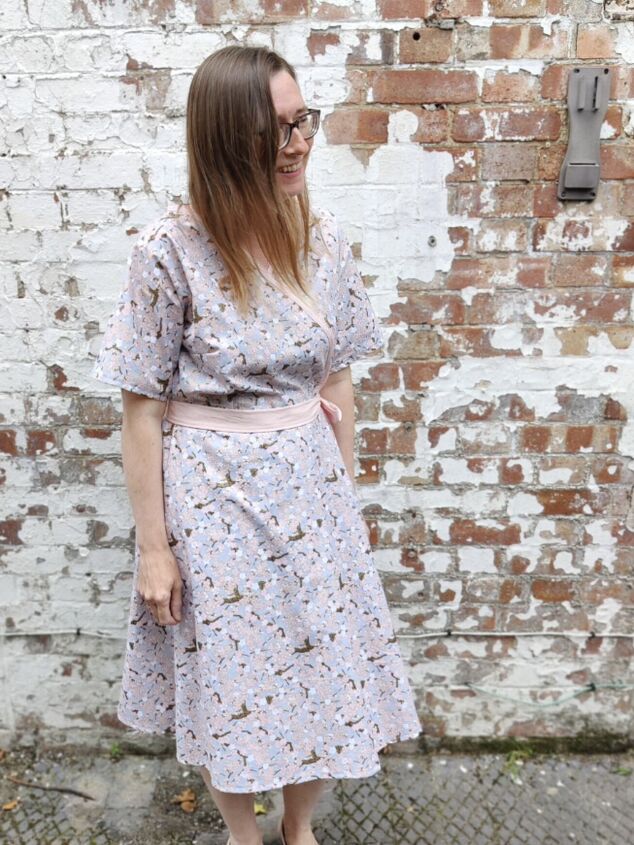
Kimono Inspired Dress

Before You Start
To draft the pattern for the kimono inspired dress, you will need:
Your measurements. If you don’t already have them jotted down somewhere, as a minimum you will need to know the distance from your shoulder to just above your elbow, your shoulder to your waist, around your hips and from your waist to just below your knee.
A bodice block. If you have one already, you can use that. If not, you can either draft one ( there are instructions here), or an easier alternative is to use a loose ish fitting t shirt.
A skirt block is also useful, but again if you don’t have one, I’ll walk through drafting one when we get to that stage.
You will also need:
Pattern paper (I prefer the sort with the grids on. Dots would also work)
A pencil
A ruler
A French curve is useful but not essential.
Drafting the Bodice
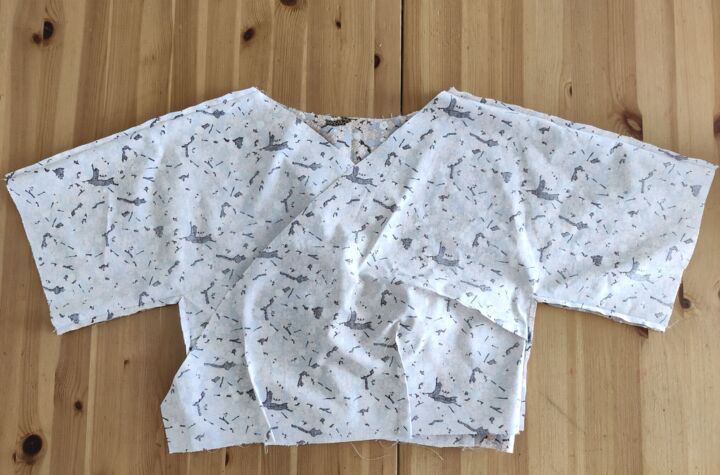
The bodice of the kimono inspired dress is in 3 pieces: one back piece and 2 front sections that cross over. The sleeves are cut as part of the bodice.
The back is easiest so we’ll start there, then use the back as a starting point for the front pieces.
Drafting the bodice is much easier if you have a bodice block already. There are instructions here if you don’t already have one. Although this means that things will take a bit longer, if you look after your bodice block, next time you want to make a dress from your own measurements, you’ll have a head start!
If you are short on time or if you don’t want to do this, you could use a loose ish t shirt as a template instead. I’d recommend folding it in half so that you pattern piece is symmetrical.
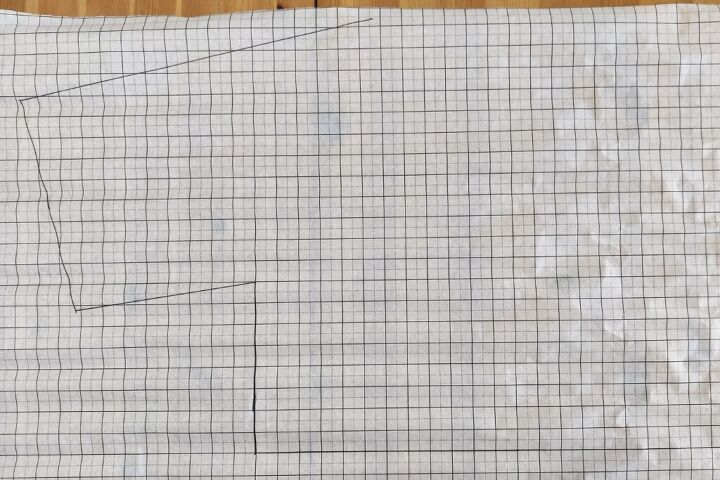
Bodice Back
Lay a piece of pattern paper over your bodice back block (or t shirt), and trace the neckline and shoulder. Mark where the bottom of the armhole is and where the waist is. From the bottom of the armhole, draw a vertical line downwards to the waist.
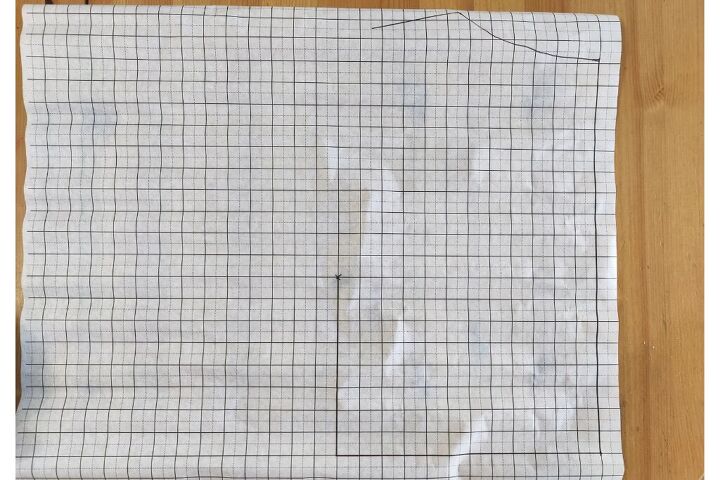
Decide how long you want the sleeves to be by measuring from your shoulder to just above your elbow. Continue the shoulder line by this amount.
From the armhole point, draw a line the same length minus 3 cm, at the same angle.
Join these two lines up to make the elbow end of the sleeve.
Adding some darts at the waist will give the kimono inspired dress some shape, but it’s up to you. I added mine to the pattern piece, but you might prefer to cut it out the pattern piece and then add the darts by pinning it to yourself or a dress form and putting them where they need to go. It’s difficult to do this as it’s round the back, so it can be useful at this stage if you have a kind friend or a helpful husband.
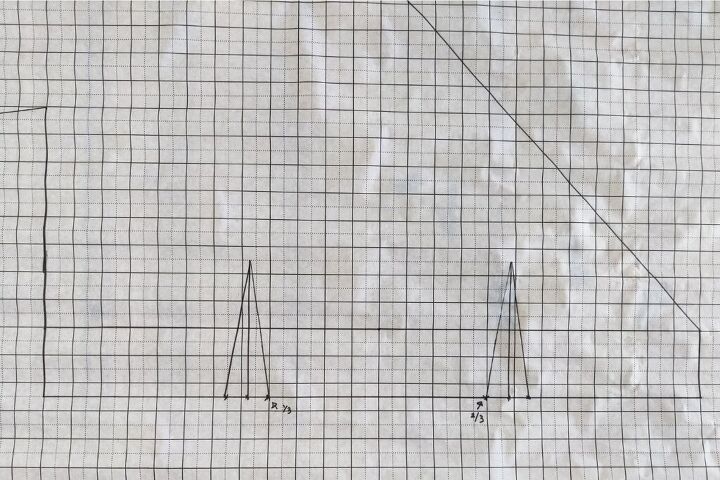
To add the darts to the pattern piece, mark 3rds along the waistline. On the third nearest the centre, draw a vertical line 10 cm (4 inches) long. Mark off 1.5 cm (5/8 inch) on either side on the waist line. Draw from the top of the line to these points.

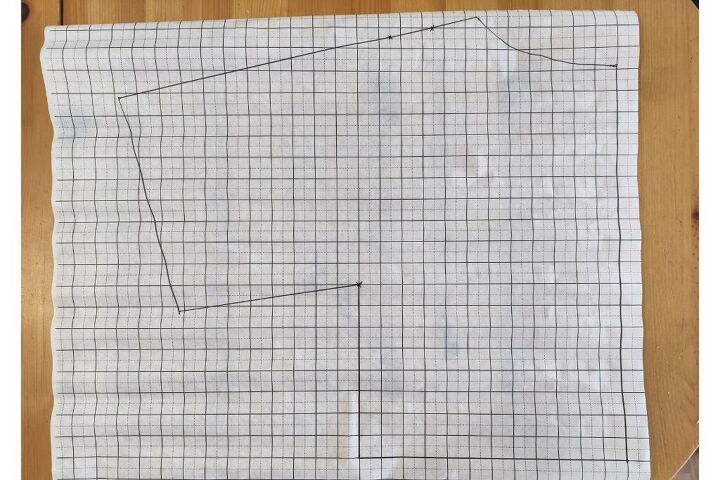
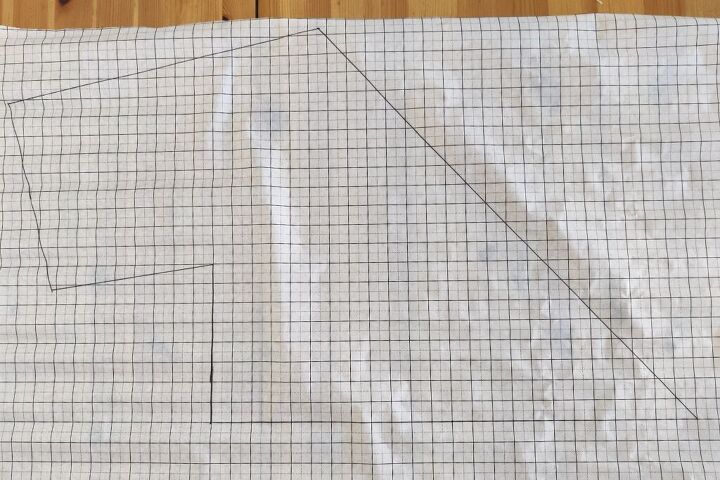
Bodice Front
The bodice front of the kimono inspired dress is a little bit more complicated. This is one of the reasons for starting with the back!
As the bodice back is symmetrical it was only necessary to draw half of it because both halves are the same, and it can be cut on folded fabric.
The bodice front on the other hand is not symmetrical, so the whole piece will need to be drawn.
Take your bodice back. On to another piece of pattern paper, trace the entire sleeve from the shoulder, the side and the waist. Draw the other half of the waist line, but don’t worry about the rest.
Extend the waist downwards by 5 cm (2 inches).
At the far end of the waist line, draw a 6 cm (2 1/4 inch) line upwards. Join the top of this line to the shoulder.
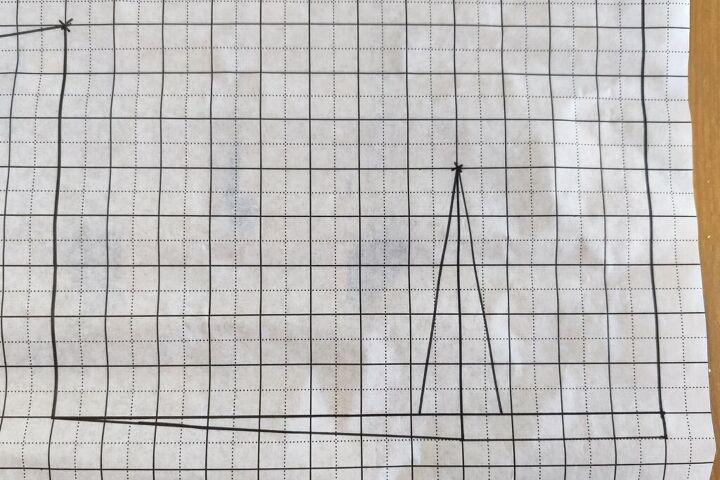
To add the waist darts, they will need to go at about a third and 2 thirds of the way along, but please check on yourself! The beauty of making clothes from your own measurements is that you can make clothes that fit you not squeeze yourself into things designed for somebody whose body shape is entirely different.
The waist darts will probably need to be about 10 cm (4 inches) long, and 3 cm (2 1/4 inches) wide, but it will depend on your dimensions so please check!
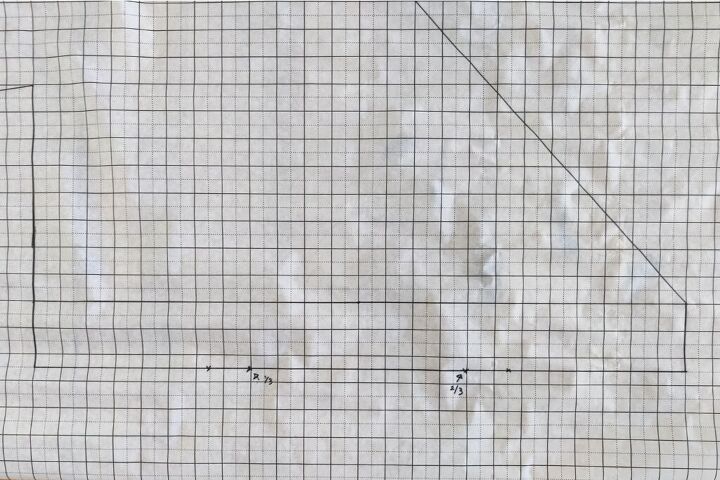
From the bottom of the side, measure up 2 cm and draw from here to the centre line of the waist dart. Do the same on the other side.
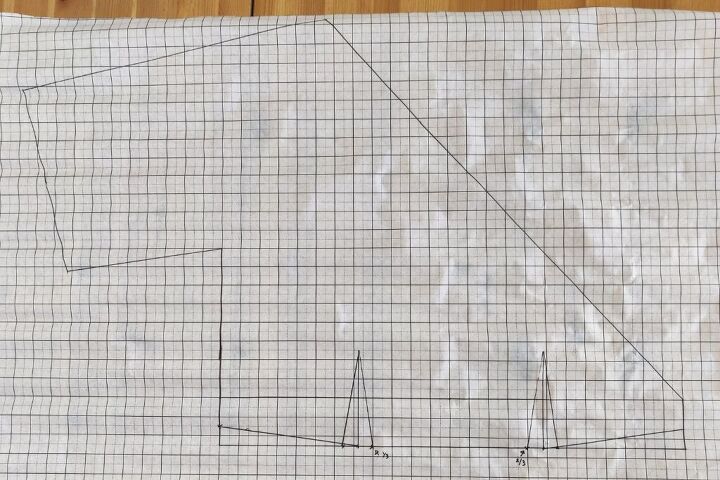
The bust dart should be about 6-8 cm (2 1/4 – 3 inches) down from the armhole and go upwards. The point of the dart on mine was 3 cm higher than the centre of the wide end.
The length of the dart was 12 cm (4 1/2 inches) long and 3 cm wide.
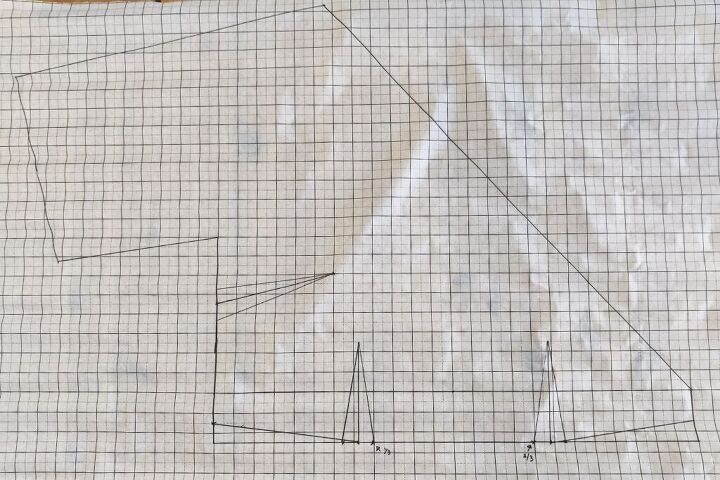
To compensate for the fabric taken up by the darts, extend the centre line of the bust dart by 1 cm (1/4 inch), then join this to the armhole point. On the side, measure down 1.5 cm (i.e. half the width of the dart), and join the centre of the dart to the side at this point.

Drafting the Skirt
You’ll be pleased to know that drafting the bodice front of the kimono inspired dress is the trickiest part! The skirt is much easier.
If you have an A line skirt pattern already, you can use that. All you’ll have to do is adjust the waist so that it is the same size as the waist on your bodice.
If you need to draft the skirt, this is how to do it.
You will need 3 measurements: the length that you want the skirt to be, your hips and a waist measurement. For the waist measurement, use the waist of your bodice pieces, not your actual waist. Don’t forget that the back is only half and you’ll lose some with the darts!
So measure the waist of your bodice back pattern piece, subtract the width of the dart and double it. Then measure the waist of your bodice front piece and subtract the width of both the darts. Then add the back and the front measurements together.
Now draw a rectangle on pattern paper that is a quarter of your hip measurement plus a couple of cm, by your desired skirt length.
Divide your waist measurement by 4 (remember this is the waist of the dress, which will probably be more that your actual waist measurement). Calculate the difference between the waist measurement divided by 4, and the hip measurement divided by 4. This number is how much you will need to lose from the waist, and the way to do that is by cutting a triangle out of the waist.
Find the half way point along the short edge at the top. Draw a line downwards 10 cm (4 inches) long. Have you still got that number that was the difference between hips and waist? That needs to make the wide end of the triangle, which will be at the waist. So if the difference was 5 cm, mark 2.5 cm either side of the line and draw these points up to the other end of the line.
Now draw a line from hem edge to the pointy end of the triangle.
Grab a pair of scissors and cut out the triangle. Now cut along the line almost to the point of the triangle. If your pattern piece ends up in 2 parts, don’t worry, it’s just that it’s slightly easier if it’s still in one piece.

Push the sides of the triangle together and stick them with tape.
Draw round this onto another piece of pattern paper. You might like to add a gentle curve to the waist and the hem. A French curve is good for this, but if you don’t have one you could use a plate instead.
Almost There!
You’ll need to add a seam allowance to your pattern pieces.
On the bodice, add 2 cm to the shoulders, sleeve hem, sides and waist. Don’t worry about the neckline or the other raw edges. You’ll be finishing those with bias binding.
On the skirt, add 2 cm to the waist, hem, and side seam.
It’s a good idea to write on your pattern pieces that you have added a seam allowance and by how much. This will be useful if you find your pattern in a year or 2 and decide that you want to make another one!
On the skirt piece indicate the edge that will need to be on the fold when you cut it out.
Tips
Drafting a pattern yourself from your own measurements does involve some trial and error. So don’t be surprised if you need to adapt it.
Don’t be afraid to make changes if you want to. We are not following other people’s rules here, we are doing our own thing!
Including a generous seam allowance means that you have a bit extra if things turn out to be a bit small.
It’s a good idea to make a toile so you can make changes if you need to before cutting into your fabric. Toiles are traditionally made from muslin. but I normally use cheapy polycotton.
The next post will explain how to make the dress up, so once you are ready, you could start deciding which fabric to use. You’ll need 3-4 metres of cotton or polycotton, a small amount in a contrasting fabric for the belt (or you could use the same as for the dress), 3 metres of bias binding and a couple of buttons.
You Will Need
3-4 metres of cotton fabric. How much you need will depend on your dimensions and whether the fabric you are using has a directional print.
1 metre of contrasting cotton fabric
3 metres of bias binding
2 buttons
Cutting Out
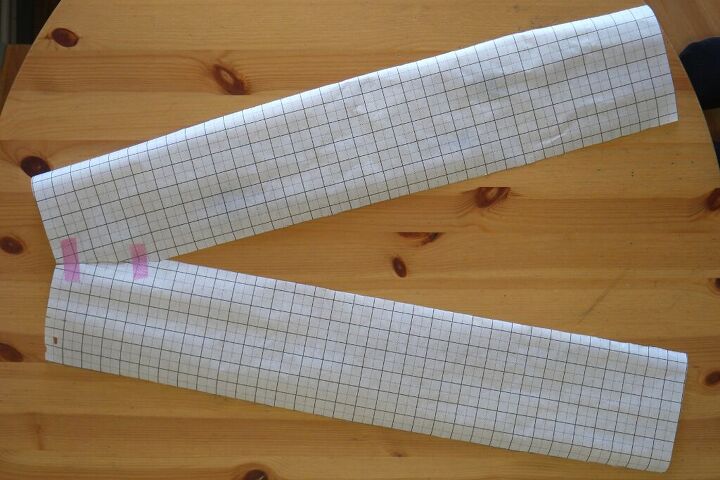
The pattern pieces you should have are 1 bodice front, half a bodice back and half a skirt.
The half pieces will need to be cut on the fold and the bodice pieces will need to be cut on folded fabric, so that you end up with a left hand one and a right hand one.
The grain on the skirt pieces and the bodice need to run up and down the centre front and centre back.
Cut 2 bodice front pieces on folded fabric.Cut 1 bodice back on the fold.Cut 3 skirt pieces on folded fabric.
Bodice
Pin and sew the side darts and the darts at the waist on both of the bodice front sections. When you’ve done this, don’t trim them! Even if you checked before, they might still need adjusting, so leave them for the moment.
With the wrong sides together, pin one of the front sections to the back piece at the shoulder. Sew from the neck to the elbow. Pin, then sew, the other front piece to the back at the shoulder in the same way.
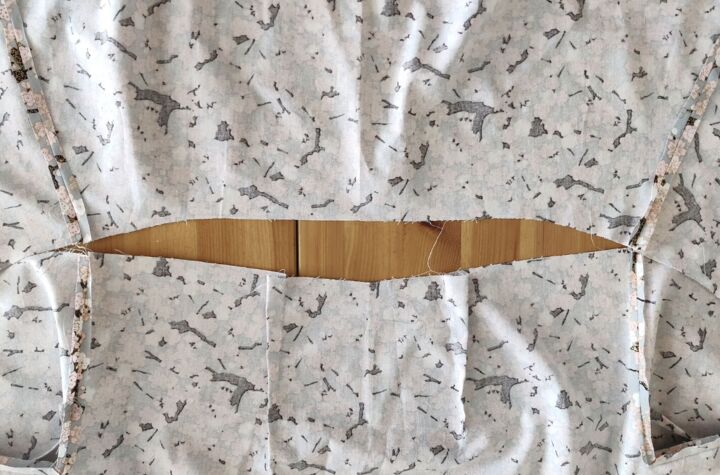
Pin the side seams and try it on.
Check that the darts are in the right place and adjust them if necessary. The side seam might need adjusting as well. Remember that the dress is designed to be on the loose side, so don’t worry if it’s not a perfect fit. We’re aiming for roomy!
Sew the side seams.
Once you are sure that the fit of the bodice is fine, then trim the seams and press them open. You will need to make a little cut into the corner of the armpit. Just be careful not to cut the stitches!
Skirt
Sew the skirt sections together. As they are all the same and symmetrical, you don’t need to worry about them being a certain way round. As long as you sew them with the right sides together and the tops all at the top, it will be fine!
if you got your maths correct, the side seams of the skirt will match the side seams of the bodice, but it’s a good idea to check and adjust the skirt if necessary.
Pin the skirt to the bodice at the waist, taking care to match the side seams. Don’t worry if they are a little bit off, as Patrick and Esme won’t be checking! If it’s more than a few millimetres though, you will need to adjust it. For some reason I had got the maths entirely wrong and I needed to take a couple of cm off each side of the skirt! But as I had taken a few minutes to make sure that the seams would line up, I didn’t have to do a lot of unpicking, so I would definitely recommend checking, even if you’re tempted to skip it!
Try the dress on and check that the waist is at your waist. One potential problem area is where the bodice and the skirt meet at the bits that wrap round. So pull the dress round you and hold it at the waist where the buttons will be before making adjustments.
Sew the waist seam.
Finishing Off
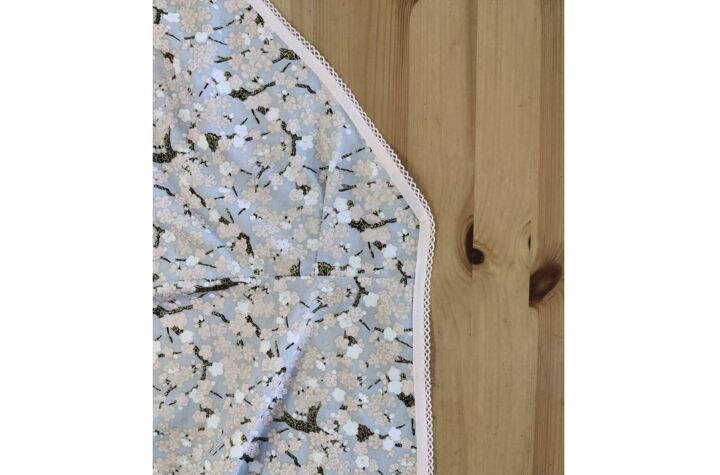
Finish the raw edges of the neckline, the bodice and the skirt with bias binding.
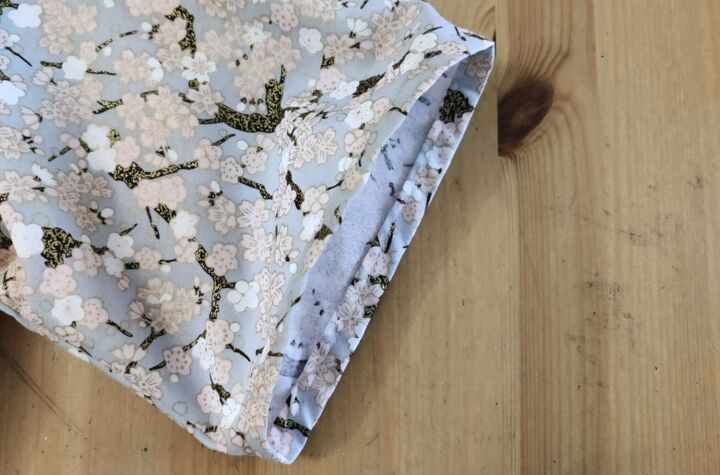
Hem the sleeves.
Hem the skirt.
I used a folded hem, but you can use whichever method you prefer.
Make the button holes. You’ll need one on either side, in the bodice near the waist. When you’ve made the button holes, pop the dress back on and mark with a pin where the buttons need to go. Then sew the buttons on.

Making the Belt
Cut 2 1 metre sections 10 cm wide from contrasting fabric.
Join them together at the short edge. Trim and press the seam open.
Fold it in half lengthways and pin. Sew along the raw edge, leaving the ends open.
Trim the seam, then turn the belt the right way out.
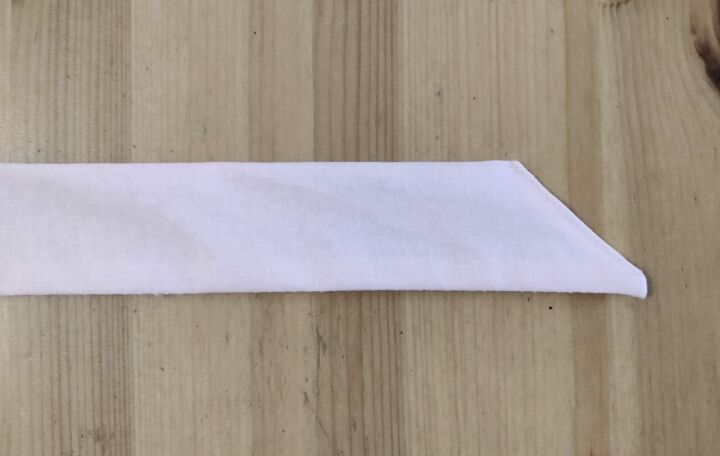
Cut the ends into a point. Fold the raw edges inwards. Pin them and sew across them. Run the iron over it.
Now your kimono style dress is ready to wear!
The author may collect a small share of sales from the links on this page.


Comments
Join the conversation
Your kimono style dress is awesome! Thank you for sharing.