How to Sew a Chunky Tote Bag With a Zipper

If you’ve ever wanted to know how to sew a tote bag with a flat bottom, you’re going to love today’s project.
I wanted a wide opening tote bag with a zipper and I came up with this flat-bottomed design. It’s easy to make even for beginners.
Tools and materials:
- Baby canvas fabric
- Cotton lining fabric
- Fusible interfacing
- 28.5 inch (72 cm) double zipper
- 1.25 inch (3 cm) wide webbing strap
- Pen
- Ruler
- Scissors
- Fabric clips
- Iron
- Sewing machine

1. Cut out the fabric pieces
The main bag piece is 28.5 inches by 13.75 inches (72 by 35 cm) and you need to cut one from each of the canvas, the lining and the fusible interfacing.
You will also need two strips of lining, each 15.75 inches (40 cm) long by 1.5 inches (4.5 cm) wide.
Cut the webbing straps into two lengths of 32.25 inches (82 cm).

2. Draft the bag pattern
Fold the interfacing in half along the longer edge and then in half on the shorter side.
Place it in front of you with the main fold facing away from you and the open edges to your left.
Draw a line across the width of the folded interfacing, 3 inches (8 cm) from the lower edge.

Divide the lower portion into three equal sections of 4.75 inches (12 cm).

Draw a diagonal line from the top left to the bottom right of each of the left and right hand sections, and from the bottom left to the top right of the middle section.

Cut along the diagonal lines.

Open out the interfacing and iron it to the wrong side of the canvas piece.
Cut around the outline of the interfacing to create the bag shape.

Use this as a template to cut the same shape from the lining.

3. Attach the straps
Draw a line 7.5 inches (19 cm) from each end of both straps.

Pin one strap to the top diagonal edges of the bag on the right side, 2 inches (5 cm) from the edge.
Sew along each long edge of the strap, from the line to the end, and across the width.

Repeat for the second strap at the other end of the bag.

4. Insert the zipper
Remove the tabs and separate the two sides of the zipper completely.

Place one of the zipper tapes on the top diagonal edge of the lining and notch the tape where it meets the top corner.

Clip the tape to the lining along the diagonal and straight edges, notching it at the other corner.

Attach the second tape to the other end of the bag in the same way and sew the zipper in place.

Place the outer bag, right side down, on top of the lining with the straps sandwiched between them.
Fold the zipper to the inside and line up the edges of the outer and lining.
Sew the outer bag to the zipper and lining, 0.25 inches (0.7 cm) from the edge at both ends.
Turn the bag right side out.

Bring the zipper teeth together and trim the ends to match.
Replace the tabs at each end of the teeth and close the zipper so the tabs meet in the middle.

5. Assemble the bag
Turn the bag and lining inside out.

Bring the sides of the raw edges together on each side of the bag, aligning the point with the center of the zipper teeth and matching the edges.
Sew half an inch (1 cm) from the raw edges.
Complete the other side to match.

6. Bind the seams
Trim off any excess tape or webbing.

Clip and sew a lining strip to one side of each seam with a 0.25 inch (0.7 cm) seam allowance, matching the raw edges.
Cut the strips to length.

Turn the strip over the seam, folding in the short edges.
Turn in the long edge of the strip, then fold it over the raw edge and sew it in place.
Turn your DIY zipper back right side out and push out the corners.


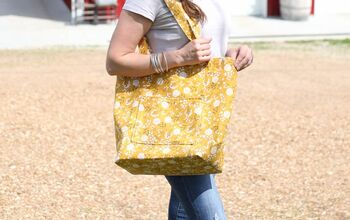
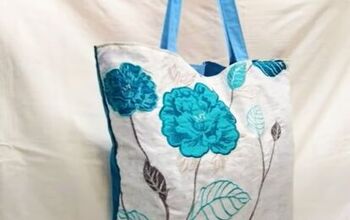
Tote bag with zipper
Cutting the bag from one piece of fabric makes it very easy to put together.
It’s a roomy bag with easy access to the inside and you could add an inner or outer pocket - or both!
I really enjoyed making this and I hope you do too. I’d love to know how you get on with it and I’m interested to read your comments.
Next, check out this Cute and Easy DIY Backpack Tutorial.
The author may collect a small share of sales from the links on this page.


Comments
Join the conversation