How to Sew a Beanie in a Few Quick Steps

In winter, knowing how to sew a beanie hat could be an important skill!
I’ve put together a beanie sewing pattern for you that’s easy to follow.
It’s a step-by-step project that’s suitable for beginners as well as more advanced sewists.
Tools and materials:
- Medium weight stretch knit or fleece fabric
- Pins
- Scissors
- Ruler
- Fabric marker
- Hand sewing needle and thread
- Sewing machine
- Serger (optional)

1. Cut out your fabric
Use a non-fray fabric with stretch, for the best results.
Cut a rectangle 24 inches (61 cm) long by 21 1/4 inches (54 cm) deep.

Fold the fabric in half widthways with the right side inside. Fold it in half again twice, so you have eight layers.
Place it down with the folded edge towards you.

2. Shape the ends
Measure and mark 4 inches (10 cm) in from one short edge along the long open edge.

Join the mark to the corner of the folded edge with a diagonal line.

Mark a half inch (1.5 cm) up from the line towards the top corner.

Curve the line upwards to the mark.
Cut along the curved line.

Open out one fold of the fabric and trim the edges so that they match.

Fold the fabric in half along the longest edge and use the shaped end as a template to cut the other end.

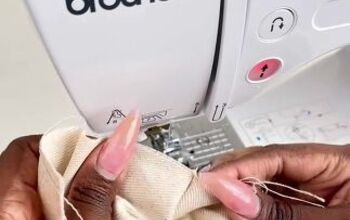
3. Sew the beanie
Open out the fabric so that it’s two layers thick, with the right side on the inside.
Place it with the folded edge towards you.

Mark a 2 inch (5 cm) opening on the long open edge towards one end.

Pin together the rest of the top edge and the two curved edges either side of it.
Also pin together the two lower curved edges.

Sew the pinned edges with your serger or using an overlock stitch on your sewing machine, leaving the marked section and the inner curves open.

Refold the beanie lengthways, matching the seams.
Pin and sew the open curved edges together at each end.

Turn the beanie right side out through the opening.

Turn the edges of the opening to the inside and sew the opening closed.

4. Finishing
Tuck the end of the beanie where the opening was inside the other end, so the stitching is hidden.
Put one hand inside the beanie and make sure the points match on the inside and outside.
Thread a hand sewing needle with a doubled length of thread and knot the ends.
Push the needle from the outside center point of the beanie to the inside.

Make a few small stitches inside the hat to keep the two layers together at the top.

Fold the beanie so the long seam is at the center back and turn up a narrow brim.

How to sew a beanie
Your DIY beanie hat is quick and easy to sew and looks so stylish! It’s also deep enough to cover your ears and keep them warm.
With this fabric, you don’t have to worry that the edges of the seam might fray.
This style looks great decorated with applique or embroidery on the brim or the main section of the hat.
I’d love to know what you think of it. Please leave me a comment below.
And for more great sewing patterns, tips and tricks, please follow me on TikTok as well: @tugbaisler
Next, check out my Cute and Easy DIY Bag Made From Jeans.
The author may collect a small share of sales from the links on this page.


Comments
Join the conversation