How to Hem Jeans With the Original Hem: Step-by-Step Sewing Tutorial

You bought a brand new pair of jeans and they’re perfect except they’re just a bit too long. You may already know how to hem jeans with a sewing machine or even how to hem jeans by hand, but you want to learn how to hem jeans with the original hem.
A lot of the newer jeans have beautifully distressed, sandblasted, or frayed hems that can’t easily be duplicated. You can try to take the dye off with a bit of sandpaper but it may not look as perfect as the professional original hem.
Some people call the technique I’m about to show you a California hem but I’m not sure where that came from! Whatever it is called, this method for hemming jeans will keep the original hem!
Tools and materials:
- Jeans
- Matching thread to the jeans
- Sewing machine with a denim needle
- Serger (optional)
- Measuring tape
- Pins
- Iron

1. Measure, measure, measure
Measure what you want the length of the jeans to be. In this tutorial, the amount I am shortening the jeans is 3cm or 1¼ inches.
Fold the hem of the jeans over to the wrong side, so the right sides are touching.
Divide the amount you want to shorten the jeans by 2, so it’s half of that measurement: 1.5 cm or 0.63 inches. That’s the amount you want to fold the cuff up to.

When jeans are new, the fabric may be quite stiff and not as pliable so as you begin pinning the jeans hem upward, keep your measuring tape handy so you get an accurate measurement all the way around.

When you get to the bulkier outer seam, make sure the fabric is perfectly lined up.

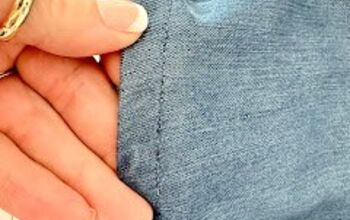
2. Sew the jeans
Once everything is pinned securely in place, stitch the jeans with matching thread as close as you can to the edge where the current hem ends. In the photo, my nail is right where you should sew.

When you hem jeans the sewing may feel awkward because you won’t be able to sew it in one go. You’ll have to sew in short, sharp bursts as you go around.
Take the pins out one by one as you sew along. Make sure to backstitch at the end. Trim any excess threads.

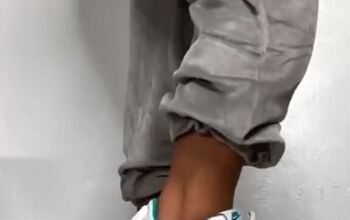
3. Finish up the jeans
Give your jeans a good hard pressing with the iron. The new hem is barely perceptible and the seam is hardly visible. Anyway, who is looking that closely at your ankles?

In this tutorial, we haven’t taken very much in for the new hem. If you need to take more up, the excess fabric might peek through.

In that case, trim the excess fabric from the seam, leaving a ¼-inch seam allowance. Serge across the seam or if you don’t have a serger, use a zigzag stitch. Press back the new seam up inside the jeans.

How to hem jeans with the original hem
This looks great! Now that you know how to hem jeans with original hem, you can confidently hem all your jeans without having to have them professionally altered!
Please let me know in the comments if you tried this method and how well it worked for you!
The author may collect a small share of sales from the links on this page.


Comments
Join the conversation
Thank you. I need to hem my husband’s jeans and was hoping to find a way to preserve the original hem.