How to Make a Beautiful Poncho With Flower Details

In this tutorial I will show you how to make a beautiful poncho with flower details. This isn’t a rain poncho – it’s a pretty, linen fashion piece to add to your wardrobe.
Follow along to get the sewing pattern for this poncho and the step-by-step instructions to make your own DIY poncho, that you can wear with or without a hood.
Tools and materials:
- Linen fabric
- Ruler
- Fabric marker
- Scissors
- Sewing pins
- Sewing needle
- Thread
- Bias tape
- Buttons
- Sewing machine
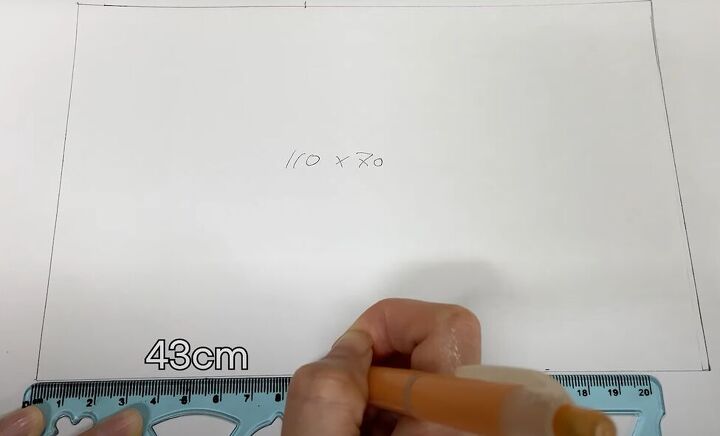
1. Make the poncho sewing pattern
Start with a 110 x 70-centimeter (43.3 x 27.6-inch) rectangle of linen fabric.
Mark 43 centimeters (16.9 inches) along both long edges from the left side.
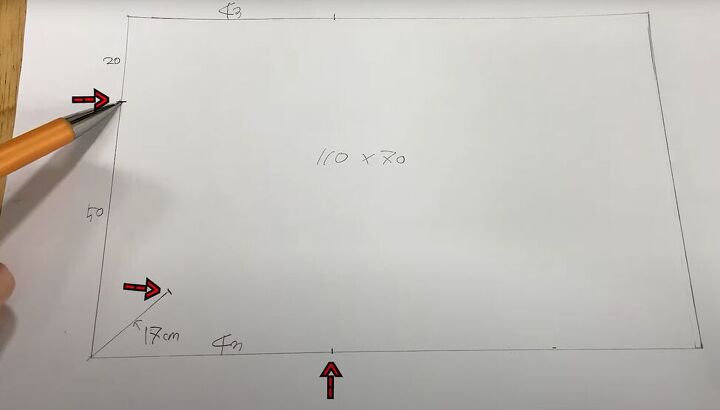
On the left short edge, mark 20 centimeters (7.8 inches) from the top and make a 17-centimeter (6.7-inch) diagonal line in from the bottom-left corner.
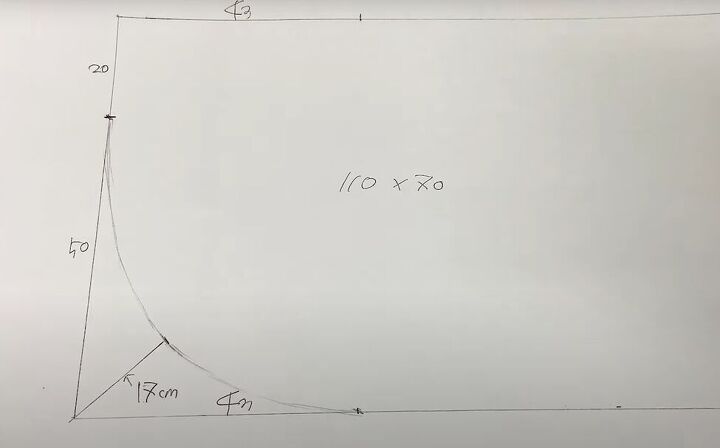
Draw a curved line to connect the 20-centimeter (7.8-inch) mark, the end of the diagonal line, and the 43-centimeter (16.9-inch) mark on the bottom edge.
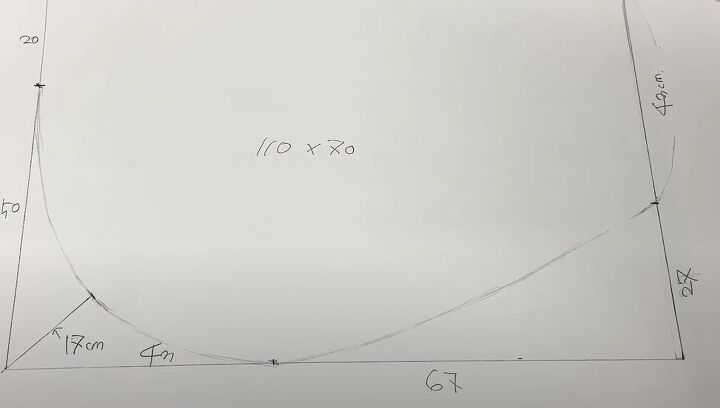
Now, make a 27-centimeter (10.6-inch) mark from the bottom on the right edge and connect the curve up to that mark.
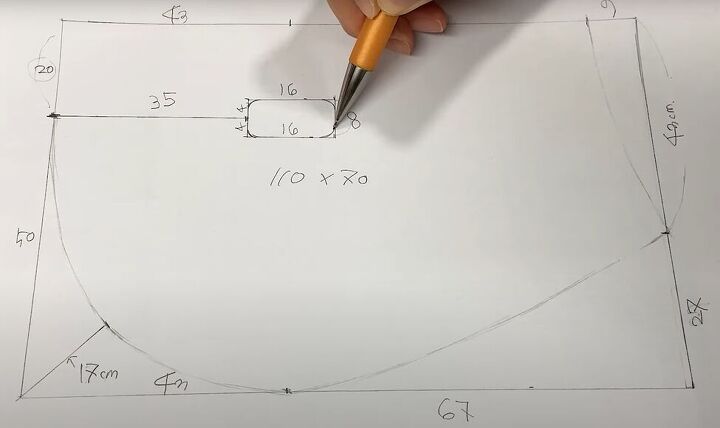
Mark 9 centimeters (3.5 inches) from the right edge along the top and connect it to the curve on the right edge.
Draw a 35-centimeter (13.8-inch) horizontal line from the top of the curve on the left edge toward the center of your pattern, and cap that line with an 8-centimeter (3.1-inch) line.
Extend the cap lines out another 16 centimeters (6.3 inches), and close that cap, curving all four corners.
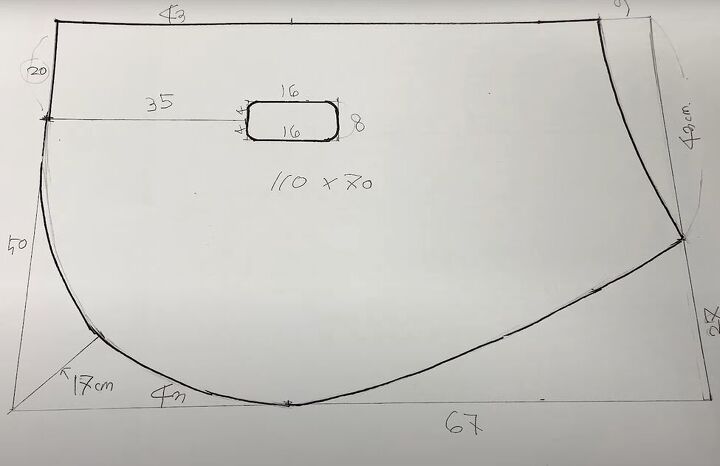
Go over all the outside lines and the cap in darker pencil.
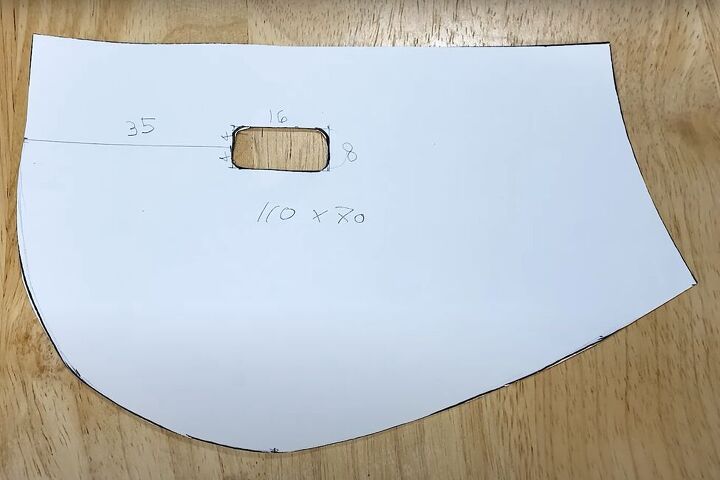
This is the pattern you will cut out from your fabric.
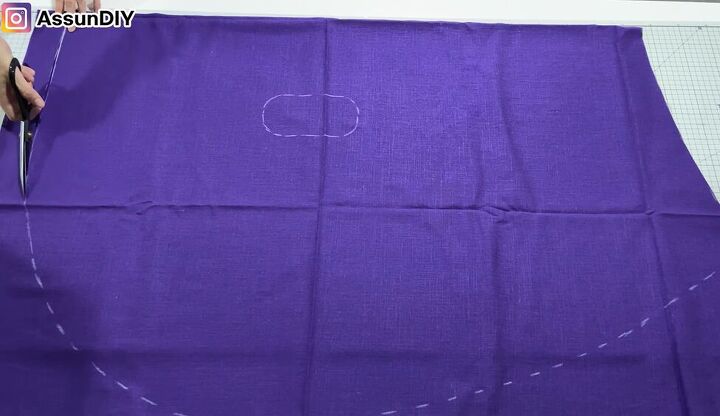
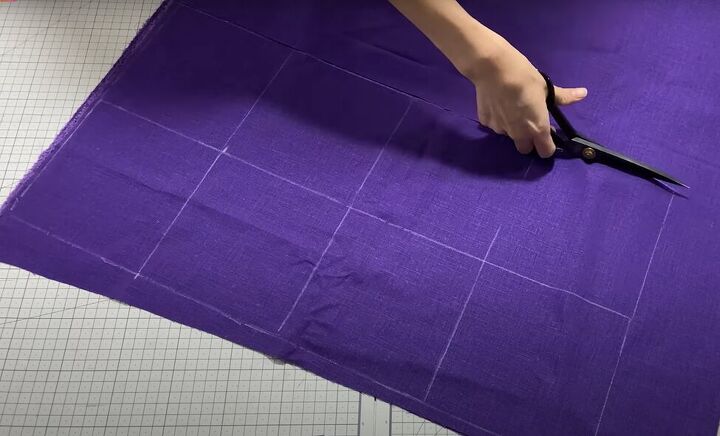
2. Cut your fabric
Fold your fabric in half and place the top edge of the pattern on the fabric fold. Trace and cut the pattern from your fabric.
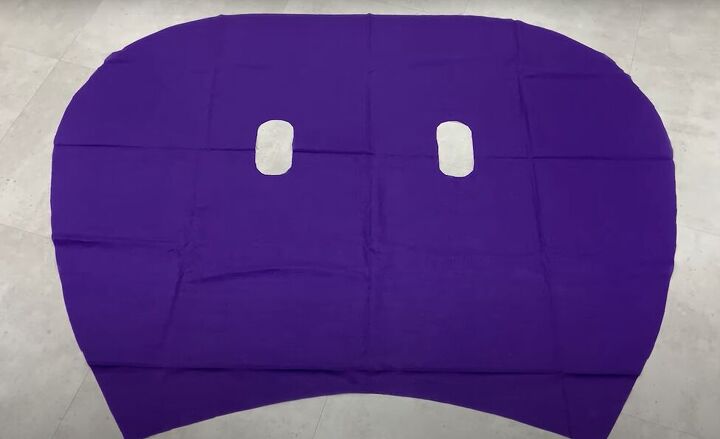
This is what your poncho fabric will look like.
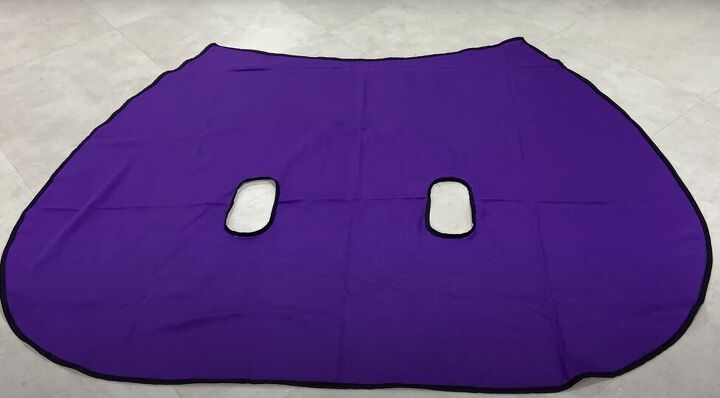
3. Bind the edges
Pin and sew bias binding around the whole outer edge of your poncho and around the armhole edges, encasing the edges between the layers of the bias tape.
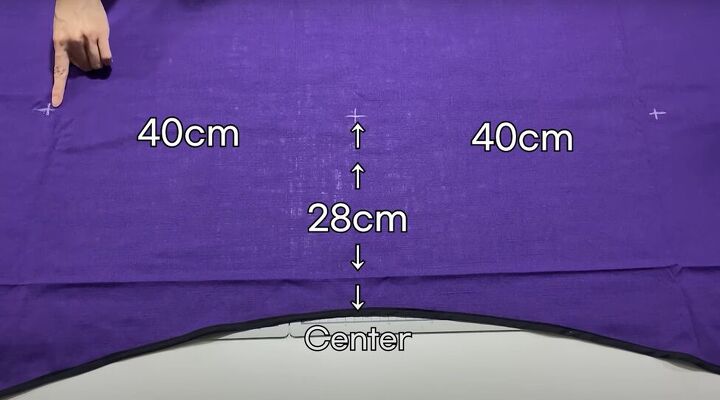
4. Mark the flower positions
On the curved edge of your poncho, mark 3 points: 28-centimeters (11 inches) up from the center, and 40 centimeters (15.7 inches) out on each side of that.
That is where you will position your flowers.
5. Make decorative flowers
From the same linen fabric, mark and cut 15 squares measuring 15 x 15 centimeters (6 x 6 inches) each.
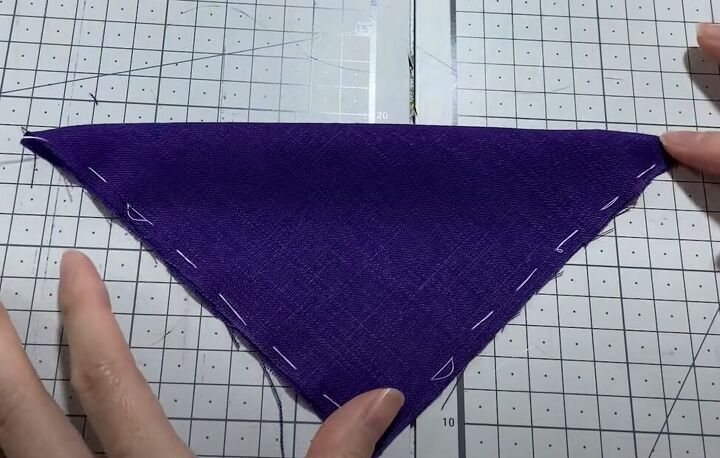
Fold each centimeter into a triangle and hand-baste the open edges.
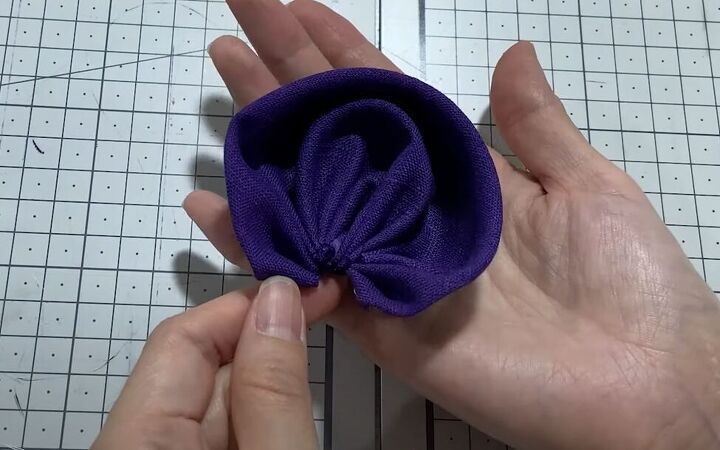
Pull one end of the basting thread to gather the triangle into a flower petal. Stitch the opening where the two ends meet.
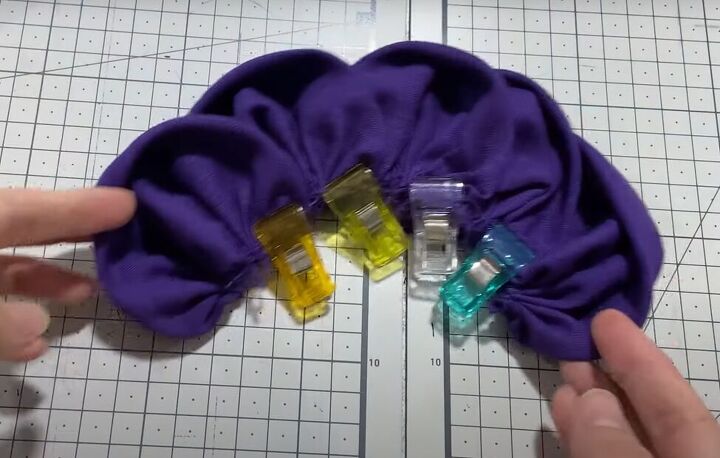
Pin 5 petals together in an overlapping pattern to make a semi-circle. Repeat so you have 3 semi-circles.
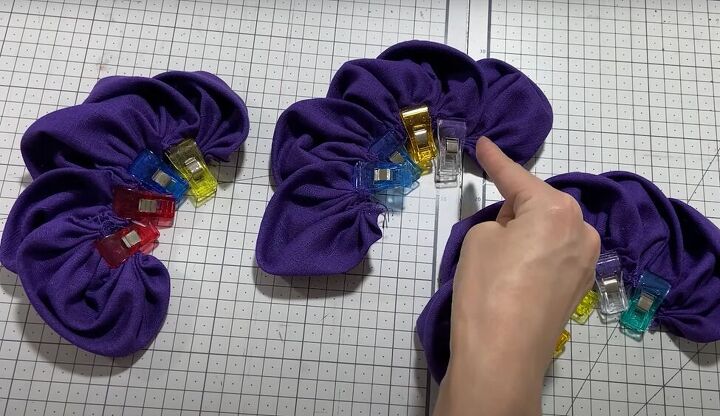
Machine sew along the bottom curved edge of each semi-circle.
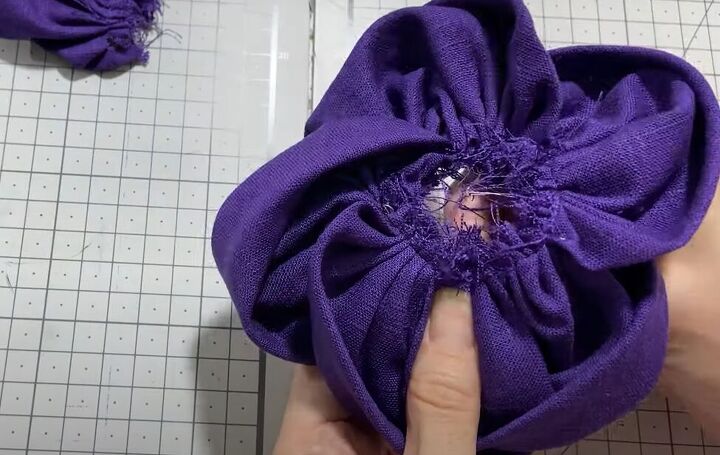
Now pull the two ends of the semi-circle together and hand stitch to make a flower. Repeat to make two more flowers.
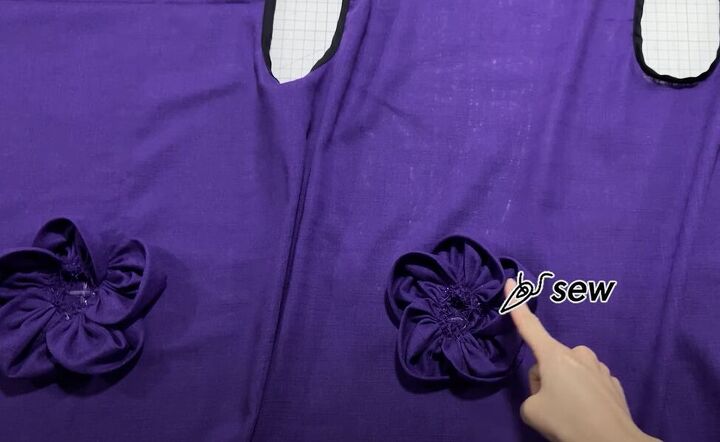
4. Attach the flowers to the poncho
Hand sew the flowers in place on the poncho markings.
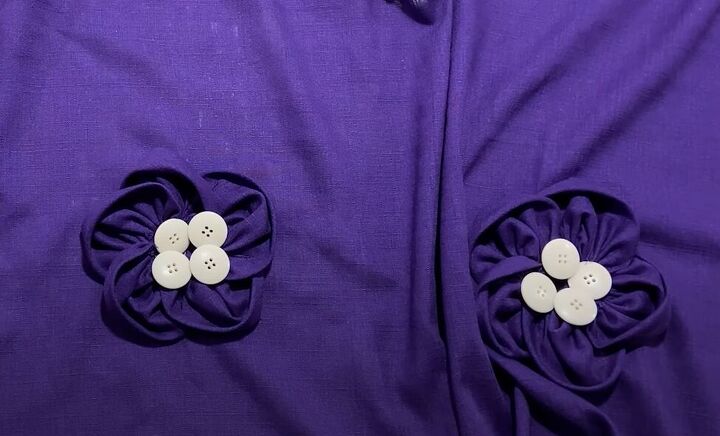
Hand sew button on to the centers of the flowers.
Slip your arms through the armholes and wear your poncho like a jacket.
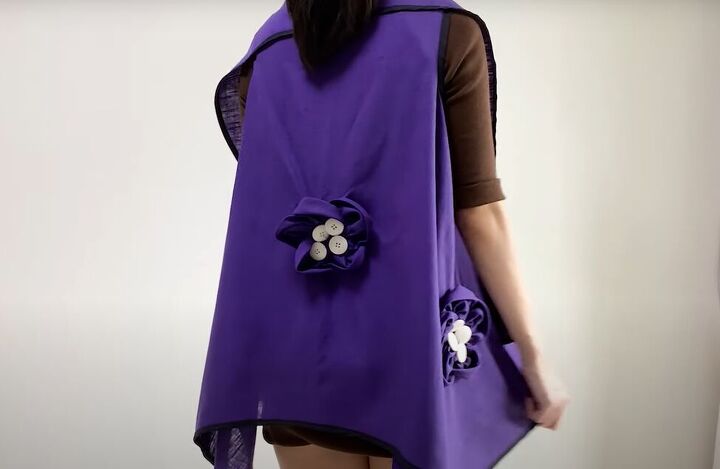
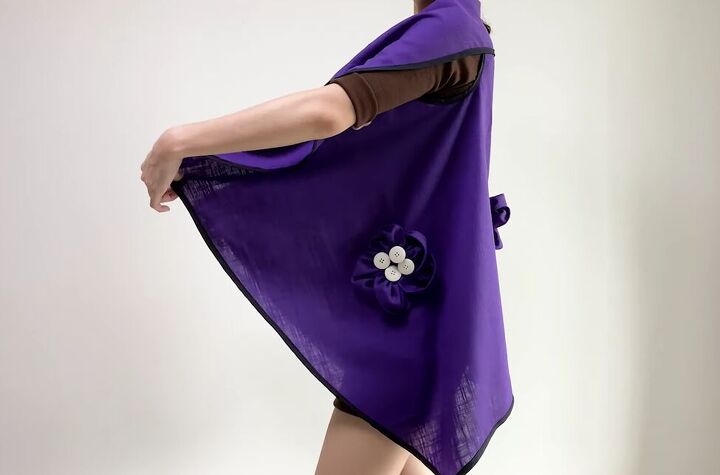
Completed DIY poncho
Here’s how it looks from the back!

You could also pull it up over your head and wear it like a scarf!
What a simple, but elegant new addition to your wardrobe! Try this DIY poncho and leave a comment to let me know how you liked this tutorial.
The author may collect a small share of sales from the links on this page.


Comments
Join the conversation
Nice but I believe I would use one large button in the flower center instead of four.