A "Ruff" Start

2 Materials
$5
30 Minutes
Easy
Bad Dog!!  Yes, the little snot got ahold of not one, but "2" of my brand new black boots. Thankfully just the heels. Since the shoe repair place said they couldn't do anything with them and I should just throw them away, I decided "I'd" do something. Why waste a perfectly great pair of shoes. So, with little cost in product, I sat down and made a 30 minute project into 2 brand new pairs of high fashion design shoes. Here's some before, during & after shots.
Yes, the little snot got ahold of not one, but "2" of my brand new black boots. Thankfully just the heels. Since the shoe repair place said they couldn't do anything with them and I should just throw them away, I decided "I'd" do something. Why waste a perfectly great pair of shoes. So, with little cost in product, I sat down and made a 30 minute project into 2 brand new pairs of high fashion design shoes. Here's some before, during & after shots.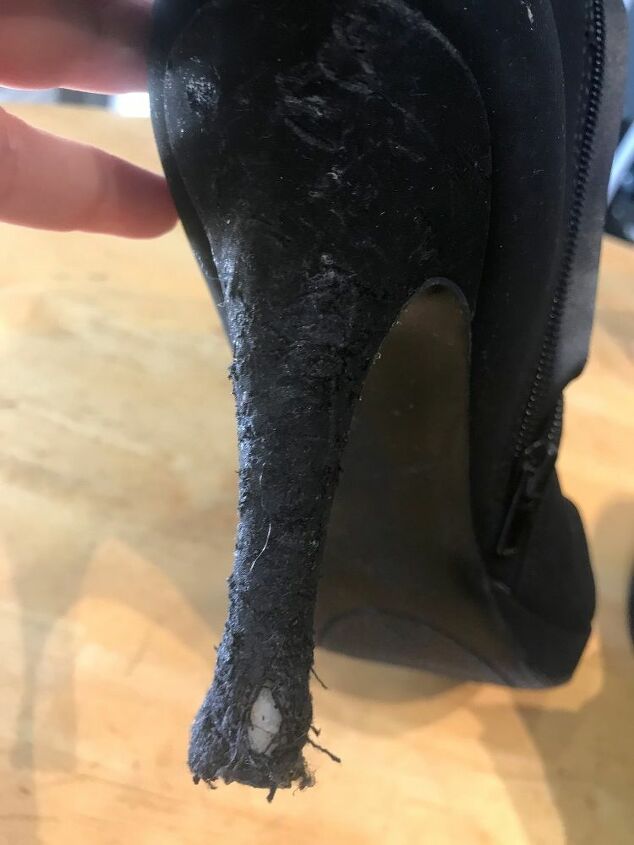
ABh1
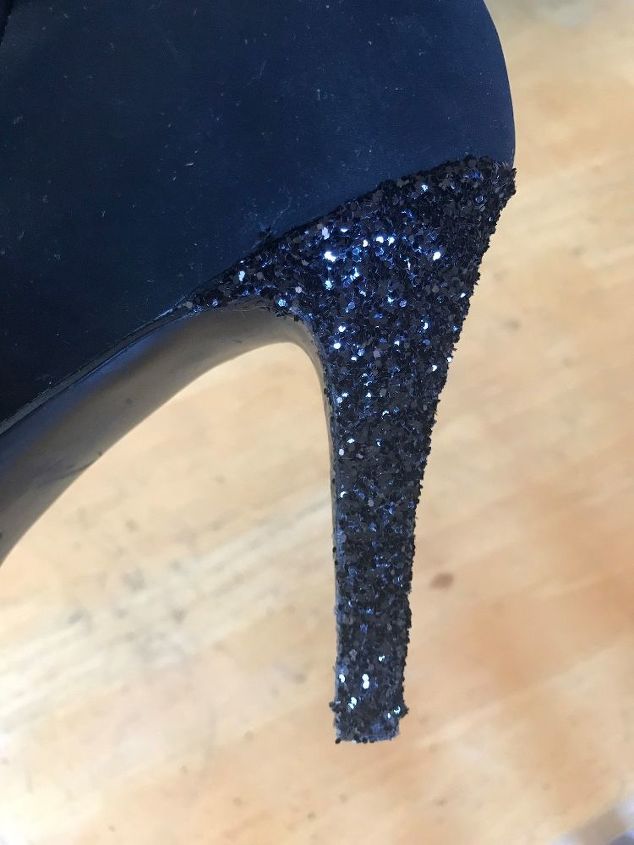
So this is the first pair of shoes. Ankle Boots-heel 1 (ABh1). You can see the teeth marks & fringed heel. Pretty destroyed. Thanks Cooper!
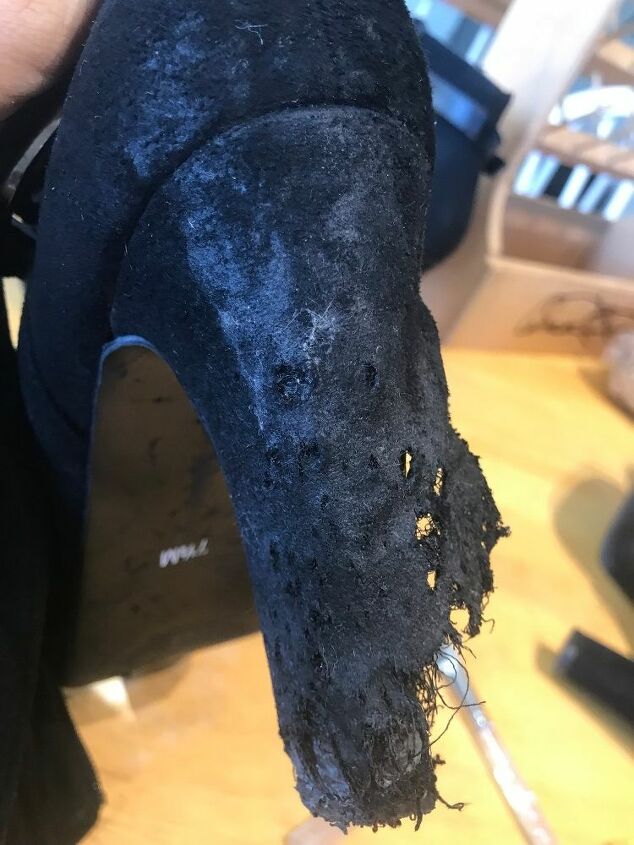
CHh1
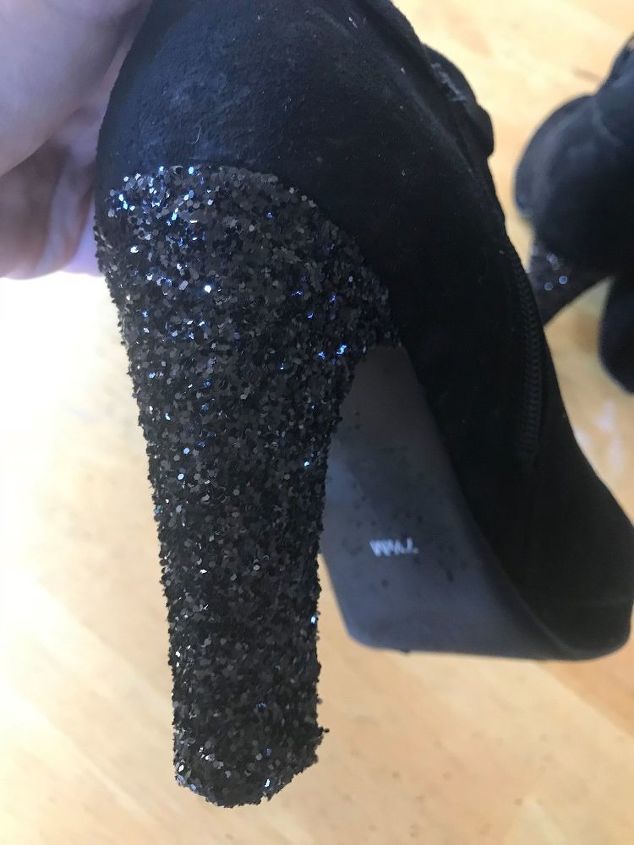
Here's the second pair of boots. They're Calf High-heel 1 (CHh1), which you can see, he really loved the tug-a-war with this one.
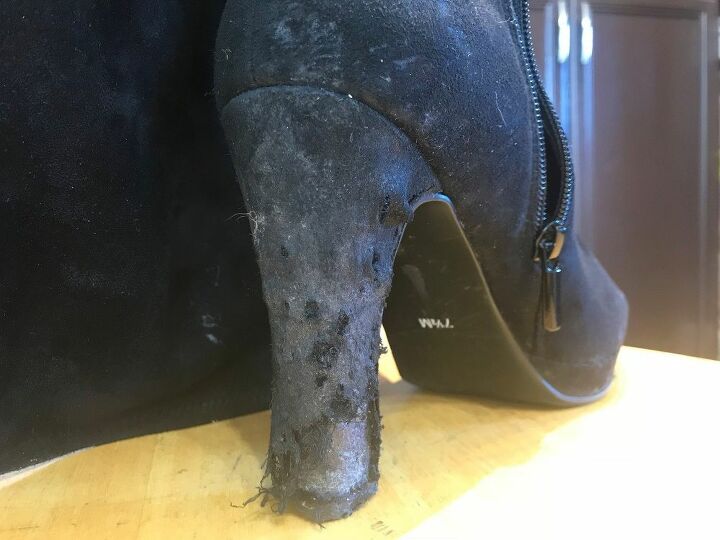
Here's where i cut off the (CHh1) pulled piece to show the underlying heel. The piece under the material is plastic but black, so that helped.
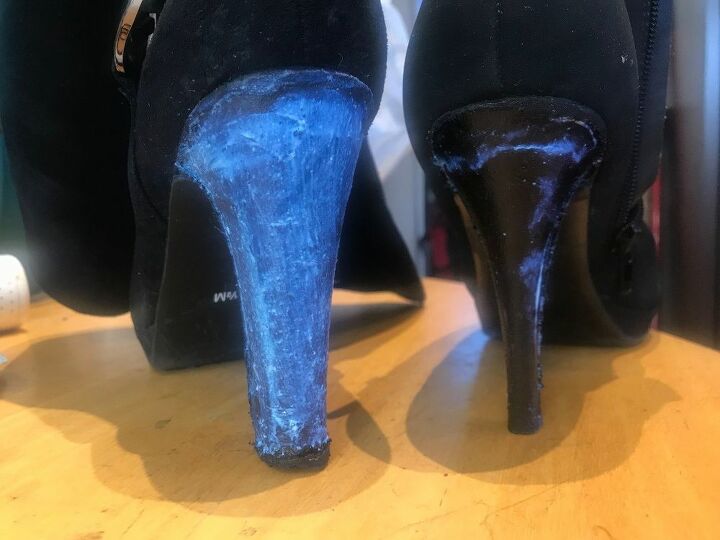
This shows the "Ok to Wash-it" glue applied to the heels, after using an exact-o knife, scissors & pliers, to remove all the material off the heels. The initial step was to put glue on the heel to press down any loose materials around the edges. There are strays that run under the edges that you can't get out unless you remove the whole heel & soul, and I wasn't about to do that. The left side is still wet, while the right side is a bit more dry. Btw, this glue dries pretty fast - which is a good thing because I'm impatient, but also a bad thing because you better work fast. lol
The reason I used the "Ok to Wash-it" glue is because I was thinking that since they're shoes, they'd be susceptible to the weather conditions outside of: moisture and puddles and such, and they might not hold up with other regular glues that I had on hand.
Also! In reference to the ABh1 heel. When I tore off the material of the shoes, the actual plastic heel was white. So instead of taking a chance that the white would show through between the glitter, I used a *black sharpie pen and colored the whole heel. Worked like a charm. Then my second step was to put another layer of glue on, for the glitter to adhere to.
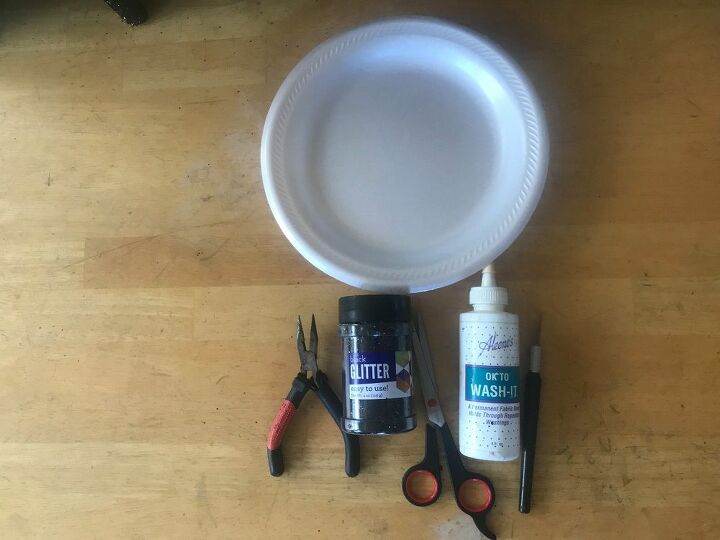
Items Needed
Here are the items I used, minus a large glass bowl. I used the exact-o knife, scissors & pliers to remove the remaining materials on the heels. I used the Glue to glue down the glitter, I used black glitter to match the shoes, I used a huge glass bowl to catch the glitter as I poured it onto the glued heels. And I used the paper plate as a funnel to put the glitter back in the holder after I was done with the project. (Missing from picture: Large glass bowl & *black sharpie pen ... which the pen was only needed to cover the white area on the heel) *see other photo & statement.
As far as costs... I already had the glue & tools, I just had to buy the glitter. It ran no more than a few dollars. You can choose whatever type/size of glitter you prefer. ie: Larger pieces, fine pieces or like mine, small.

This is an after picture before tidying up the bottom heel area. I was letting the glue dry a bit. This is the CHh1&2 heels.
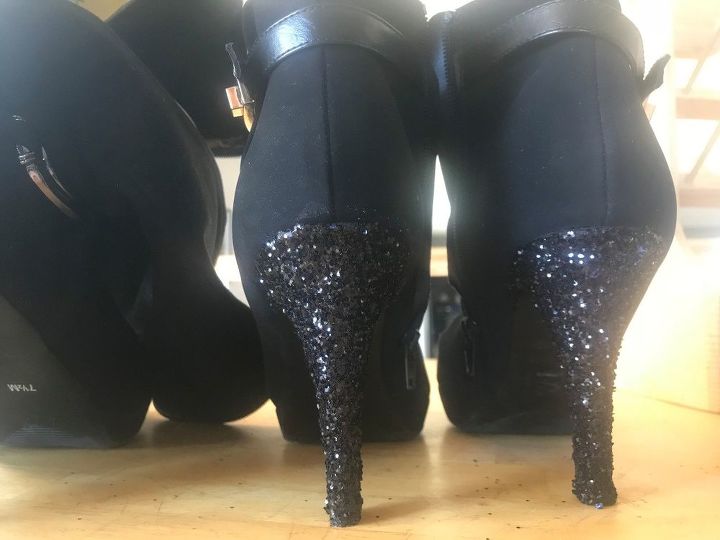
Here is the ABh1&2 shot before the tidy up pics.
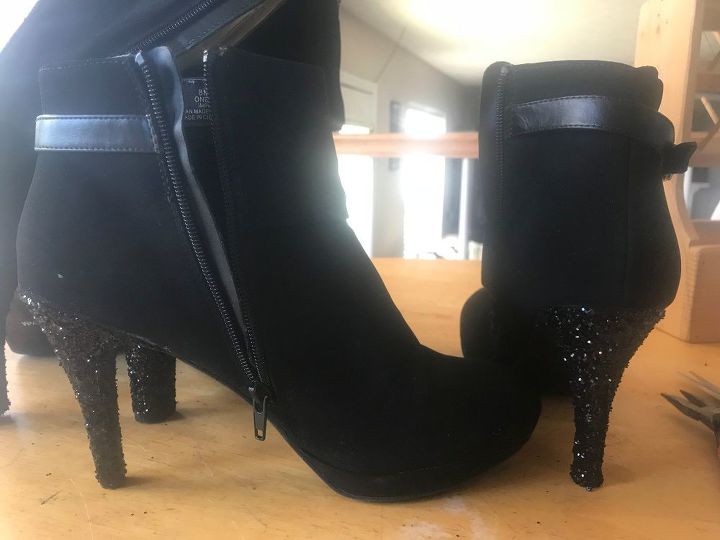
Side views of ABh1&2 boots. As you can see, I covered the whole area of the heel along the sides too, so it flowed smoothly and didn't look out of place.
Here is a different angle/view of the CHh1&2 boots.
I had removed the heel caps from the shoe prior to glittering it, so it looks incomplete, but in last 2 pictures you'll see the final product.
There are 2 layers of black glitter on all 4 shoes. The dog only chewed one of the heels of each shoe, so I didn't have to rip apart & remove the other heel materials. I just glued right on top of the original material.
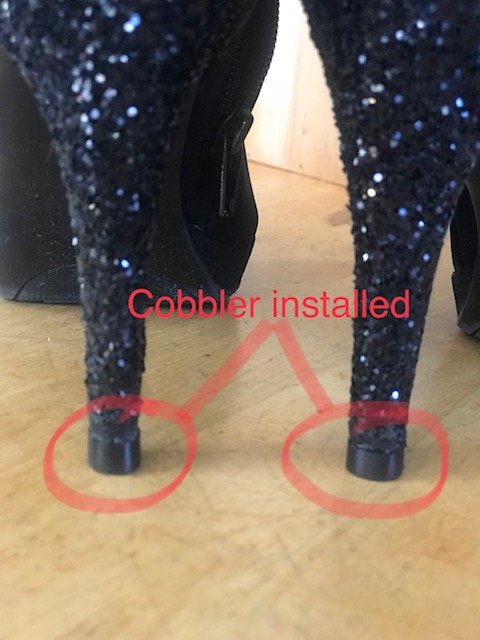
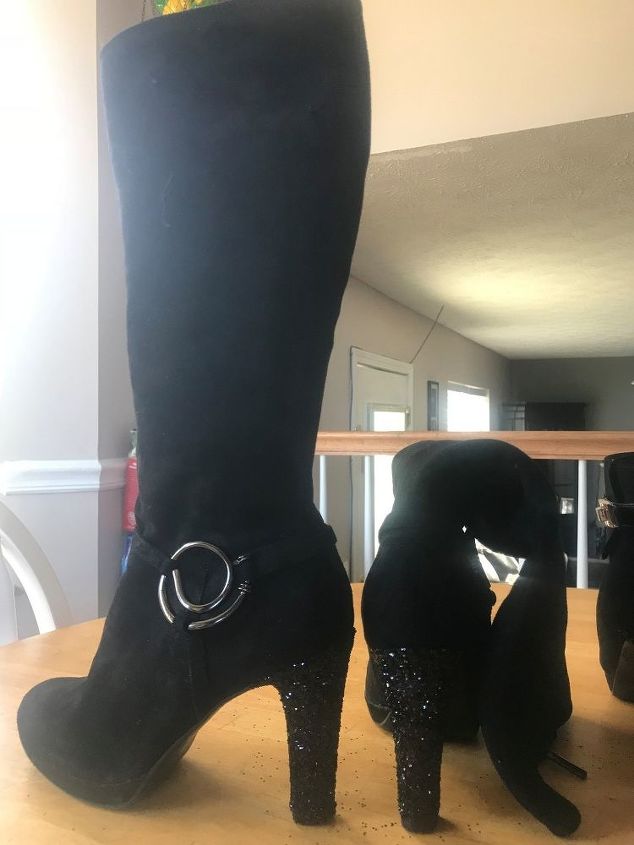
I then took the ABh1&2 boots to a DIFFERENT shoe repair place and asked them to install 2 new heel caps and WALAH!
Final Product!
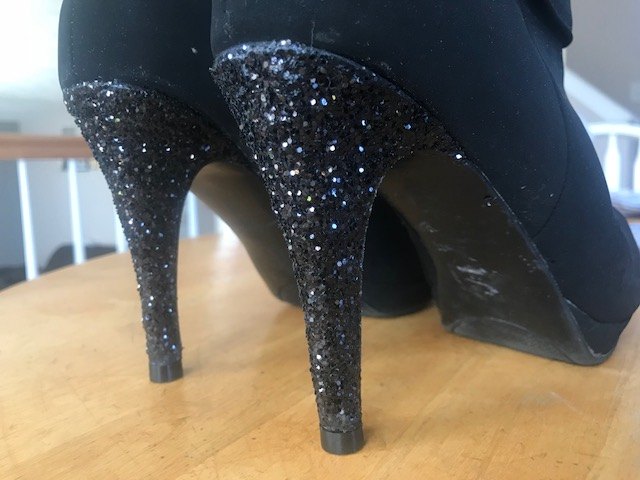
Here is the final product. The shoes look brand new and of course, in style with all the glitter designs that are out now. I can now wear both my boots again and might even give the little snot a treat. After all, he did spur a bit of spontaneity and creativity for me. Thanks (again) Cooper. This time in a more positive way. 
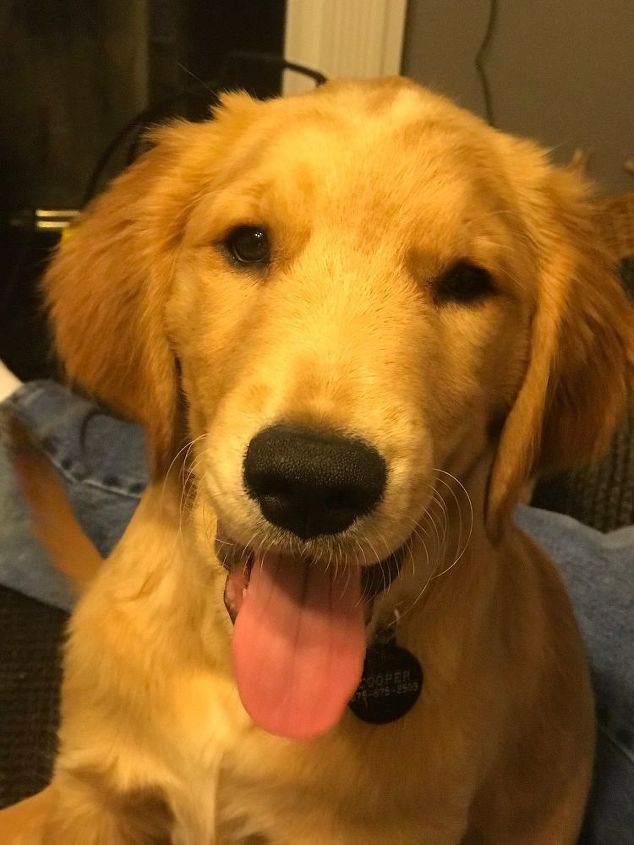
The Culprit
aka: The little snot, aka: Cooper.
The author may collect a small share of sales from the links on this page.


Comments
Join the conversation
Oh no! What a great fix!
Super repair! It's just genius. They look great.