Check Out the Totally Unexpected Way in Which I Created This Vintage T

I’ve had this project in mind for a while. My brother actually gave me the idea and I’ve been waiting for a chance to put it into action. In this tutorial, I’ll show you how I made a cool and unique vintage-looking t-shirt. The cool part, though, is how I made it. I’ve never done anything like this before, and it was quite an experience. Keep reading to check it out.
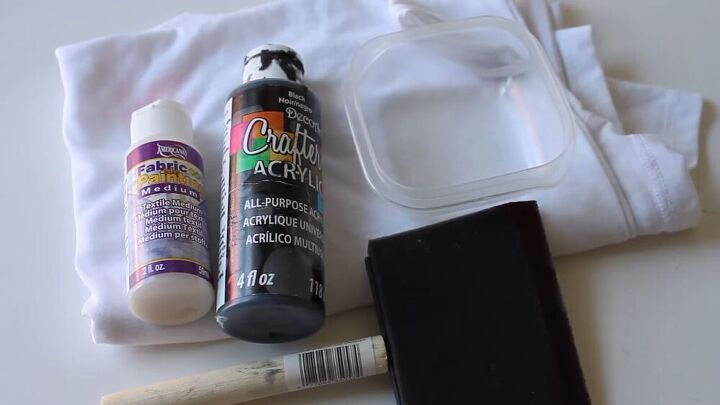
Tools and materials:
- T-shirt
- Sponge brush
- Acrylic paint
- Fabric medium
- Container
- Scissors
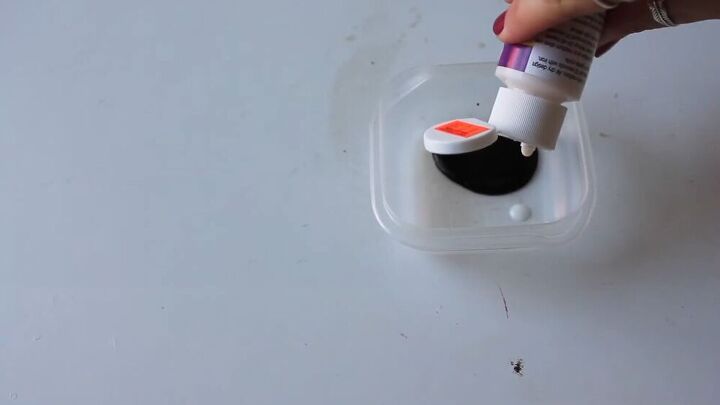
If you’re trying this project for yourself, you can use fabric paint. I, however, didn’t have any. So instead, I mixed acrylic paint with this fabric medium that turns the acrylic paint into fabric paint.

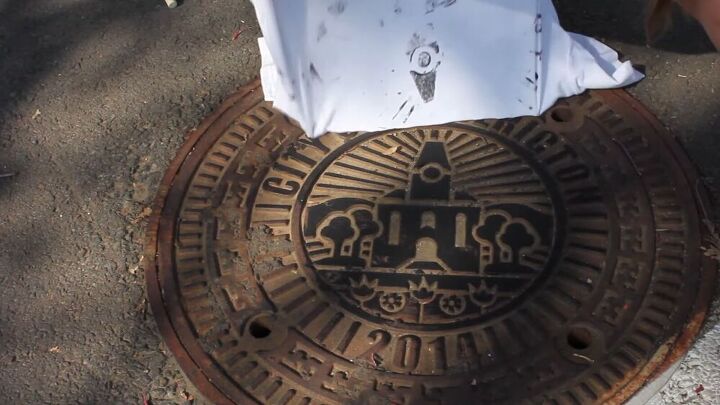
So for this project, I needed to use a stamp to transfer the paint onto my t-shirt. The cool part? I used a sewer hole cover that I saw once when I was out for a walk. I loved the design, especially how unique it is to my city. So I took my sponge brush and painted it.
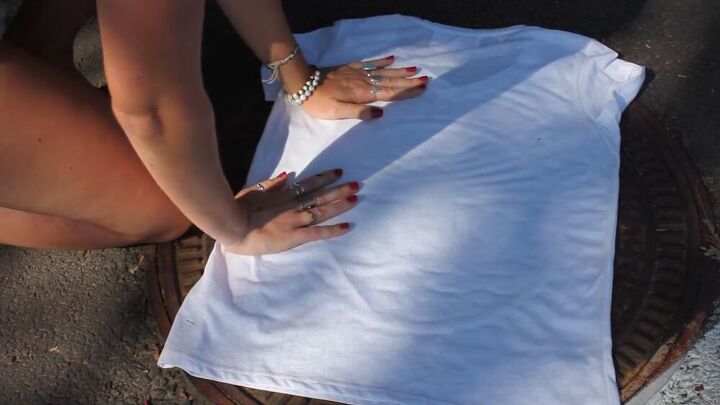
I took my shirt and put it face-down onto the sewer hole, making sure to really press it so that the paint would transfer.
I picked up my shirt, and that was it...NOT! Turns out it’s not that simple. The paint did not transfer well at all. So I had to add a few more steps.

I went home and got more paint, this time in gold. The gold did transfer better than the black, but it was still a challenge.
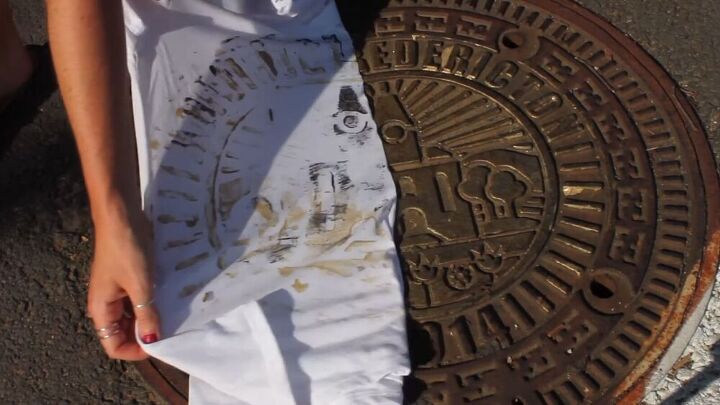
It was so hot and the paint was drying really fast, so I had to kind of paint parts of the sewer hole and press the shirt down. The design didn’t transfer evenly during the multiple times I pressed, but honestly, I think the layered look it gave the design is part of the shirt’s charm.
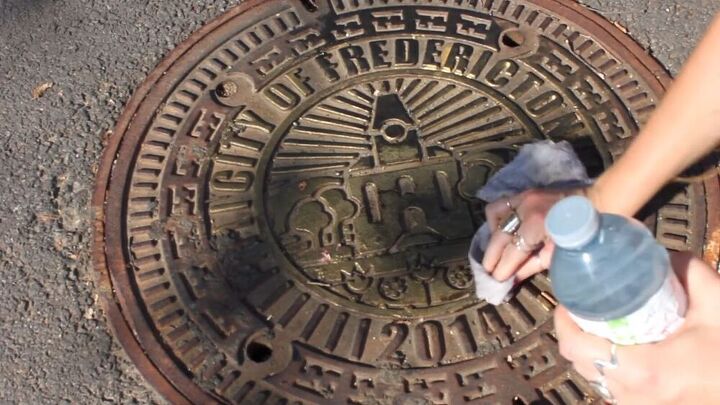
Guys, this is the most important step! If you’re going out and doing something like this make sure to clean up after yourself! We don’t want anyone vandalizing public property.
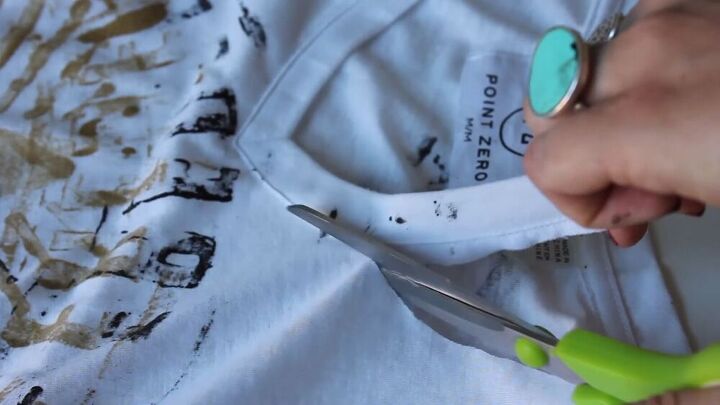
I really didn’t like the neckline on the shirt, so I cut it off. Because I was going for that vintage look, anyway, I didn’t have to worry about it being even. I just decided where I wanted the neckline to start and went to town with my scissors.
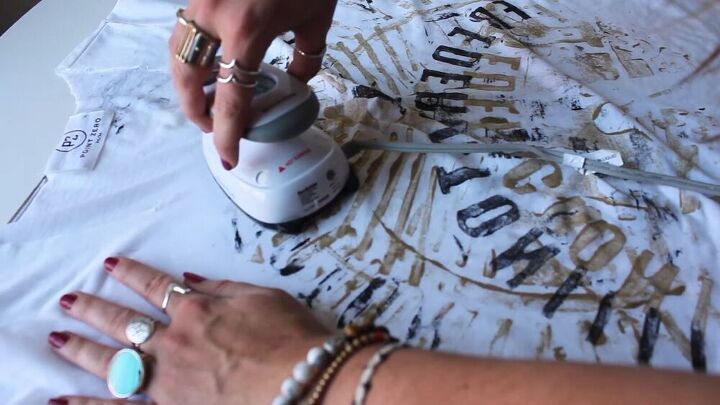
It’s important to let the fabric paint sent, and the instructions on my paint said to iron the shirt to do so. So I grabbed my little iron and pressed the shirt.
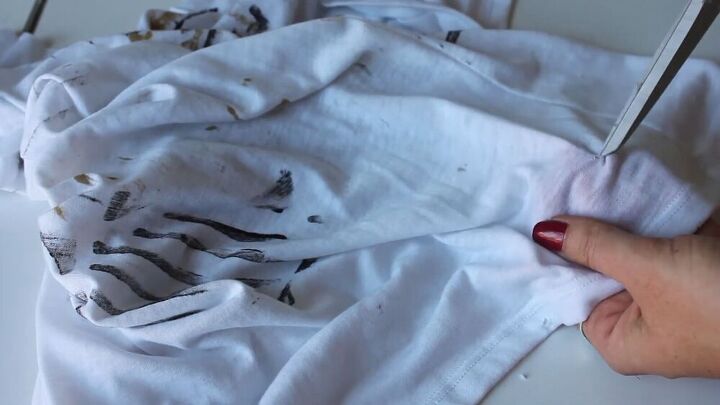
The very last thing I did to the shirt was to add holes to it to give it even more of that vintage feel. I just snipped at different parts of the shirt with the tip of my scissors and then pulled at the holes to make them bigger.

That’s it! I like the shirt. I do wish that the words were facing the right way; I forgot about that when I made it. Still, though, I’m happy with it. Let’s just say it adds to the uniqueness of the shirt. I think it’s super cool, a great representative of my city, and so unique in the way it was made. What do y’all think? Are you going to try it? Go out and find a unique “stamp” and show me your results!
The author may collect a small share of sales from the links on this page.


Comments
Join the conversation
I appreciate you walking through your various attempts at this. Excellent tutorial!
I have an old iron star that I may try to use. No lettering so that's not a worry.