DIY Leather Cuff Bracelets With Your Cricut Maker
This is a sponsored conversation written by me on behalf of Cricut. The opinions and text are all mine.
Making your own DIY leather cuff bracelets is super easy with the Cricut Maker. Grab some leather, some heavy duty snaps, and get to making!
With these leather cuffs I wanted to try a bunch of different things and so I was really excited to get my hands on the QuickSwap Toolset. I used the Wavy Blade, Engraving Tip, and Debossing Tip to add some details to the cuffs and I love how they turned out.
I provided the link to my svg files below and you can customize the cuffs to make something that you truly love.
- Cricut Maker
- Strong Grip Mat
- Cricut Deep Point Blade or Knife Blade (depends on the leather you use)
- Cricut Engraving Tip & QuickSwap Housing (optional)
- Cricut Wavy Blade (optional)
- Cricut Fine Debossing Tip (optional)
- Snap Tool
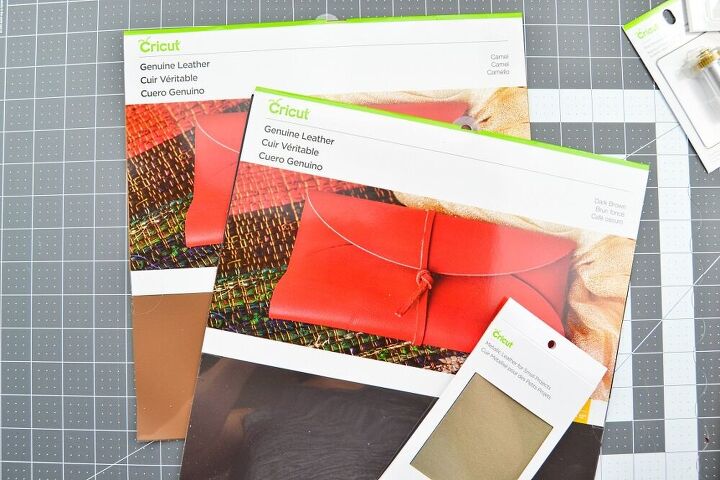
- Leather
- Heavy Duty Snaps
Open my leather cuff bracelet file. Click “Customize”. Now this file has a few cuffs on it for you to use if you like but you can totally change them all up or even hide the ones you don’t want to make. To hide the ones you don’t want to make you just click the eyeball on the part you don’t want to make on the right hand menu.
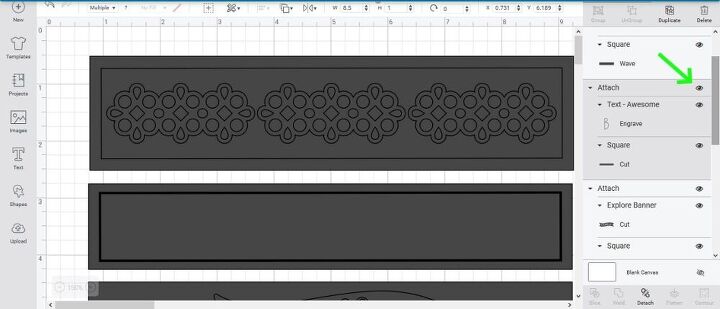
You can also change the sizes of the cuffs, what the words say or the images. Additionally you can click on an image, the words, or the lines and change the Linetype in order to change whether it’s cut, debossed, engraved, wavy, etc. at the top left of the page in Design Space.
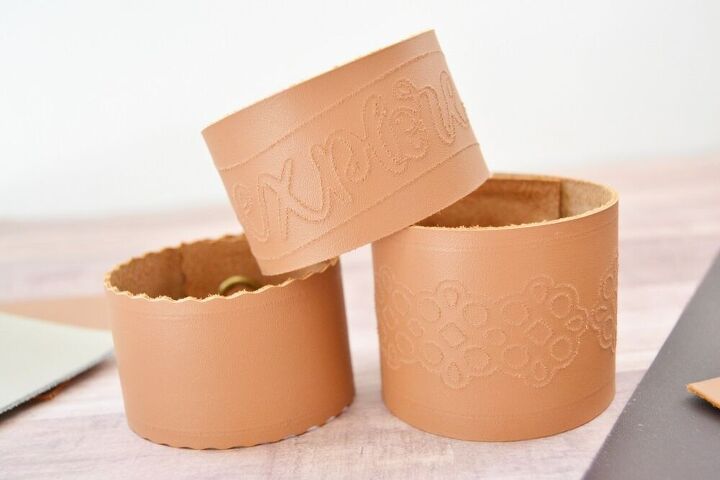
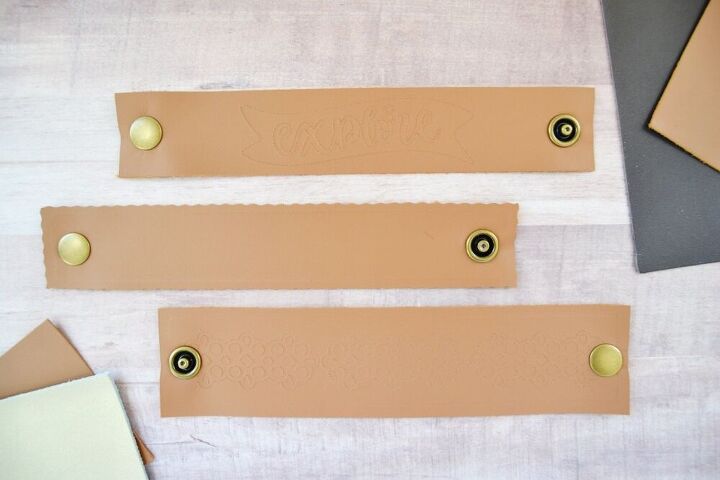
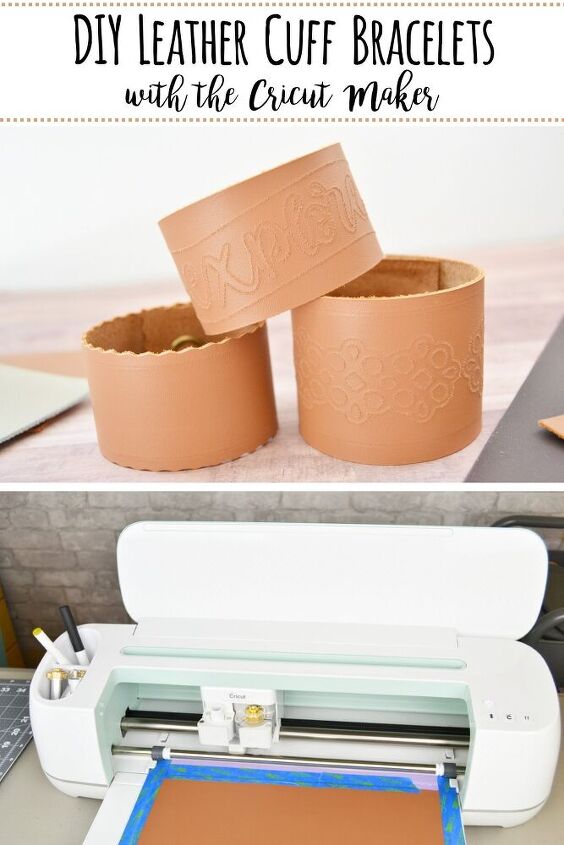
So if you look at this picture below I’ll point out what the blades and tips do so that you can see them. The top and middle piece of leather both have images engraved on them. I love that with the Engraving Tip I can use the Maker to engrave designs into a variety of materials including Cricut Metal Sheets.

On the top and bottom pieces of leather you can see a faint line going around the border of the cuffs. As you can see it makes a little more subtle line than engraving does. You can add the effect on foil cardstock, coated paper, shimmer and glitter paper, basswood, and more.
On the bottom piece of leather in the photo you can see a cute wavy edge. The Maker cut this easily with the Wavy Blade. I love that this blade can be used on so many materials including vinyl, cardstock, fabric, and more. It’s such a cute detail I can’t wait to use it more.
When you are happy with your design you click “Make”. Position your project where you want it on your mat and then click “continue”.
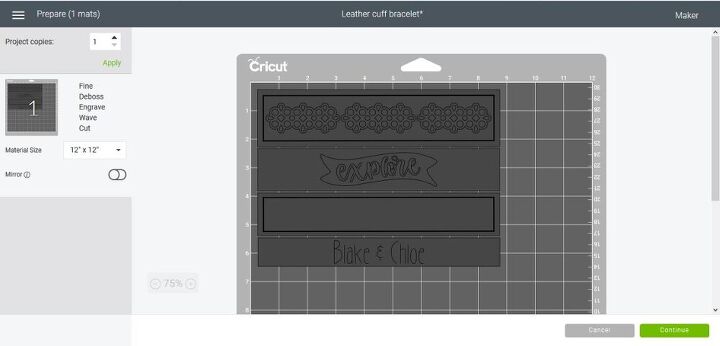
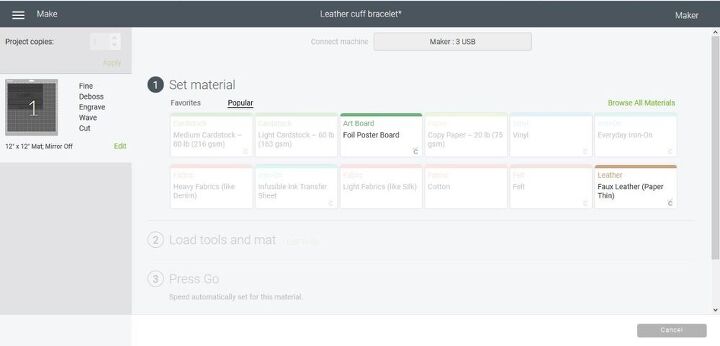
Then you are taken to the screen where you select your material. Click “Browse All Materials” to search for the type of leather you are using.
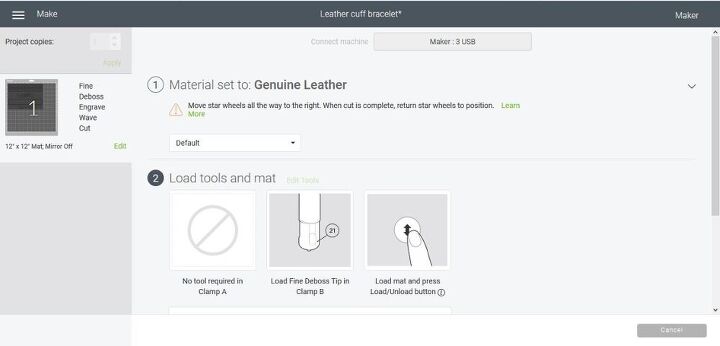
The Cricut will then run you through the next steps for loading on the right tool for your project and loading the mat. Be sure to move the star wheels all the way to the right or you’ll get ugly indents in your leather!
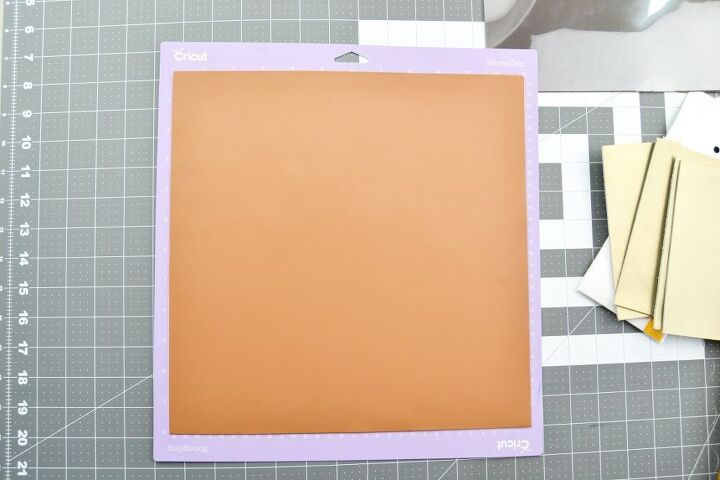
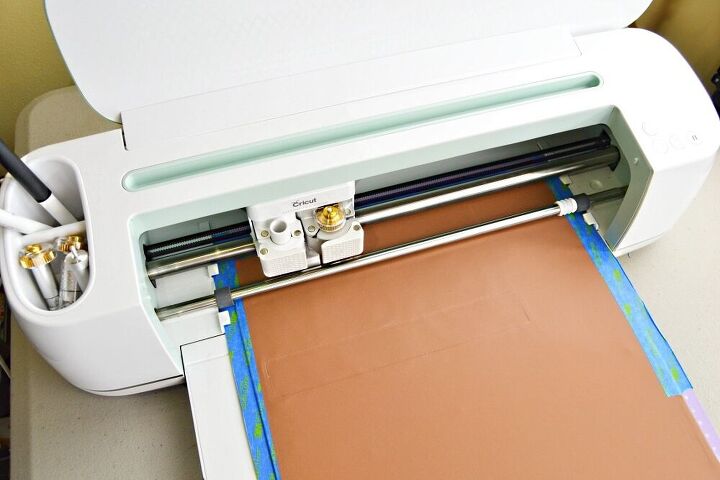
Put the Leather on the Mat
For leather you’re going to want to use your Strong Grip Mat. Be sure to really push it down into the mat or use your brayer to smooth it down with some pressure. You may also want to tape around the edges of the leather to keep it from moving around during cutting.
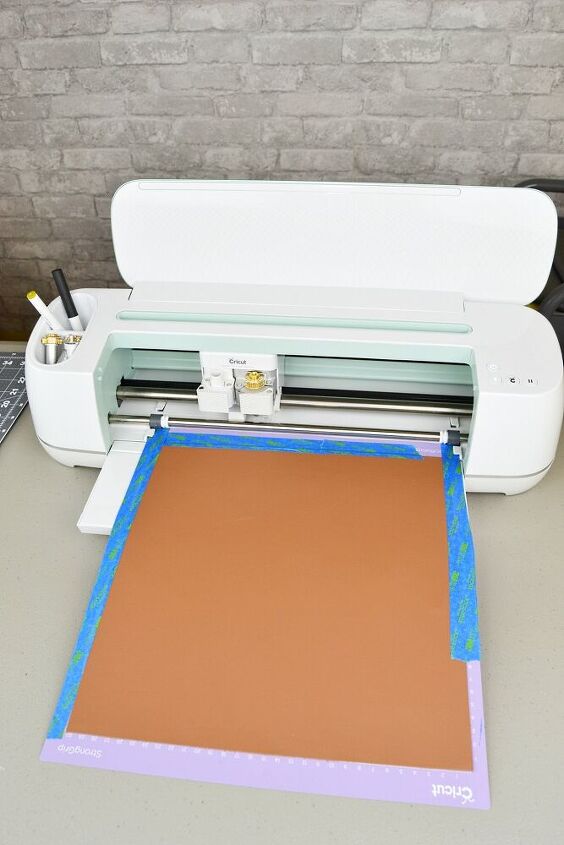
Load & Make
If you’re making a cuff that requires multiple tools then be sure to pay attention to the prompts so that you put the tools into the clamp in the correct order.
When the Maker is finished cutting you’ll get a prompt asking you if you think it’s good or if you think it needs another pass of cutting. I’d recommend that you probably err on the side of doing an extra pass just to be sure.
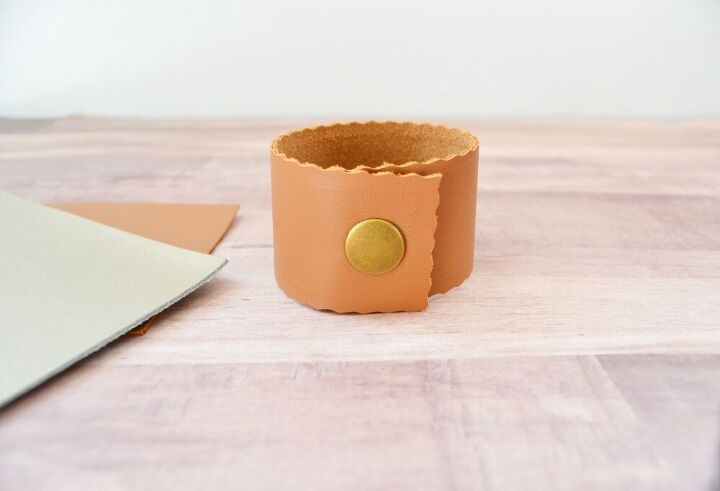
Add the Snaps
Once you peel the leather cuffs off of the mat you’ll want to add some heavy duty snaps to them.

Follow the directions on the back of the package for attaching these. There is a really helpful image on the back that helps me remember how they go together.
And you’re done!
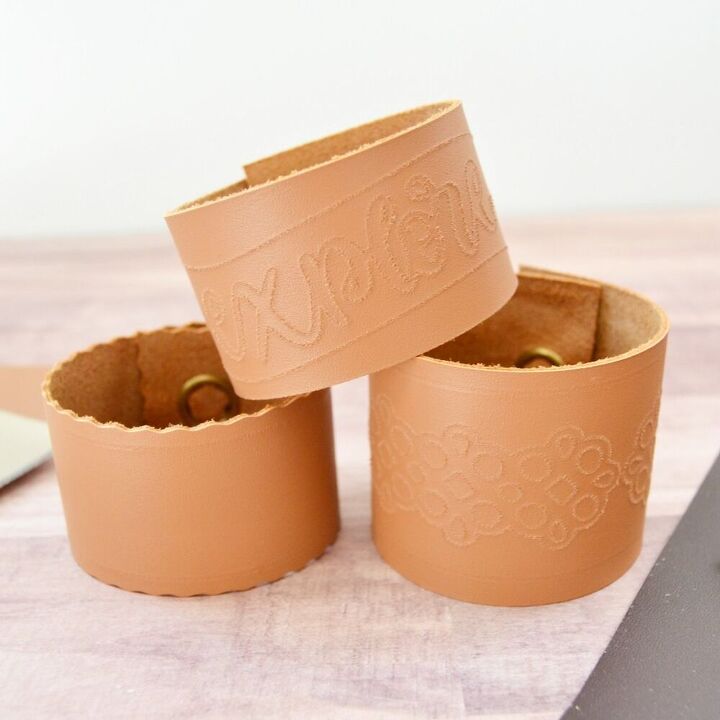
I love how easy it was to make these cuffs. With all the great new tools it’s so easy to customize them for a unique look. The 3 tools I mentioned earlier (the Wavy Blade, the Engraving Tip, and the Fine Debossing Tip) are all part of the Maker’s QuickSwap Toolset which make is so easy to move between tools while working on a project like this.

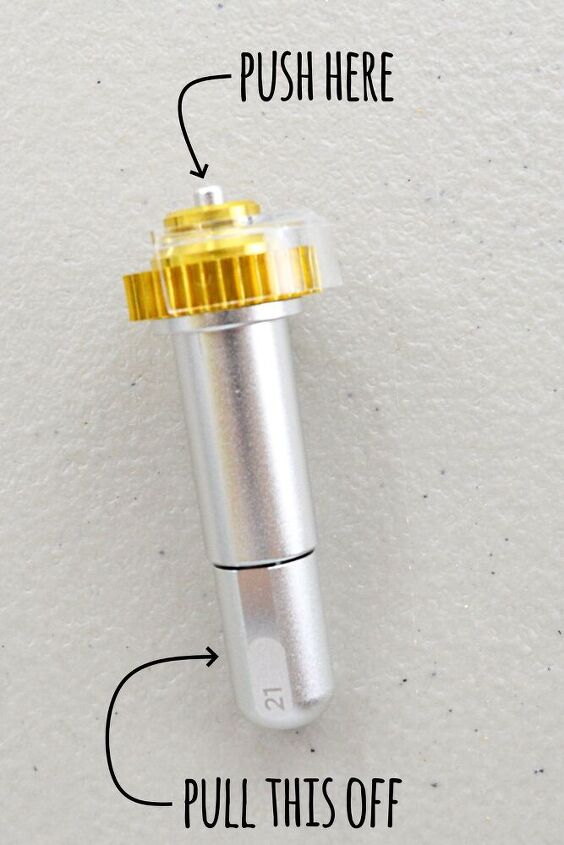
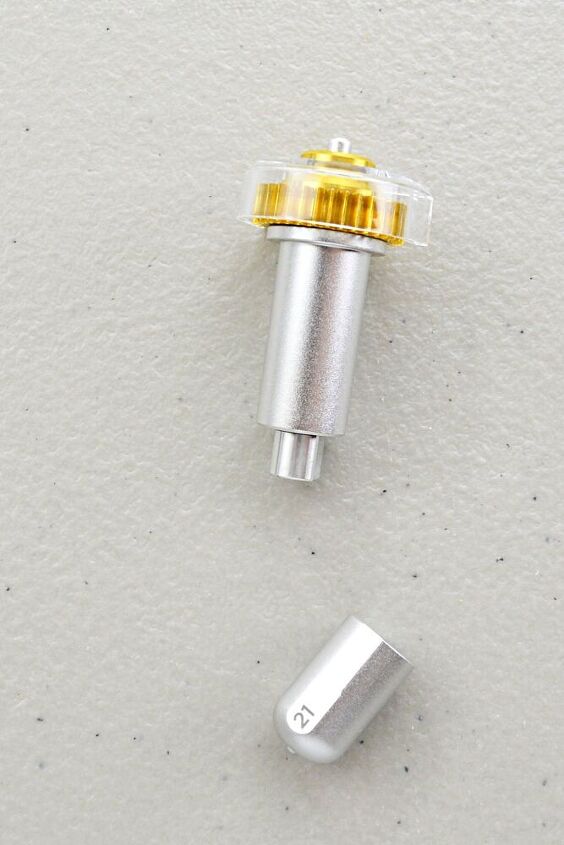
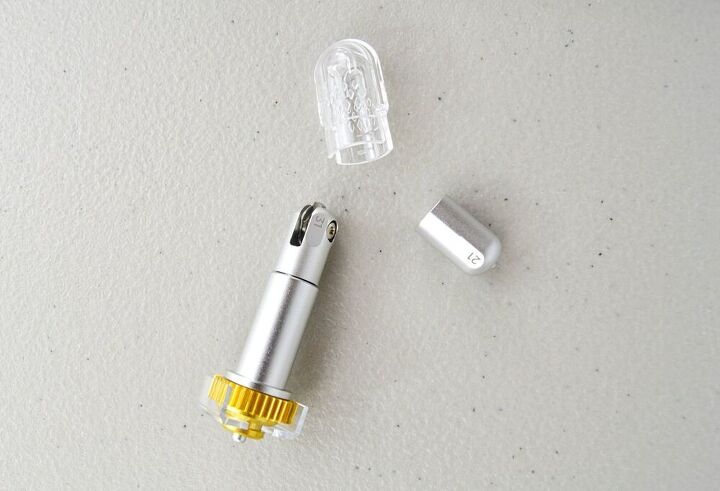
To switch between tools in the QuickSwap Toolset you just push on the top of the QuickSwap housing and pull the tool off of the bottom part. Then just push on the top and snap the new tool onto the bottom. The awesome thing is you only need one QuickSwap Housing and you just change out the blades.
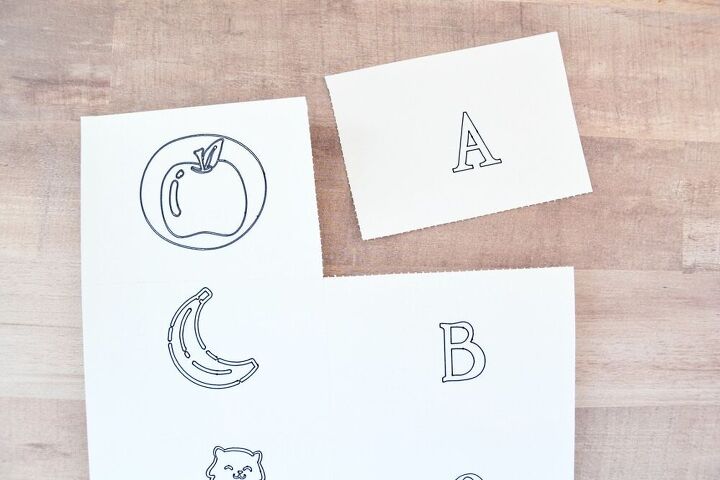
I didn’t use it on my DIY leather cuff bracelets but there is also a Perforation Blade that is part of the QuickSwap Toolset. You can use this blade to make perforated tear-offs and easy peel-aways using materials like paper, cardstock, acetate, posters, and more. I think this would be really awesome for making flash card sheets that kids can easily tear apart. No need to fold for a neat tear!
When Cricut came out with the Maker 2 years ago they promised to come out with more tools and materials so that we could make an even greater variety of crafts and they are totally doing it with these expansions to the Adaptive Toolset.
With the Maker’s ability to perform tests before cutting, its sophisticated steering system, and the fact that it has 10 times the cutting force that the Explore line had we are able to make so much more. I enjoyed making these cuffs and I look forward to making more projects with these new tools. What would you make?
Want more Cricut Maker projects? Try these Cricut Maker Wood Projects.
The author may collect a small share of sales from the links on this page.


Comments
Join the conversation
Awesome!!