Tools and materials:
- 19 gauge wire- 1.5 inches, 2 inches, and 2.5 inches
- Beads
- Pliers
Today’s tutorial focuses on making beautiful jewelry with minimal effort. Basic wire jewelry is the perfect answer for those looking to get creative without ready for much commitment. It’s quick, it’s easy and it creates styles that are one of a kind!
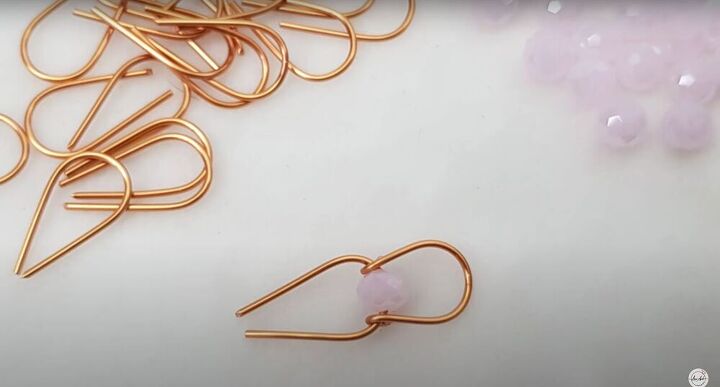
Cut out two wires for each length that we need and then bend them slightly around a wooden rod. This will give you the loop shape that we are looking for. Repeat this with the other two sizes until you have six hoops in three different sizes.
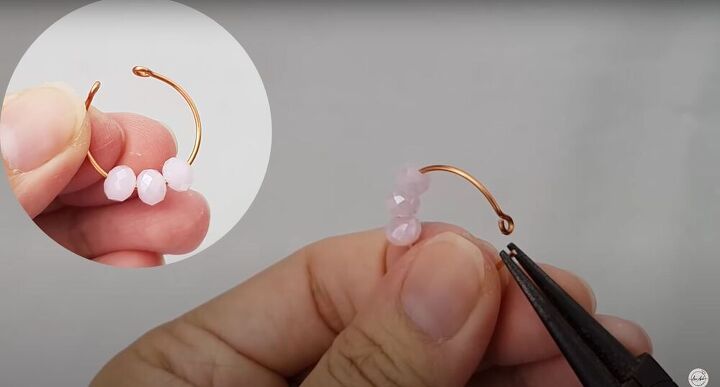
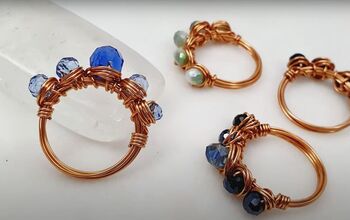
To add detail, simply choose beads that you love and slip them onto the hoop. Next, we are going to curl the edges using some pliers so that we can connect the three layers. Use your pliers to curl the edge inward and then pull back slightly to secure the curl.
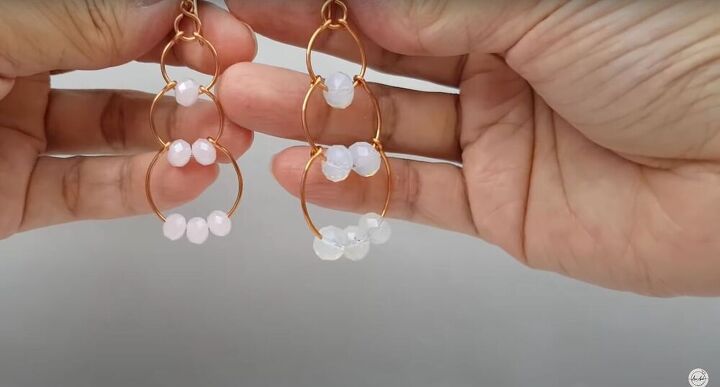
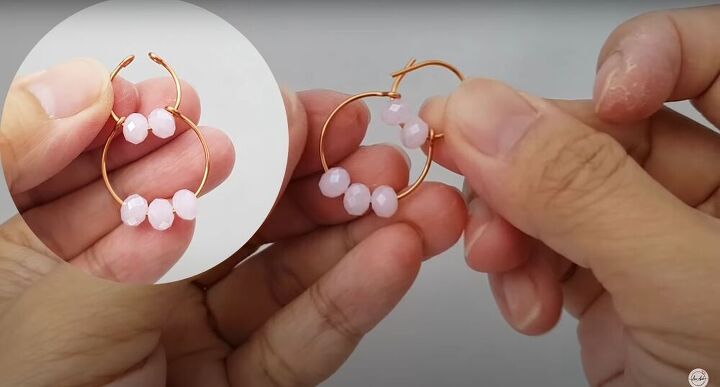
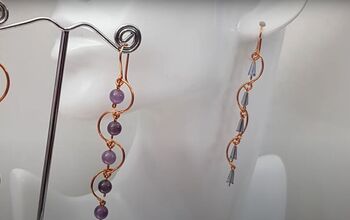
To connect the three layers, start with the bottom layer first. Make the curled edges for the bottom layer and then slip the middle layer through one edge. Once one side is in, add your beads and then insert the other side securely into the curl. Finally, curl the edges of the middle loop and repeat for the top hoop. Once you’re done, repeat these steps for the other earring.
To connect the earpiece, first, you need to use some pliers to twist open the connection - this will allow you to slip the earring and the earpiece through. Once the connection is through the hoops, twist open the bottom of the earpiece and weave it through the connector piece. Remember to twist everything back in place once you’re done and to keep the connections secure. Repeat for the second earring.
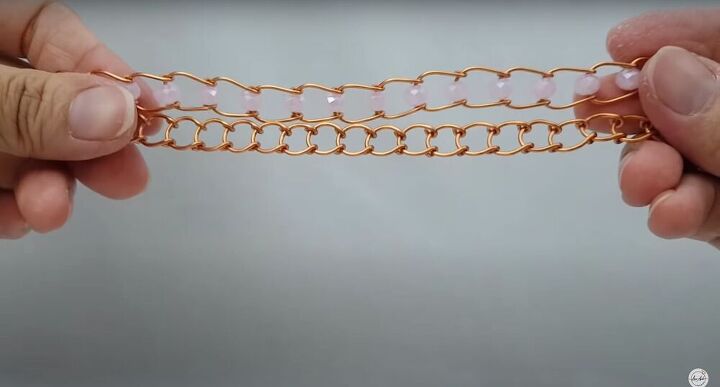
For the bracelet, you will repeat the same steps as in the earring. The idea is to create small hoops (beaded if desired) and to loop them together using curled edges. Keep in mind that depending on the size of the horseshoe (and thus the hoop) the combinations and patterns you create will be different.
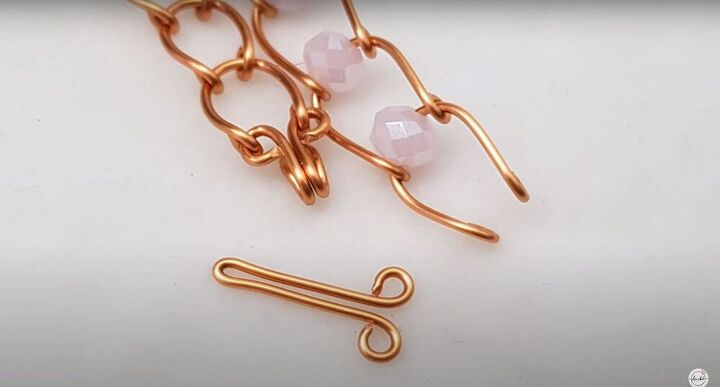
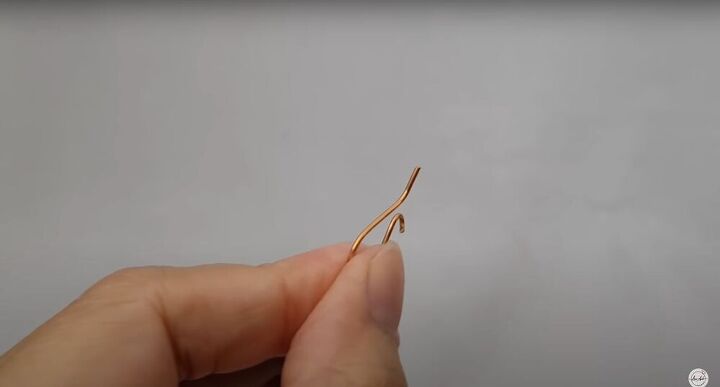
To secure the end of the bracelet, take a piece of wire and fold it in half. Next, curl the edges of that wire until it resembles the image above. Fold the wire in half again so that you have created a hook. Secure the edges of the bracelet through the curls of the hook. Remember to keep a blank hoop to attach the hook to and your bracelet is done! Feel free to try different wire lengths and sizes for different styles and looks.
There you have it! How to make wire jewelry in five easy steps! I love choosing my beads and styles and coming up with different ways to create gorgeous jewelry. If you created something unique, I’d love to see it. Share down below!
Looking for an easy way to save money, upcycle, and take your style to a whole new level? Then this...
Aaaand we have a brand new sewing tutorial up on the blog! There are seriously so many different...
Happy, happy hump day! Hope you're having a lovely week so far. I am excited to share a spring look...
I'm going to be showing you how to style Dr. Martens with ten different outfits. I thought this...
Scrunchies are no longer a thing of the past, and I am so excited to start making a few creative...
A button down shirt is one of the most versatile pieces you can have in your wardrobe. I styled...
I'm going to be showing you an easy but effective glitter DIY. I’ve gone for a gorgeous red color...
As I send off 2 of my boys to go skiing this morning, I’m reminded that it is indeed in the thick of...
Looking fabulous is great but looking fabulous while staying comfortable is even better. After a...
What do you get when you combine a pile of fabric scraps, a bit of spare time and a vintage sewing...
In this tutorial, I will be showing you how to turn a pair of men’s pajama bottoms into a stylish...
A belt creates a feminine, hourglass silhouette that enhances your figure. I adore wearing them and...
This easy summer dress is such a fun project because it is made from a blanket! I love projects like...
Today we are going to be turning a pair of plaid pants into a vest and tote set. I love getting...
When we talk about jeans it sounds very casual and easy, but there are definitely some tips and...
I’m not sure about you, but for me, spring felt like it would never arrive. And now that it’s here,...
Need a handy bag to store your stuff? Why not opt for a cute bucket bag? It's easy to make, and it...
I found an almost perfect v-neck sweater at the thrift store. I liked the color and fit, but I...
I had an oversize top that was just lying in my closet, so I decided to spruce things up and...
There’s no better way than making a statement with a beautiful statement necklace. This is the kind...
Wondering how to wear a smart white shirt in new ways? Here are 14 white button-down outfit ideas...
Looking for a few ways to keep your favorite cropped jeans in wardrobe and still be trendy. I’m...
This DIY Out of Office T-Shirt tutorial is sponsored by Expressions Vinyl.
All opinions expressed...
We’re going to be talking about sneakers and dresses, which is one of my favorite spring wardrobe...
I have to admit, I am a sucker for anything with a heart on it. It’s always been one of my love...
Spring is quickly approaching which means warmer weather, yay! I had fun styling this cute dress for...
I found some inspiration for a lovely lace-up top and I decided that doing a DIY lace-up top on a...
If you have not heard of sashiko before it is a Japanese word describing embroidery frequently used...
I’m going to share with you some of the looks that I put together using a few key pieces based on...
Hang up those oversized sweaters, spring is here!! Luckily living in the south, it already feels...
I’ve been really envious of all the cute knitted and crocheted cardigans and sweaters I’ve been...
This post is kindly sponsored by IlovetoCreate + Blueprint Social. Thank you for supporting the...
Happy, happy FriYAY! I hope you've hada beautiful week so far. Today, I am sharing an adorable short...
I am notorious for either breaking every pair of sunglasses I own or losing them. Anyone else? I...
Join the conversation
I love this and can't wait to try it!
You make it seem second nature !!! I really would love to try this! So beautiful!!! tfs😍
thank you liked , Wish you success and make more beautiful products