Make It Yourself: Kimono-Style Cardigan for Beginners

Today’s tutorial will teach you how to make this adorable cardigan/coverup/kimono/whatever you want it to be. It is so cute and versatile and that is only one of the reasons that I love it! This project is fun and perfect for any skill level - especially for beginners!
Tools and materials:
- Two yards of fabric
- Scissors
- Pattern paper
- Marker
- Pins
- Sewing machine
- Measuring tape
Make your pattern
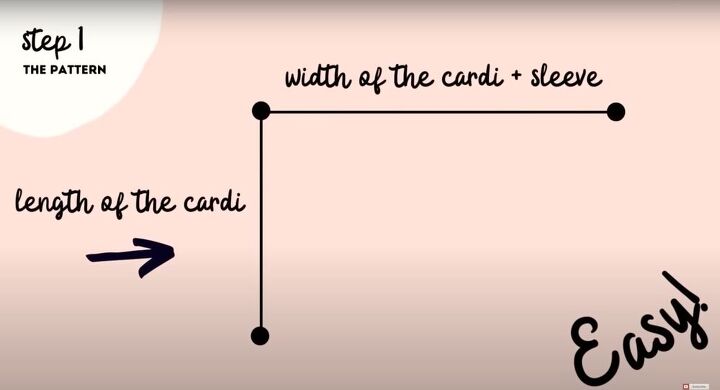
First, we want to make a pattern (even though this kimono is mostly made from rectangles, a pattern will help us keep everything neat and in order). Start at the top of your pattern paper and draw a straight line across. To find the measurement of the top line, hold the measuring tape in both hands and stretch it across your shoulders, arms, and neck. Next, fold the measuring tape in half and that’s the measurement of your top line. (Keep in mind that this garment is extremely loose and flowy, and if you aren’t sure it is okay to cut it a little larger than you think). Then, for the second pattern line, we are measuring the actual length of the garment. Take your measuring tape, place it on the center back of your neckline and then drop it as low as you want. The kimono can be any length that you desire.
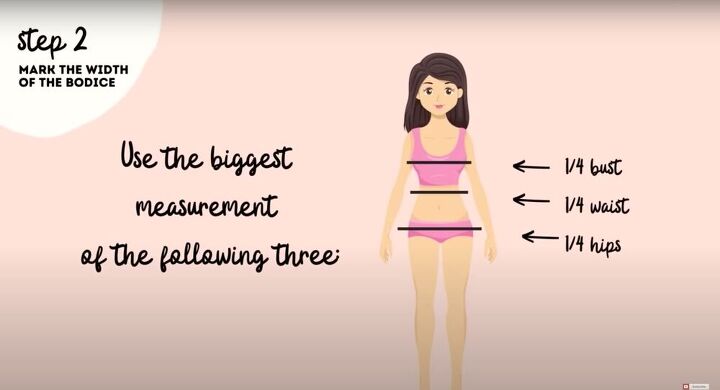
To continue the pattern, take the following three measurements; ¼ bust, ¼ waist, ¼ hips and apply the biggest of the three, applying it along the top line of your pattern. Once you mark the largest measurement, use a ruler to then drop a line straight down (parallel to the length). Next, to finish the pattern, mark the neckline. Mark 3.5 inches across and one inch down and connect the two points. Then, mark the width of your sleeves. Mark about eleven inches down (on the line we just drew parallel to the length) and draw the sleeve out in the opposite direction. Remember to make sure the sleeves are wide because the loose should be fit and the fabric is non-stretch. Finally, find the middle of the length line and mark it. Connect that marking with the edge of your back neckline (this will be your front neckline curve).
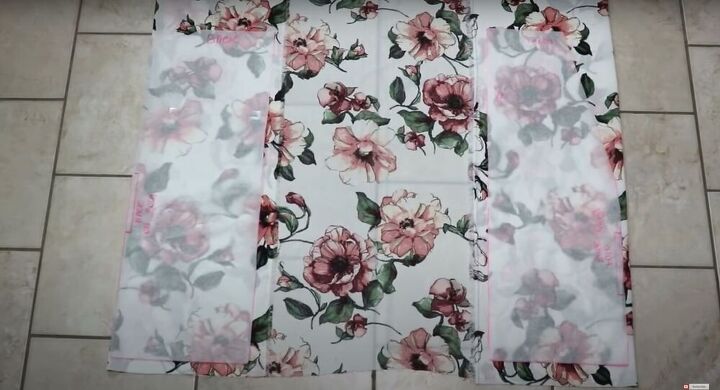
Cut out your fabric
Cut out your pattern pieces (the front and the back can be on the same piece if they aren’t you should find the bodice pieces to be pretty much identical except for the neckline). Next, take your fabric, fold it over and place your pattern pieces on the fabric. This will make it easier for you to cut out your pieces. Cut your back piece on the fold so that it comes out as one piece, and cut your front pieces on the opposite side so it comes out as two. Remember to leave about ¼ inch to half an inch of seam allowance. (For the sleeves, if you want a thick hem, leave about 3.5 inches seam allowance).
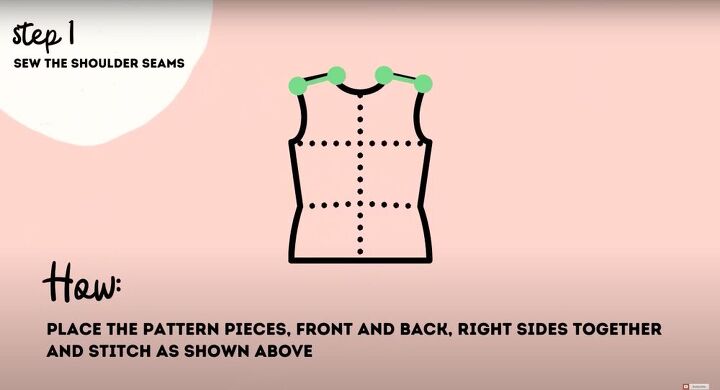
Connect the front and back pieces
For sewing, we will follow the same basic four steps. First, we will place two pieces of fabric right sides together, then pin them in place, stitch them using a straight stitch according to the seam allowance, and then zigzag/overcast the edges. So, for the first step, take the back piece and lay it out, right side up,two-sleeve, and then take the two front pieces and place them right sides down, making sure to match the shoulders. Pin the fabric in place, stitch the pieces together and secure with a zigzag stitch or overcast. Finish by pressing the pieces with your iron.
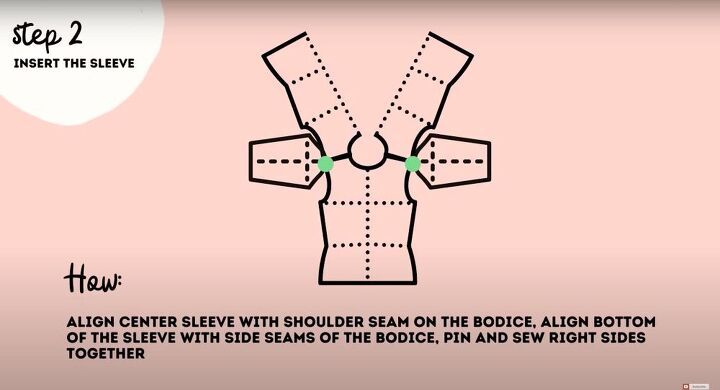
Connect the sleeves
Take your two-sleeve pieces, fold them in half and make little notches by the halfway point - this way we know where the center point is. Next, take the cardigan and lay it out with the right sides facing down (so you can clearly see the shoulder seam). Now, take your sleeves and match that notch with the shoulder seams. Pin the pieces together and follow the same four steps from before to sew them in place.
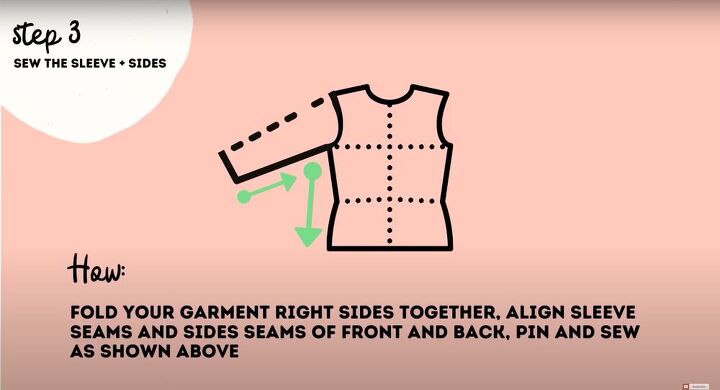
Sew the seams
Now we want to finish the seam of the sleeve and the seam of the cardigan all in one go. So fold your cardigan over, right sides together (making sure the sleeves are formed into a tube). Pin everything in place and starting at the beginning of the sleeve, stitch all the way down to the hem of the cardigan - remembering to follow the same four steps as before.
Hem the sleeves
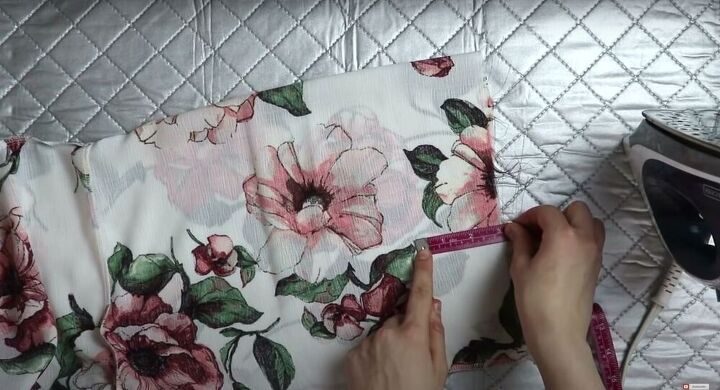
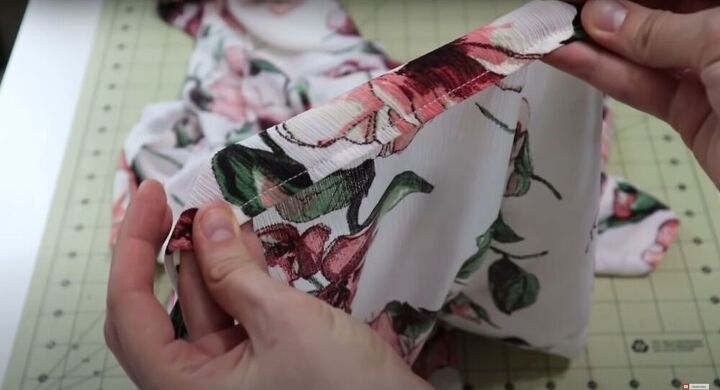
To give the sleeves that really nice and thick border, fold them over about 3.5 inches. Iron the fold down to keep everything neat and then pin the border down. Use a straight stitch to secure the hem (sew along the very edge of the sleeve) and don’t go back in with a zigzag stitch after. Once that’s done, fold the raw edge inside about ¼ inch, press it with an iron, and add another straight stitch all the way around. By the end, there should be no raw edges on the hem.

Create the collar
To make the band/collar of the cardigan, we need to start by finding the center back of the neckline. To do this, simply fold the back neckline in half and pin the middle spot. Next, take your measuring tape and measure all the way from the bottom hem of the front cardigan to the center back of the neckline. Cut out two strips at that length and 6.5 Inches wide (don’t forget to add seam allowance). Once both strips are cut, sew them together by one side of the short ends. Fold the strip in half (lengthwise) and match the seam with the middle point we marked earlier. Align both pieces of fabric and pin the strip along the edge of the kimono. Repeat this for both sides and then connect the collar with the same four steps.
Hem the cardigan
To finish the cardigan, we need to hem the bottom edge. Fold the fabric in about a quarter-inch and pin it in place. Sew the hem down with a straight stitch on the very edge of the fabric. Next, fold it in one more time another ¼ inch and stitch in exactly the same place where you put the previous seam (the seams should be overlapping one another to give the appearance of there only being one seam).

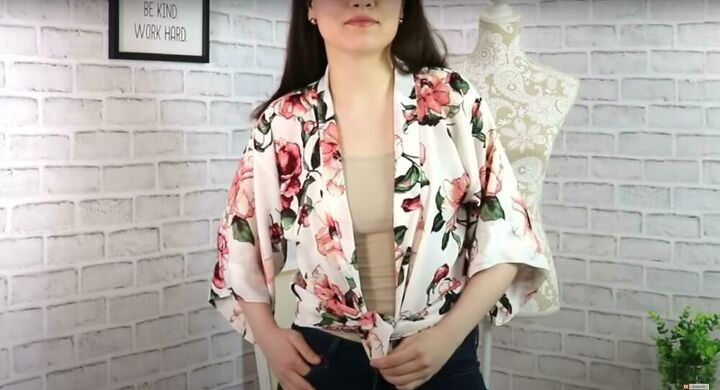
I’d love to see how you guys wear this. Whether you throw it over your favorite bathing suit or tie it up with some jeans. Show me below how you made easy kimono-style cardigan work for you!
The author may collect a small share of sales from the links on this page.


Comments
Join the conversation
Simple yet elegant! Great fabric choice, too.
Love this. It looks easy-peasy. I also love your fabric choice!