How to Sew a Sleeveless A-Line Top

In this tutorial, I’m going to show you how to make a simple A-line top. The top is sleeveless and is a perfect piece for the summer!
To get started, you’re going to need the measurements for your desired top length as well as your bust, waist, hips, shoulders, and arm hole measurement.
Tools and materials:
- Tape measure
- Scissors
- Rotary cutter
- Paper
- Ruler
- Pins
- French curve ruler
- Hip curve ruler
- Paper weights
- 1 and a half yards of non-stretch fabric
- Sewing machine
- Basic bodice template
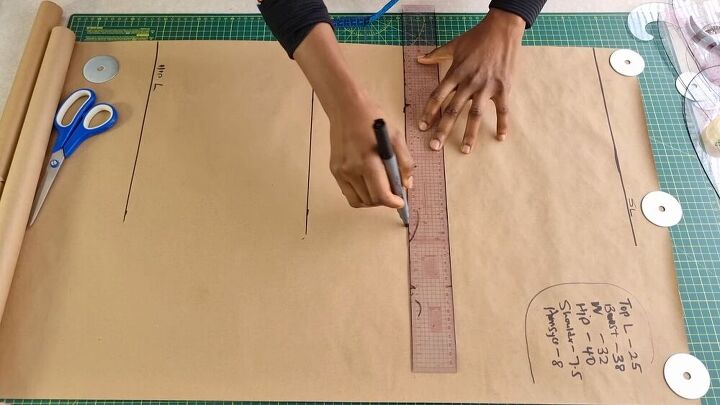
Mark the horizontal measurements
My desired top length is 25inches, so I’m going to measure this and mark it on some paper. The bottom of this measurement will be your hip line, and the top will be your neckline. To make things easier, you can label this on your paper template. Once you’ve done this, you’re going to input your bust line and your waistline. My bust line is 11inches from my shoulder, so I’m going to mark this on the paper. Then my waistline is 16inches from my shoulder. Those are the four basic horizontal measurements that you need. The edge of the paper is the center front and you’re going to be cutting it on fold.
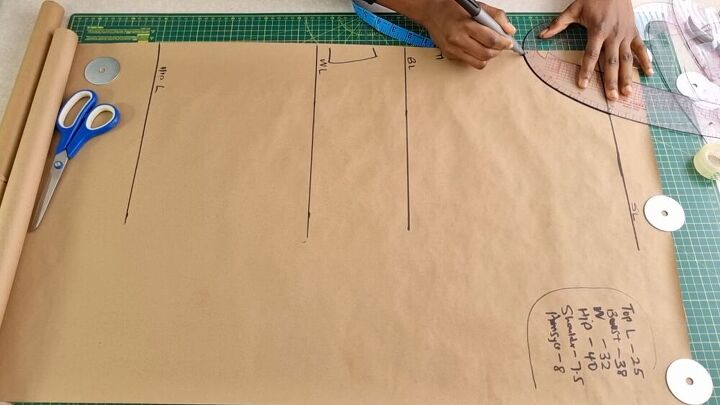
Draw the neckline
Once you’ve drawn out all of these horizontal lines, the next thing that you want to do is to create the neckline, the armholes, and the shoulder slope. This top doesn’t have a zip, so you’re going to make the neckline a little bit wide. You can just add 1/4inch to both ends of the measurement. I usually make my neckline 4inches so that it will be 4.5inches instead. Mark this in the center of the neckline on your paper template. Then, using a French curve ruler, you need to draw the neckline hole. I’m making a curve neckline on this design, but you could make a v-shaped neckline if you want.
Mark the shoulder and armhole measurements
Now you need to mark your shoulder measurements. My shoulder measurement is 7.5 inches, and from that 7.5 inches, I’m going to go down by 1 inch to create the shoulder slope. Next, you are going to input your armhole depth measurement. Mine is 8 inches, so I’m going to mark 8 inches here by drawing a straight line. Find the middle point of the armhole that you’ve just drawn, and from that middle point, you’re going to mark ¾ inch. Then connect the points together to create a nice armhole hole for the front.
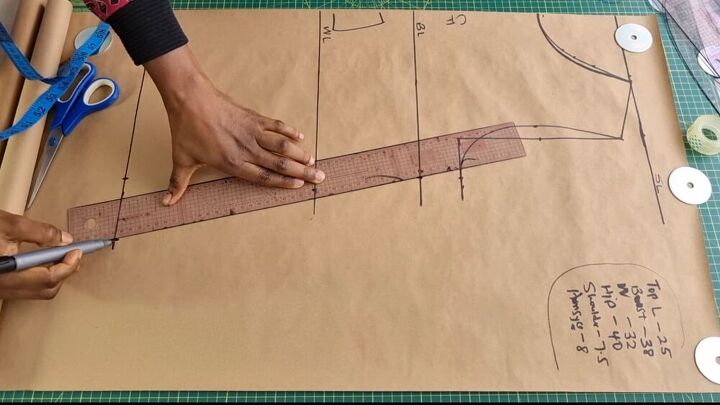
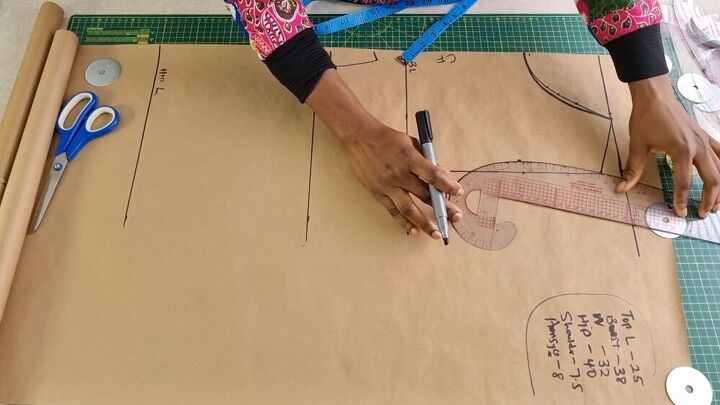
Connect the bust point to the hip line
Now we’re going to come to the bustline. Whatever your bust measurement is (mine is 38 inches) you’re going to divide that by 4, so I’m going to have 9.5 inches. I will mark 9.5 inches on my bustline. And then I’m going to add an ease allowance of ¼ inch to each side (you can add more ease allowance to yours if you want). You don’t need to do anything to your waistline, so we’re going to jump to the hipline. You need to divide your hip measurement by 4. (My measurement is 40inches which divided by 4 is 10 inches). Then I’m going to add some ease allowance to this; you can add between 2-5inches depending on how free and flowy you want the top to be. Then we’re going to connect the bust point through to the hip line.
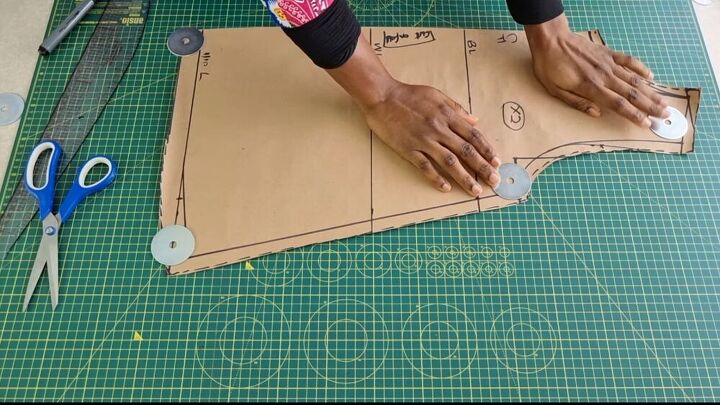
Add a seam allowance and cut out the pattern
If you don’t want the back neckline to be as wide as you have it on the front, you can go ahead and create a back neckline of 2 or 3 inches.
I’m going to add a ½ inch seam allowance around the pattern and then a 1-inch seam allowance to the hemline.
Tip: I like to draw my seam allowance as a dotted line to differentiate it from the sewing pattern.
Proceed to cut the pattern out. After cutting it out, this is what we have. I’ve placed some weights on the paper to make sure that it stays flat on the table.
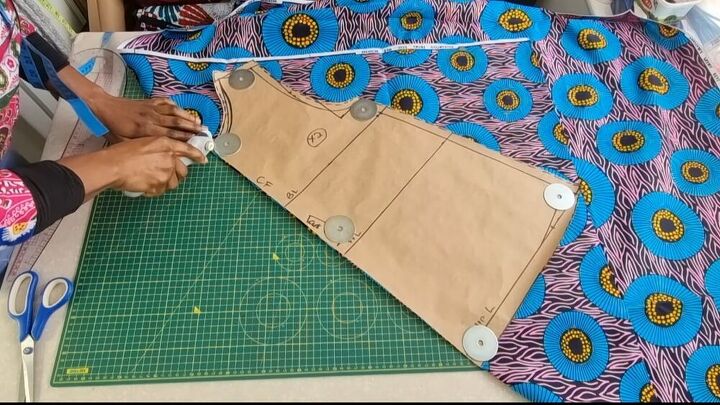
Cut the fabric
The fabric that I’ll be using is an African print, non-stretch fabric. To cut the fabric, you’re going to fold your fabric on the bias. Place your template on it and cut it out. You’ll need to cut out two templates for the front and the back of the top.
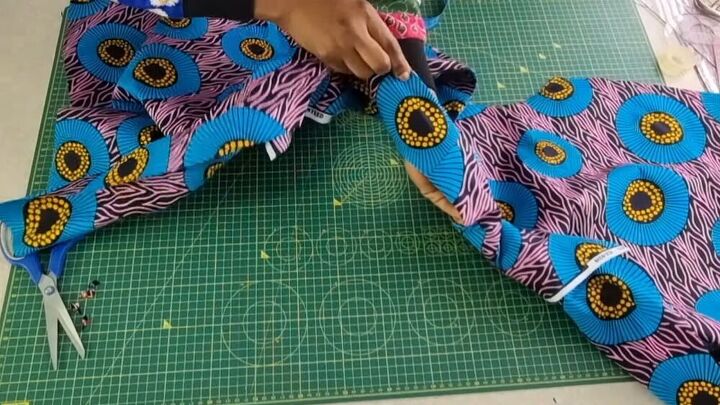
Sew your top
Place the two sides together, right sides facing one another. Make sure the shoulders are aligned with one another and then sew them together on the sewing machine. Proceed to sew all of the sides together using your seam allowance. Once you’ve finished, turn the hemline up and sew it.
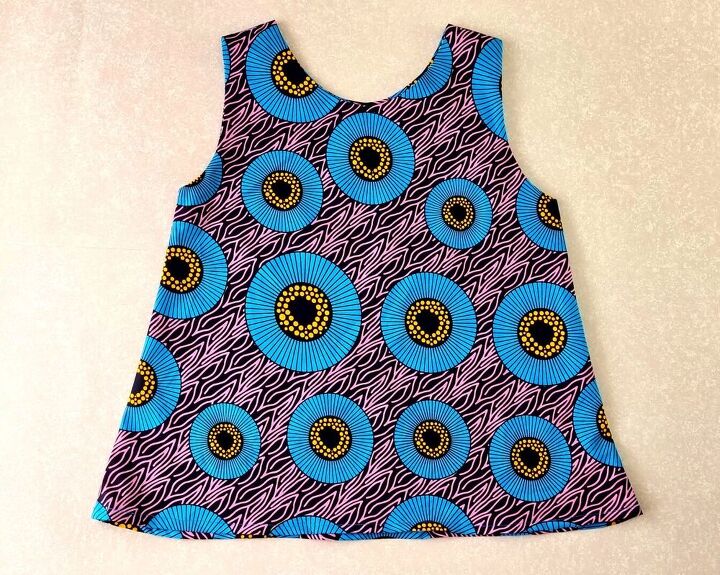
This top is loose and flowy and great for summer. It’s such a simple sewing pattern yet it creates a gorgeous and flattering piece of clothing. I hope you enjoy wearing it as much as I do!
The author may collect a small share of sales from the links on this page.


Comments
Join the conversation
Cute print!
Nice job. You made the shoulders look easy. I always have trouble with facings.