DIY Sweater Inspiration: Sew a Marlo Sweater From True Bias

Want to know how to make the exact same Marlo sweater from True Bias? Well, you've come to the right place! Make your own Marlo DIY sweater with this easy DIY sweater tutorial. I was looking for a versatile fashion piece, and when I came across this fantastic sweater that, by the way, true bias actually supplied this pattern to all of their fans, I knew this would be the perfect combination for me. You can either wear it as a top or an outer piece with something chic underneath. I really could carry on about how lovey and fitting this sweater is but let's cut to the chase, shall we?
Tools and materials:
- Marlo pattern from true bias- get it here
- Lightweight iron-on fusible interfacing
- Fabric- sweater knit, french terry polar fleece or rib knit
- 3-5 buttons (optional
- Sewing needle for stretch fabric
- Walking presser foot
- Sewing machine
- Scissors
- Pins
- Matching thread

Cut out the patterns
Cut the neckband interfacing as the pattern states.
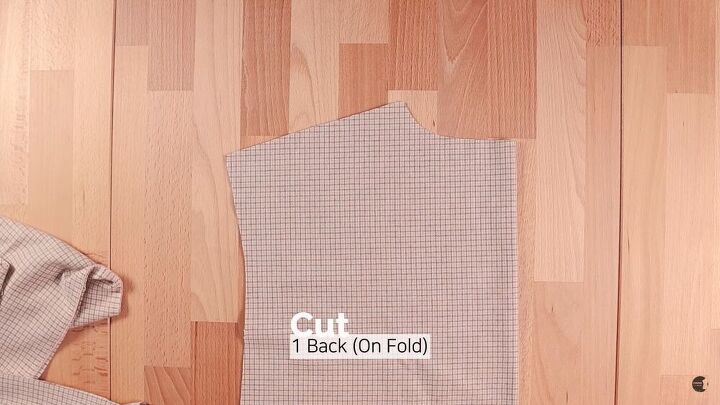
Next, cut the front and back bodice. Trace the pattern onto your fabric and cut around using a ⅜ inch seam allowance. Remember to use this seam allowance throughout the whole tutorial unless stated otherwise. You should have two front mirrored bodice pieces and a cut-out back on fold.
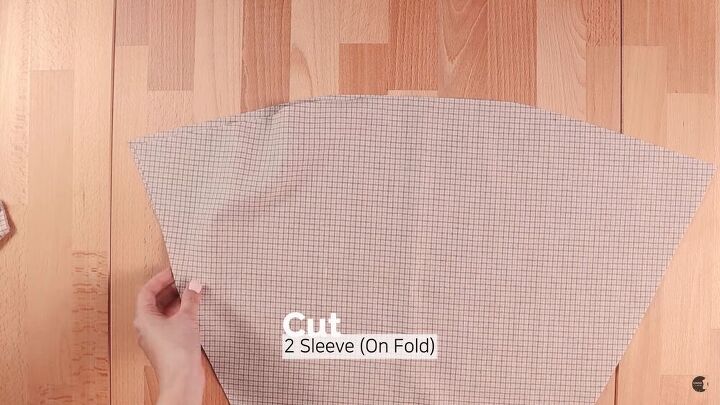
Cut two sleeves on fold.
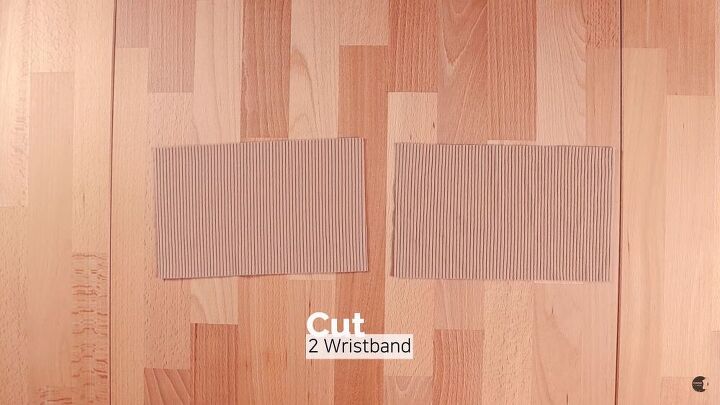
Cut out two wristbands.
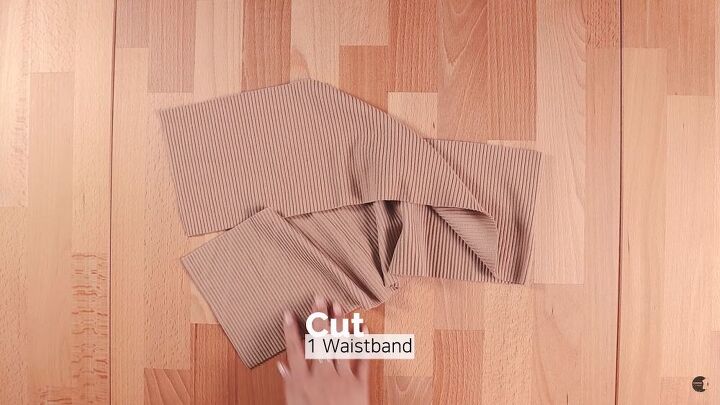
And, don't forget the waistband.
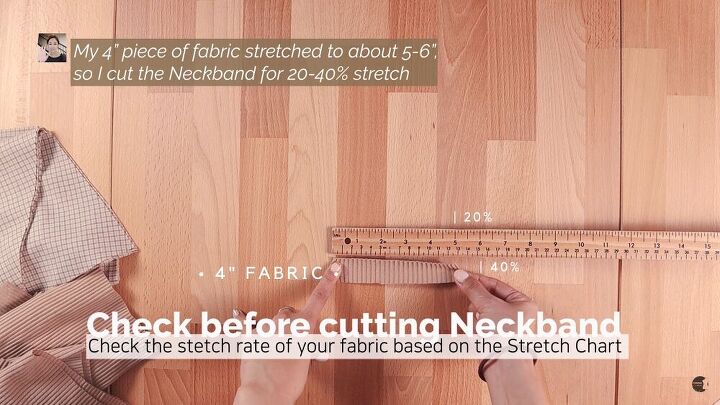
Before cutting the neckband, check the stretch weight of your fabric based on the stretch chart. In the example shown above, my 4-inch piece of fabric stretched to about 5-6 inches. This means that the neckband, in this instance, should be cut with a 20-40% stretch in mind.
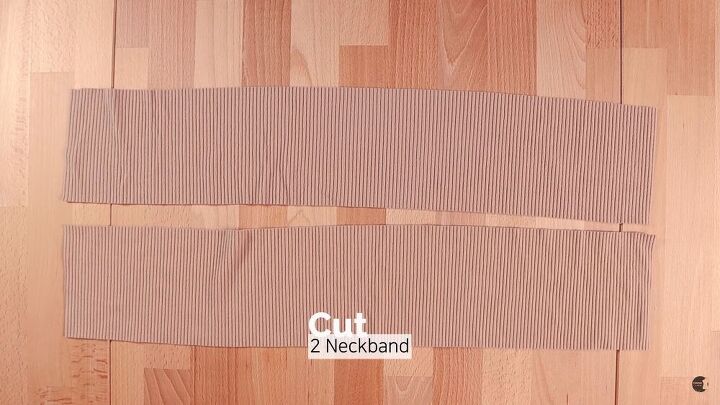
Lastly, cut out 2 neckbands accordingly.
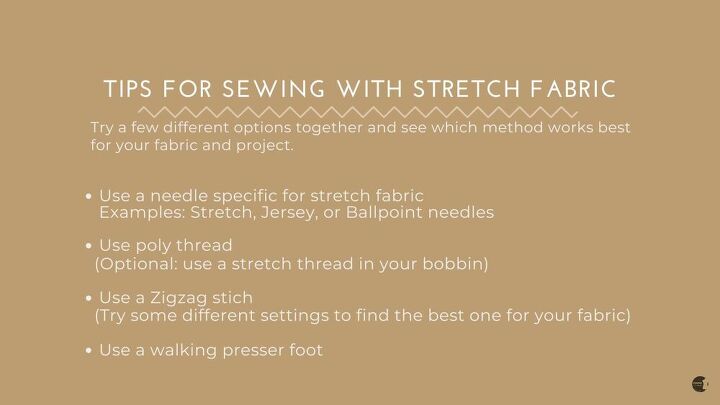
Practice your stitch
Before you go ahead and stitch all the pieces together, play around with your sewing needle and settings. Sewing with a stretch fabric calls for some optimizations, such as a zigzag stitch and poly thread.
Sew and assemble the pieces
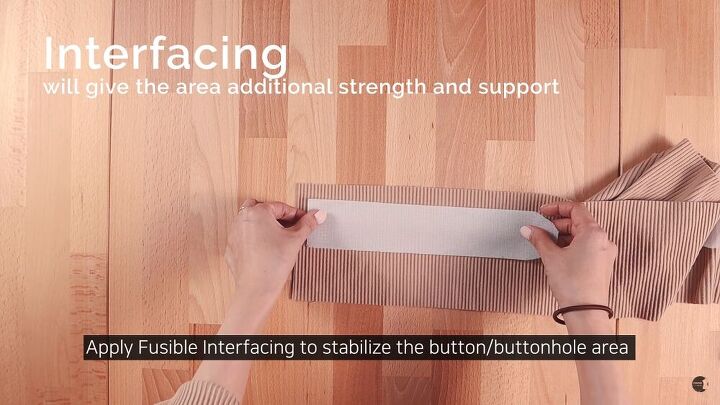
Starting with the neckband, face them right sides together and sew the edges with the double notches. Then, fold it lengthways so you have a guide on how long to cut your fusible interfacing that will stabilize the buttonhole area.Press the interfacing once you're satisfied with its positioning.
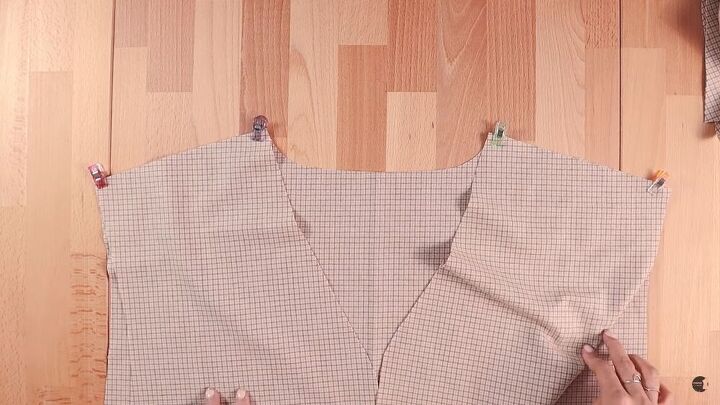
Pin and sew the 2 front bodice pieces to the back bodice, at the shoulder seams. Then, press the seams towards the back.

Now, it's time to make and add the sleeves. Pin the sleeves to the bodice piece's armhole, making sure the fabric is right side together. After everything is pinned correctly, sew the sleeves.
TIP-
For sewing curved armscyes, start at the center without pinning the fabric.
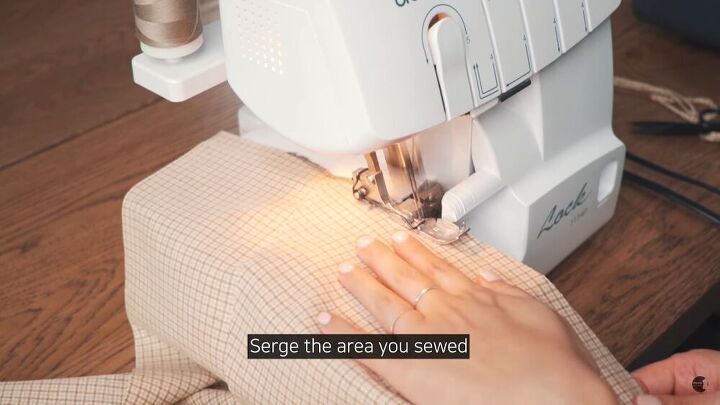
Next, go over the stitch with a serger.
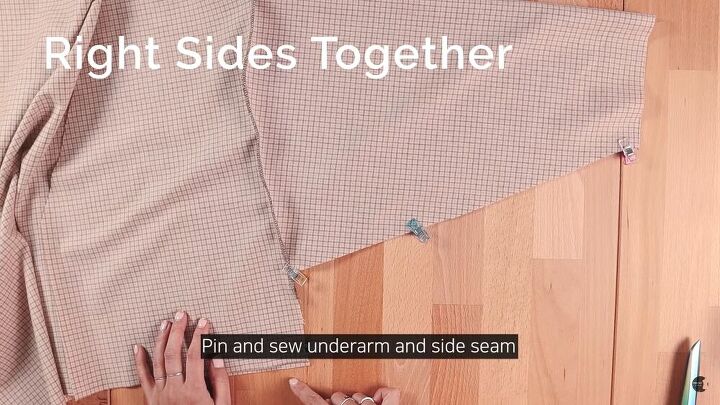
Now, pin and sew the underarm and side seam.
TIP-
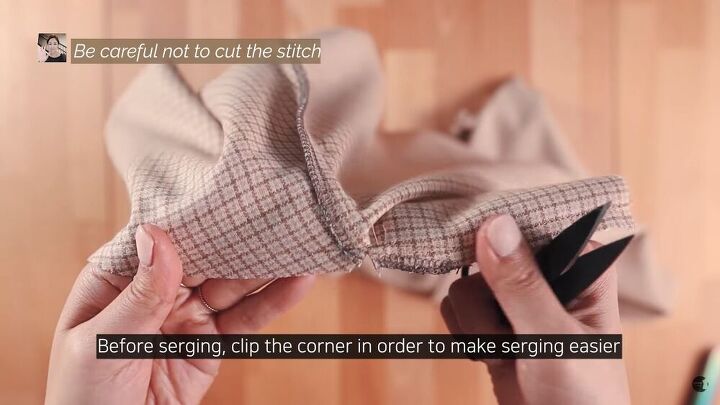
Pivot when you meet the stitch at the shoulder. Also, before serging this area, clip the corner to make the serging process easier.
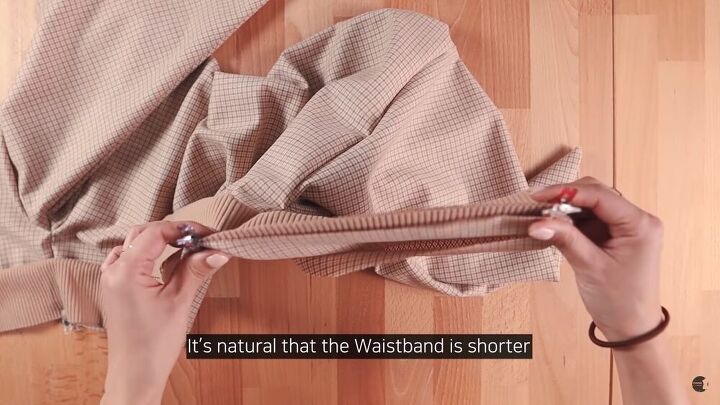
Now it's time for the waistband. Fold the waistband in half and pin its raw edges to the bottom bodice. Be sure to match the notches. Pin it all around and sew. It's totally fine if the waistband is shorter than the length of the bodice. After, press the seam towards the bodice.
TIP-
When sewing the waistband, stretch it so that it fits the length.
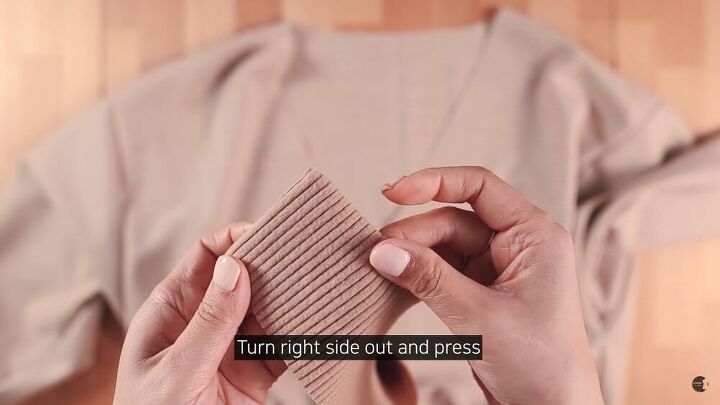
For the neckband, fold it in half, lengthwise and right sides facing. Sew the short ends. Then, turn it right side out and press.
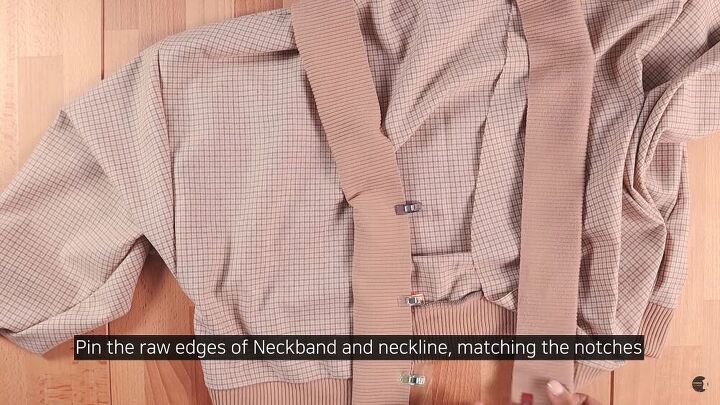
To add the neckband, pin the raw edges to the neckline, matching the notches as you go along. Make sure both interfacing parts are at the bottom, where the buttons will be placed.
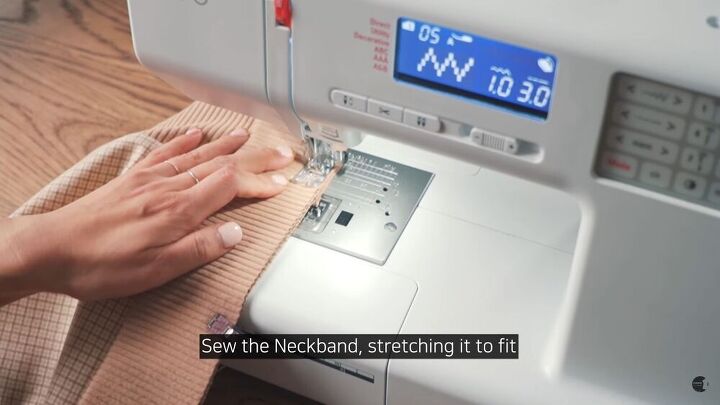
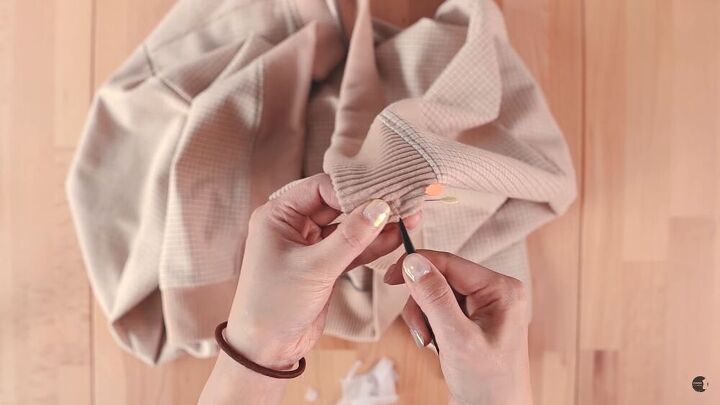
Sew the neckband and stretch it to fit. Then, serge the outline of the neckband.
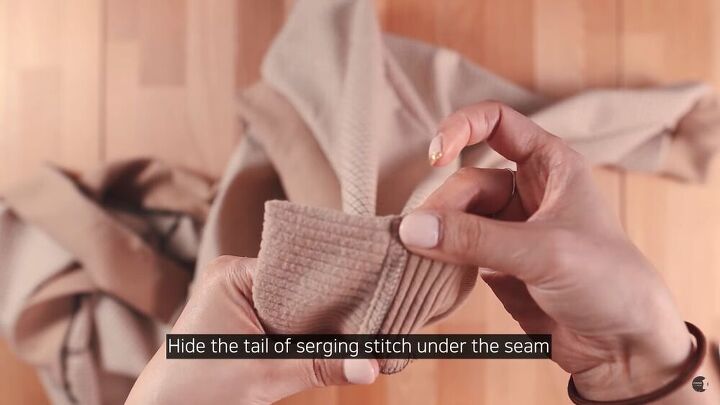
Hide the tail of the serging stitch under the seam and topstitch all around.

Fold the wristband in half and sew the short edge. Slip the sleeve into the waistband. Pin the raw edges and sew the diameter. Remember to sew the wristband, stretching to fit. Finish it off with a serge.

Make the buttonholes & attach buttons
Mark where you'd like your buttonholes to be. Next, stitch the holes on one side of the panel, and cut them open with a sharp fabric blade.
Pin the edges of each hole to prevent yourself from cutting the hole longer than it should be. The Pins create somewhat of a blockage.
Attach the buttons to the other panel, making sure the location of both matches up.

Use a fray liquid to prevent the buttonholes from fraying.
TIP-
Every machine has different settings for making buttonholes. Refer to your machine's guide for precise steps.

You've done it - your very own Marlo inspired sweater! I am so in love with this look, and it's so easy and chic. As mentioned, You can wear this in so many ways, and it's a perfect item to have in your closet. I hope you enjoyed this tutorial! Thanks for following.
The author may collect a small share of sales from the links on this page.


Comments
Join the conversation