DIY Sewing Pattern From Your Own Clothes | TUTORIAL
Slow Fashion. Have you heard of it? It's the ethical response to fast fashion.
"It's about understanding the process or the origins of how things are made," says Soraya Darabi, co-founder of the clothing line Zady. ( npr.org)
"It represents all things “eco”, “ethical” and “green” in one unified movement. It encourages taking time to ensure quality production, to give value to the product, and contemplate the connection with the environment." ( notjustalabel.com)
It's like fast food vs slow food and we all know one way to avoid fast food is to cook the food ourselves. So why not make the clothing ourselves? There are plenty of sewing patterns out there. Even free ones online but you don't really know what the fit will be until you make it.
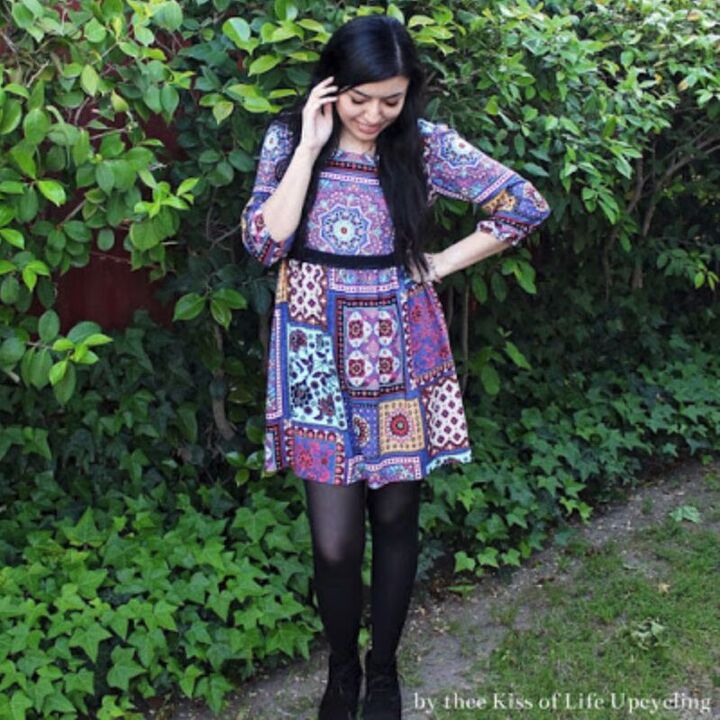
You already know how your own clothes fit you though. So why not use them as your patterns? Because you you're not sure how? Well let me give you an idea by showing you how I made a copy of this simple dress I really like. The concept can pretty much be applied to any article of clothing.
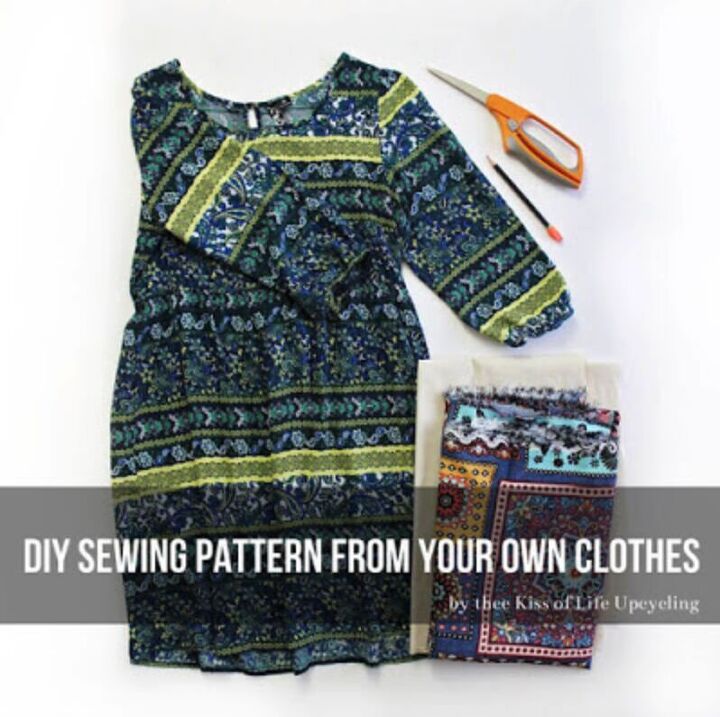
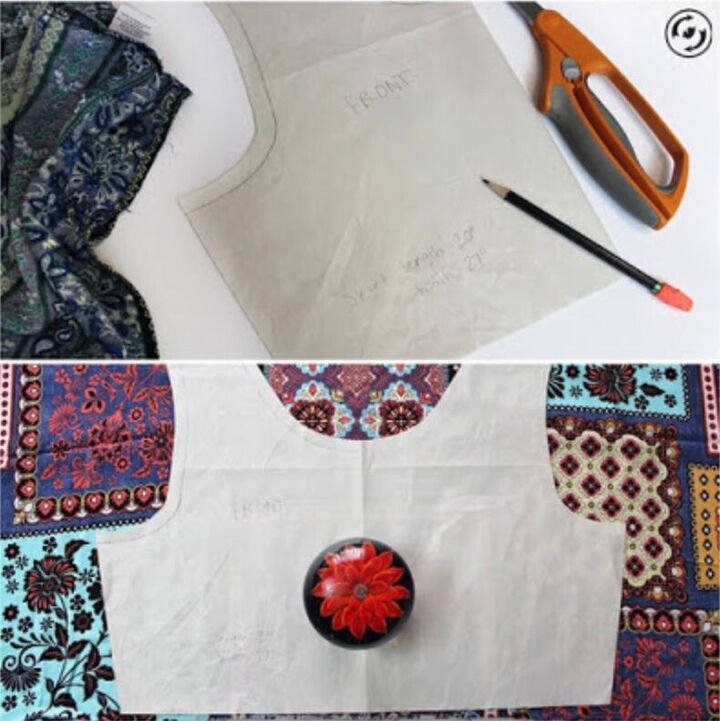
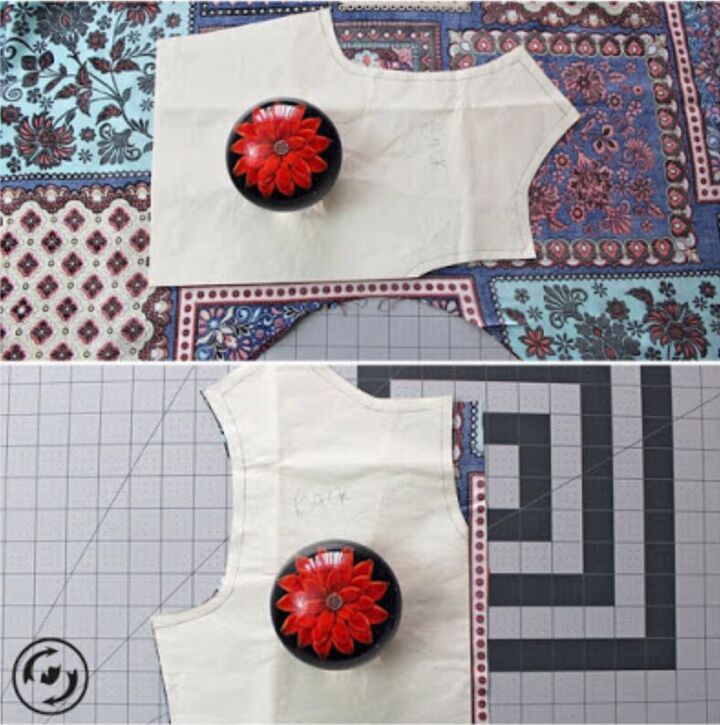
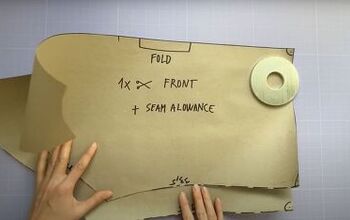
I re-use packaging paper to draft patterns on. It works great, just iron out the crinkled ones. This dress is 5 pieces. A front bodice, back bodice, skirt and pair of sleeves. Starting with the top I took the widest measurement first so I would know how wide I need the sheet of paper. The widest would be the bust width then waist width, also get the longest vertical length.
Remember to include a seam allowance. I wanted this new dress to be slightly looser so I gave it another inch. A big bonus to making your own clothes is the personalized alterations you can make.
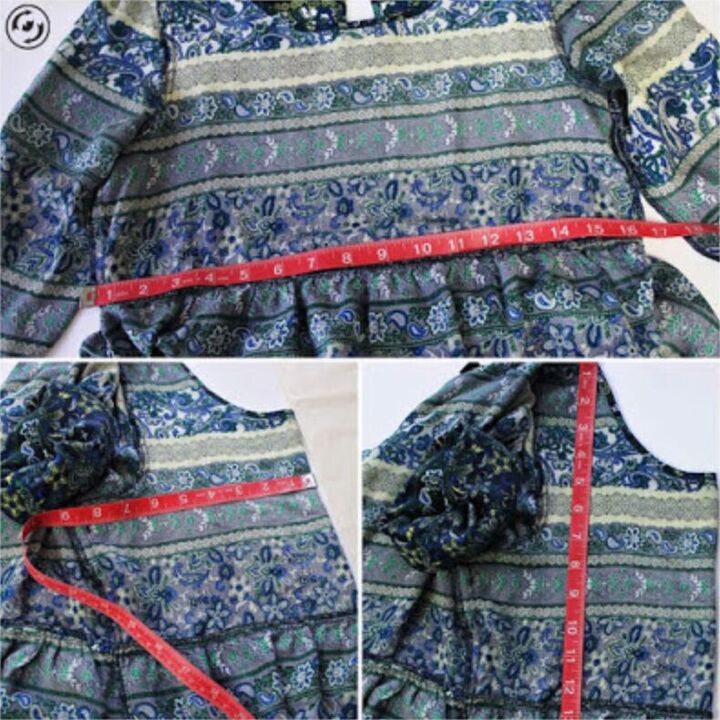
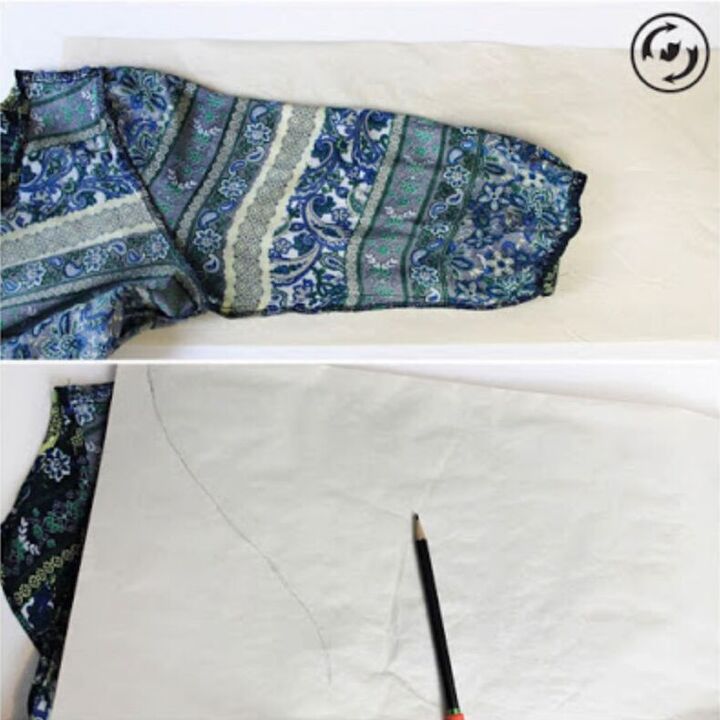
I bought 2 yards of this colorful rayon and it was more than enough. Take the same measurements for the back piece. Once you work out how big the pieces of paper you need, fold them in half. Also fold your dress in half. Starting with the front place your paper over it, aligning the folds and end. Then trace over the edge of the neckline and armhole.
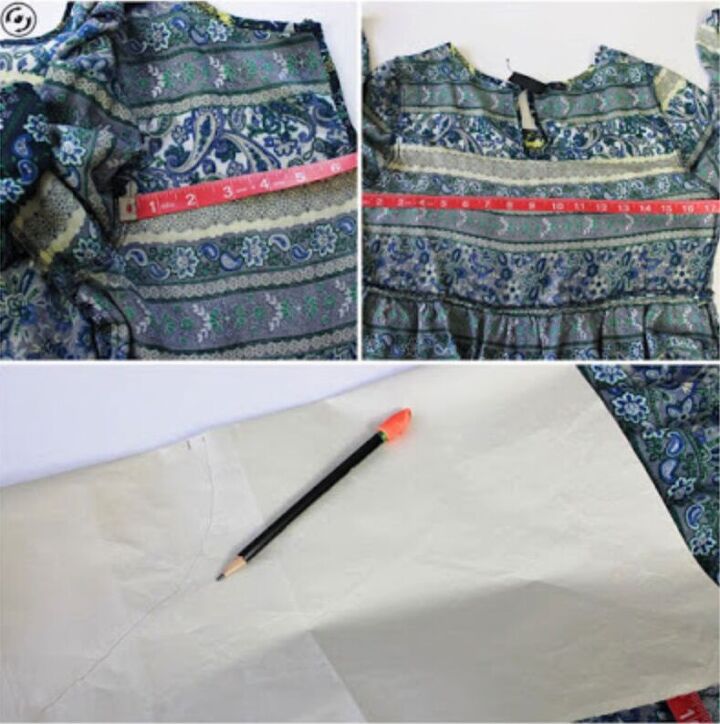
Do the same thing to the back pieces and also for the sleeves. These sleeves are slightly gathered at the tops. I took that into account and made them a little longer then the tracing would make it appear. They also have elastic in them so I took down the measurement for the length of elastic I would need too.
I think the skirt is the easiest to alter, if you want to. Add width if you want it more full. If you want it longer or shorter, add or take away. Add pockets if it doesn't have any. I wanted the dress slightly shorter, also like an inch. For the skirt part though, I don't think it's necessary to make a pattern. Many a time, your skirt width will be the fabric width. In my case it was. It worked out perfectly.
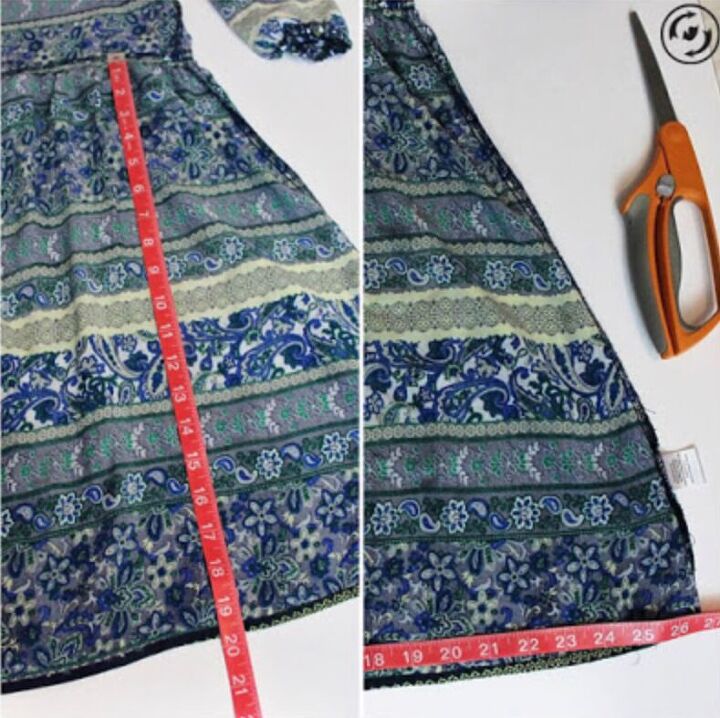
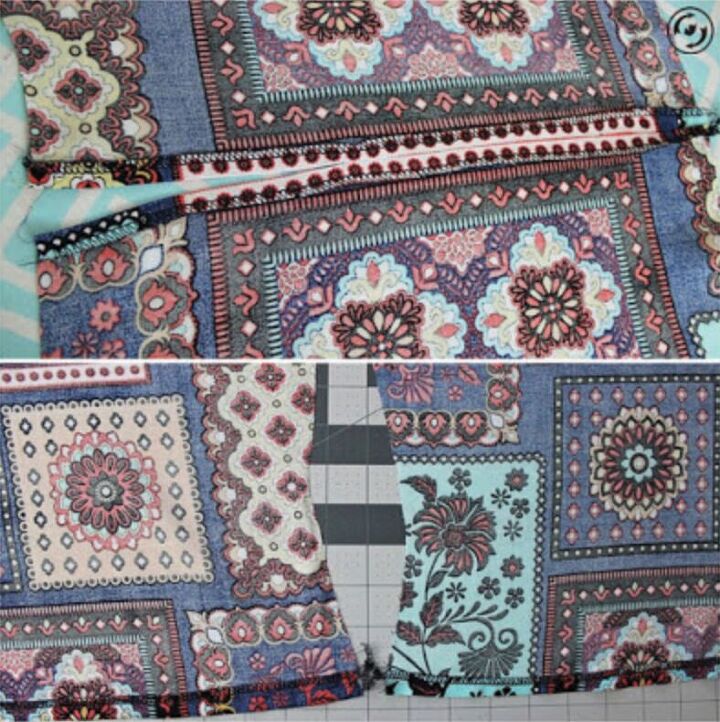
Jot down your skirt details (and any other notes) on one of the pattern pieces for the top. Since my fabric has these square patch like things going on, I wanted one centered on the front. So I unfolded the front piece and set it in place where I wanted it.
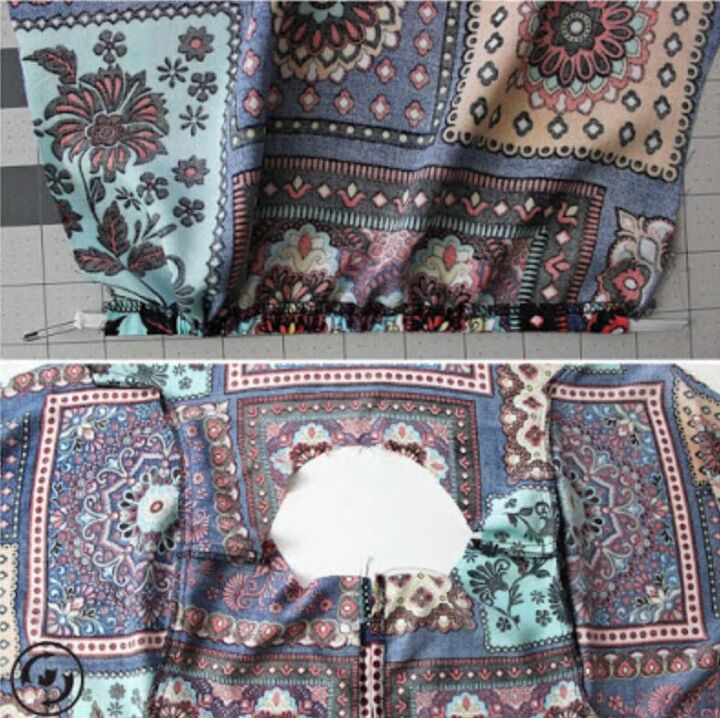
There was enough space to cut out the sleeves along side the front piece so I did that. I was able to place the second sleeve over a similar patch design so that they would match a bit.
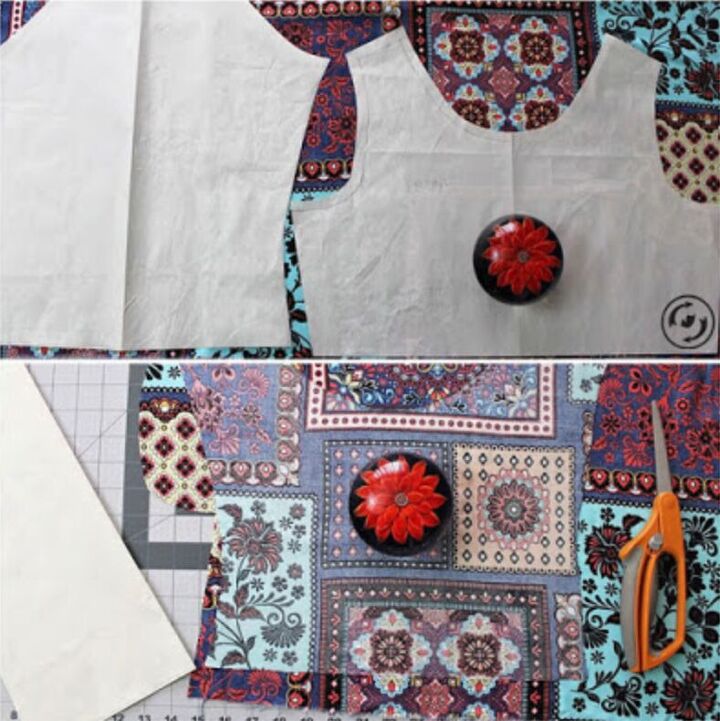
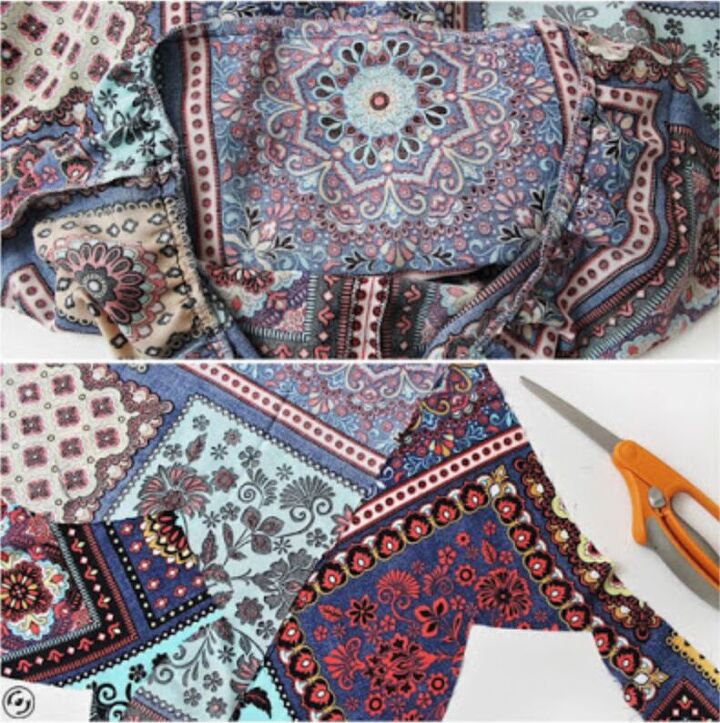
I cut out the back in two halves because it fit better on the fabric this way. So I gave the center a seam allowance to sew it together.
Took the back pieces and sewed them together to create one then attached the front to back at the shoulders.

Then I serged those shoulder seams, the center back and the ends on the sleeves.
I created a casing for the elastic in the sleeves. Gathered the top of the sleeves a bit. Then sewed them onto the bodice. This way I could sew the sides from sleeves to end of bodice all in one seam. Alternatively, you could sew the sleeves lengthwise and sew the bodice at the sides then attach the sleeves to the bodice at the armholes. Doing it this way actually creates a nicer end to the sleeves since the serged edge would end up tucked away in the casing but I forgot this. It's okay though, either way gets the job done.
The skirt took one seam and I placed it on one side. I gathered the top of that piece to fit in with the bodice width. I sewed them together and serged the raw edges together. Then I hemmed it. To finish the top neckline I created a bias tape out of the same fabric.
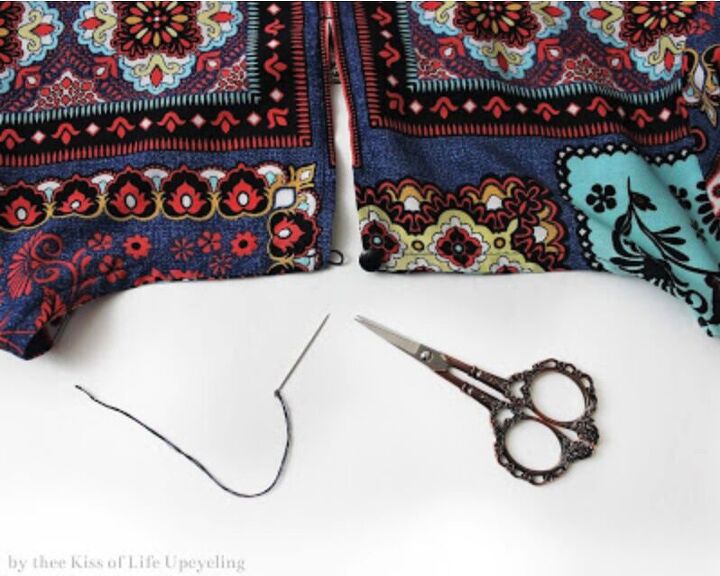
Lastly, I added a tiny piece of elastic and a tiny black button to close the key hole on the top back of the dress.
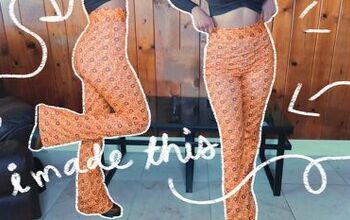
This was the initial, final result that I was not 100% content with. The pattern on the skirt conflicted with the top (the big squares with the light blue centers). I really didn't like that and wished I had paid attention to it before sewing it on this way but thank goodness for seam rippers.
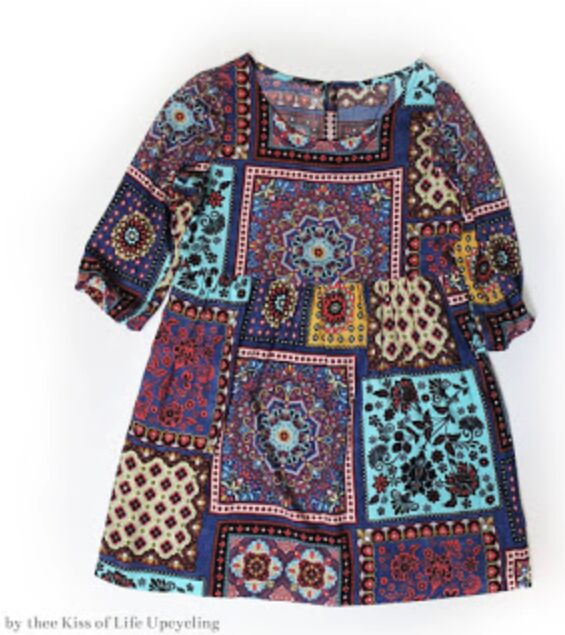
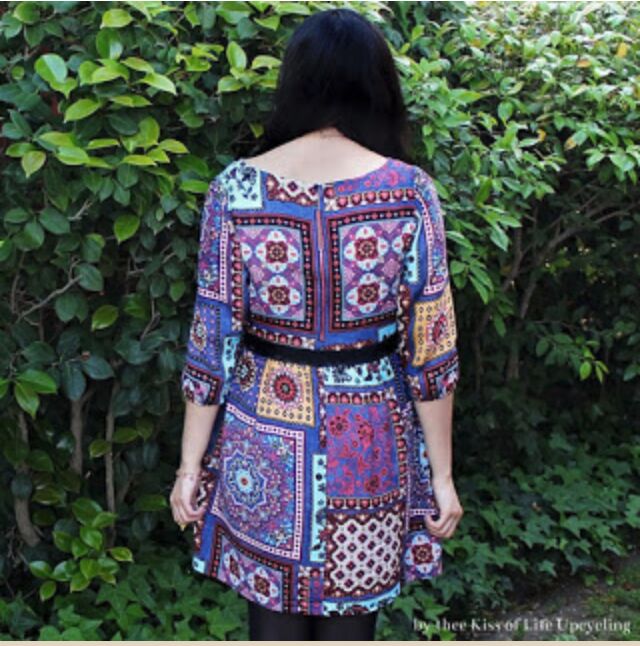
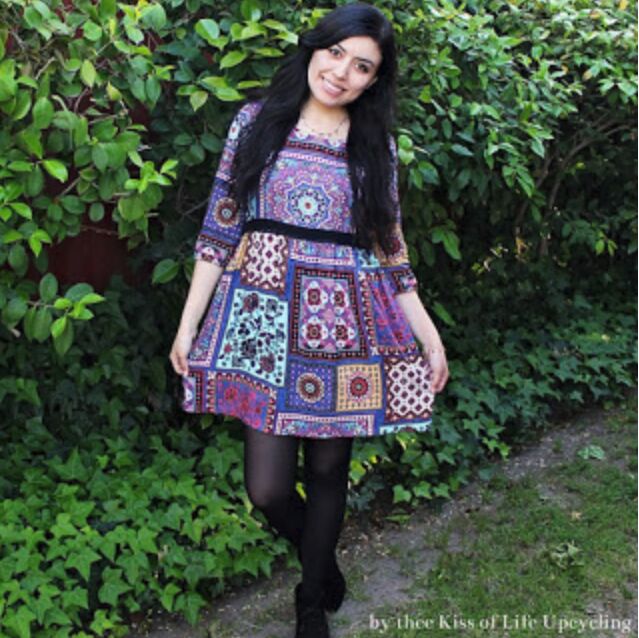
I also thought it lacked a little something and added black cotton lace trim to the waistline.
So, I hope you give making pieces for your wardrobe a try. The feeling of accomplishment whilst you wear the thing is pretty awesome.
☮♥♻
The author may collect a small share of sales from the links on this page.


Comments
Join the conversation
Very beautiful, great job!