Ogden Cami Pattern Hack – Flowy Cami Tutorial
Ogden Cami Pattern Hack – Flowy Cami Tutorial
I’ve had the Odgen Cami pattern by True Bias for a while now and just never got around to making it. I recently receive an inquiry for a flowy tank top. I immediately accepted and the search began for the pattern I would use. Little did I know I wouldn’t have to search far.
This was the inspiration photo below on the left. I started to think about how I was going to construct this top since I hadn’t found a pattern in my stash that fit the bill. Then I remembered that I had the Ogden Cami by True Bias.
I decided that I could achieve the same look with the slash and spread method using the Ogden Cami pattern.
How to Achieve the Look
To hack the pattern you will need the following:
Odgen Cami pattern or any other cami or tank top pattern you might have.
Paper
Pencil/Marker
Ruler
Scissors
Pattern weights
Tape (if using the PDF version)
- Decide which pattern size you will need based on you bust measurement.
- Put the pattern together and cut it out.
- Trace the front bodice and front lining pieces if you plan to keep them, if not skip this step.
- Next draw vertical lines across your pattern from top to bottom about 2 inches apart. (note that I have all sizes shown).
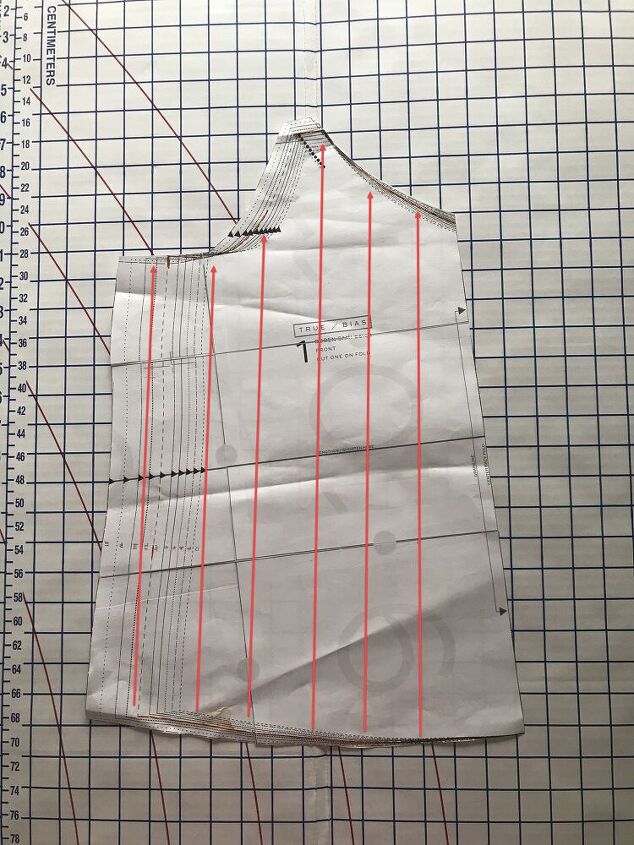
5. Next you will cut the pattern along the lines just drawn all the way up to the top of the pattern without cutting through it.
6. Place the just cut pattern on top of a piece of paper large enough to trace the pattern on top of.
7. Next tape down the center front of the pattern and spread out your other pieces of paper about 2 inches apart and tape those down.
8. Next you will trace around the pattern making sure you mark all your markings from the pattern. I chose to raise the neck line because I wanted a round neck and not a v-neck.
9. Cut all pattern pieces out and now you have your pattern for a flowy tank top.
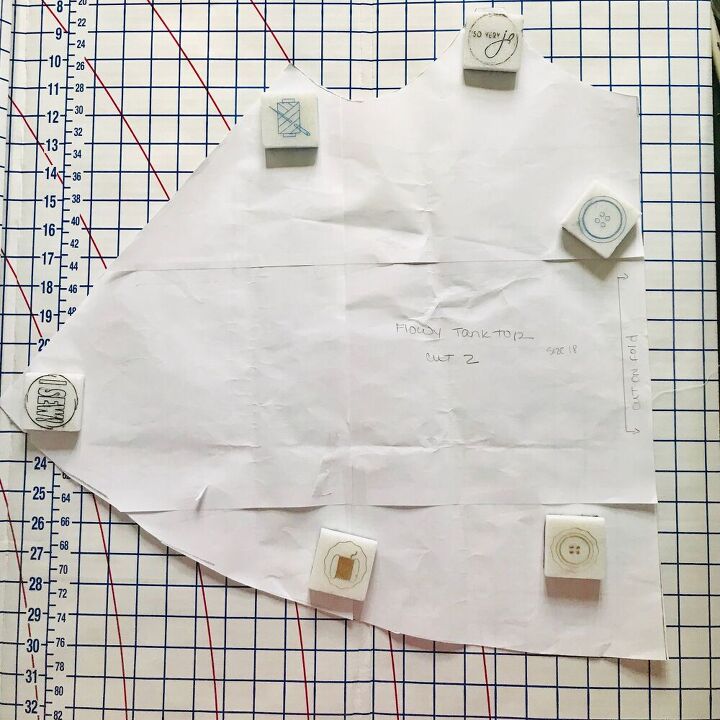
This is what the final pattern will look like.
To create the lining pattern piece, I measured down about 6 inches from the neckline and used the existing lining pattern piece to make the new one. Simply extend the side and you can free hand the bottom half or trace with the existing lining piece. Place the lining pattern piece on top of the new bodice piece and the sides, arm and neck should match.
Now follow the pattern instructions to complete your top! Pretty painless if you ask me.
This fabric might look familiar to you. I used the same fabric last year to make my Kate Vintage Tea Dress.
I really hope you enjoyed my tutorial. I’m working on editing the video and should have it up soon. As soon as I learn how to use iMovie that is.
Until Next time!
Johanna
UPDATE: Guess who learned how to use iMovie?!! This girl!! You can now watch a video detailing the steps above.


The author may collect a small share of sales from the links on this page.


Comments
Join the conversation