DIY Chapstick Holder
Cracked lips are the worst, they hurt when you smile, talk, drink or eat. The only thing that can stop them is chapstick.
The problem with chapstick is that it always gets lost in your bag or purse and you can’t find it when you need it.
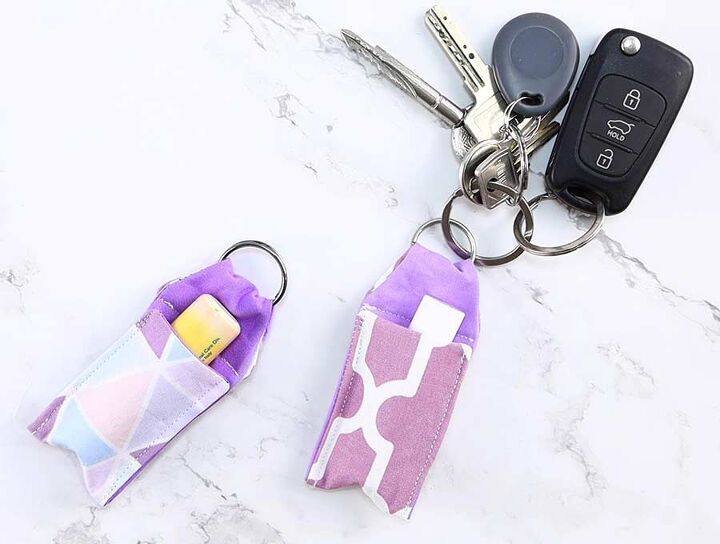
Unless you have a chapstick holder. This holder lets you keep your chapstick in plain sight without losing it. Just attach the holder to your bag, keys, or pocket, and you’ll be able to use it in a flash!
This holder is fun and easy to make, here’s how.
Cut the fabrics
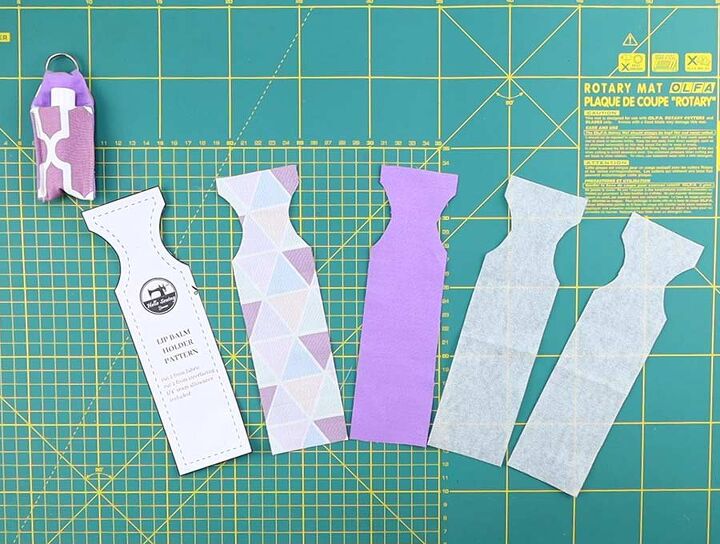
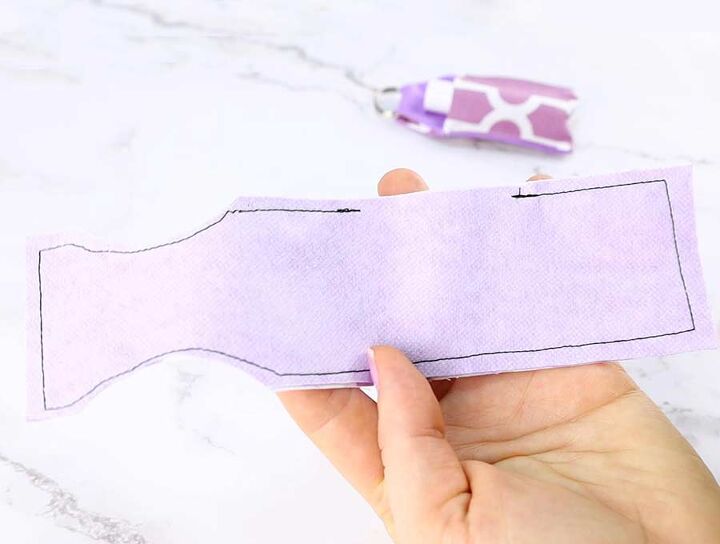
Download the free chapstick holder pattern and print it out. Use the pattern as a guide to cut the fabric.
You’ll need four pieces identical in size. Two interfacing pieces, and one from both types of the main fabric.
Stack the fabrics
Place a piece of interfacing over the wrong side of one of the main fabrics and align the edges. Join them together with a hot iron. Repeat the same process with the remaining pieces of fabric and interfacing.
Put the two main fabrics onto each other with their right sides in. Align the edges and pin them together.
Sew the chapstick holder
Sew all around the stacked fabrics, but leave a small gap unstitched for turning.
Clip the corners and trim down the seam allowance.
Turn the fabric inside out. Fold the raw edges on the opening inward and press the entire thing.
Attach your new chapstick holder where you want it and say goodbye to cracked lips! Don’t forget to make a few for your friends and family who use chapstick as well. If you feel like sewing something else, check out our other sewing projects. Enjoy your sewing sessions!
The author may collect a small share of sales from the links on this page.


Comments
Join the conversation
Very clever. Love it❤️
Going to have to adapt this idea for my tube of lip balm...it's not a stick, but more like the Chapstick in the tube idea...though mine is flavored with chocolate mint. ;) Blessings and thank you!