Easy DIY Dried Flower Hair Slide Tutorial
I was supposed to be getting married in September, them March and now July. We have decided to keep our day small and embrace the micro wedding trend. This means however that I have an whole heap of wedding props I have been collecting for the last few years….20 vases anyone!
One thing I ordered plenty of was dried flowers, they are very on-trend at the moment and I love them. I will still use some of them for the wedding, but I have been thinking of other crafts I can create with them, hence this blog post.
These hair slides were so fun and easy to make and hopefully if you are a future bride or someone who loves a fancy hair slide, this dried flower hair slide tutorial will be useful for you! I just winged it really and it turned out so pretty!
What You Will Need
- Hair Comb Slide
- Dried Flowers
- Hot Glue Gun
How to Make
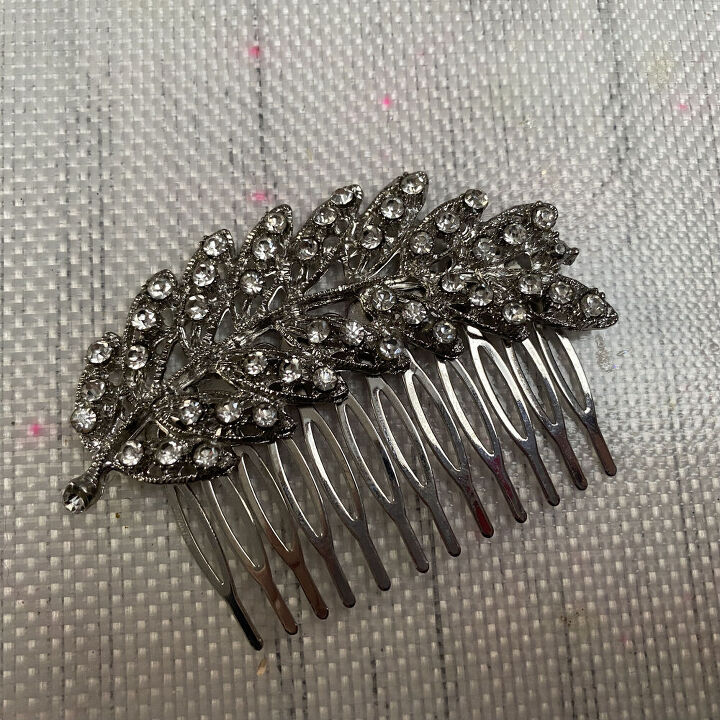
You can buy hair comb blanks, but I had this one from when I was a bridesmaid at a wedding a few years ago, it is pretty but not something I would wear again. It’s also good for this dried flower hair slide tutorial as it has a large surface area for gluing on the flowers and if some sparkle does show through it’s not the worst thing.
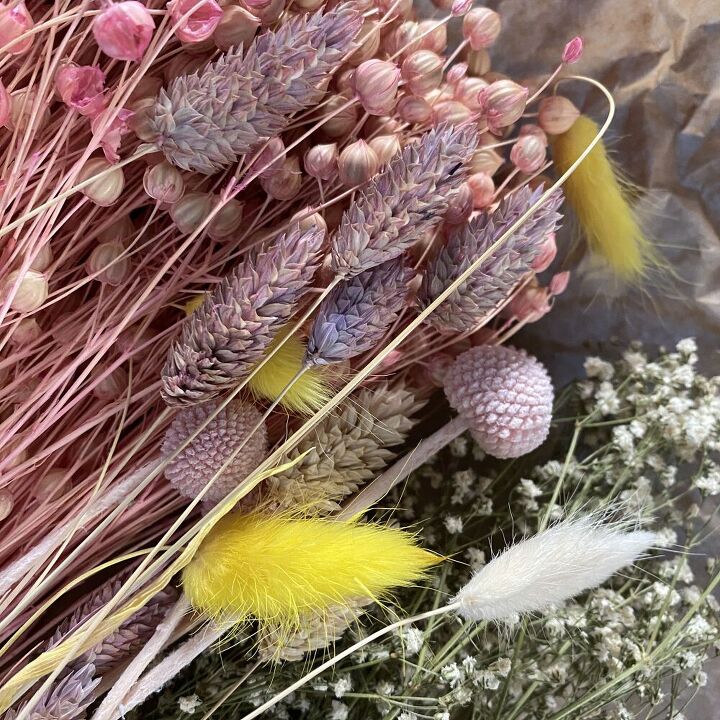
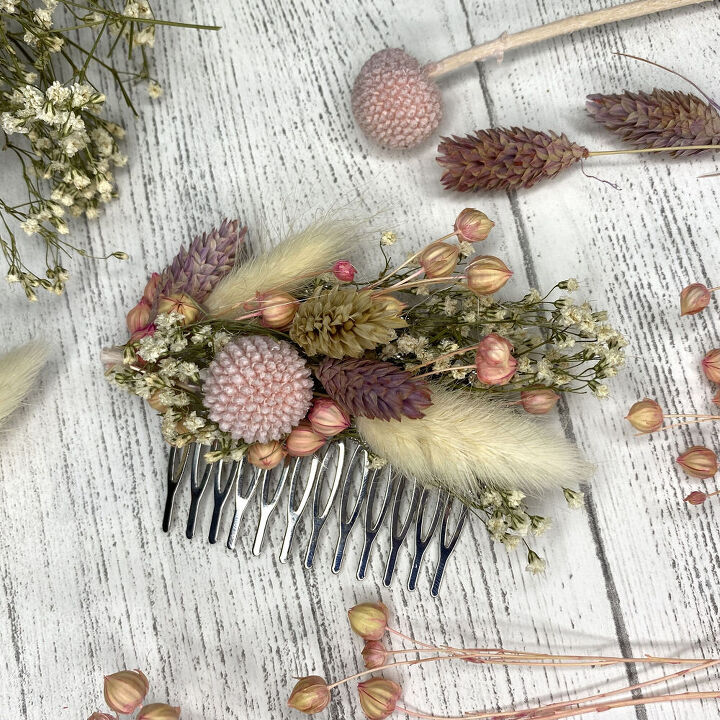
I used a mix of flowers for this DIY dried flower hair slide tutorial, these flowers would be perfect for a wedding and you can mix them up depending on your colour theme. I bought my dried flowers from both Etsy and Ebay. I used Wheat, Gypsophila, Bunny tails, Craspedia and Linum (flax)
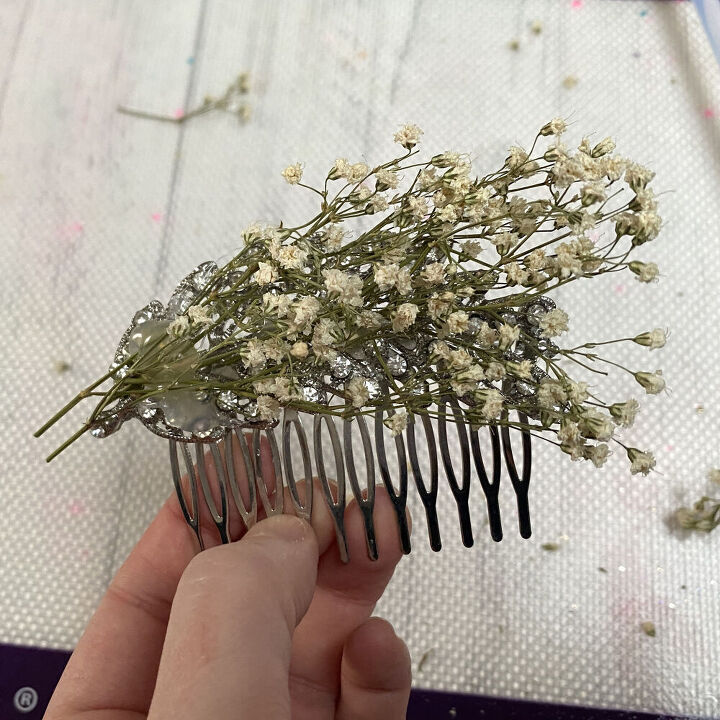
I started by adding some dried gypsophila to cover the whole hair comb. I purchased this from the supermarket and hung it upside down in a dark wardrobe for a few weeks to dry the flowers. This is a really easy flower to dry yourself and makes a great base for your design.
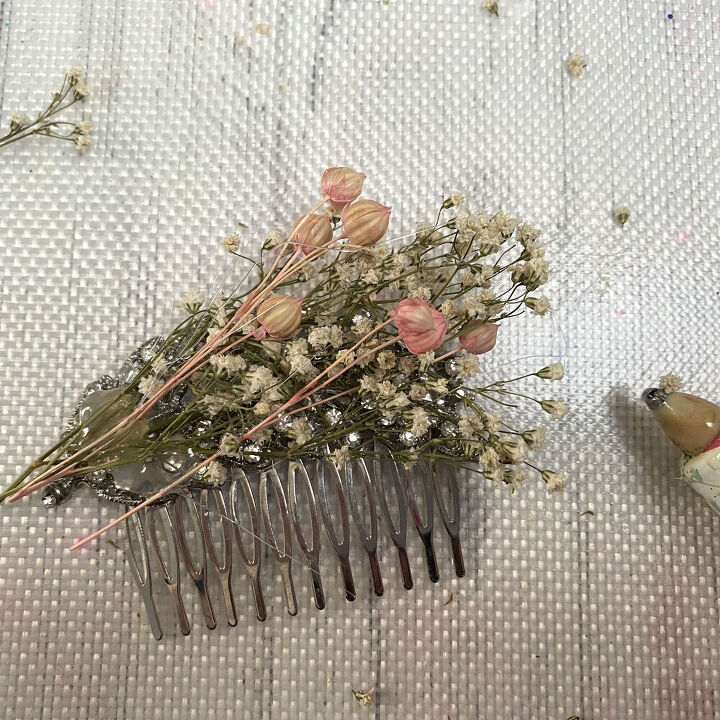
Start adding your flowers of choice, securing them with hot glue, don’t worry about the blobs of glue as we will cover those later, we will also trim the ends once happy with the design too. If you are unsure of the design, build and layer your dried flowers first, once you like the layout, take a photo and then use this to follow when gluing them down.
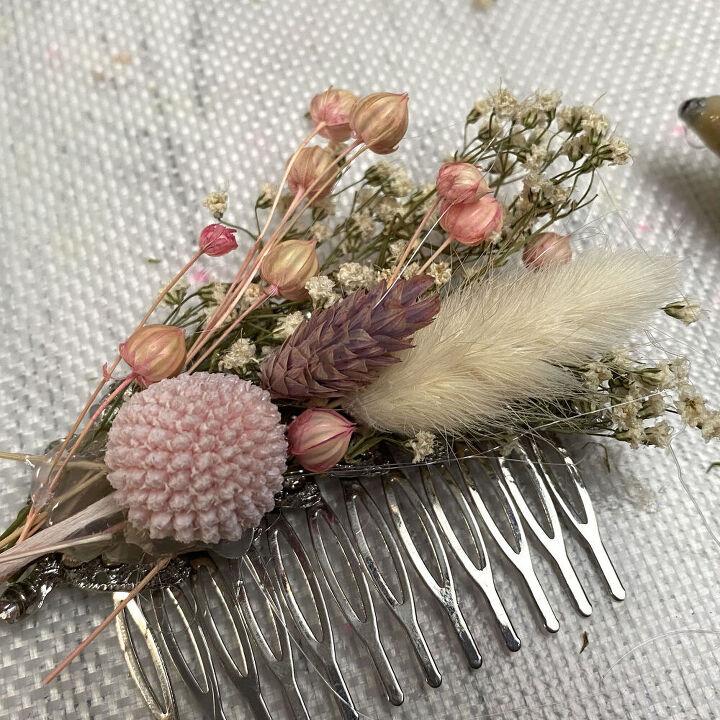
I built up the design adding in different textures and colours. Once I had filled most of the space I used a Craspedia ball to cover most of the glue marks. When the glue has dried, trim all the ends as close to the hair slide as possible. You will no doubt have lots of glue strands too, just let the hot glue dry then gently pull them off.
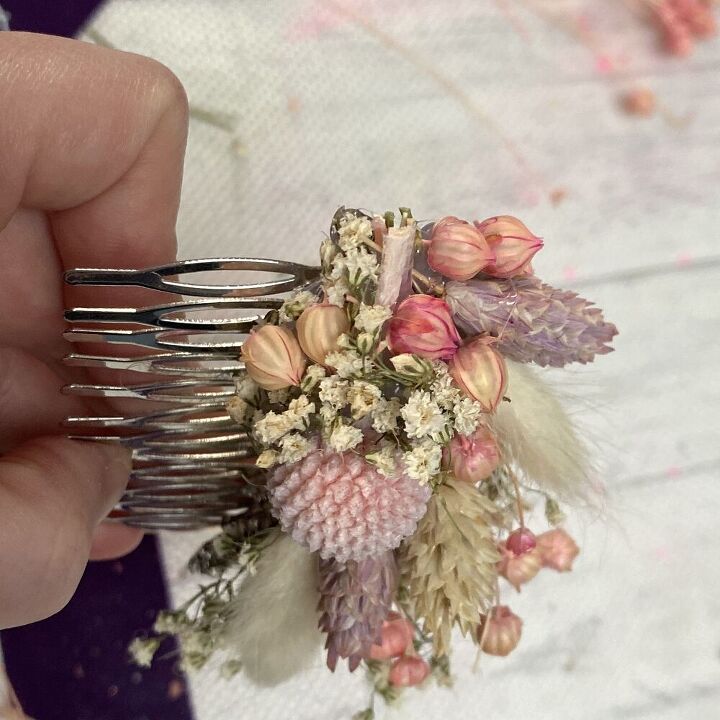
Start to cover the end of the stems with small bunches of Gypsophila, you should have lots of Gypsophila heads that have come loose, use these to fill gaps as well as individual Linum heads too. Check for gaps or glue blobs in other areas of the dried flower hair slide and fill these in the same way.
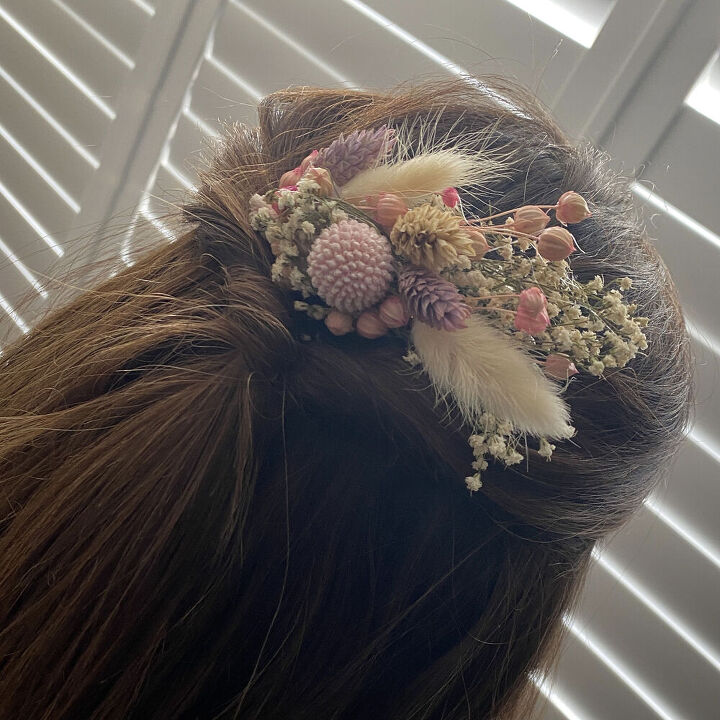
Here is the finished result, it is super hard to photograph the back of your head, but doesn’t it look great. if you are planning to make these dried flower hair slides for your wedding you can buy flowers in bulk and make them for your bridal party, you could also make matching corsages for your wedding party. You can easily make them in advance and it is cheaper and less stressful than using fresh flowers.
Thank you for taking the time to read my dried flower hair slide tutorial. You can follow me @i_heart_maggie on Instagram or Tik Tok and you can also subscribe to my YouTube channel so you can see what I have been making, and don’t forget to check out my other blog posts.
Love
Claire X
The author may collect a small share of sales from the links on this page.


Comments
Join the conversation
This looks amazing! Great idea!