How to Tie-Dye Overalls at Home in Just a Few Simple Steps

This is a tutorial on how to tie-dye overalls. Everyone is tie-dyeing sweatsuits or old t-shirts, but tie-dyeing can go further than that, you know.
I'm taking this trend up a notch and decided to tie-dye…. overalls! That's right, baby! I went all out and made a simple overall into something fun and trendy.
The tie-dye overalls that I'll be using are 100% cotton, which is a great fabric to dye. I will be using a natural black dye to make these easy tie-dye overalls. So, let's get to it.
Tools and materials:
- White cotton overalls
- Black dye
- Rubber bands
- Bleach
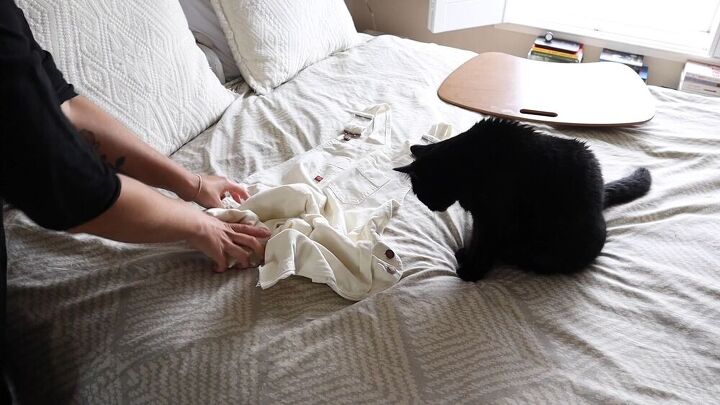
1. Make your pattern
There are so many patterns one can do, but I'll be using the crumpling method in my tie-dye overalls tutorial. Basically, crumple your overalls, starting from the bottom and working your way up to the top.
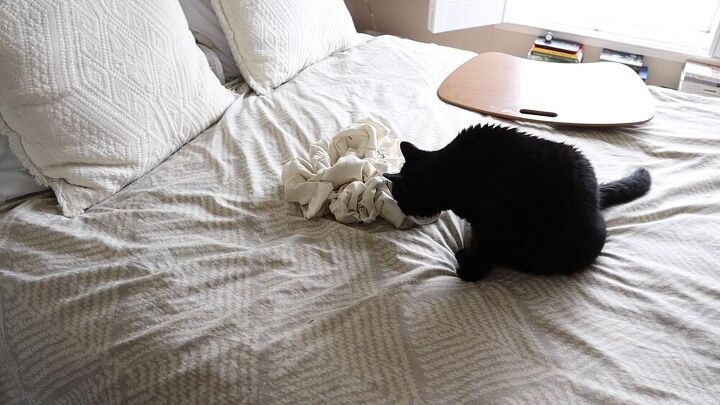
2. Secure with bands
Now, secure your pattern by tying bands on each section.
I used three rubber bands, one for each leg and the other for the top section. This is crucial so that the dye seeps through and creates an excellent effect.
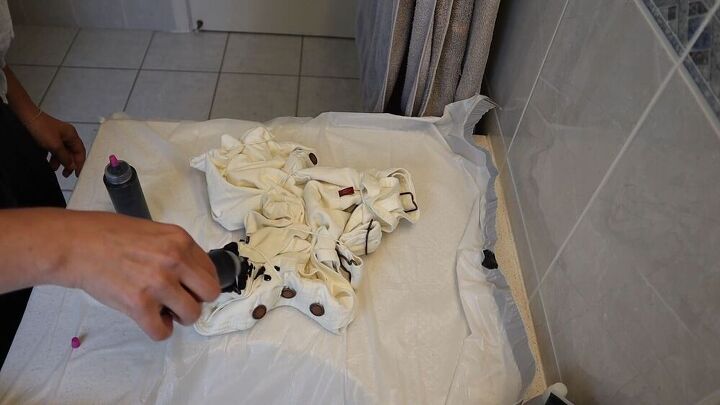
3. Prepare and add your dye
Now, add dye to your simple tie-dye overalls.
First, prepare your workspace, covering the table and working area so you don't get dye everywhere. Then, prepare your dye in a bottle.
I use the Tulip tie-dye as I feel this is the best, color-rich pigment brand to use.
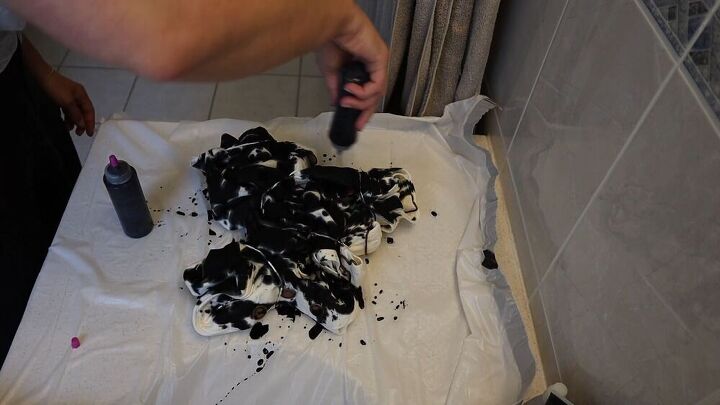
I am basically covering the overalls with dye. I wanted a lot of this to be black, and so I saturated the overalls with black dye on either side, pretty liberally.
Tip: Spritz and dampen your overalls before adding the dye.

4. Wait
Now, leave your overalls for a couple of hours. The longer it sits, the more saturated it is. So it's best to give ample time so that it really gets that lovely dark color.
I left this on for around 2 hours.
5. Rinse
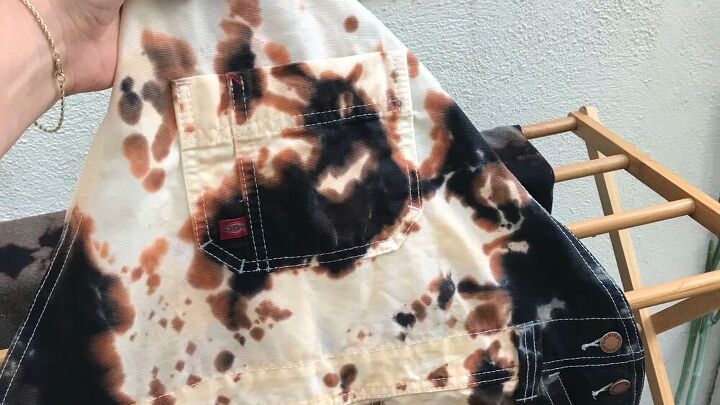
After you've left your tie-dye overalls to dry and let the black dye saturate the cotton, go ahead and rinse your overalls. I had to do several rinses.
As you'll see, the black dye came out so great, but it left the rest of the overalls with this off-green color. It's not the look I wanted.
If the same happens to you, don't fret. Simply grab some bleach and bleach in the green, weird-colored areas.
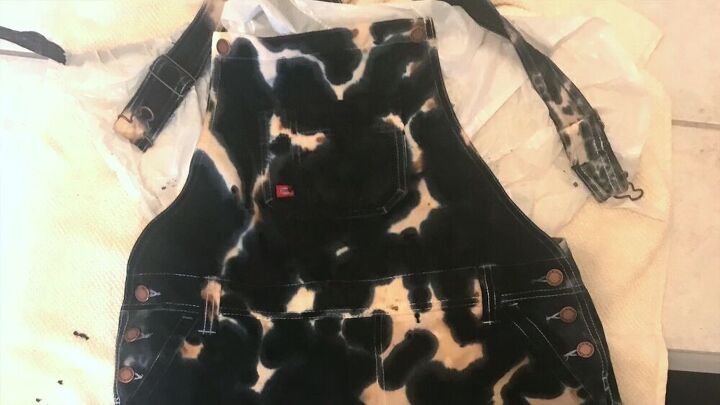
6. Check for modifications
I didn't really like the result because It looked too spotty for my liking. If you come across the same issue, then add more black dye manually.
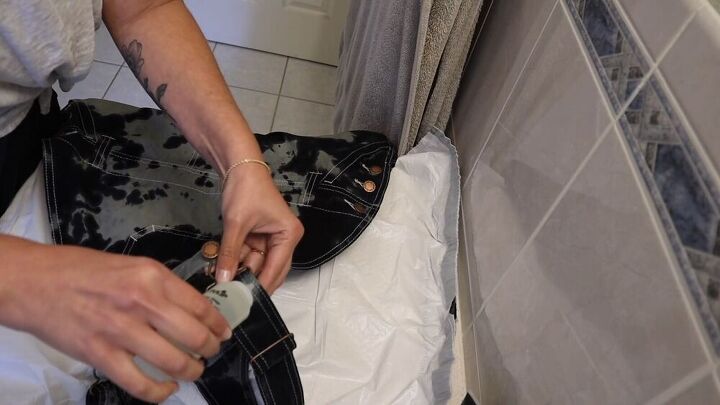
Make sure your overalls are dry when adding or modifying more color or bleach. Otherwise, the new color will seep in quicker and blend with the first color layer.
I let the overalls dry entirely and put a garbage bag in between the layers of fabric.
I manually added black dye the way I wanted and let it dry completely before rinsing.
How to tie-dye overalls
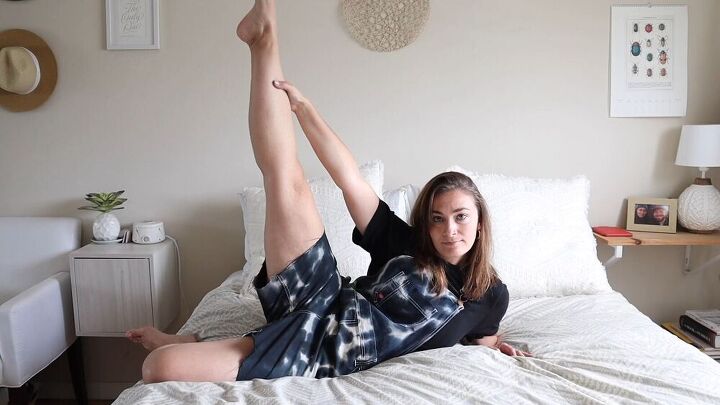
Here's the finished look! It was pretty fun to tie-dye something that wasn't a t-shirt or sweatshirt!
As you can see, the color did fade a little, and the white parts had some blue tones, but I absolutely love these DIY tie-dye overalls, and they came out so funky and cool.
I hope you enjoyed this tutorial as much as I did; it was really fun! Happy tie-dyeing!
The author may collect a small share of sales from the links on this page.


Comments
Join the conversation
Lovely legs!!!
They look great, but I thought you were making the overalls. ☺ I see it is tie -dying overalls. Guess I will hunt down a pair. Wore them years ago. Aw, kitty approves 👍 💟