How to Upcycle a Plain White Tee

With the summer approaching, I am in the process of upcycling my summer wardrobe. I am using things that I already own and transforming them into cute spring and summer pieces. This tutorial will show you how you can turn an old white t-shirt into a funky patchwork t-shirt. Ready? Let's begin!
Tools and materials:
- Plain white tee
- Tape measure
- Chalk/fabric marker
- Ruler
- Thread
- Sewing machine
- Fabric scissors
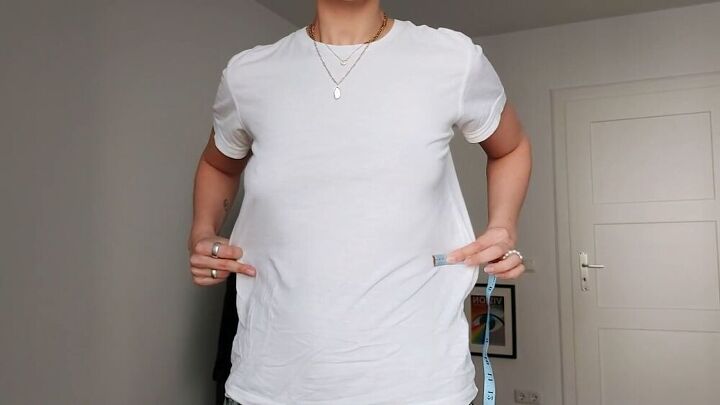
Take measurements
I wanted the new top that I'm making to be cropped, so I started by taking my measurements to see how much I have to take it in to make it shorter and more snug. I measured my waistline as well as the length from my waist to the bottom of the shirt. I also took measurements from the sides of my shirt as well as from my sleeves.
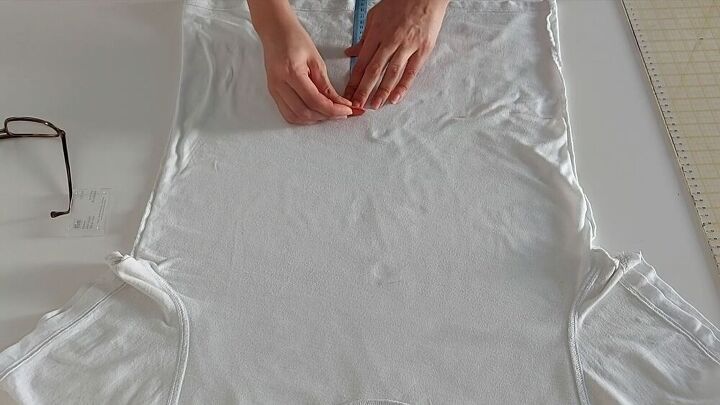
Mark shirt
Then I took my chalk and measuring tape and marked all the lines where my new seamline will be to know where to cut and sew the shirt.

Pin
The next step is to pin everything in place so that nothing is moving around while you’re sewing your new seams.
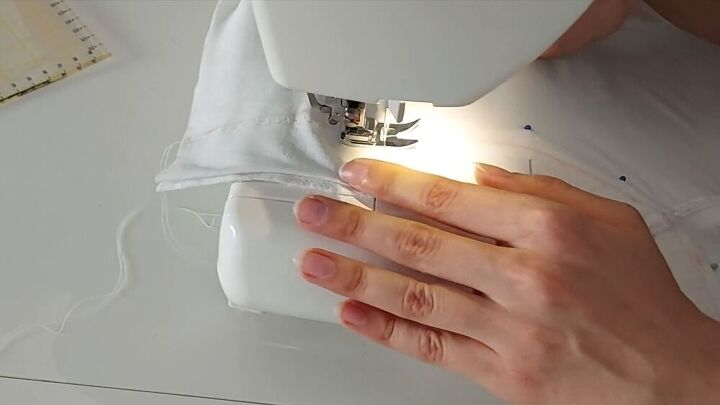
Sew seams
After you’ve pinned everything in place, cut off the bottom of your shirt to make it cropped. Proceed to sew along your new hemline with a zigzag stitch and then cut off the excess material with scissors or a serger.

Mark new seams
Using a tape measure, chalk (or fabric pen), and ruler, mark all the lines where you want to cut your shirt and where you want your decorative seams to be later on.
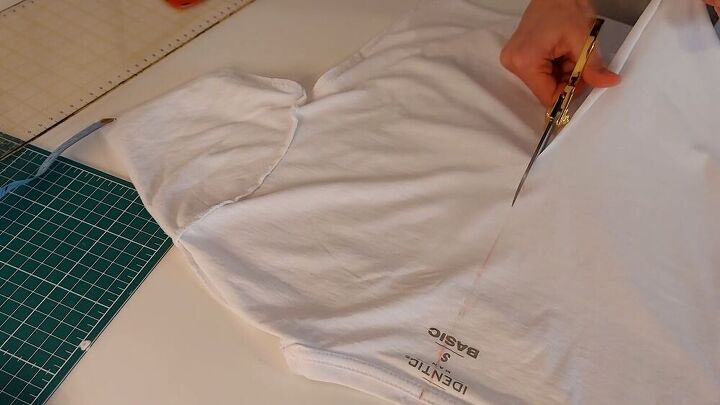
Cut
You then need to start cutting your shirt into pieces. This will look like a hot mess at first, but it will then come together in the end. It is up to you exactly how you want your finished piece to look. I started by cutting the back open so that my shirt would have stitching going right up the middle. After cutting it, I pinned it back together with the wrong sides facing so that the good sides are on the outside.
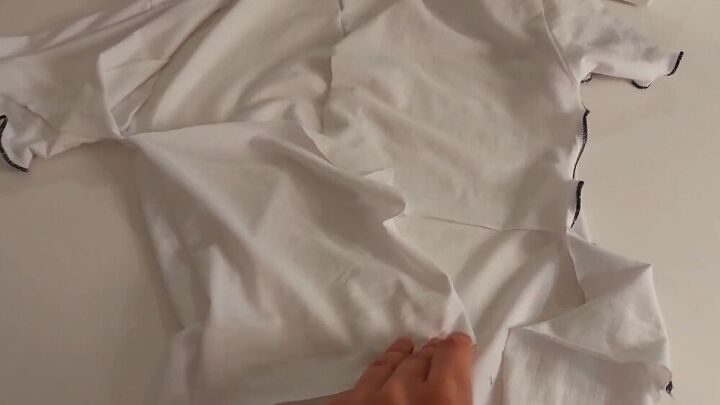
Sew
I decided to go for a navy thread for the decorative seams that would really contrast with the white t-shirt. Since I don't have an overlock, I used a zigzag stitch on the highest width and the shortest length. I also used a very high thread tension. I sewed each seam and went over all of them three times which left me with a very nice hem, and I think that the end result was quite impressive. Then I cut the front open and redid the whole process.

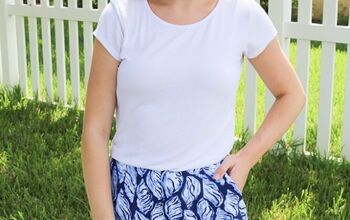
And here we have the finished product. I love the way that it looks, and I think it is super unique. The cropped element is perfect for the summer, and I’ll definitely be getting a lot of wear out of this top. This DIY is an excellent example of how you can easily upcycle things that you have sitting around in your wardrobe rather than going out and buying new clothes. Stylish and sustainable!
The author may collect a small share of sales from the links on this page.


Comments
Join the conversation
I love it.
Thank so much! 😊🌼