Groovy Bleach Jeans and Funky Picture Pants

In this tutorial, or should I say in these tutorials, I'm going to be teaching you how to design not one but two funky pairs of pants. In the first tutorial, we're going to be bleaching a pair of jeans, and in the second, I'm going to show you how you can add pictures to your pants.
We're going to start with the bleach jeans. I have a pair of jeans, and I really like their fit, but they're a little plain, and I just don't grab them a lot compared to my other jeans. So I wanted to make them a little bit different.
Best Mod Podge kit!
Tools and materials:
- Jeans
- Bleach
- Old toothbrush
- Pants
- Printed pictures
- Mod podge
- Paintbrush
- Wet paper towel
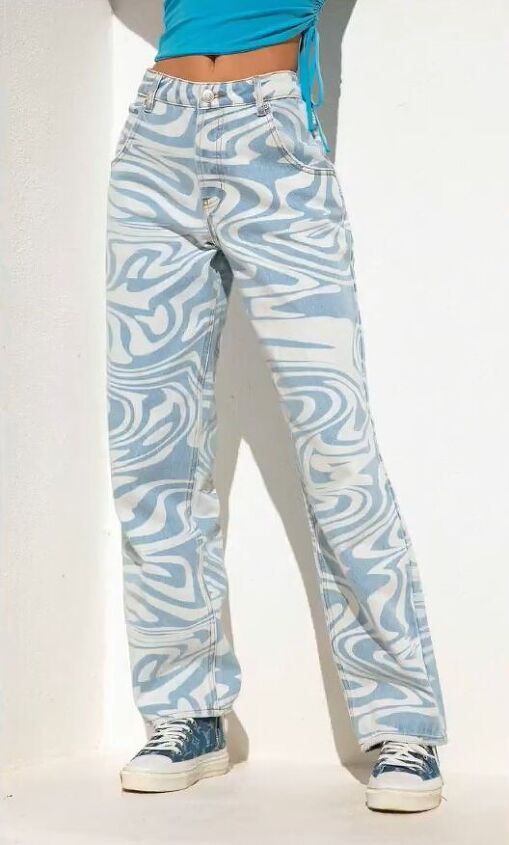
This is what I want the jeans to look like, and to achieve this, I'm going to use bleach (of course) and an old toothbrush that I'm going to use to make the specific lines and detailing on the jeans.
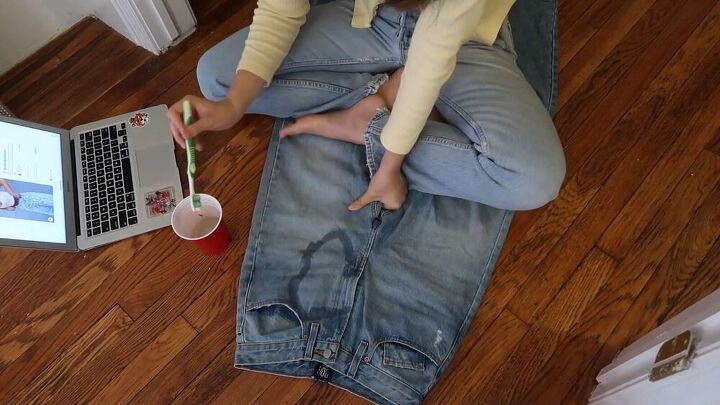
Brush the bleach onto the jeans
Start by putting some bleach into a cup; I personally didn't dilute the bleach with water, and it works just fine. Then dip your toothbrush into the bleach and just brush it onto the jeans. I had the above image in front of me while I was working. I was trying hard to recreate the design exactly, but as I did it more, I realized that it's not so serious, and I could just have fun with it, and it would still look good.
Do the back side
Before repeating the process for the back side, hang up the jeans and let them dry for about 20 minutes. You'llYou'll also want to put cardboard in between the pants to ensure that bleach doesn't bleed through to the other side. When you're done bleaching them, and they've dried, throw them in the washer and dryer (by themselves) as that stops the bleaching process.
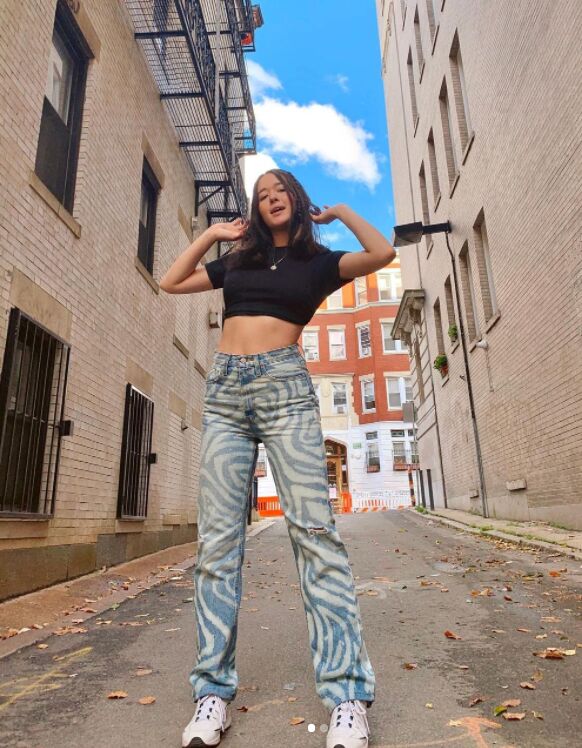
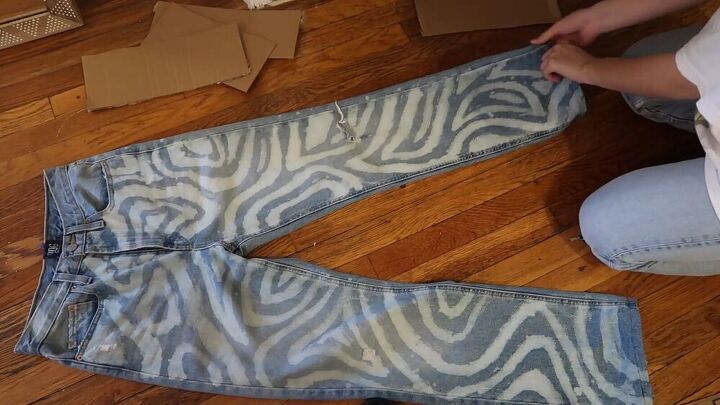
Here are the finished jeans! They turned out just like I wanted them to. They're so funky and have an almost Zebra-like pattern. I really like the contrast between the denim color and the bleached parts.
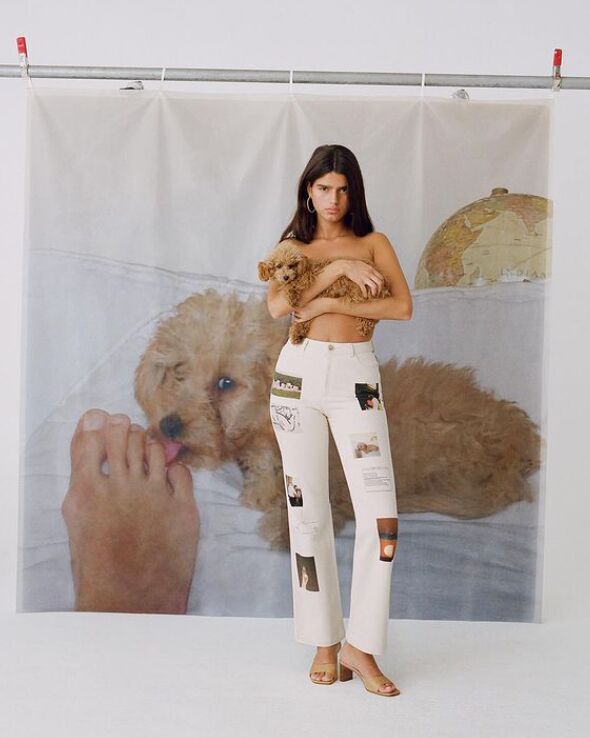
For the next DIY, I'll be transforming a pair of plain beige pants into photo pants, just like the Paloma Wool friendship pants. The plain pants are the perfect blank canvas for this DIY.
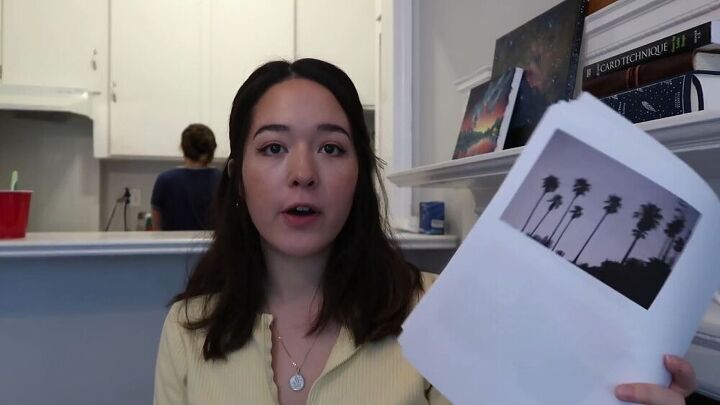
Print and cut photos
The first step is to print off pictures and photos (I printed off 10). I went for a mix of some colored pictures and some in black and white. Cut out your photos as precisely as possible so you don't have a bunch of white space.
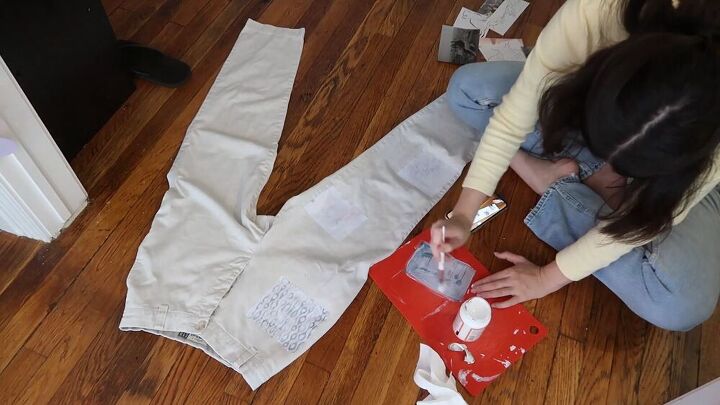
Stick pictures to pants
Next, you need to figure out where on the pants you want to place all of the pictures. I went for an uneven, asymmetrical look. Once done, apply mod podge to the side of the picture that has the image on it and then place the picture face down onto the pants. Do this for all of the pictures. You want to put enough mod podge to cover the entire photo until you can't see the design anymore. Make sure that you press down really hard, and all of the edges are lying down flat. When you've done this, wait about 30 minutes before doing the same steps on the back of the pants.
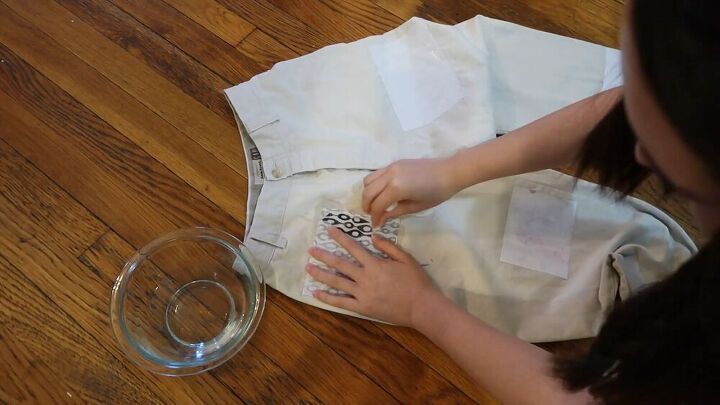
Remove the paper
When you've finished sticking the pictures on, you have to let the pants sit for 24 hours. Then you can peel the paper off and expose the photo. To do this, dip a paper towel into a bowl of water to dampen it a little bit. Gently rub the towel onto the wet paper, and you'll slowly see little bits of paper coming off. You want to keep rubbing until you get the very top layer of paper off. Do this for all of the pictures. When you've finished this, your picture pants are ready to wear! I advise waiting around three days before you put them through the wash.
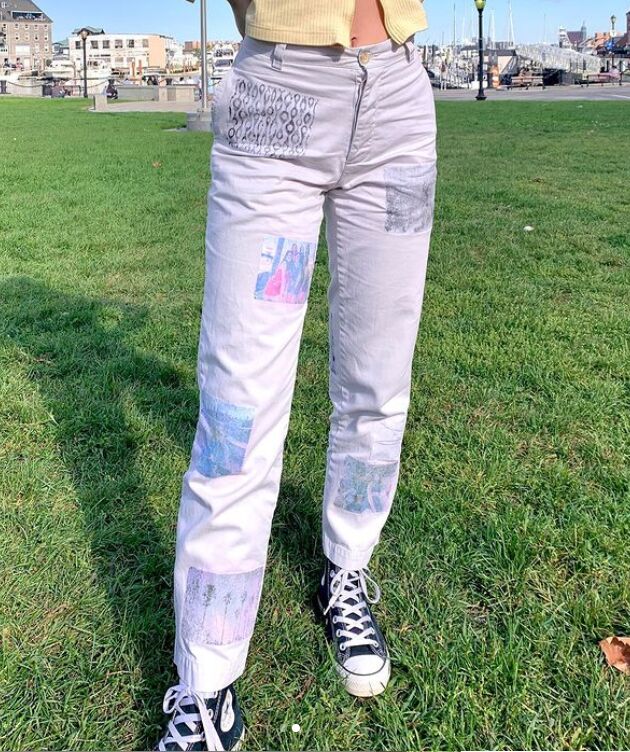
Here are the finished pants! I love how unique and customized they are. All of the pictures have a special significance to me, and these pants will have a cherished place in my wardrobe.
The author may collect a small share of sales from the links on this page.


Comments
Join the conversation
Great projects! I would never bleach ANYTHING on my hardwood floors… Tiled rooms like kitchen & bath are a better choice here🤷🏼♀️
I absolutely Love brushing bleach on the jeans so much! Thanks for posting!! So cute!! I definitely will do this one & on an old jean skirt I have...