How to Shorten a Zipper Every Which Way to Sunday
Let’s talk about how to shorten a zipper.
Sewing zippers is one of those tasks in sewing where the devil is in the details.
One of the problems you’ll run into is having a zipper that’s too long. In fact, many times it’s EASIER to sew with zippers that are too long. (Hello annoying zipper stops that get in the way of everything!)
And then there are times when you find that you can’t find the right length of zipper in the right color, so you buy the longer one. (Ask me about the jacket I bought a front zipper for no less than 3 times!)
Whatever the case, the good news about working with zippers that are too long is that it’s easy to shorten them yourself.
In this post, we’ll talk about how to shorten a zipper by hand, with tools, and by machine. You’ll learn how to do this with invisible zippers, separating zippers and closed end zippers too.
Grab some needle nose pliers and let’s shorten some zippers.
This page contains affiliate links. As an Amazon affiliate, I earn on qualifying purchases. If you purchase a product through one of them, I will receive a commission (at no additional cost to you). I only ever promote products that I use and love and I think you will love too. Thanks for supporting this blog!
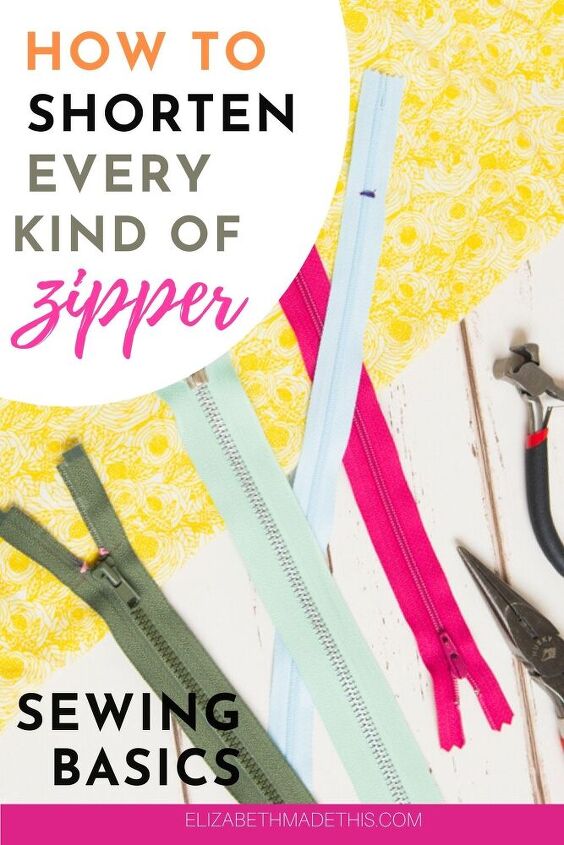
Table of Contents
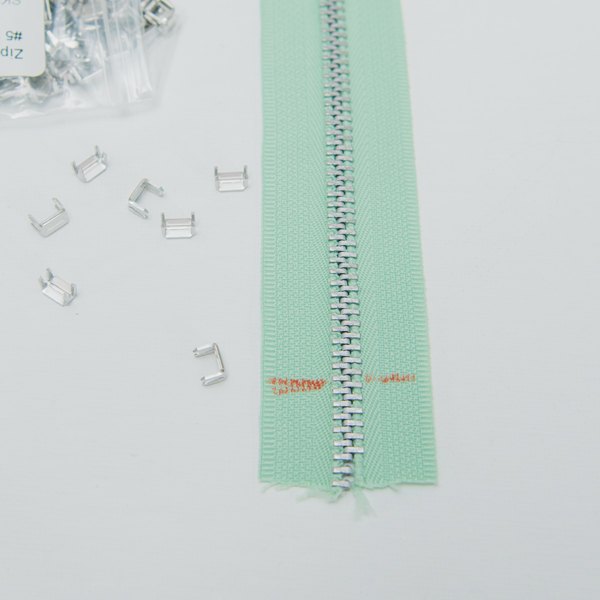
Supplies for shortening a zipper
- Needle nose pliers
- Zipper repair kit (or pack of top stops or bottom stops)
- Needle and thread
- Fabric marker
- Scissors (not your best ones)
- Zipper end nippers
How to shorten a zipper by hand
The easiest way to shorten a zipper is with a needle and thread. The best zippers to shorten by hand are invisible zippers and closed end zippers.
The first thing that you want to do is to thread a needle. Be sure to use thread that matches your zipper’s color.
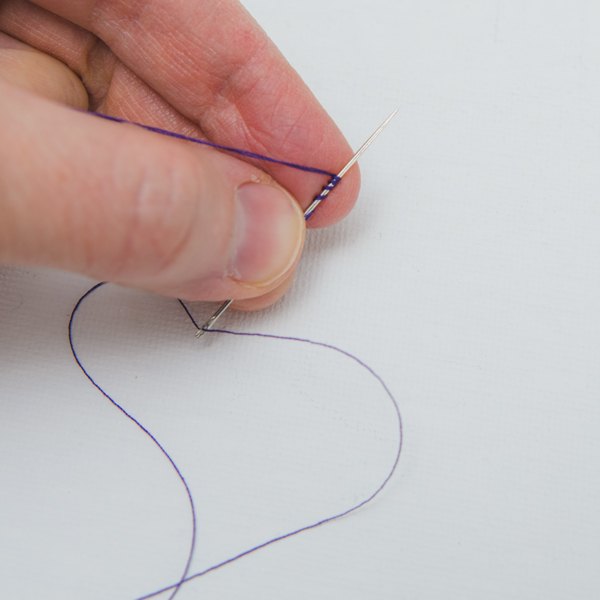
Push the thread through the eye, then bring the ends together so there’s a loop of thread running through the eye.
Wrap the ends of the thread around the end needle several times. Pinch the thread wrappings then slide them off the end of the needle all the way down to the end of the thread.
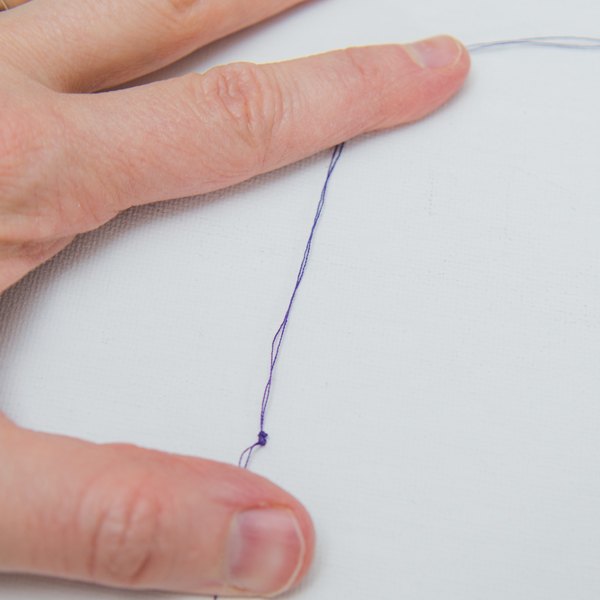
Tada, now you have a strong knot, and you’re ready to shorten this zipper.
How to shorten an invisible zipper or closed end zipper by hand
Now that you have your thread ready to go, here’s how to shorten an invisible zipper by hand. You’ll follow the same steps also to shorten a closed end zipper by hand.
Figure out how long your zipper needs to be. Patterns will have zippers marked. If the pattern doesn’t specifically tell you how long of a zipper you need, measure the area with the zipper with a ruler.
From here, measure down from the top of the zipper and use a fabric marker to make a mark where the bottom of the zipper should be.

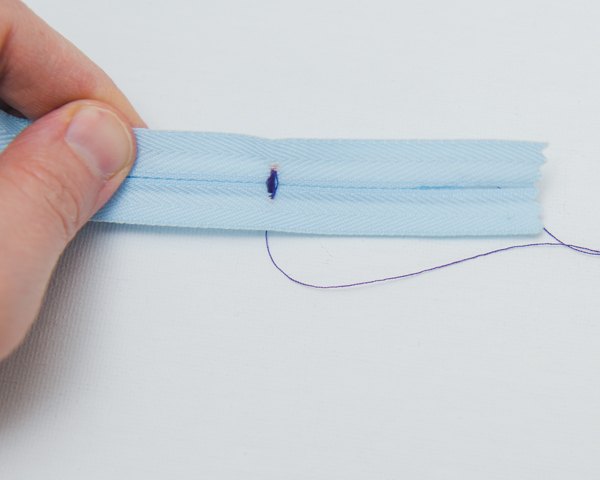
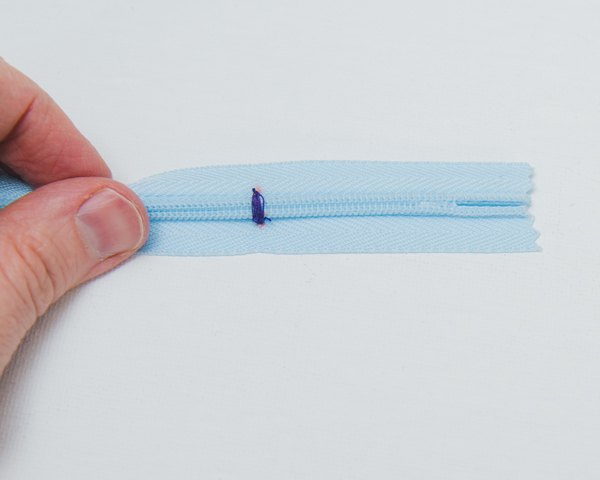
Poke your needle through the zipper tape to one side of your mark from the wrong side of the zipper.
Next, bring the needle back down over the zipper teeth to the other side of the zipper tape. Poke the needle through the tape to the wrong side.
Repeat this process until you’ve wrapped the end of the zipper 4-5 times. Finish by bringing the thread back down to the wrong side.
Tie a good strong knot and cut off the thread.
Use an old pair of scissors to cut off the extra tape about 2″ below the thread stop that you’ve made.
Don’t use your best scissors here as you can nick the blades. Your old cruddy scissors used for nefarious crafting purposes will likely cut through any zipper you need them too and you won’t run the risk of damaging your favorite shears.
How to shorten a separating zipper by hand
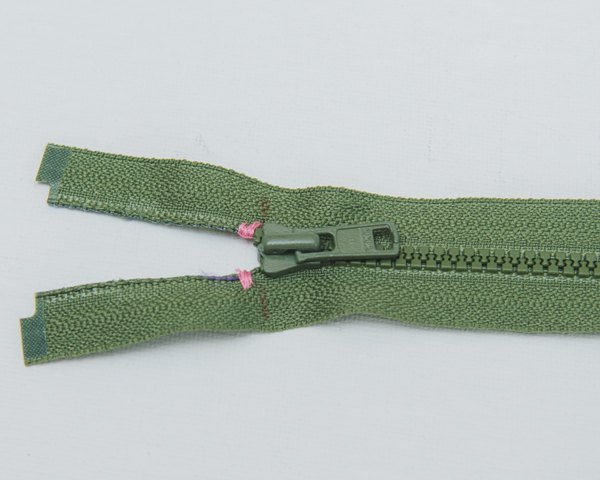
Separating zippers are the type of zipper you use for jackets and coats. They’re a little funky in that they come apart at the bottom of the zipper, but you know this. If separating zippers didn’t come apart at the bottom, you’d have to do weird yoga to get into your winter jacket when it’s 10 below. No thanks.
When you go to shorten a separating zipper, you’ll need to do that from the top.
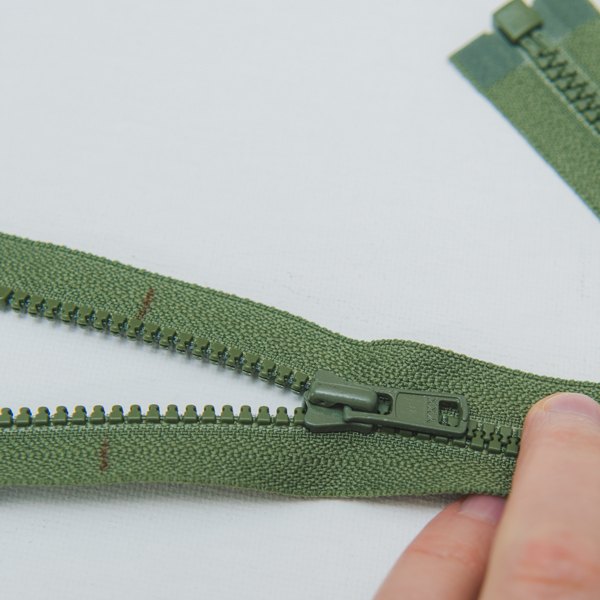
First, figure out how long your zipper needs to be. Measure the edge where the zipper is going. Be accurate here. For jackets to look the best, the stop needs to end at the bottom of the jacket and at the top of the neckline.
Zip up the zipper and measure and mark that length on your zipper with a fabric marker.
Next, unzip the zipper.
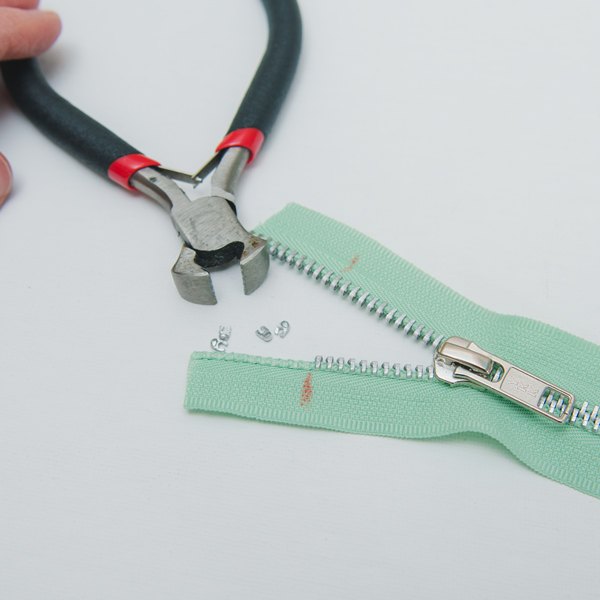
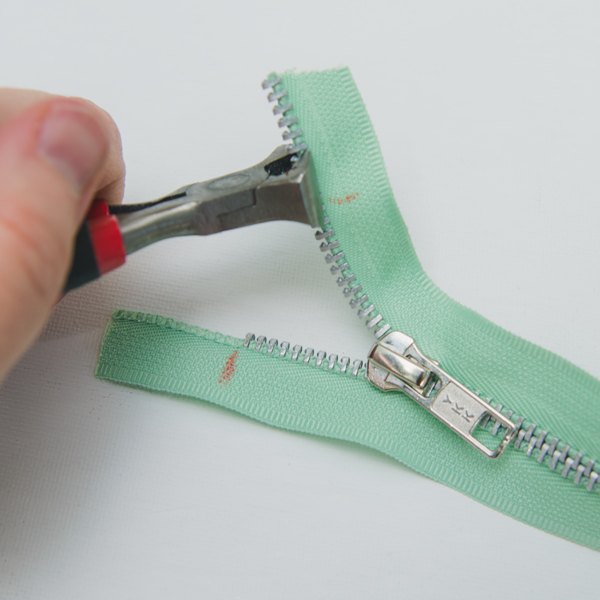
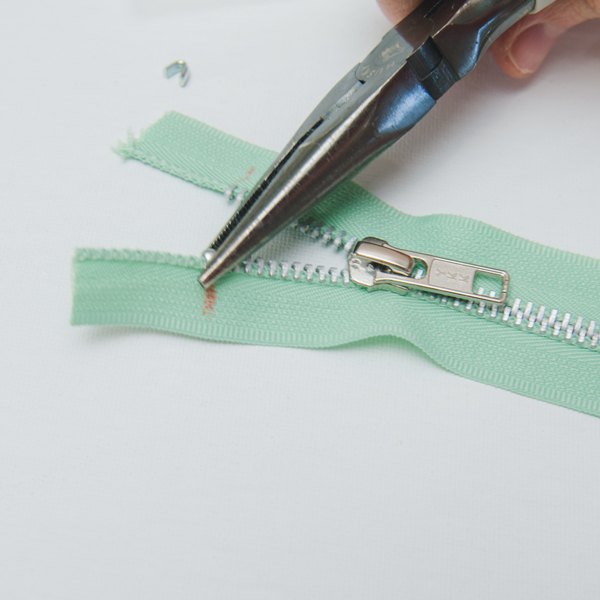
Remove extra zipper teeth
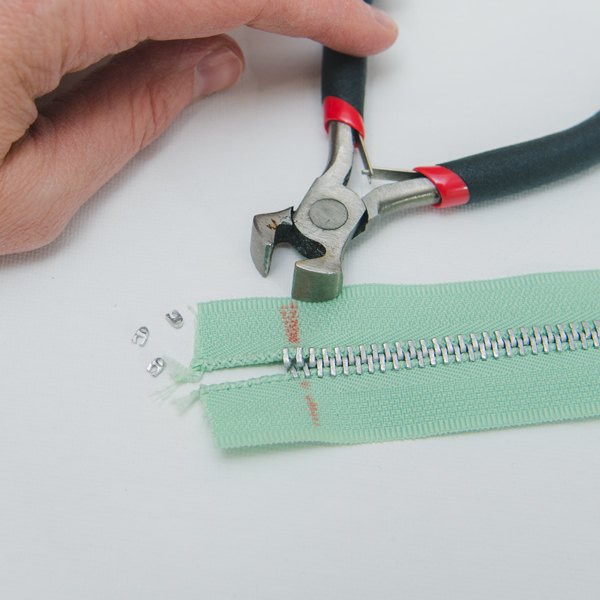
Now for the not fun part. Be careful here as you can totally hurt yourself, though if you use zipper end nippers, you’ll be safer. There’s not a lot of times that I recommend a unitasker kind of tool, but this is a cheap tool you want to have if you work with zippers at all.
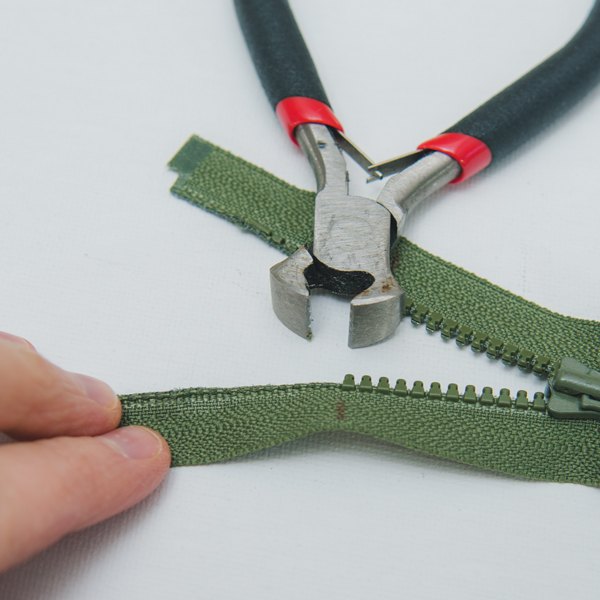
If you attempt this step with regular pliers, you can totally draw blood, as I’ve done on multiple occasions.
You will need to remove the zipper teeth 1″ above the marks on your zipper.
The best way to do this is to grip the teeth with your zipper end nippers. Get a good hold of them with the zipper nippers, squeeze, and then pull off the teeth. The shape of the business end of these pliers does a really good job of helping you grasp off and pull off the extra teeth.
Do this to both sides of your separating zipper.
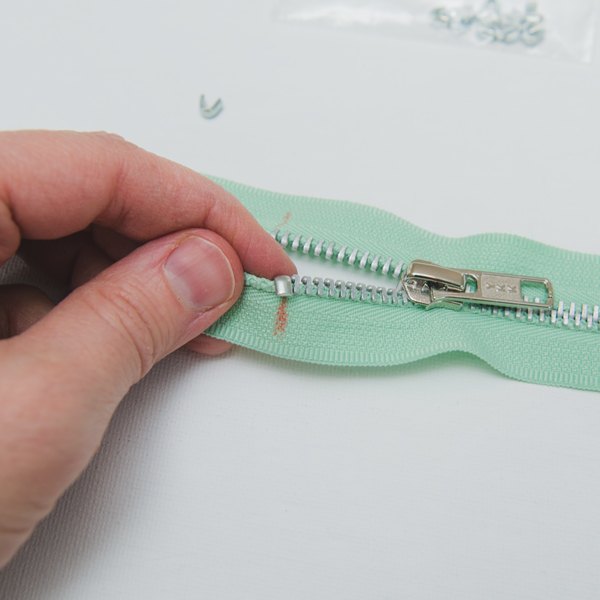
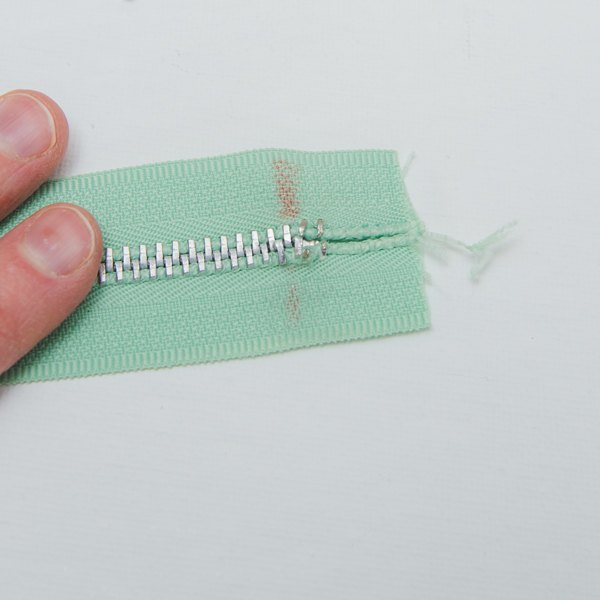
Making the thread stops
Thread up and knot your needle with a double length of thread.
Poke your needle through the zipper tape to one side of the tape towards the wrong side of the zipper.
Next, wrap the thread over the edge of the bottom of the place where you removed zipper teeth to the other side of the zipper tape. Poke the needle through the tape to the wrong side.
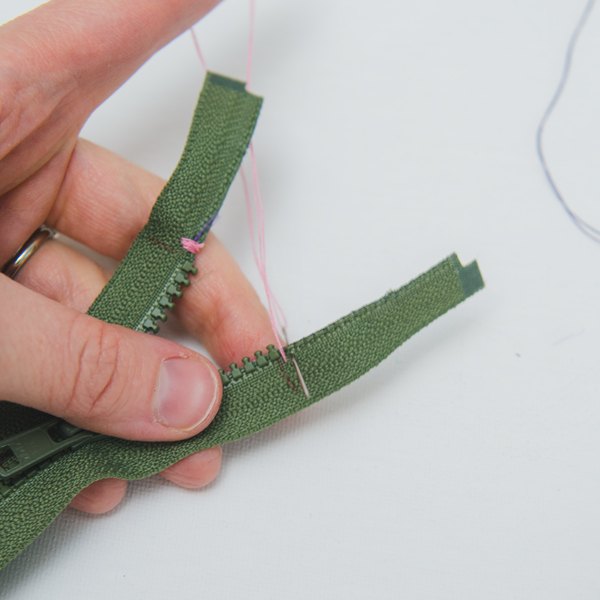
Repeat this process until you’ve wrapped the end of the zipper 4-5 times. Finish by bringing the thread back down to the wrong side. Tie a knot, then cut off the thread. Repeat for the second side of the zipper.
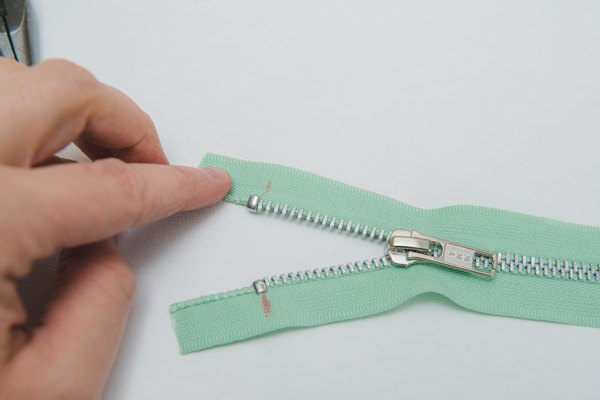
You can cut off the extra tape above the area you removed the teeth and sew in your zipper as normal now.
How to shorten a zipper by machine
This is not my method of choice, but I know a lot of people would rather use their machine than sew by hand or use tools any day.
If you want to shorten a zipper by machine, you’ll have the best luck with invisible zippers, and closed end zippers made of nylon. For metal zippers or separating zippers, you’ll do better with tools.
Measure the length you need for your zipper and mark the zipper with a fabric marker.
Set your machine for a zigzag stitch.
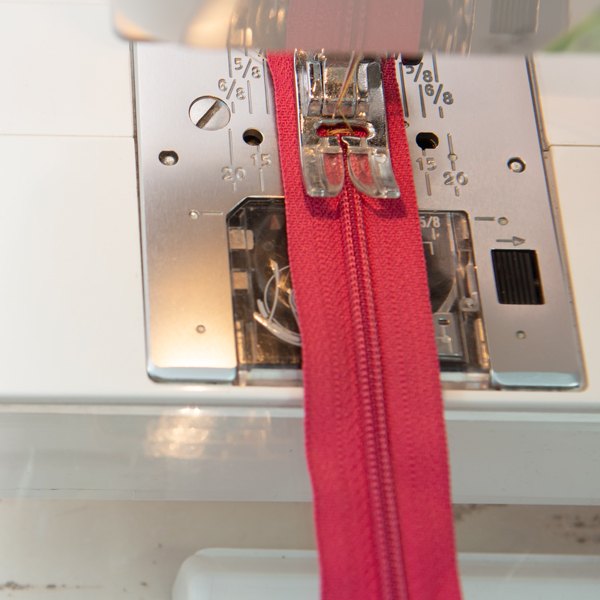
Widen your zigzag stitch to a width that is just slightly bigger than the width of the teeth. Set the length of the stitch to 0.
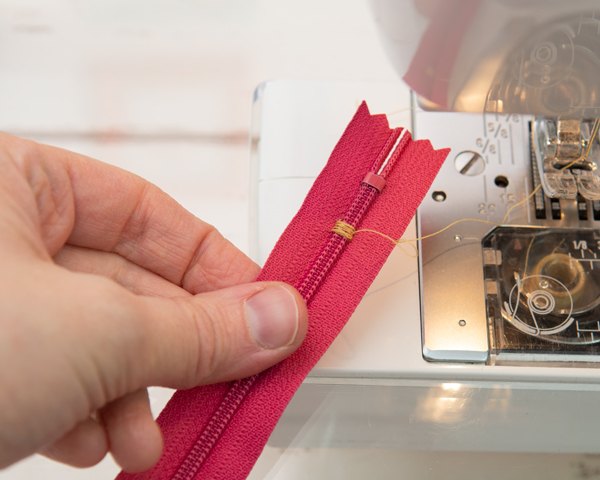
Stitch through the bottom of the zipper about 10 times. Cut your threads long, then tie them in a square knot on the wrong side of your zipper. After that, cut off the rest of the thread..
Finish up by cutting off the end of your zipper 1-2″ below the bottom of the stop you just sewed.
How to shorten a separating zipper with top stops
This is actually my favorite way to shorten a zipper because it adds a professional finish.
This method works best for metal zippers and it can work for separating zippers as well.
First you’ll need a pack of top stops. Or you can get a zipper repair kit. Make sure that you match the size of the top stop to the size of the zipper.
You want to make sure you don’t use a too big stop for your zipper or they will fall off.
First measure the edge where the zipper is going.
Zip up the zipper and measure and mark that length on your zipper with a fabric marker.
Next, unzip the zipper.
Remove the zipper teeth 1″ above the marks on your zipper with the zipper end nippers.
Do this to both sides of your separating zipper.
Place a top stop at the bottom of the empty space where you removed the teeth. Wrap the stop around the tape.
To fix the stop in place, grip the stop with needle nose pliers and squeeze until the stop doesn’t wiggle.
Repeat for the second side of the zipper.
You can cut off the extra tape above the area you removed the teeth and sew in your zipper as normal now.
How to shorten a zipper with bottom stops
This is probably the easiest way and the nicest looking way to shorten a metal closed end zipper. I’ve also done this with zipper by the yard.
You’ll need a pack of zipper bottom stops or a zipper repair kit.
Measure out the length of your zipper, then mark it with a fabric marker. Remove the teeth below the mark with zipper end nippers.
Grab a zipper bottom stop and place it over your mark on the right side of the zipper.

Force the teeth of the bottom stop through the zipper tape to the wrong side of the zipper.
Use pliers to flatten out the prongs.
Cut off the extra zipper tape 1″ below the stop.

So that’s how to shorten a zipper just about every way possible. I have to say I’m partial to using the metal top and bottom stops, but it’s good to know how to do different tasks different ways. Hopefully you’re feeling more equipped by now to tackle your next too-long zipper with all these methods for shortening zippers.
The author may collect a small share of sales from the links on this page.

![How to Sew a Zipper on a Jacket [surprisingly Simple]](https://cdn-fastly.upstyledaily.com/media/2021/11/23/7646807/how-to-sew-a-zipper-on-a-jacket-surprisingly-simple.jpg?size=350x220)


Comments
Join the conversation
Thank you for this info. Anneliese benton