What Are The Best Things to Do With Old Lipstick? Try This Simple Hack

Ever wondered what are the best things to do with old lipstick? Or are you tired of an unorganized makeup bag?
This simple lipstick hack allows you to consolidate your makeup kit, compare colors, have all your lippy shades within easy reach, and find space for old lipsticks at the bottom of the pile!
In this tutorial, I’ll show you how to make your own lipstick palette by decanting and melting down your lipsticks for easy, clean storage.
Tools and materials:
- Empty makeup palette
- Spoon
- Metal spatula or knife
- Candle
- Small sticky labels
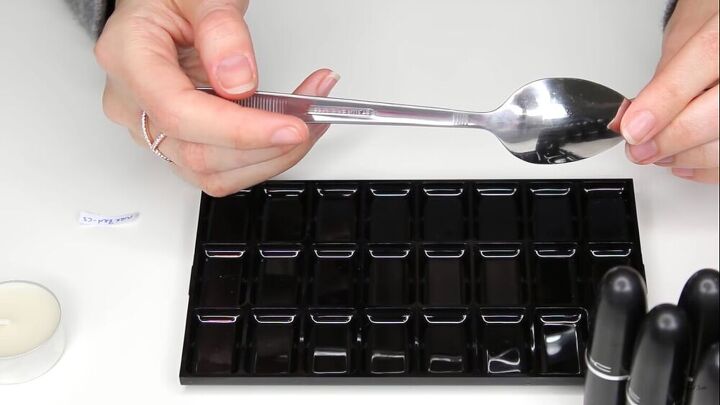
1. Get a spoon and a palette
First, clean out an old palette or buy a palette with a customizable insert. I’ve gone for a palette with 24 options because I can continue to grow this palette as I buy new lipsticks or retire old ones.
You’ll also need a metal spoon. Make sure it has a long handle, as it can get quite hot!
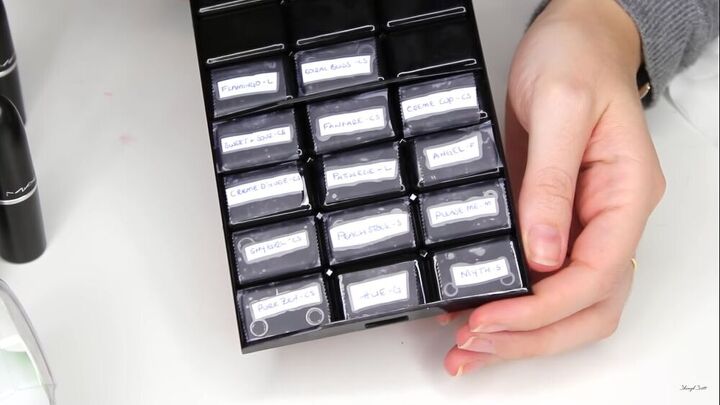
2. Make a list of the names of your lipsticks
This is actually a really important step. Before you start adding lipsticks to your palette, make sure you have a list of names and brands, so you don’t lose track of which lipstick is which.
You don’t want to realize you love one of your palette shades, but can’t remember which brand or shade it was!
Write out the names and brands on small labels you can stick onto the back of the palette, or use paper and sticky tape.
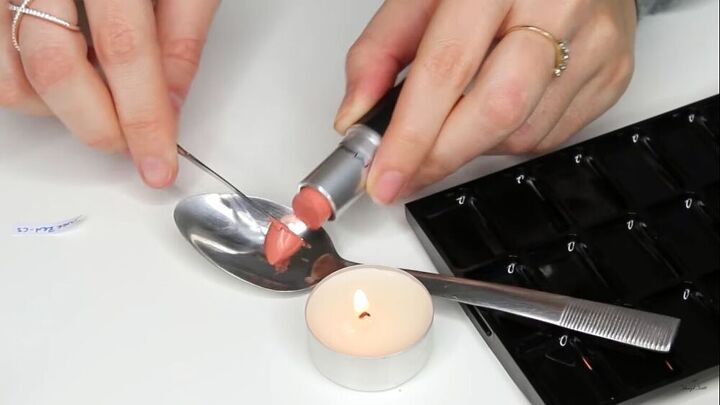
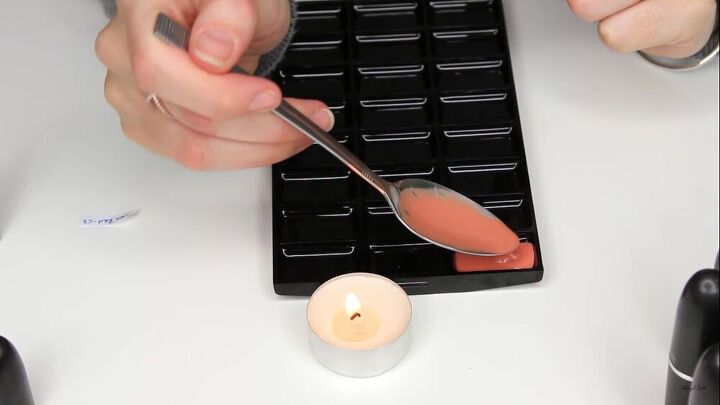
3. Put your lipstick onto the spoon
Use a metal spatula or a knife to get your lipstick onto the spoon. If you have nearly a full stick, as I do, you may want to gauge how much of the lipstick will fit in the palette.
You can always start off with a small bit at first, then add another layer on top.
4. Melt the lipstick
This is the satisfying part! Hold the spoon over a lit candle and watch the lipstick melt.
Be sure to keep the spoon at least half an inch away from the flame, so it doesn’t turn your spoon black or burn your lipstick.
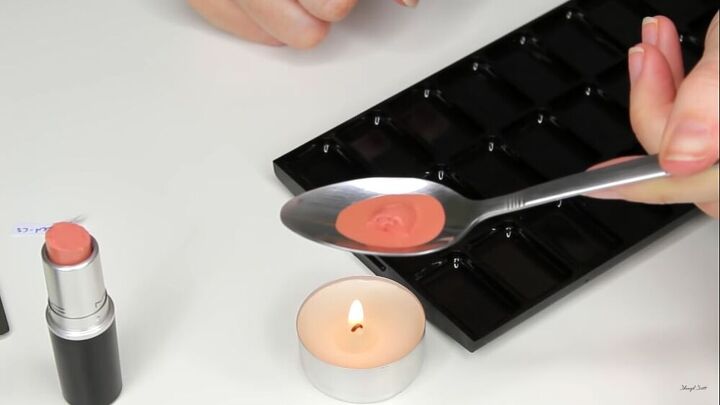
5. Decant the lipstick
Pour the lipstick into the palette. This is where you can see if you can add another layer.
The lipstick sets really quickly. If your spoon starts to overflow, decant a bit at a time.
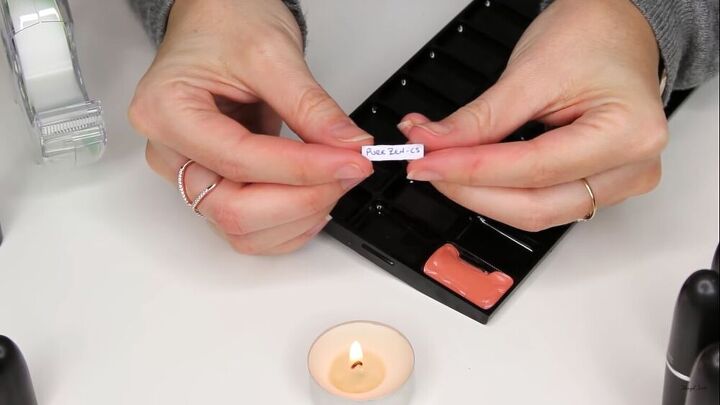
6. Label the lipstick
Don’t forget to add the label! I like to add a code for the finish of the lipstick as well. This one is “CS” for cream sheen.
Melting your lipsticks doesn’t compromise the finish of your lipsticks, but for some (such as pearly or frosty shades), you may see the shimmer separating.
There’s a quick fix for that - just mix the liquid with your spatula once the melted lipstick is in the palette.
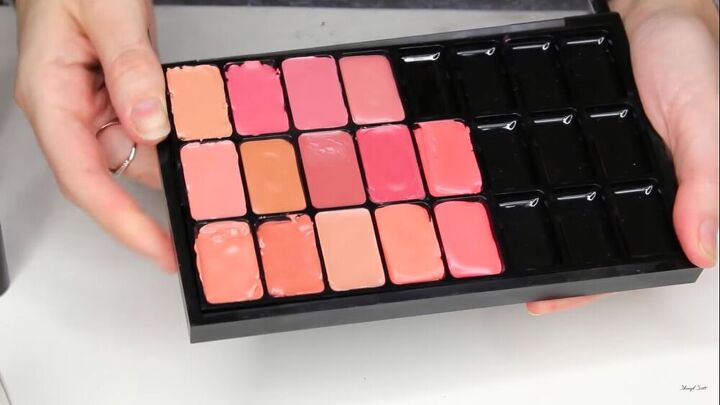
How to make a DIY lipstick palette
Here’s my finished palette! I popped the insert back into the box and it’s ready to be used. You can use this technique with any lipsticks, including gel and cream formulas.
This is a great way to keep all of your lipsticks in one convenient place, especially old lipsticks lurking at the bottom of your makeup bag that you forgot you had!
Give this DIY a go and let me know how you get on by leaving a comment.
Easy Eye Makeup Tutorial for Red Lips
The author may collect a small share of sales from the links on this page.


Comments
Join the conversation
Great idea !
Nothing but very dusty lipstick in a tray. It needs a lid and then it starts to become annoying to use it.