DIY Apron in 2 Sizes

Today’s 30-minute sewing project is an easy DIY apron. I love this because of how versatile it is. An apron can be a traditional kitchen apron, a gardening apron, or even an artist’s smock. In this tutorial, I included a child’s size as well as an adult’s size because aprons can be great gifts and toys for kids to get creative with!
Tools and materials:
- Fabric (1 yard)
- Paper
- Marker
- Ruler
- Bias tape
- Scissors
Draft a pattern
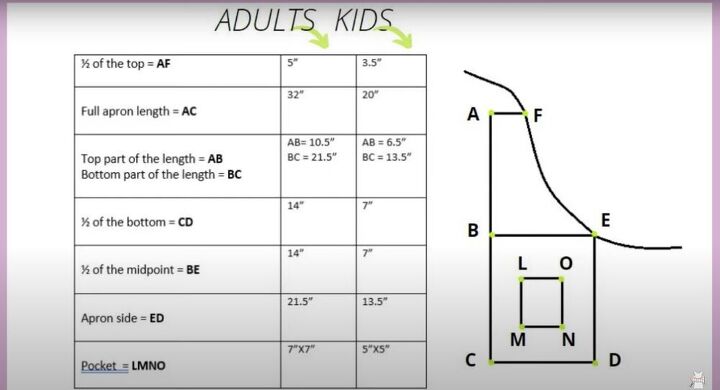
Drafting the pattern is really simple. Simply grab some pattern paper, a marker, and a ruler and trace the measurements above onto your pattern. The only things to keep in mind (that are not on the pattern) are the seam allowance for the side seams, bottom hem, and top hem, and the ties that we are making from bias tape. For a more precise tutorial on drafting your pattern, watch the video at 1:29.
Prepare your fabric
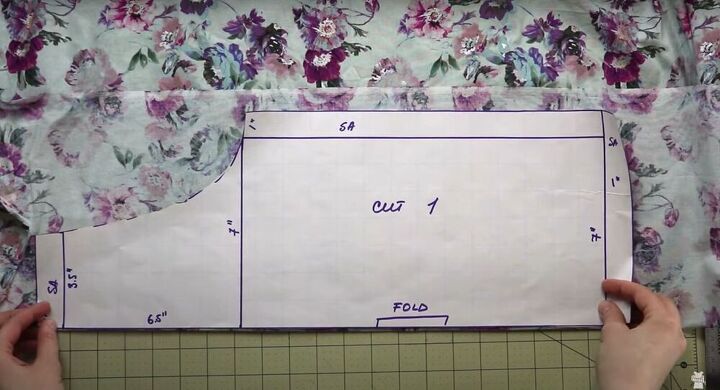
Fold your fabric over (right sides together) and then place your pattern over the fabric and cut by the fold. This is so that when you open up the fabric, you will be left with one full piece for your apron. Next, the first step is to press your bottom hem, side hems, and the top hem. Each hem is going to be pressed twice at about half an inch. This is to get rid of any raw edges.
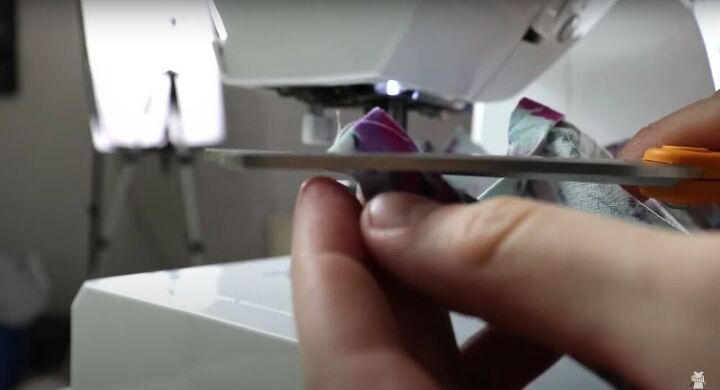
Cut corners
Pin each of the folded edges and then sew a straight stitch on the very edge of the folds. Next, to reduce the bulk by the corners, open up the folded edges and snip the small tail off. Once it’s off, refold the corners so that none of the raw edges are showing.
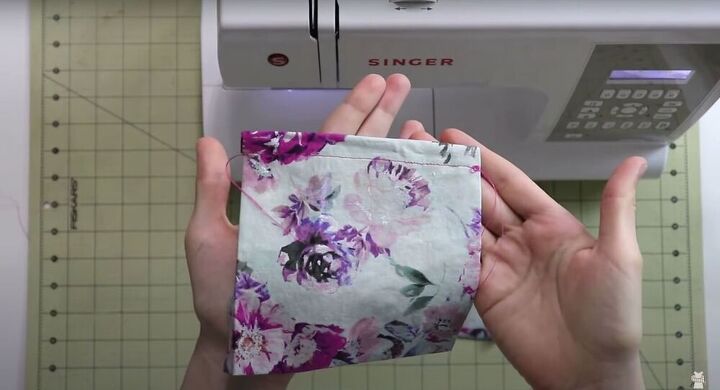
Make the pockets
Repeat the same process on the pockets. For the three sides that will be sewed onto the apron (where we cut a half-inch seam allowance) fold them over once. However, for the top edge of the pocket (that will be the opening of the pocket and where we cut a full inch of seam allowance), proceed with a double fold. Next, position your pockets onto your apron, pin, and stitch them down. You can stitch with a single row of stitches, a double row, or decorative stitches - whatever feels right to you.
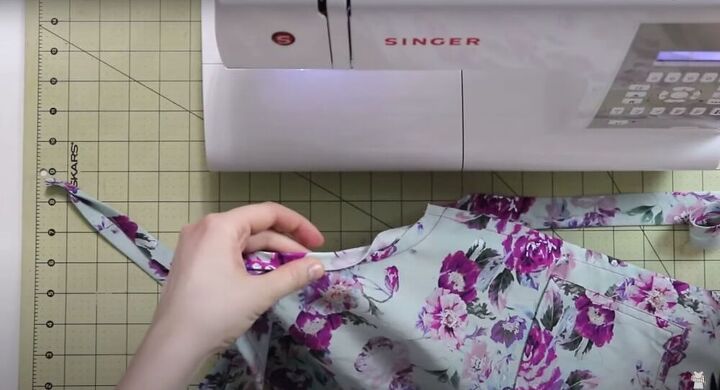
Make your ties
Cut out your two-inch wide ties at a 45-degree angle. For the child’s size the ties should be 43 inches long and for the adult’s size, 60. Fold your ties in towards the middle and then in half to create your bias tape and iron it down. Once that’s done, lay your apron down, wrong side up and begin to pin your ties to the curved edge. The right side of the ties should be pinned to the wrong sides of the apron. Use a straight stitch to attach it.
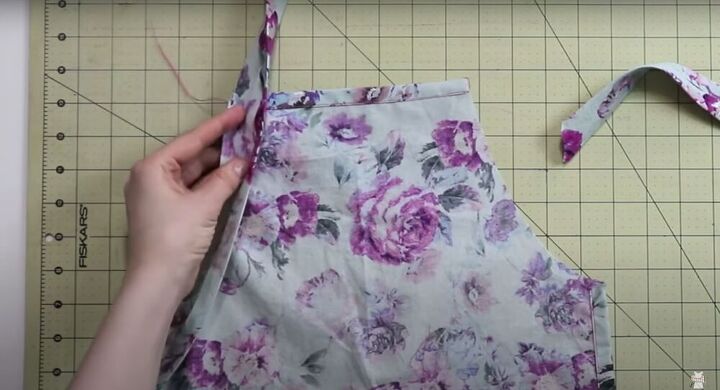
Finish the ties
Once the bias tape is sewn into place, fold it over to hide the raw edges and pin it in place again. Do this along with the entire tie and then sew from the beginning of the tie, over the curve, until the end of the tie.
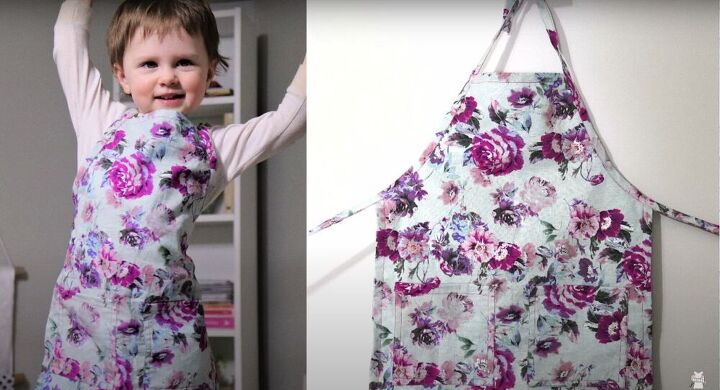
I made my apron for my baby girl. She loves to paint and mess around and this simple DIY apron is a really easy way to keep her clean. Remember that the straps are completely adjustable so don’t worry about the apron not fitting right. Enjoy!
The author may collect a small share of sales from the links on this page.


Comments
Join the conversation
Question: What about the ends of each tie, are they left unsewn? If so, will there be problems with fraying?
I'd make one doll-sized, too so mom, daughter, and doll can all dress the same. My mom did that for us when I was a kid and I thot I was hot stuff!