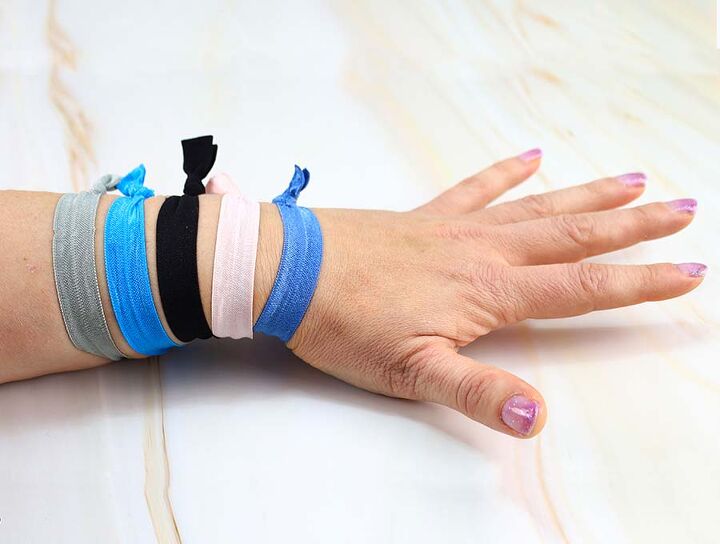
DIY: Make Your Own Hair Ties for 10cents Each
When you want to quickly keep your long or medium hair in control, your best ally is hairbands. We long-haired folks can never get enough of them.
Instead of buying hairbands in stores, there’s a much better alternative for you to go with.
Make them yourself!
This way, you’ll get unique hairbands that are stylish, and you’ll save up some cash! You can make some as presents and give them to your friends as a nice surprise.
Read our tutorial to learn how to make these hairbands, with no sewing and in a matter of minutes.
=====================
 For more detailed fold over elastic hair ties tutorial go over at HelloSewing.com
=====================
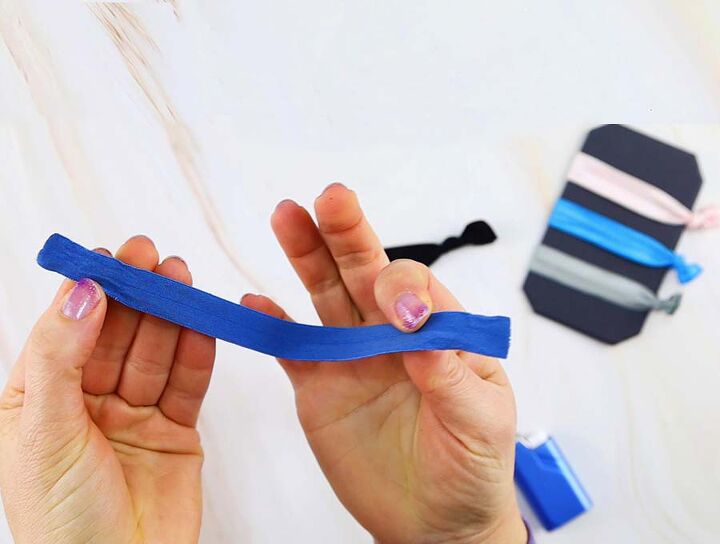
Cut the elastic
Use a 5/8 inch elastic for this project.
Cut the elastic into a 9-inch strip.
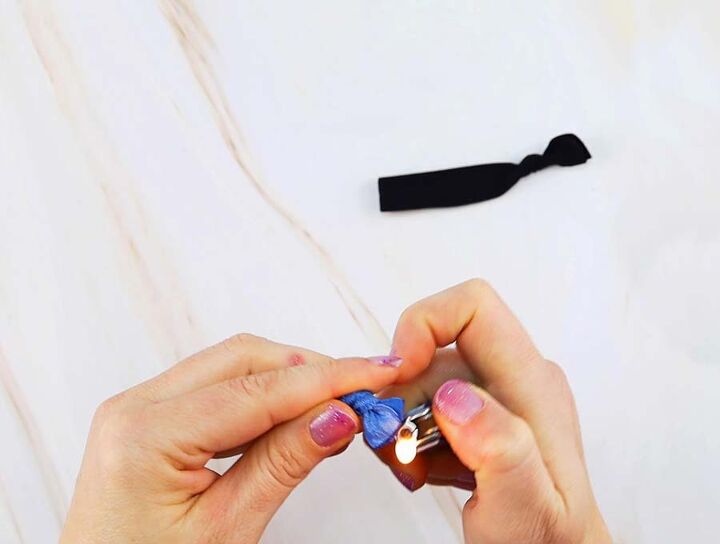
Tie and melt the ends
Fold the elastic in half. Tie up the ends of the elastic together.
Use a lighter to melt the ends after the knot a bit. This will prevent the elastic ends from fraying as you use the hairband.
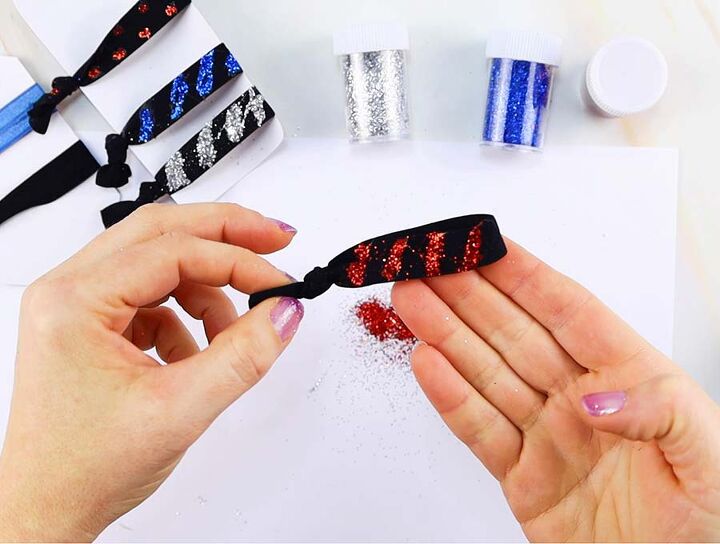
Add some bling (optional)
Use fabric glue as a marker to draw a pattern onto the hairband.
Take a bit of glitter and sprinkle it over the glue. Press the glitter slightly to join it with the glue.
Let it dry and then shake off the excess glitter.
Repeat on the other side of the hairband.
Make the holder for the hairbands
Cut out a rectangular piece of cardboard. Make it about 2.5 inches wide.
Clip the corners to make the piece slightly round.
Your new hairband is officially ready for action!
Did you have fun making hairbands? Try out different color combinations and decoration styles to see which one suits you the best! If you get some ideas for improving this project, share them with everyone in the comment section below. Enjoy your new fancy accessory!
The author may collect a small share of sales from the links on this page.


Comments
Join the conversation
A project to do with grandkids