Sew Your Own Sun Hat

With summer on its way, you better have a gorgeous summer hat to wear. This tutorial has you covered - learn how to create a beautiful sun hat with chin straps. The pattern can be found here.
Tools and materials:
- Firm interfacing
- ½ yard of fabric
- Scissors
- Matching thread
- Ribbon or binding (26 inch or 66cm long)
- Pins
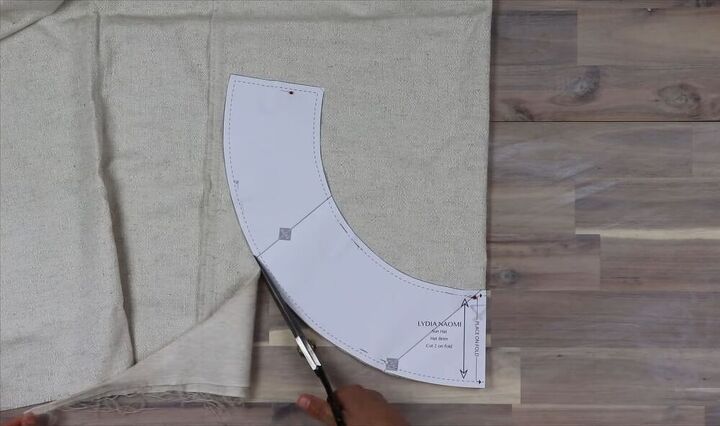
Cut the brim pieces
Cut your two brim pieces on fold and cut a shallow little snip at the fold to mark the center of the hat brim. (Trust me, it will come in handy later!) Make sure that you also snip the little chin strap notches (marked on the pattern) as well. You also need to cut two pieces of fusible interfacing for the brim.

Cut the hat panels and strap pieces
You need to cut ten hat panels and four of the strap pieces.
Attach interfacing to the brim
Apply your fusible interfacing (or whatever you’re going to use to stiffen it) to both brim pieces.
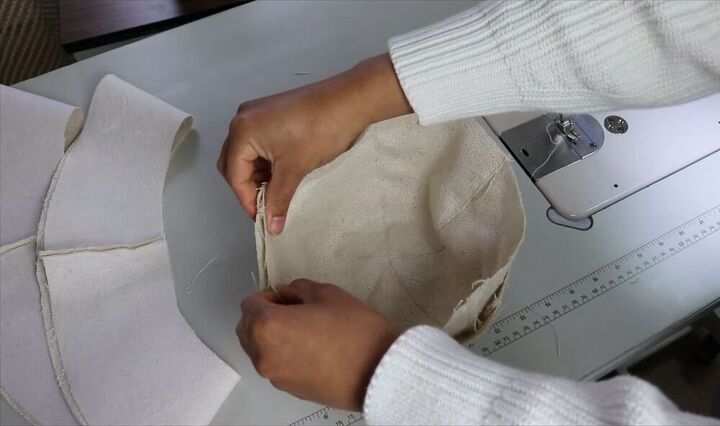
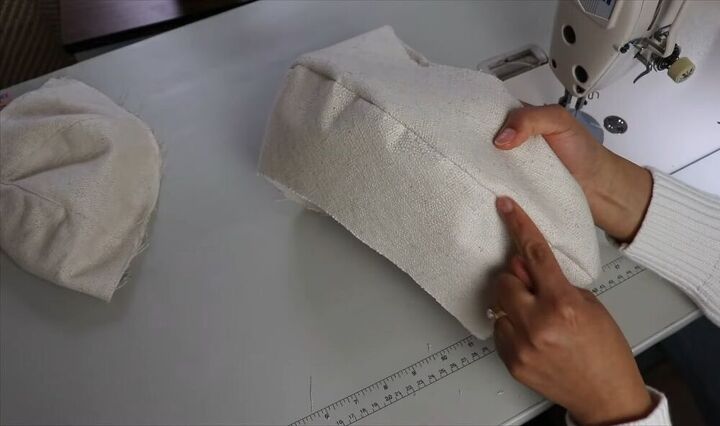
Assemble the panels
Sew together four pairs of panels, right sides together, on one long side of the triangle. Then you can go ahead and push the seam allowance to one side and topstitch. To complete a cap, sew one of the remaining panels to one of the paired panels and topstitch. Then, apply the two-panel portion to the three-panel portion and sew one long seam, and topstitch the seam allowance to one side just as you did with the other ones. Next, place the two caps, one inside the other, wrong sides together, so the sides with the seams are touching. Finally, sew a stitch close to the edge along the perimeter of the hat. You want this just as a pre-stitch to keep them together, so don’t sew at the ⅜ seam allowance, sew at like a ¼ inch.
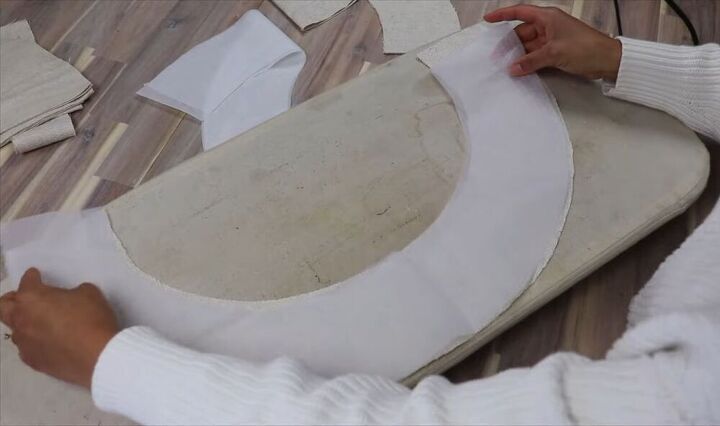
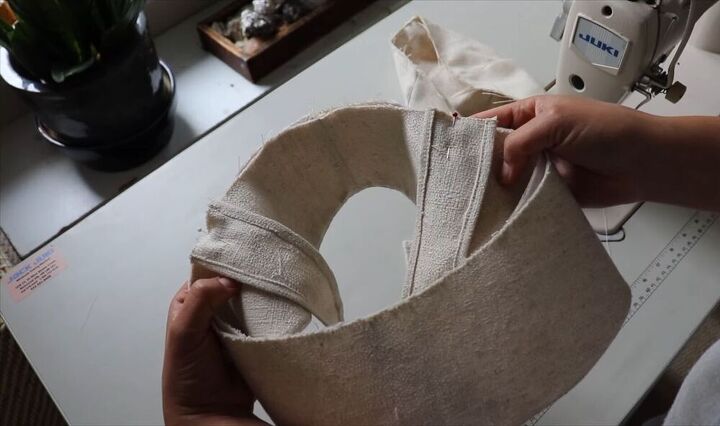
Assemble the brim
With right sides facing, sew up the open ends of each brim piece. Press the seams open with your fingers, and then place each brim piece right sides together and sew the outer perimeter. Then push the seam allowance to one side and sew it close to the seam. This is called understitching. The side with the stitching will face down on the finished hat, so make sure that you sew it on the piece that you’ll want on the hidden side of the brim. This gives a really nice crisp edge to the hat brim. Then you can just do a quick press with an iron to finish.
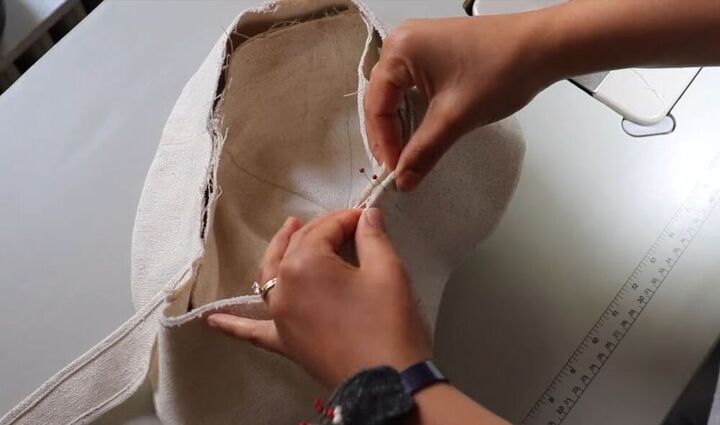
Attach the chin straps
Next, fold the edges of your two chin strap pieces and sew them. Then apply these chin straps to the brim of the hat. If you snipped these notches on the pattern, you’ll know exactly where to place your chin straps. Place them on the inner side of your hat rim; you can angle the straps away from the center back seam a little bit. Then just sew a stitch around the inner perimeter of the hat brim close to the edge, catching the straps as you sew.
Join the cap to the brim
You’re now ready to sew the cap to the brim. Place your hat cap right side out and facing down with the right side of your brim facing down, pin your cap to your brim. Match one of your cap seams to your brim center back seam, then match the center of the opposite cap panel to the center of your hat brim. Fold the cap panel in half to get the center of it, and then match it to that little notch that you put in the center of the hat brim. Then sew the seam.
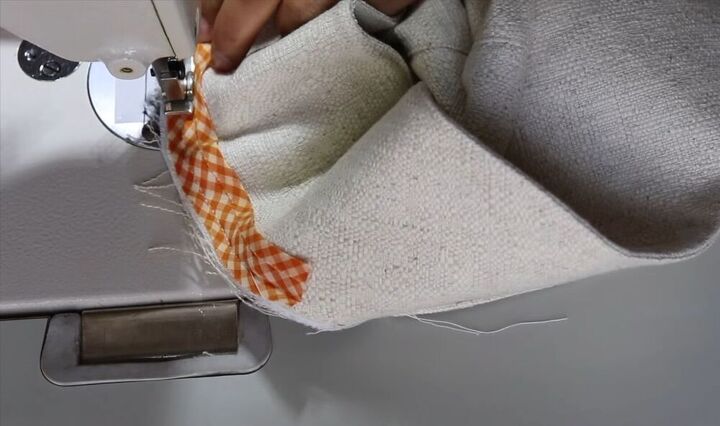
Insert bias tape
Cover the inner raw edge with bias tape. Fold your binding on both sides and open up one side and sew it along the raw edge to the seam, leaving a little space at the start of the binding. When you get back to where you started, stop stitching an inch or so away and snip your binding. Then sew the binding together and stitch up the gap that you left. Then fold the binding up toward the cap and do a blind stitch to stitch it in place. You only want to sew it to the inner cap layer.

The finished hat is both pretty and practical. The brim will keep the sun out of your eyes, and the straps will make sure the hat doesn’t blow away.

The author may collect a small share of sales from the links on this page.


Comments
Join the conversation
Well done a lovely hat 😊