How to Make a Beret That You Can Wear 2 Ways!
Follow these easy sewing instructions for how to make a beret to suit every stylish occasion. We’ll show you how to draft a beret sewing pattern that fits perfectly, and best of all, it’s reversible! So that’s two chic berets looks in one just one chapeau.

How to Sew a Reversible Beret and Make your own Beret Sewing Pattern
Berets are super versatile and can be made from a variety of fabrics. Classically wool is most suited to this style of hat as it’s warm and hard wearing, but we’ve used fleece for ours as it’s easy to sew with and can be machine washed.
Other suitable fabrics include felt, corduroy or even velvet. The fabric needs to have a bit of body otherwise your hat will be too floppy to hold its shape.

This particular pattern is reversible. You can choose to use the same fabric for both sides, or mix it up and make the reverse in a different colour.
It’s best to keep the weight and type of fabric the same if you are going for a 2 colour option.

If you’re interested in jazzing up your beret with handmade details, why not add a patch? You can make a Free Motion Embroidery Patch or find a cute selection of sew-on patches over here on Etsy.You will need:
- 55 cm fleece fabric 155 cm width (or fabric of choice)
- Thread (match fabric)
- Tiny pearl beads (optional)
- Drafting paper
- Pencil
- Sewing needle
- Sewing machine
- Cutting board (optional)
- Compass
- Measuring tape
- Ruler
- Scissors: paper; fabric
Note:
The seam allowance through out this project is 1 cm.
The sewing machine setting for this project only needs to be a basic straight stitch with a 2 mm length stitch.
How to:Drafting a Beret Sewing Pattern
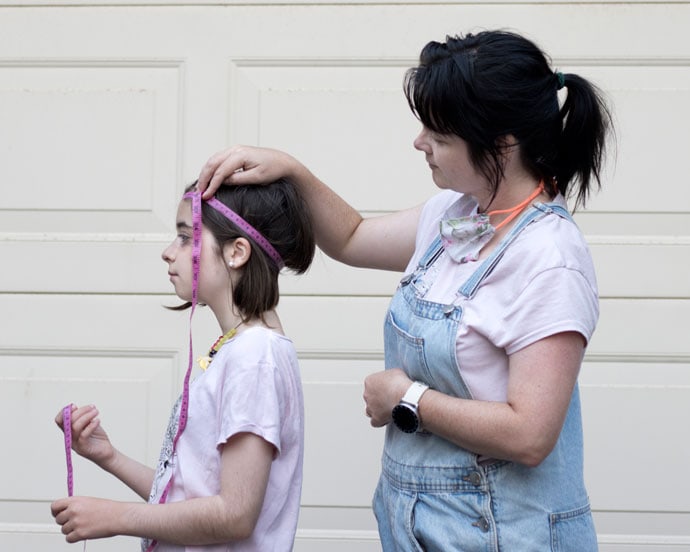
1. Measure the head circumference.
2. Calculate the radius of the head circumference:
- Divide the circumference by 3.14 (equivalent of π) for estimation. The result is the circle’s diameter.
- Divide the diameter by 2, and that is the radius.
- If the radius is not a whole number round it down (E.g. 8.2 cm is rounded down to 8 cm)
Example:
I measured Keira’s head to have a 52 cm circumference.
52 cm divided by 3.13, equals 16.56 cm diameter.
16.56 cm divided by 2, equals 8.2 cm radius.
8.2 cm rounded down to an 8 cm radius.
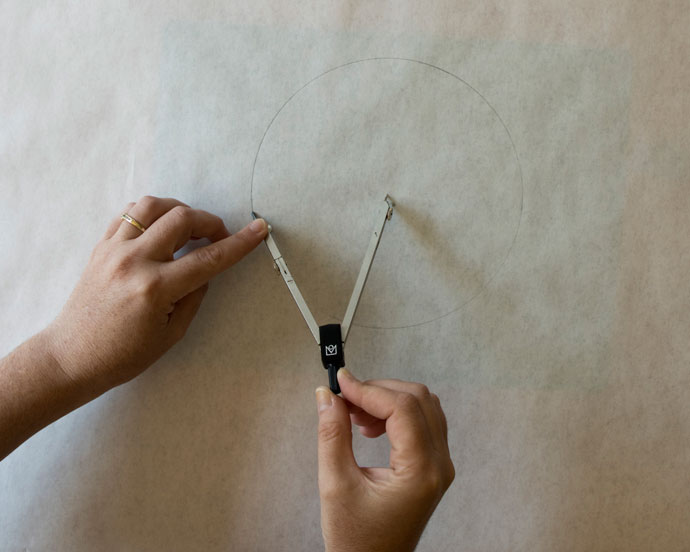
3. Place a cutting board under drafting paper to protect the table from the compass. Using a compass draw a circle onto drafting paper with the calculated radius.
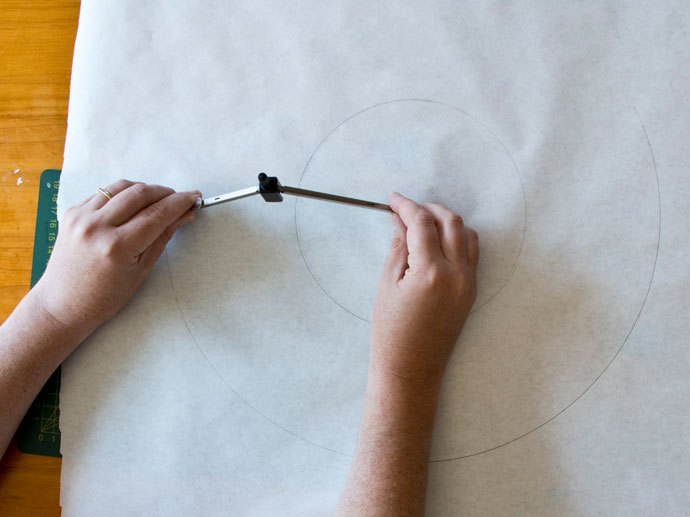
4. Draw another circle with same central point, increasing the radius by 7-8 cm (E.g. head radius + 7-8 cm).
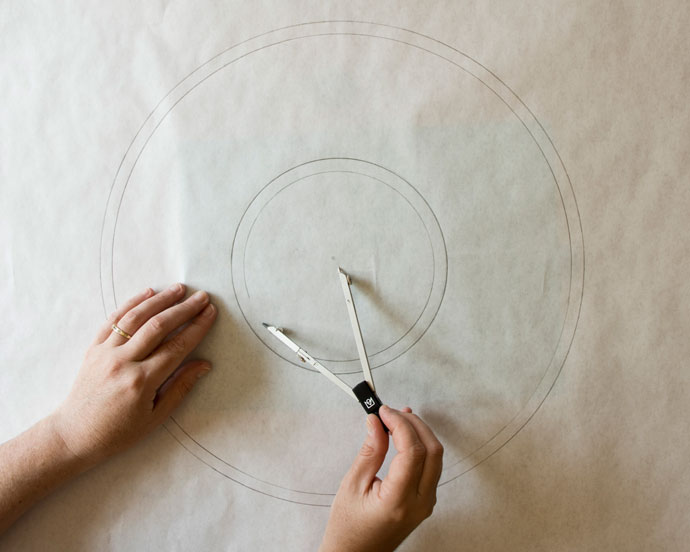
5. Creating seam allowance – draw a ring 1 cm away from outside ring created in Step 4. Then draw a ring 1 cm lower than the inside the ring created in Step 3.
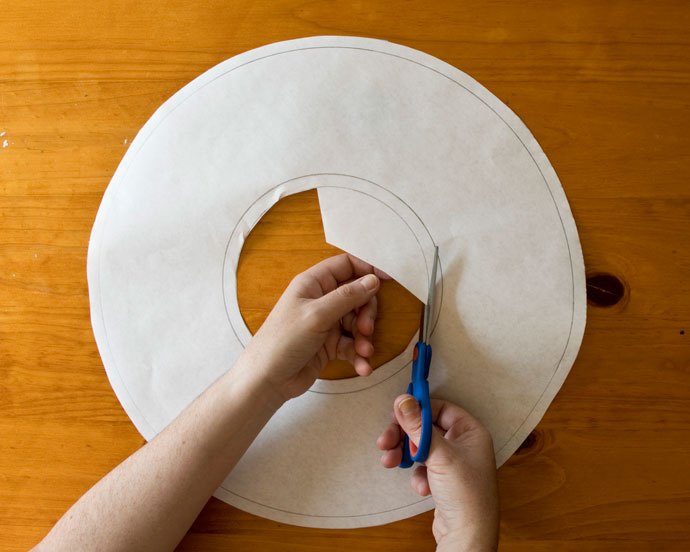
6. Cut out the paper pattern ring on the seam allowance lines.
Sewing a beret
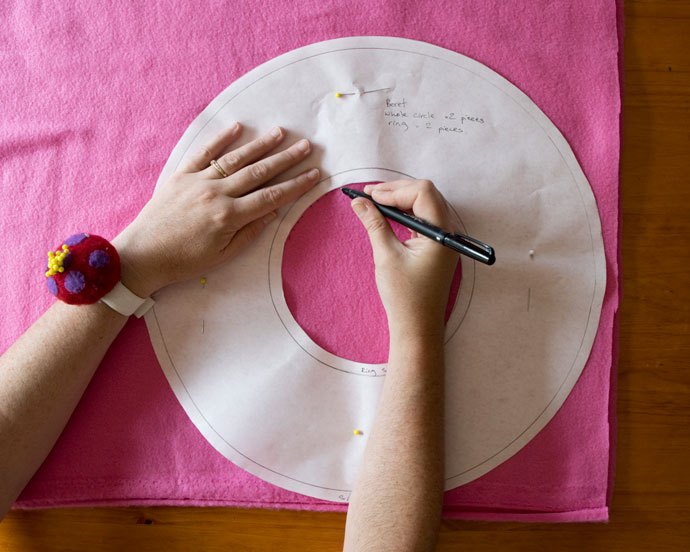
7. Overlay the pattern onto folded fabric.
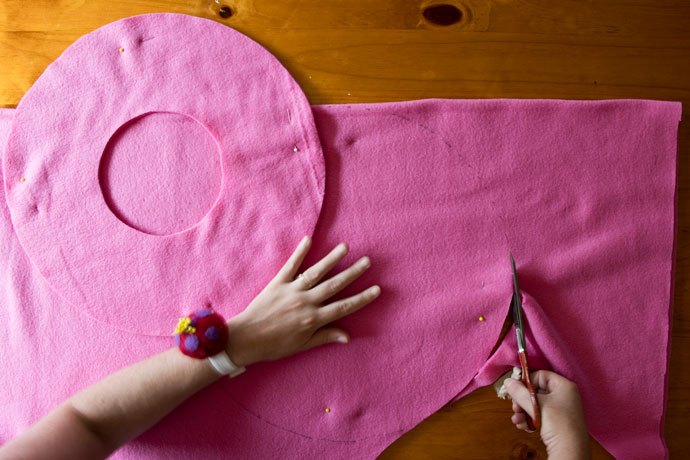
8.Pin, trace and cut two whole circles, and two rings.
9. Cut out two small strips of fabric, 7 cm x 1 cm each.
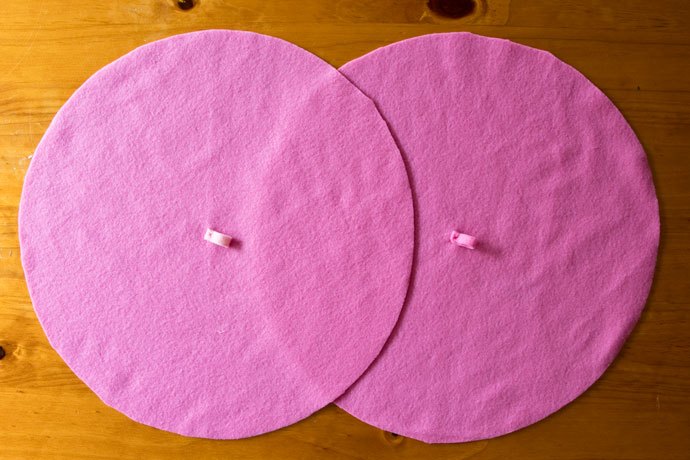
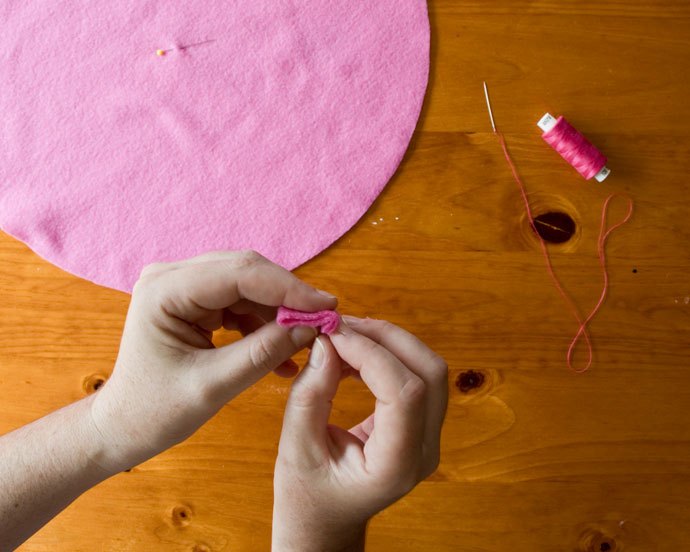
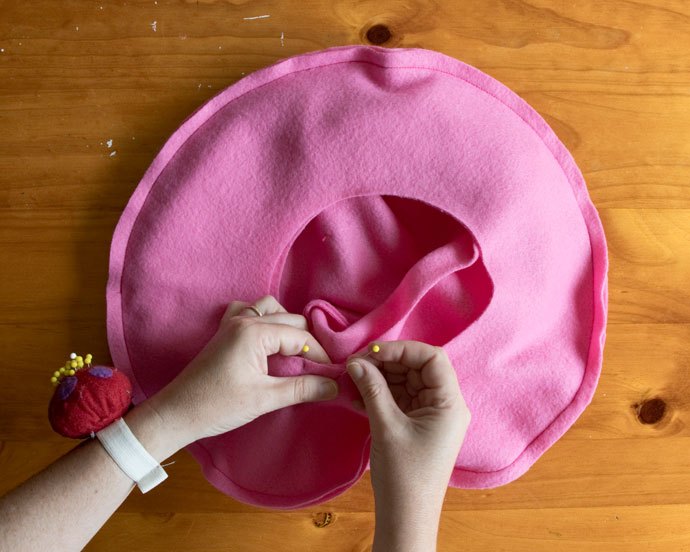
10. Fold a strip in half. Then fold over the 5 mm end. Sew the 5 mm fold to the centre point, on the right side of fabric circle. Repeat with the second strip.
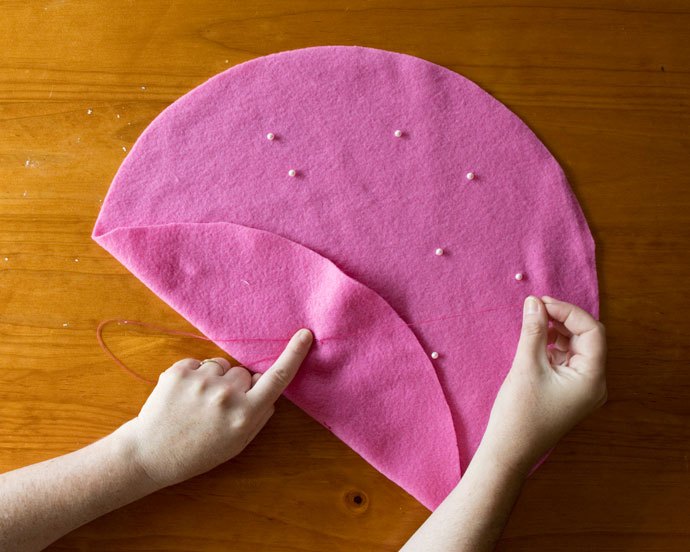
11. Sew tiny pearl beads to one of the whole circle pieces. The other circle piece will not be decorated so that there is contrast.
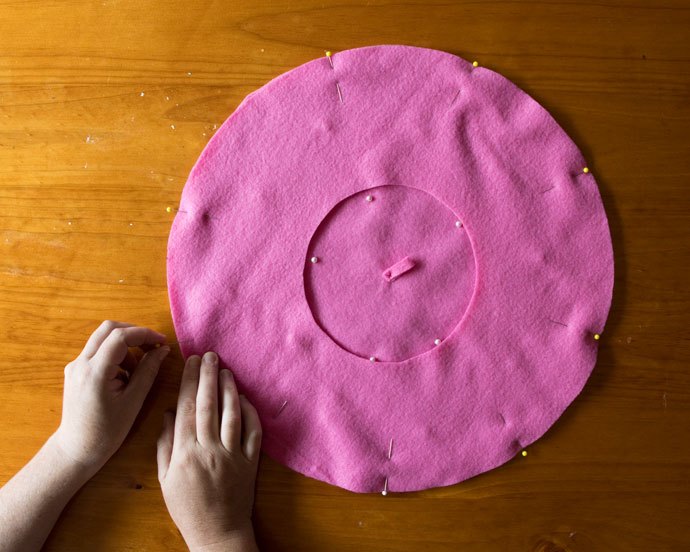
12. Pin and sew together a ring with a circle, making sure the right sides are together. Repeat with the second ring and circle set.
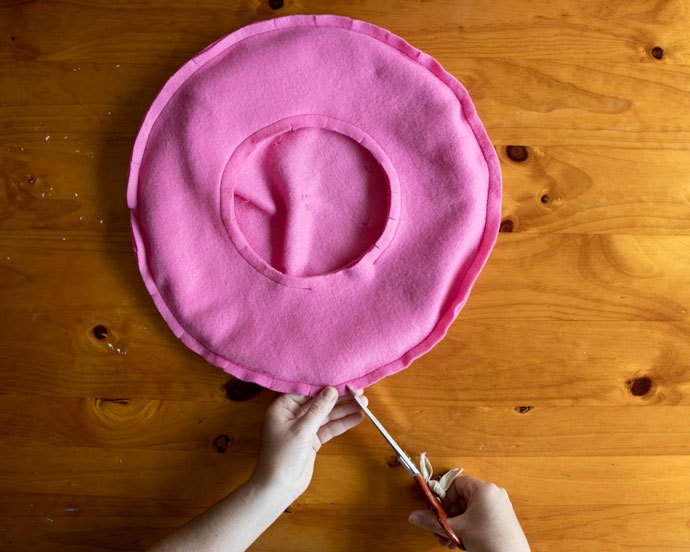
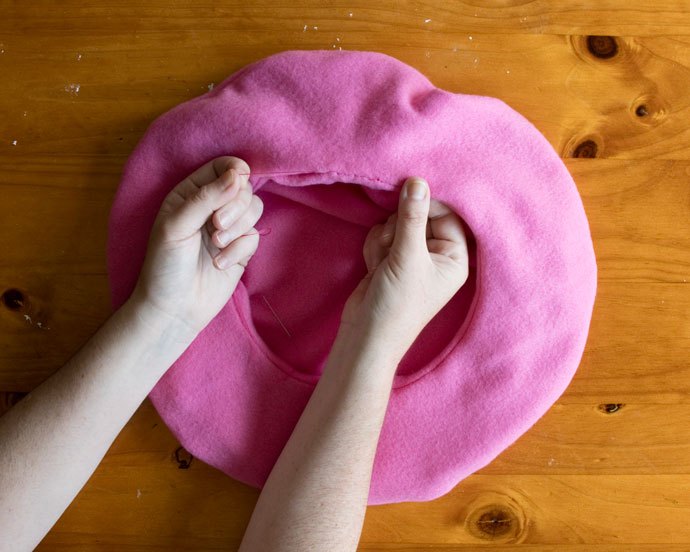
13. Turn one of the ring-circle sets right-side out
14.Then pop this inside the second ring-circle set and pin together the inner circles

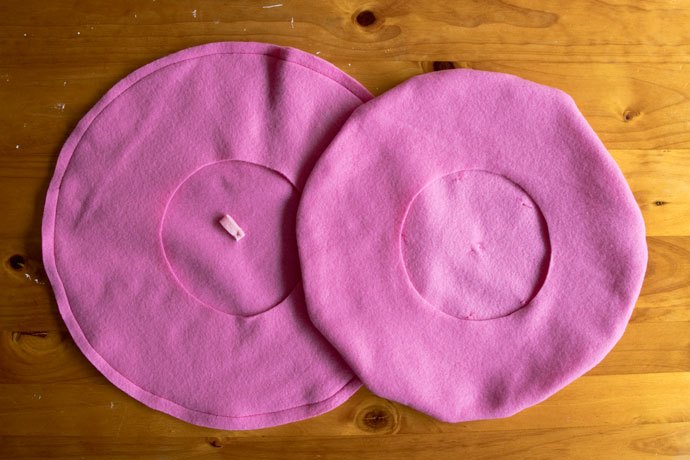
15. Sew the two inner circles together, leaving a four-finger gap in the seam allowance.
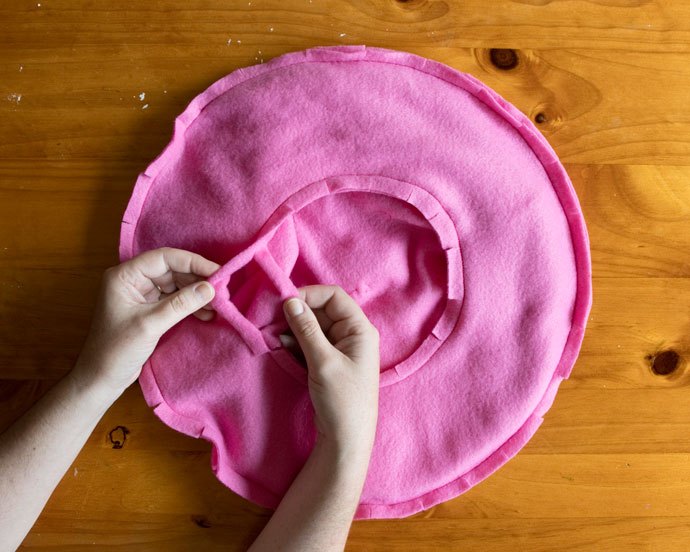
16. Make little incisions in the inner and outer seam allowance of the beret. Be careful to not cut into the stitching. These incisions will give the beret smoother curves when it is turned through.
17. Turn the beret right side out via the four-finger gap from Step 10.
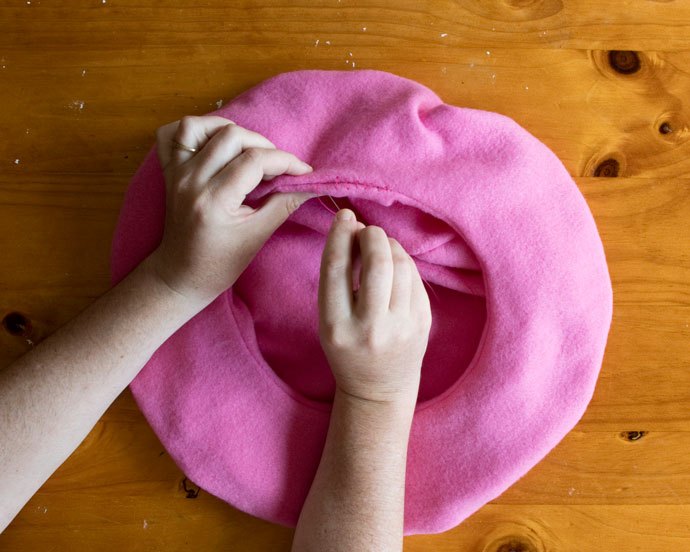
18. Stitch the gap closed by hand using an invisible stitch (sew parallel stitches through the gap then pull the thread tight to close the gap).
The neat thing about this beret is that it’s reversible. From day to night! One side has pearl beads to make the beret party ready. For a simpler affair turn the beret inside out, with the plain side exposed.
The author may collect a small share of sales from the links on this page.


Comments
Join the conversation