This Gory Ariel Little Mermaid Makeup Look is Perfect for Halloween

What would have happened if Ursula literally ripped out Ariel's voice box? Well, this gory Little Mermaid Halloween makeup look explores just that! Follow along with this fun Ariel makeup tutorial to create some impressive FX makeup wounds for a truly scary Halloween Disney Princess costume.
If you haven't seen my other Disney Princess Halloween makeup ideas, take a look at my scary Cinderella Halloween makeup and Beauty and the Beast Halloween makeup tutorials too.
Tools and materials:
- Red wig
- Foundation
- Eyebrow powder
- Matte eyeshadow
- Lipstick
- Makeup brushes
- Gel Sculpt flesh tone A, B, and C
- Metal spatula
- Kryolan liquid latex
- Kryolan burn wheel
- Sigma FX brushes
- Skin Illustrator FX palette
- TV blood
- Splatter blood
- Witch hazel
- Cotton pads
1. Ariel makeup
First, do your Disney Princess eye makeup. I used the same techniques as my Belle from Beauty and the Beast Halloween makeup. You can follow along with that tutorial first or do your eye makeup as you wish.
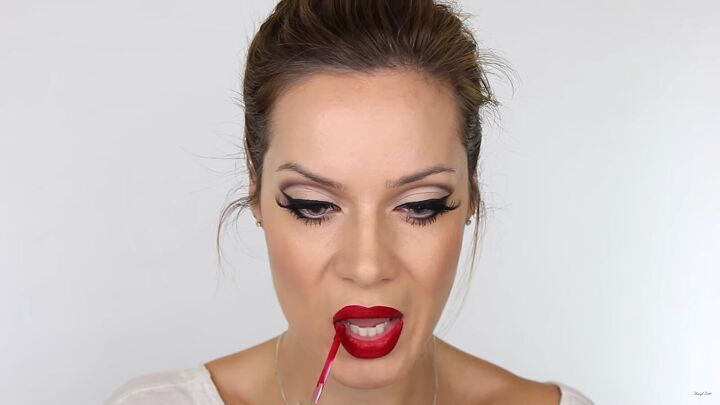
Then, use a true matte red lipstick to match the wig color.
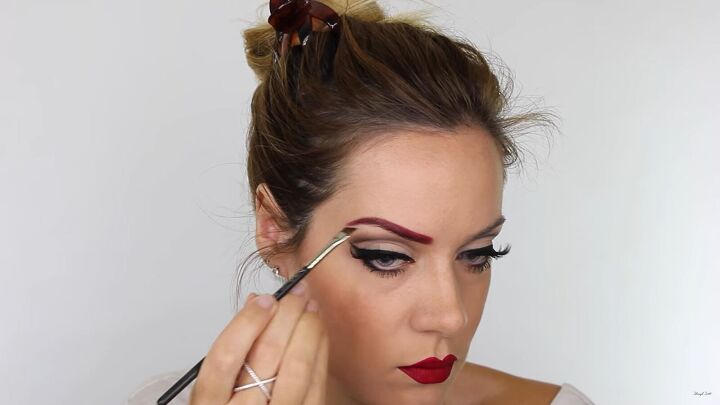
I used a maroon-brick-colored eyeshadow mixed with brown eyebrow powder for the eyebrows. I rounded the front and arch of the eyebrow and extended the tail slightly.
2. Prep the skin
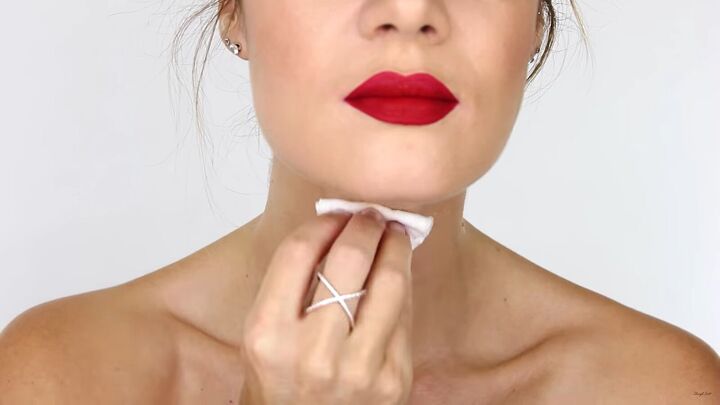
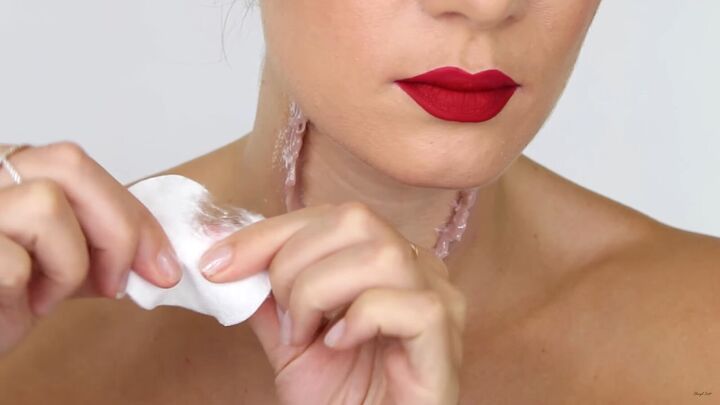
Now, onto the FX makeup! Apply witch hazel to a cotton pad to remove any oils on the skin.
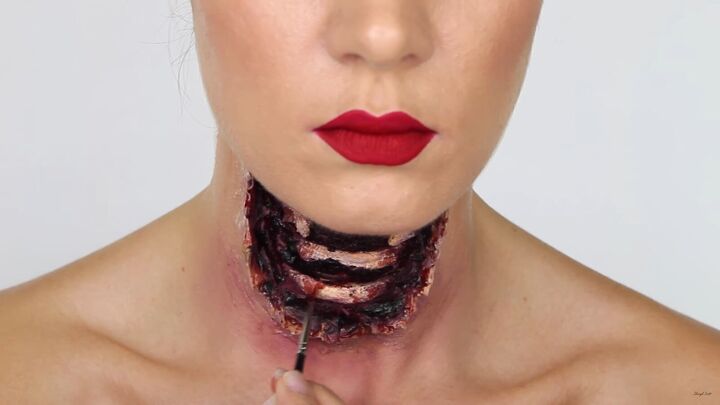
3. Create torn flesh
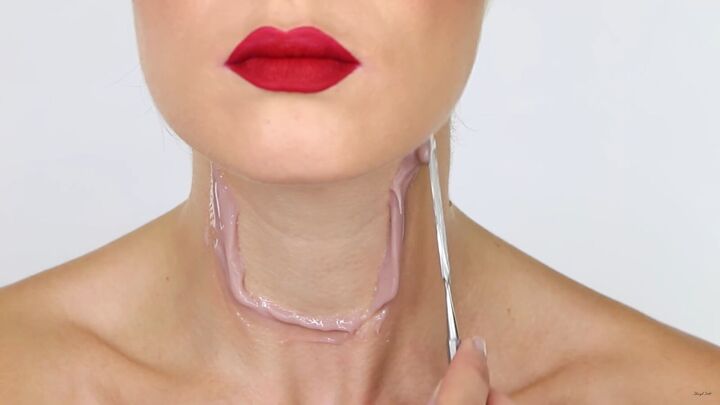
Mix equal parts of sculpt gel A and B, and a slightly smaller amount of C. I used a spatula to swipe the product onto the throat in a horseshoe shape. I wanted to get a smooth edge on the outside with a rougher inside edge to look like it’s torn skin.
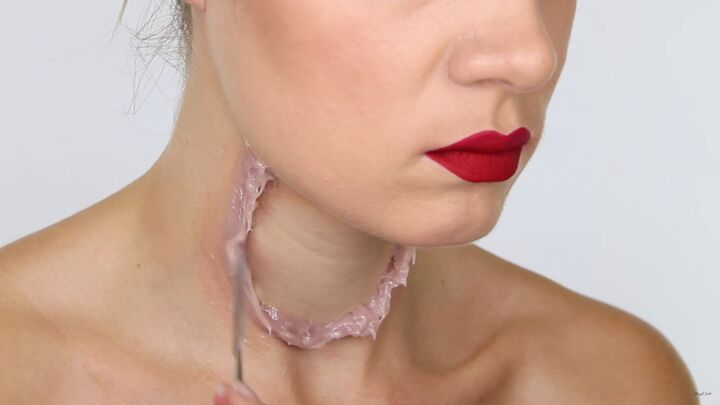
To make the torn edges, use some more product and build it up on the thicker edge, pulling the product up and outwards.
At the bottom, I turned the product inward on itself and pushed it upwards towards the throat to create shape and texture.
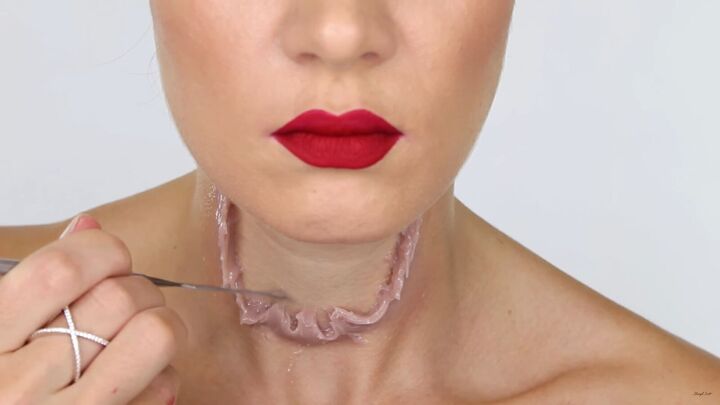
4. Create vertebrae
Separate a cotton pad into two halves, then tear them into 2 smaller pieces, so there are 4 pieces total.
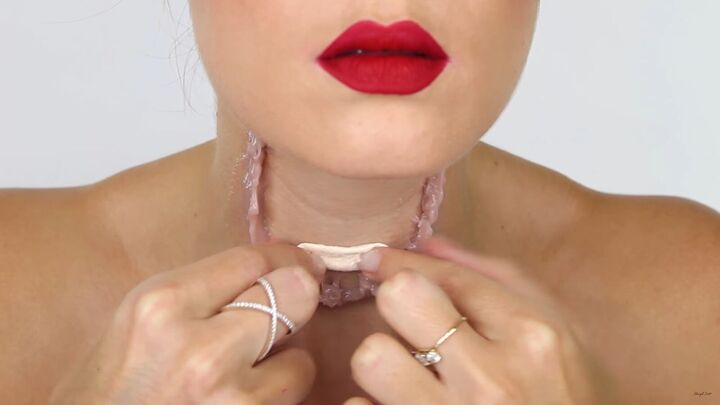
I coated one of the larger pieces of cotton with latex and then folded it into a vertebrae shape.

Press it into the base of the throat in the wound area. Repeat with a second piece. Place them about ½ an inch apart.
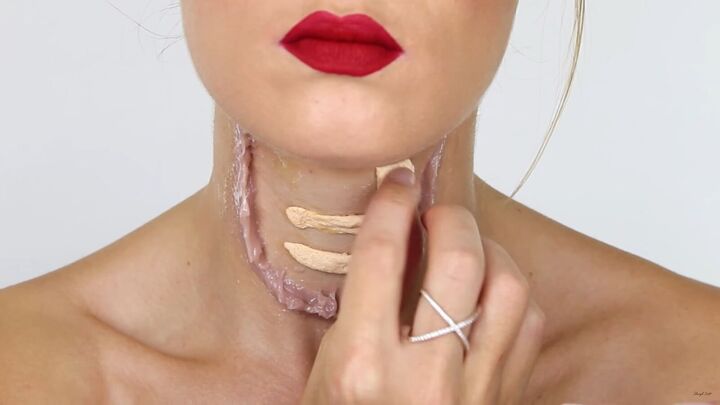
With the two smaller pieces, place them on either side of the top of the “U” to look like snapped vertebrae.
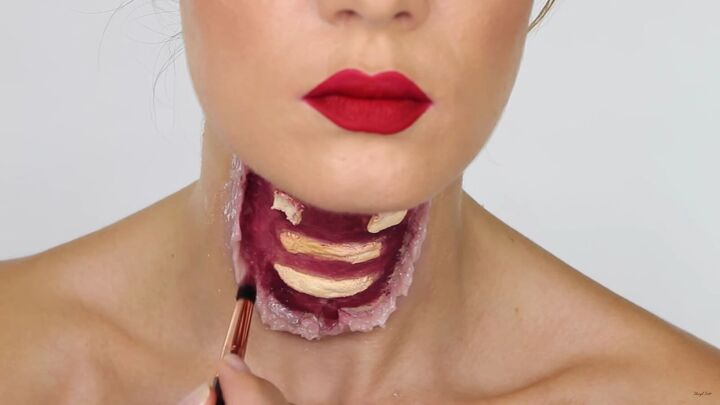
5. Create the bloody wound
I used the maroon shade from the burn wheel and covered the entire surface area of the wound. Don’t worry about being neat - it needs to look rough.
Next, use the black shade from the burn wheel with the same brush. Paint the seams of the wall to make it look quite dark and deep. Include the outside of all of the bone shapes, especially by the snapped bone, to highlight the absence of bone.
Use the very tip of the brush to discolor the outside area of the bones. They should be darker at the outer edges.
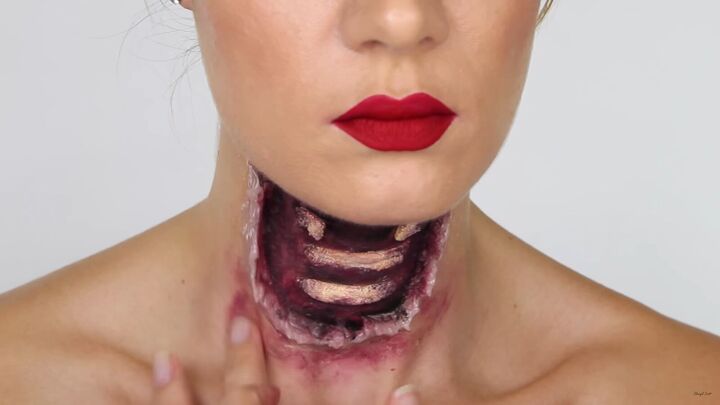
6. Add bloody texture
Make it look like blood has rushed to the surface by applying some of the maroon shade with your fingers outside of the wound.
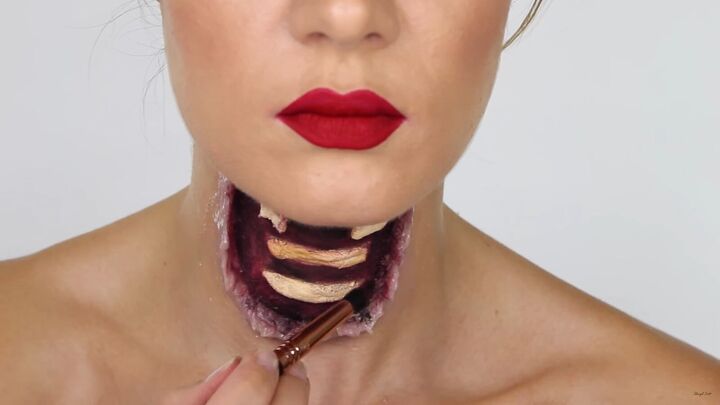
7. Add highlights to the wound
I mixed yellow and a flesh tone from the burn wheel, then used a brush to apply it to the outer edges of the wound. Add the highlight to the textured area inside the wall of the wound to look like tiny lumps of fat and flesh.
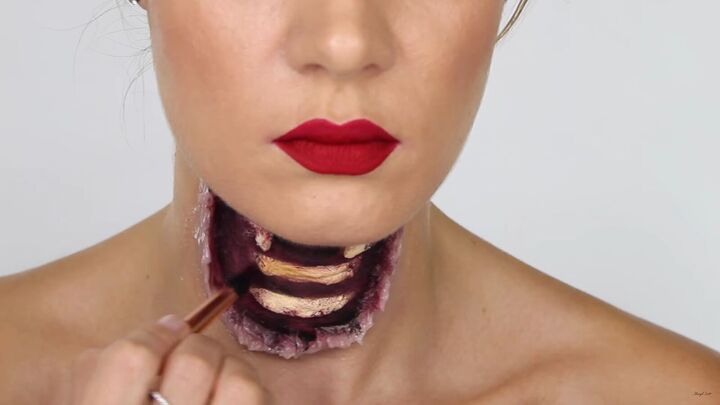
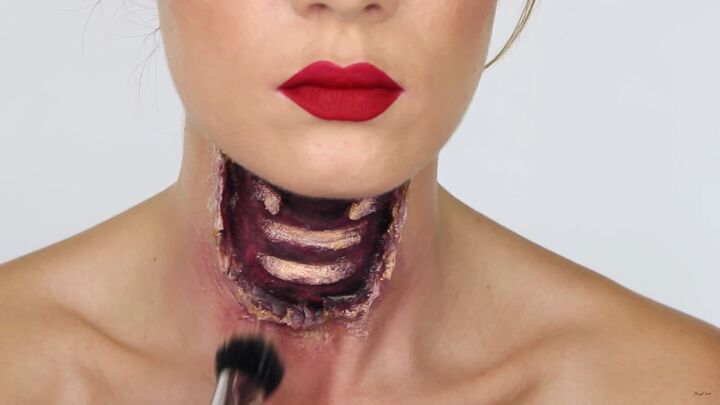
8. Make some bruises
I applied foundation on the maroon shade on the outside of the wound to look like painful bruising under the skin.
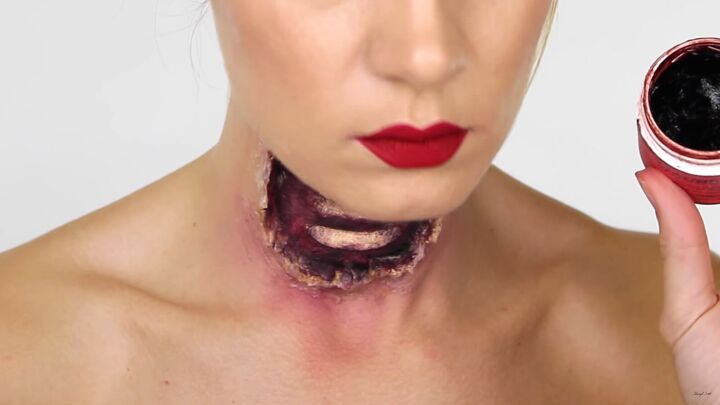
9. Apply wound filler
The wound filler looks like congealed and thick blood. No neatness is required!
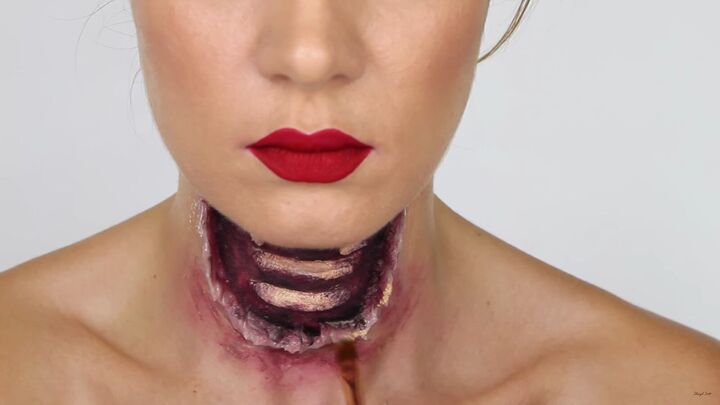
10. Add more blood shading
I used a fine brush and 2 blood shades to paint around the edges, so it looks like fresh blood where the wound split the skin. Add some of the congealed blood to the bone. I also added a slightly diluted version, lightly tapping with my fingers around the outside of the wound.

11. Time for liquid blood
I applied TV blood with a fluffy brush, pressing all over the entire wound. This gives a fresh, realistic, and glossy appearance.
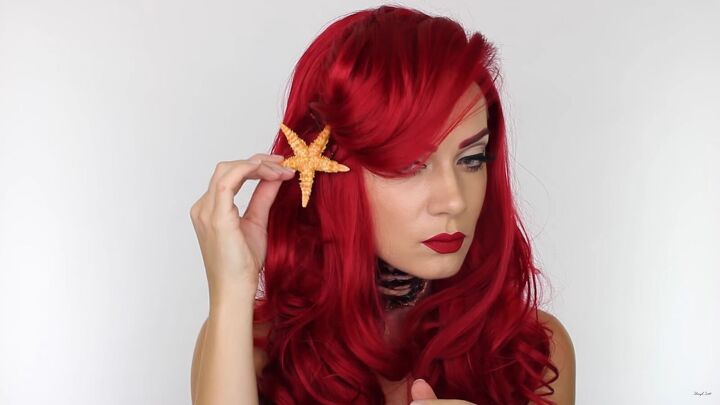
12. Add the wig and starfish
Put the wig on. Pull the hair to make a side part, pull the bangs forward, and clip the side part in. I added a starfish to make me more recognizable as Ariel.
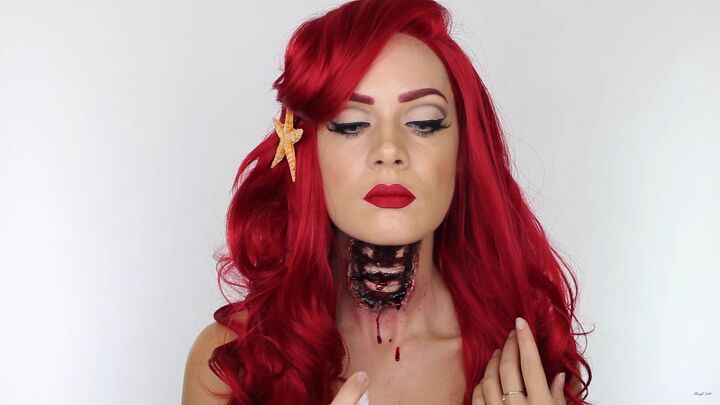
13. Blood splatters
I sprayed splatter blood at the base of the wound so it drips down. I also used some of the dark TV blood and applied it over the top of the wound again. I used my fingers to tap around the wound to make it look more bloodied.
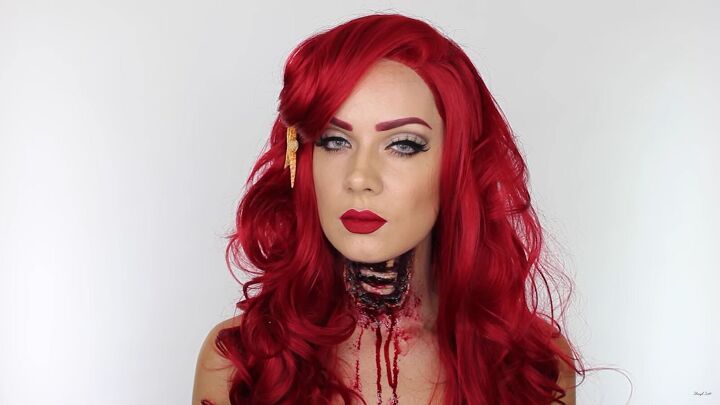
Ariel Little Mermaid Halloween makeup tutorial
That’s it! A twisted Ariel Little Mermaid makeup tutorial for Halloween. Let me know how you liked this tutorial in the comments or better yet, if you tried it! Happy Halloween!
Products used
The author may collect a small share of sales from the links on this page.


Comments
Join the conversation