How to Create an Awesome DIY Fossil T-shirt

Hey, guys. I’m going to show you how to take a regular, boring shirt and make it into a fashionable fossil t-shirt.
If you have an old t-shirt and you want to bump it up to make it more stylish, this is a great project for you.
It might sound difficult. It might look difficult, but there's no sewing involved. Just your scissors and your hands!
Tools and materials:
- T-shirt
- Scissors
- Cutting board
- Marker
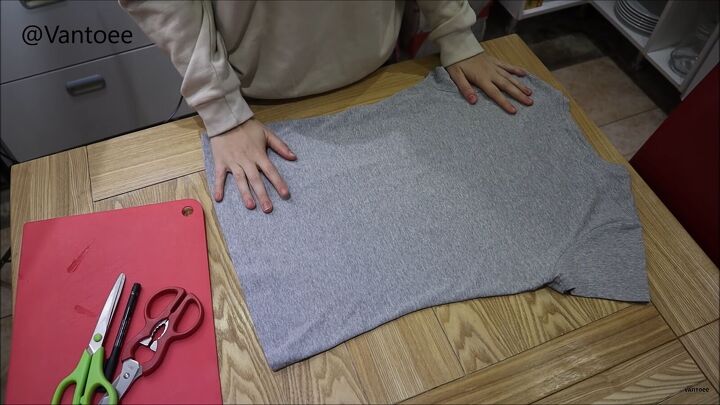
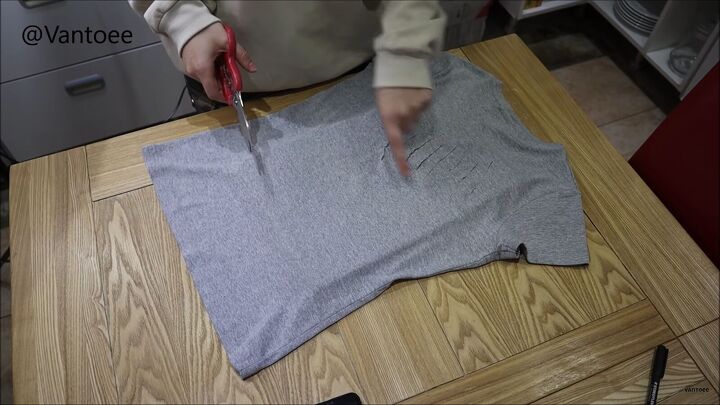
1. Prepare your shirt
Lay your t-shirt with the side you want the design on facing you.
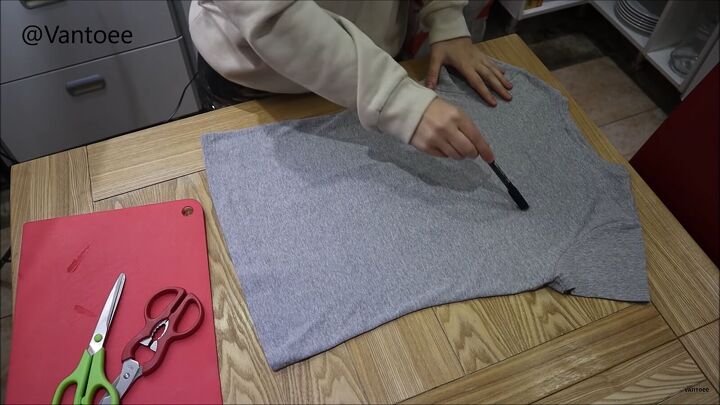
2. Use a marker
Before you start cutting, I recommend using a marker to mark where you will be cutting. You can freehand it if you feel confident to do so.
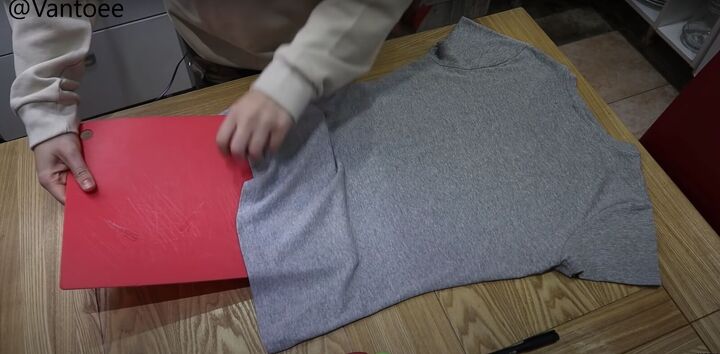
3. Use a chopping board
Put a chopping board underneath the layer of material that you’re cutting so you don't accidently cut through to the other side of the t-shirt.
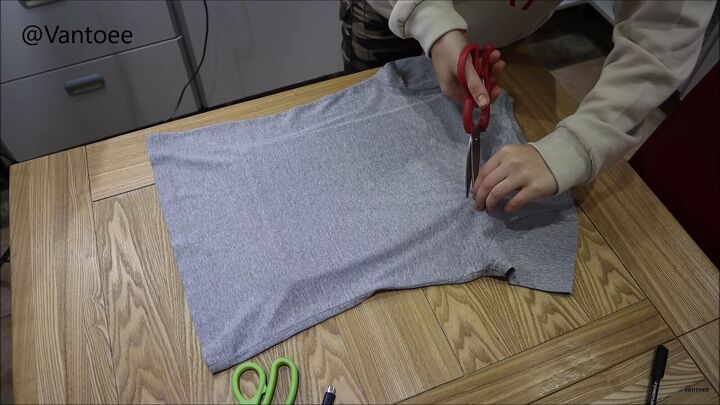
4. Pinch and cut
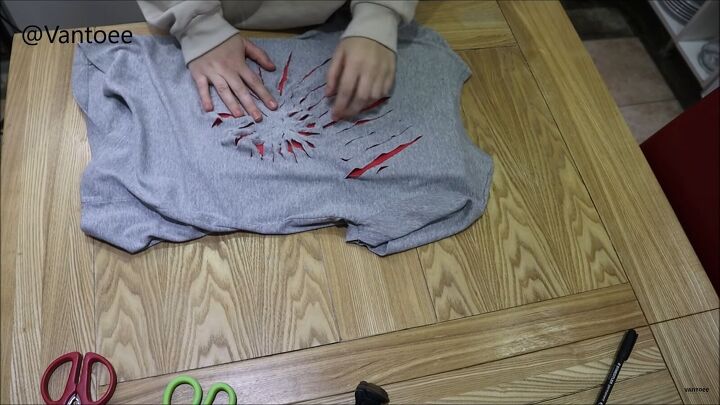
Pinching the material where you want the slit is a good way to make the initial hole.
Start with the biggest slits and keep in mind that the slits will be getting smaller and smaller towards the middle.
5. Line up the slits
Make sure the end of your slits all finish on the same line for a cleaner more defined fossil shape.
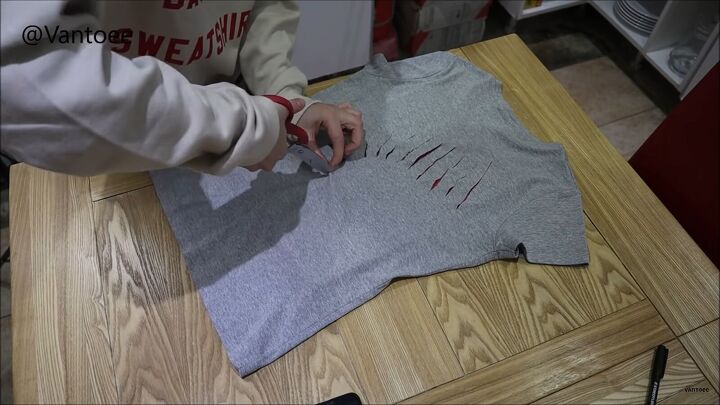
6. Continue cutting slits all the way around to create a slitted spiral
7. Scale the size down as you go
As you get around towards the middle, start to make the slits slightly smaller in length so it will create a coil.
You can start to see the shape taking place there.
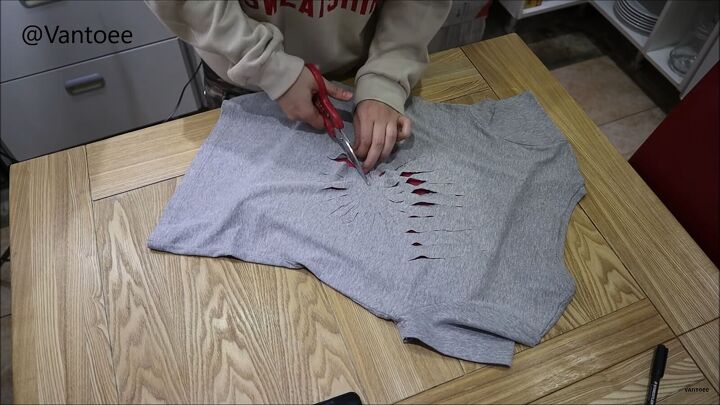
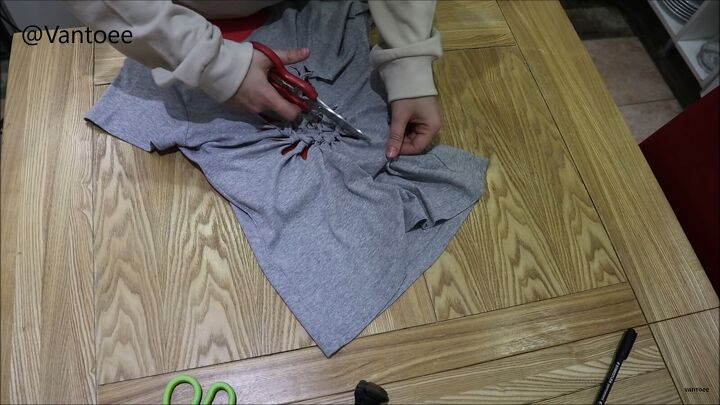
8. Cut the slits closer together as you go
As you get to the center, in addition to making the slits smaller in length, you will also start making them closer together so they start to condense inward.
Be very careful when cutting these that you stop in time because if you cut into the other slits, it will ruin the effect of the fossil.
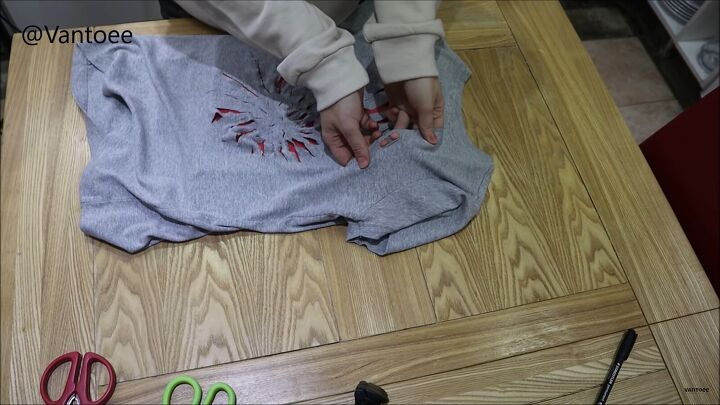
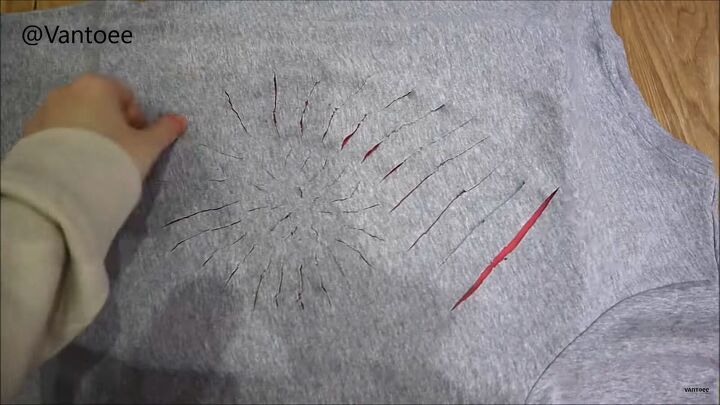
9. Make a small cut above the middle of the first slit
Now that your slits are all done, go back to the first slit. Just above it, make a tiny little cut about half an inch in length.
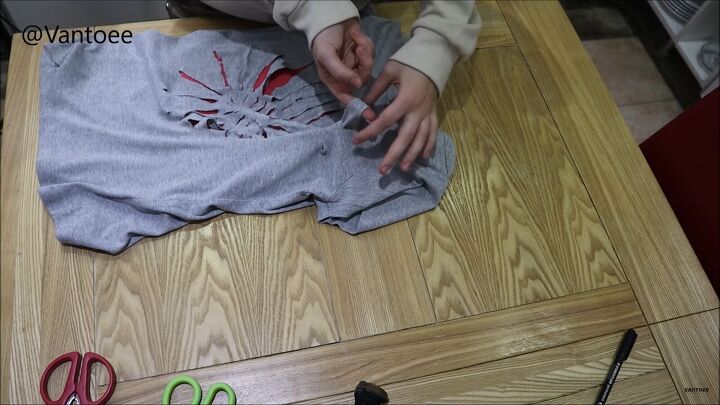
10. Pull the first big slit through the small slit you just cut
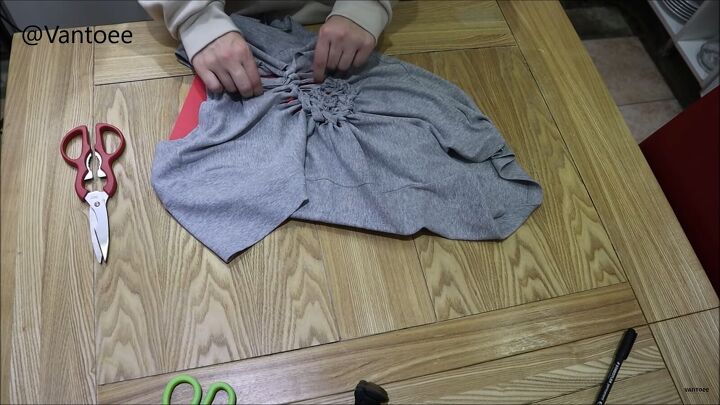
11. Pull it through and twist it around your finger once
Take the next slit, pull it through the loop, twist and repeat. Keep going all the way around repeating these steps until you get to the middle.
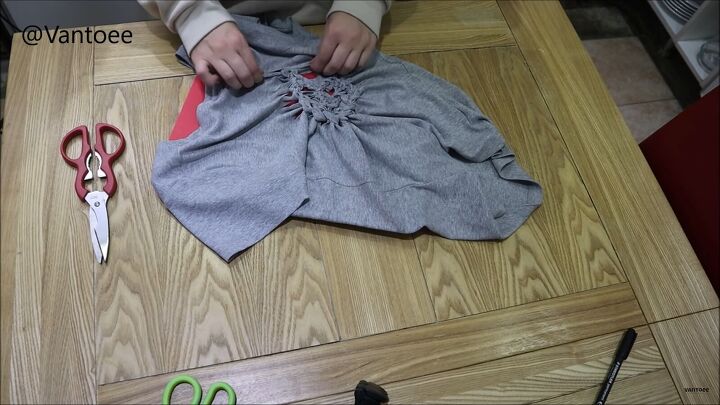
The pattern is going to bunch up while you’re working on it, but don’t be concerned. We will be taking care of that after the weaving, when we tighten things out.
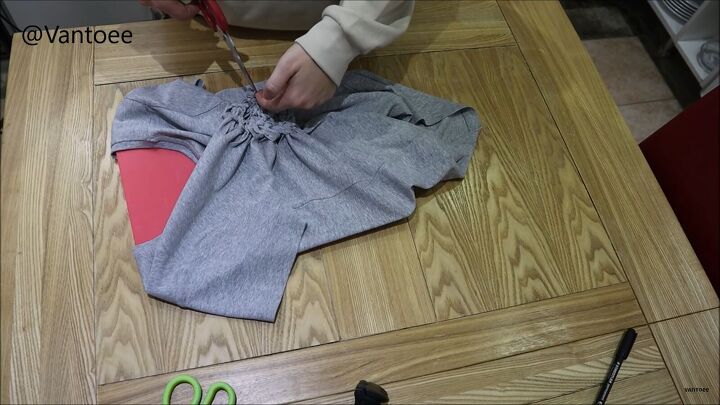
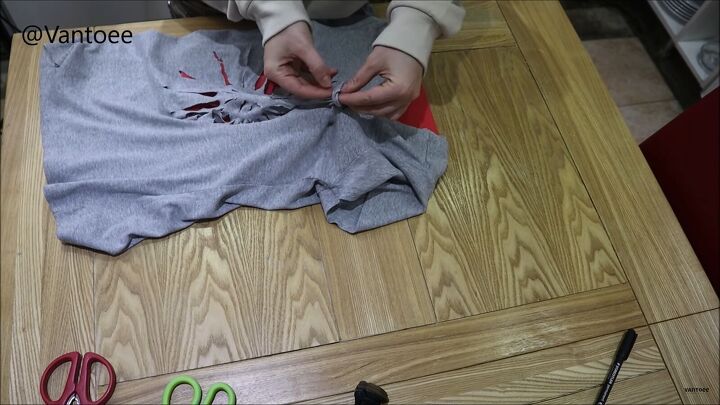
12. When you get to the final loop, cut it in half
13. Close it up
Take your final slit and cut that in half as well. Now tie all those pieces together with a double knot.
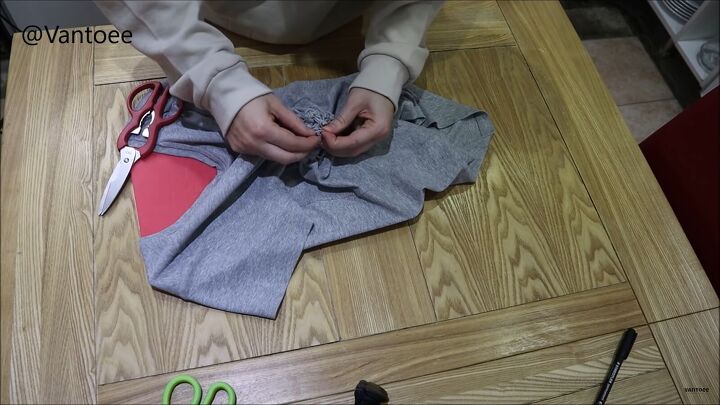
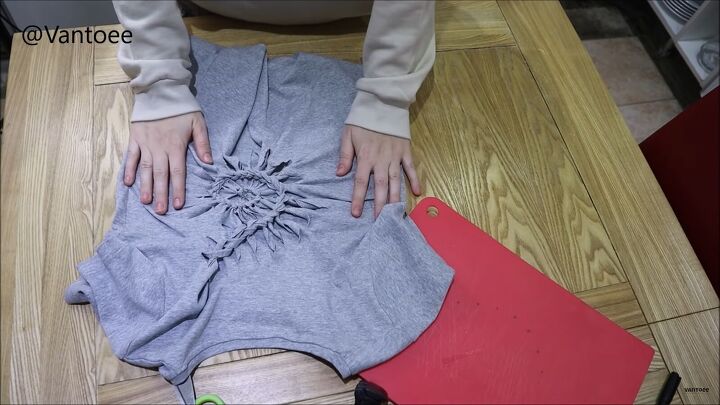
14. Tighten the weave
Now you're ready to tighten the weave. This will help reveal the pattern you created. Take each slit, hold it on both sides, and pull to tighten.
15. Elongate the slits
This step is optional. If you want to make the effect more pronounced, you can cut the slits a bit more to elongate them.
That is how to cut and weave a fossil shape into your t-shirt.
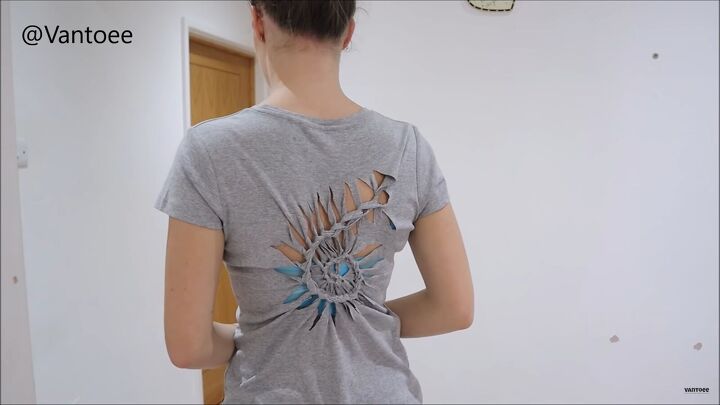
Completed DIY fossil t-shirt
Here is what the finished product looks like on me.
If you want to get even more creative, you can add more weaves on different parts of the shirt. You can also put a color behind it with another fabric and sew it in. You can do multiple little ones. You can change it up however you want. I'm wearing a blue bra underneath mine and I love how you can see the bright color peeking through.
Let me know what you think. In the comments. I hope you guys follow along and make your own fossil t-shirt, because I feel like everyone should have one. I love how I was able to take a plain top and just jazz it up a bit.
The author may collect a small share of sales from the links on this page.


Comments
Join the conversation
yes I will definitely give it a go: lt s fabulous l love it
thankyou lots
sand