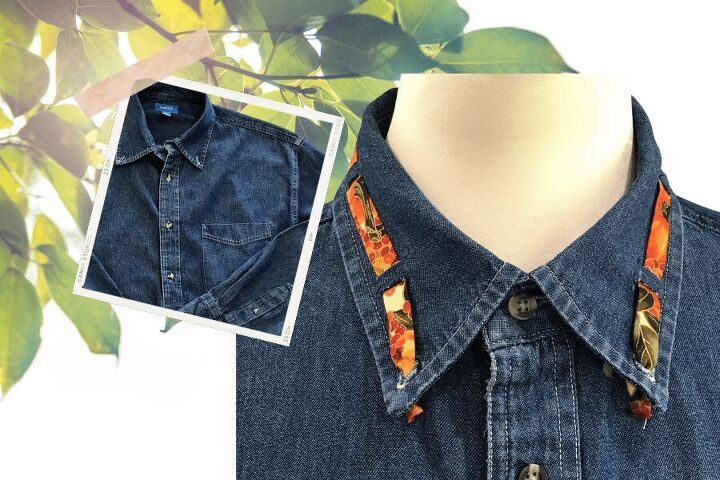
Easy and Simple Hack to Give Your Shirt Collar a Refresh!
FashionHow ToSewingSewing ProjectsSewing Tutorial
Easy and Simple Hack to give your shirt collar a refresh!
August 30, 2022 9 min Read
If you view your button-down collar as a blank canvas, then today’s sewing tutorial will pique your interest. We are channeling our inner Bob Mackie designer skills and transforming those bland, woven collars into works of wearable art. While this technique may look difficult, this Easy and Simple Hack will give your shirt collar a refresh and will transform your collar in less than 1 hour!
Before starting, make sure you have the following tools:
- Buttonhole stitch and presser foot that can sew a ½” buttonhole
- Fabric tube turners
- Sharp seam ripper
- Sharp snipper scissors to cut open buttonholes
- Measuring tape
- Straight pins
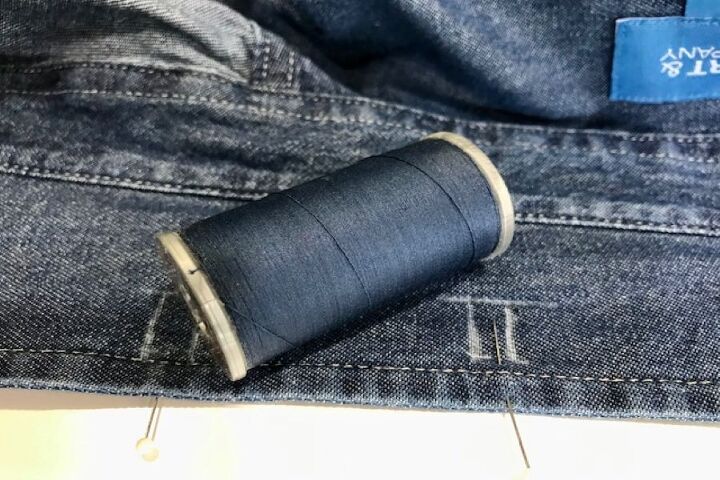
- General utility sewing thread that closely matches the color of your collar fabric
- Tailors chalk or disappearing ink fabric marker
Step 1: Press or iron your shirt collar
Make sure you remove all wrinkles. It is very important that you have a smooth, even surface for buttonhole marking.
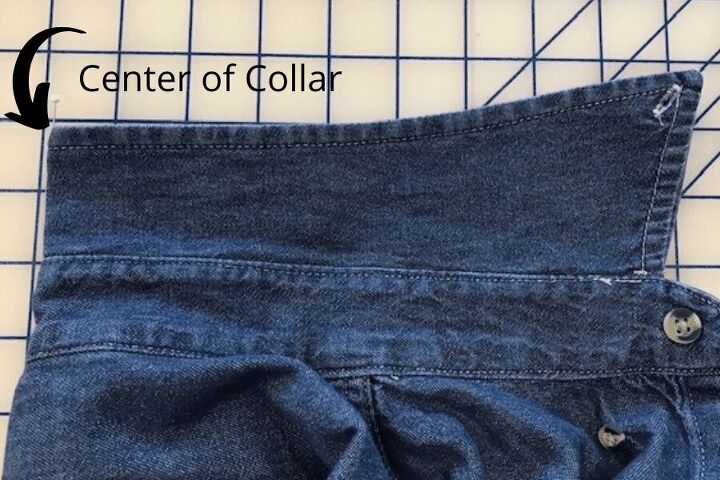
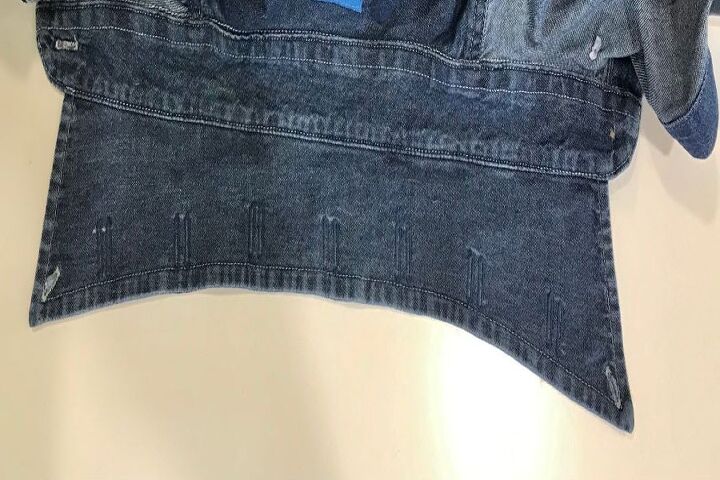
Step 2: Divide your collar into 8 equal parts
To begin, fold your shirt collar in half. Line up the collar points and identify the center point. Place a straight pin at this point. Make sure the pin is secure.
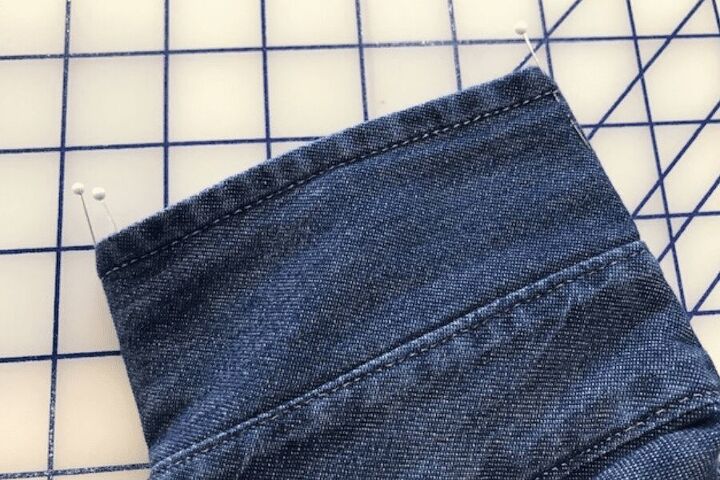
Next, carefully fold the shirt collar in half again. (See photo) This fold will divide the collar into 4 sections. Place pins at these 2 new folds. Unfold the collar and check your measurements. If your 4 sections are not equal, adjust the pins, as necessary. It is important to maintain the symmetry.
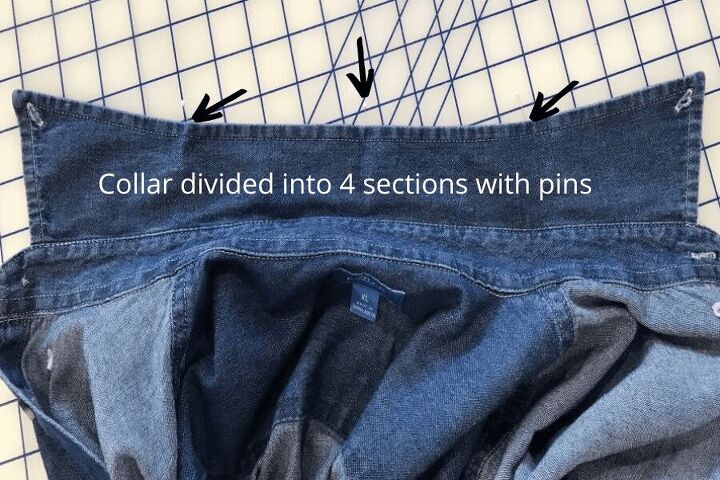
Once these sections are marked, you will need to divide the sections in half again. This step is not difficult. Simply measure each section and divide in half. Mark the division line with a pin.
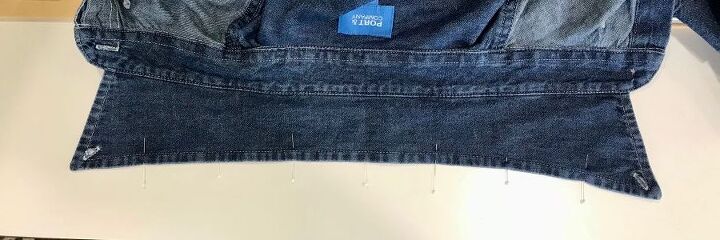
When finished, your collar should now be divided into 8 equal parts. Check your measurements, to ensure that everything is evenly divided. Once you are happy with the numbers, you can proceed to the next step.
Step 3: Mark your buttonholes
This may seem like a difficult step, but it isn’t. Just take your time and follow the directions. With your tailor’s chalk, place a vertical line, 1/8” to the left and right of each pin. You can start from either side, just continue moving in the same direction. Due to the thickness of the chalk, your marks won’t be exactly 1/8” away from the pin. They may be slightly further away. Just try to have ¼” to 3/8” distance between the chalk marks. Make sure that this distance is the same for all the vertical marks.
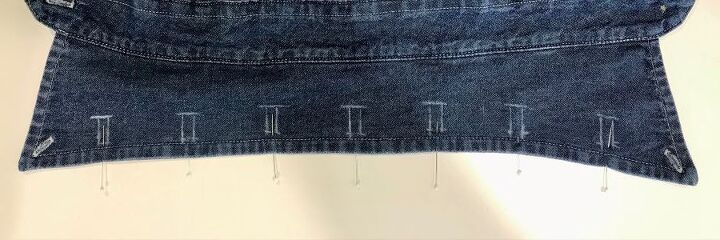
Once you have marked the vertical lines beside the 7 pins, you will now mark the lower horizontal line for the bottom of your buttonholes. The bottom of my buttonholes is 1/8” from the decorative straight stitch on my collar. This means that the bottom of my buttonholes is 3/8” from the collar edge. This was a good distance for me and worked well. Draw a horizontal line at this measurement. This will be the bottom of your buttonhole. Once you have the lower line marked, it’s time to mark the buttonhole top. To do this, measure up ½” from the lower line and place a horizontal mark with your tailor’s chalk.
Once all lines are marked, you can remove the pins.
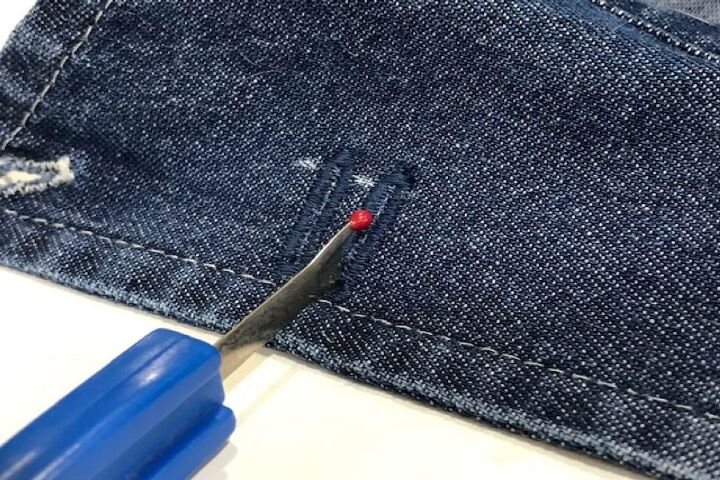
Step 4: Sew your buttonholes
At each chalk mark, you will sew a buttonhole. Follow your sewing machine’s directions for creating buttonholes. Some machines start at the bottom of a buttonhole, others start at the top. It’s important to know which way your machine will sew the buttonhole before starting.
Take time to ensure that your buttonholes start and stop as closely as possible at the marked start/stop points.
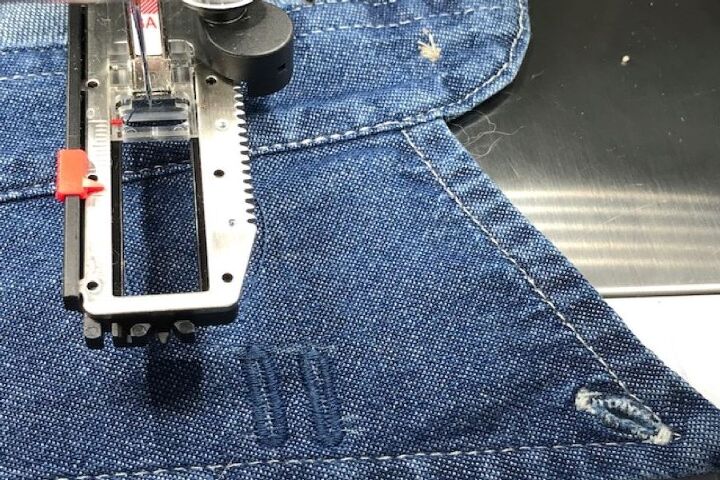
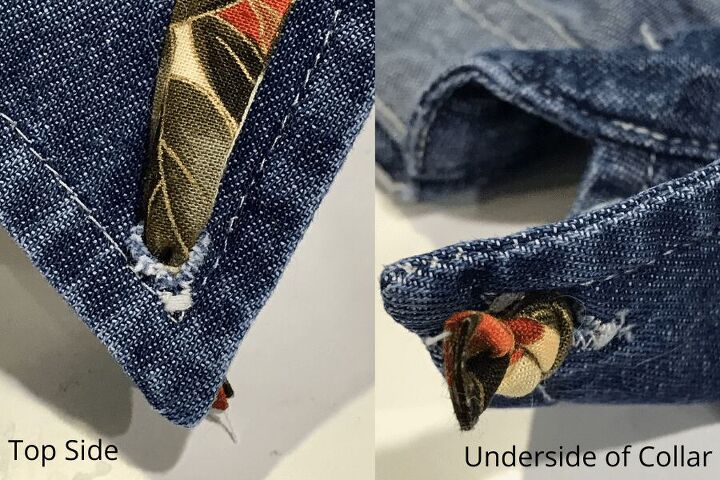
Once you have the buttonholes completed, carefully cut them open. (I like to start them with a sharp seam ripper and then switch to my scissors.) Try not to cut your buttonhole threads. If you do accidentally cut them, you can use a tight zig zag or satin stitch and sew over the problem area.
Once you have all the buttonholes finished, set aside your shirt.
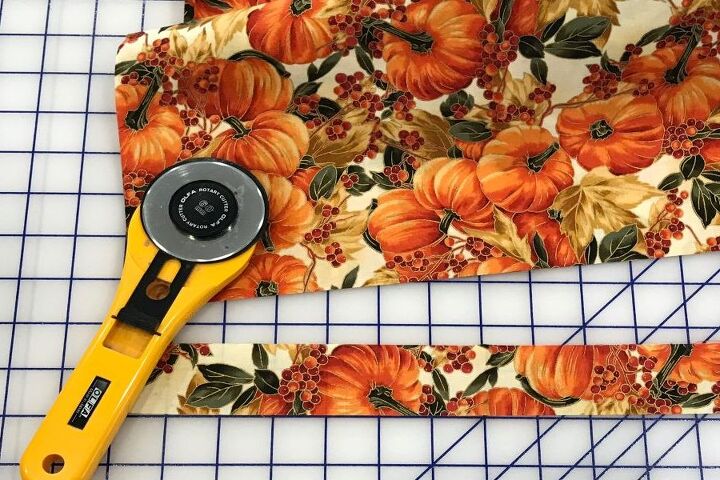
Step 5: Making your fabric trim
For this step you have a couple of options.
Option 1: Cotton fabric strip
Cut a 1 ½” wide strip of printed cotton that measures the length of your collar + 6 inches. (Example: my sample collar measures 19” from point to point. I cut a strip of cotton fabric 25” long. Your strip length will vary depending on the measurement of your collar.)
With right sides together, sew a seam ¼” from the raw edge. Backstitch at the beginning and end of your seam.
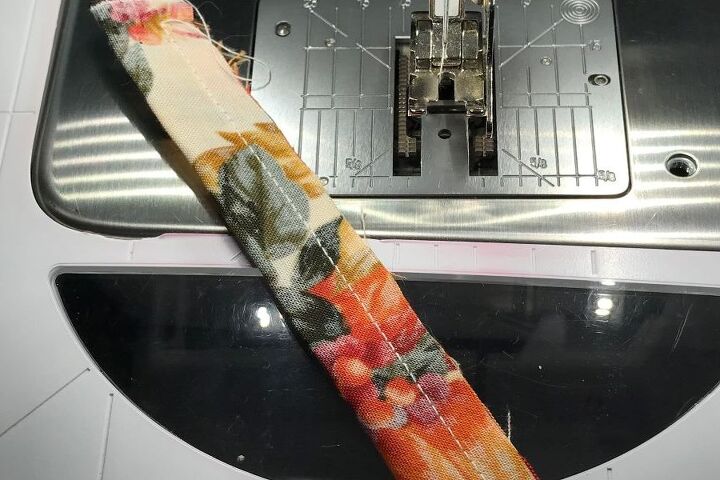
Using fast turn fabric tubes, turn your fabric right side out.
Press seam flat.
Option 2: Ribbon
You will need a ribbon that is 3/8” to ½” wide. Cut a strip that is the length of your shirt collar + 6 inches. For my example, I would need a piece that is 25” long.
Step 6: Weave trim thru the buttonholes
I used a button-down collar for my project. If your collar does not have that feature, you can add buttonholes at the collar points.
TIP: Before we start this step, place a safety pin, at the beginning of your trim. It will make weaving MUCH easier!
Starting at EITHER side, begin by pulling the trim UP thru one of the original buttonholes. Next, weave the trim/ribbon thru the first set of buttonholes. Once you have the ribbon thru them, move to the next set of buttonholes. Weave thru them. Continue this process until you reach the other side of the collar and finish weaving by pushing your trim down thru the other original buttonhole to the underside of the collar.
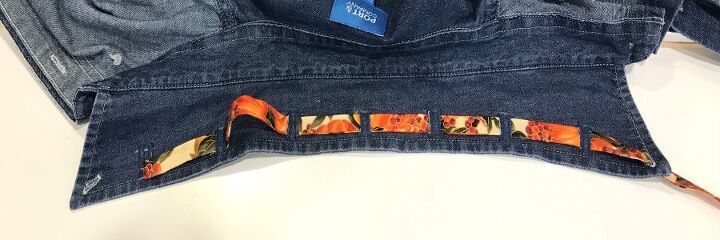
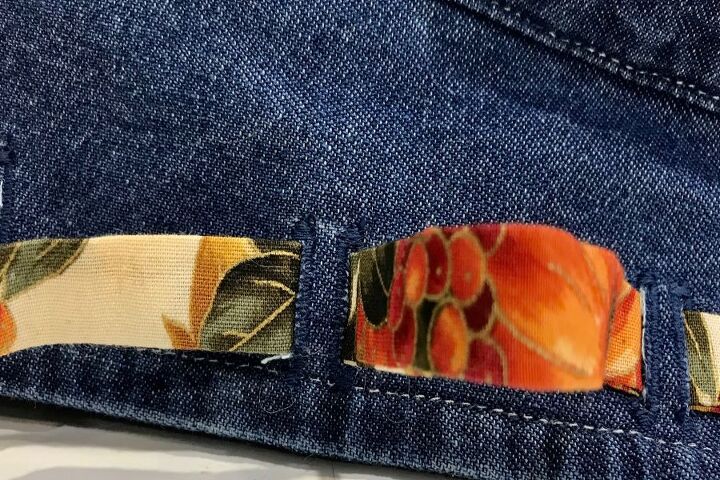
If your weaving puckered the collar, it’s time to smooth it out. Leave fabric/ribbon tails at each end.
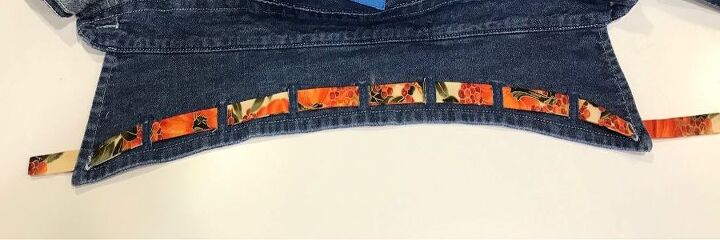
Tie a knot at the end of the trim that does NOT have the safety pin. Trim the excess fabric/ribbon close to the knot.
Smooth out your trim again making sure that the knot is holding the trim in place.
Remove the safety pin from the other side and tie a knot at that end. Take your time and place the knot so it doesn’t pucker your collar. Once you are satisfied with the knot placement, trim the excess.
NOTE: If you want to make additional trim strips so that you can switch out your trim for different holidays, you can use buttons instead of knots to secure your trim strips in place.
Wasn’t that easy? Now you can wear your improved shirt proudly and enjoy all the compliments you will receive!
If this tutorial has helped you, please consider sharing it with others on social media. Also, be sure to sign up for The Creative Sewist email list so we can send you helpful sewing advice.
If you have a question or tutorial suggestion, please leave it in the comments below. We would love to hear from you!
AdviceAlterationsbob mackie wearable artFashionHacksHow toSewingsewing projectssewing tutorialsSewist

← Previous
Shirt Tail Too Long? Try This Simple and Easy Hemming Technique

Next →
How to Easily Create Stylish Pant Cuffs with a Simple Sewing Hack
Subscribe Now
Interesting Posts

The author may collect a small share of sales from the links on this page.


Comments
Join the conversation