Refashion: Cutout Striped Shirt
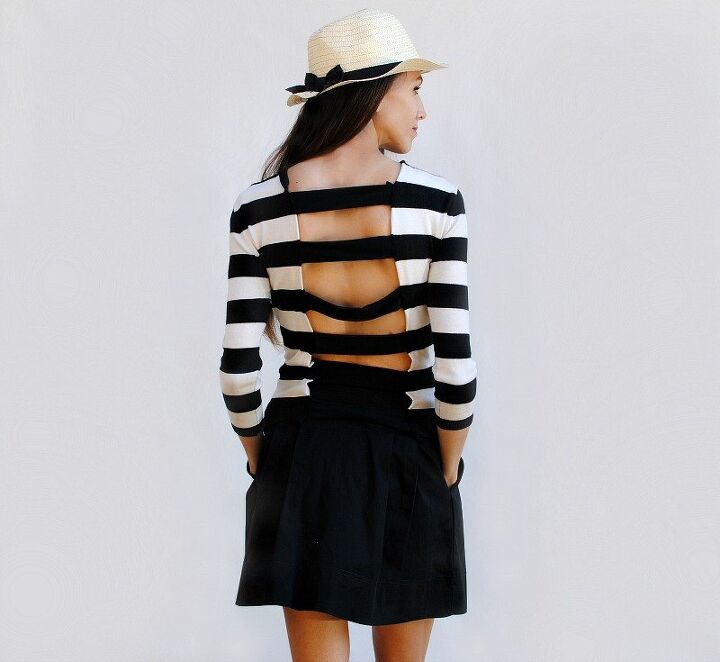
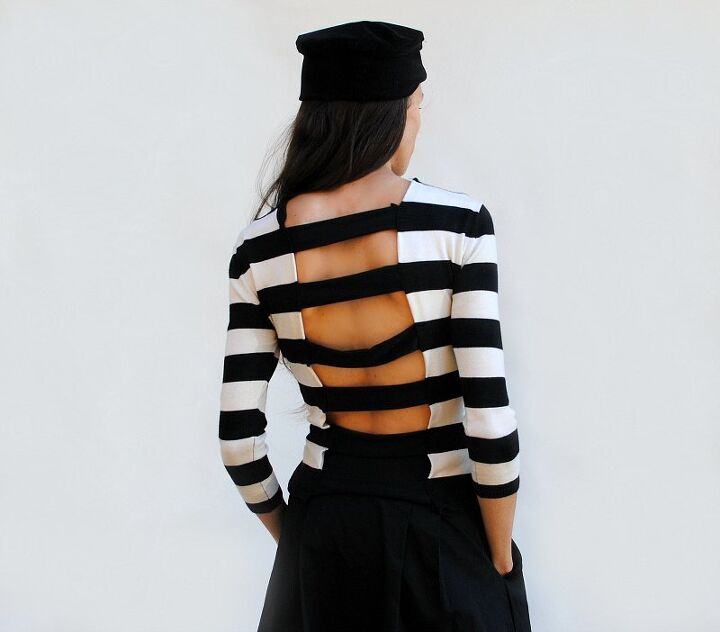

I had this striped French top for awhile now and just couldn't seem to get rid of it. I loved the wide stripes, boatneck collar, and 3/4 sleeves. The problem wasn't the overall look but it was too snug to wear comfortable. Instead of getting rid of it I wanted to refashion it into something I could wear. At first I thought a cardigan but I have plenty of those. I eventually came up with this interesting cut out detail on the back using stretchy strips of knit. It added that extra width I needed and of course a cool design element.
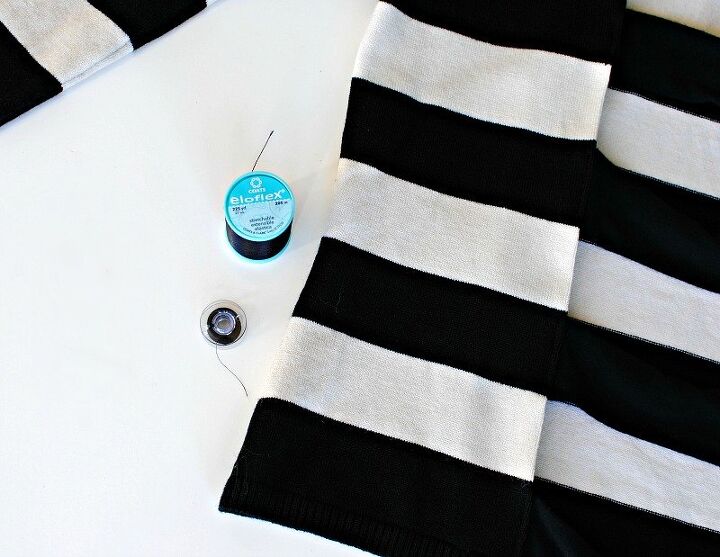
The key to getting this design to work well is Coats Eloflex Thread. Eloflex is a stretchable thread that you use for both hems and seams. It won't pop when stretched because it expands with the fabric. It's great for knit projects like this as well as athleisure, cosplay costumes, swim suits, elastic waistbands, etc. It gave this top the extra stretch I needed to make sure I wasn't hearing that pop! of threads when putting the knit top on.
Get the details below on how to make your own:

Supplies:
- Coats Eloflex Thread
- Snug Top (doesn't have to be stripes)
- Brother Sewing Machine
- Dritz Looper Turner
- General sewing supplies
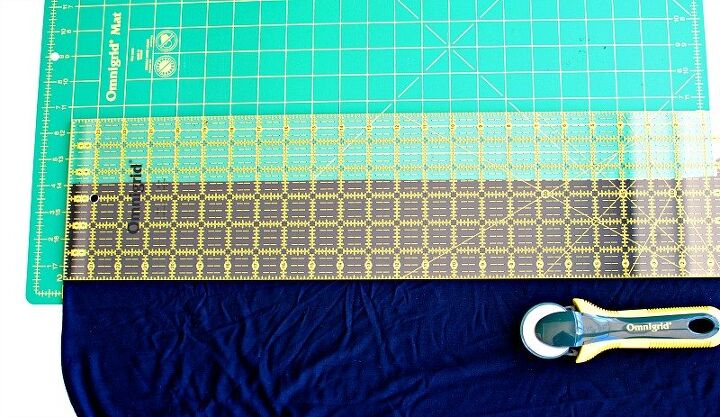
- General measuring and cutting tools: Omnigrid
- 1/4yd. knit (rib knit works the best)
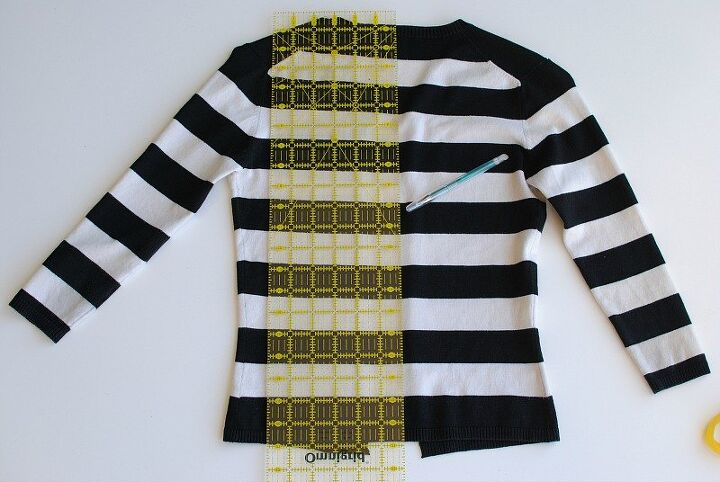
Find the midpoint of the back and mark a line or press a fold.
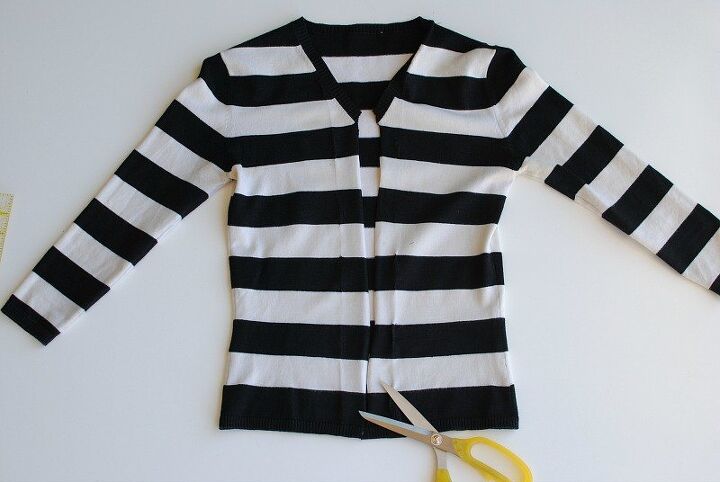
Cut open.
Press the newly cut center front edges over 1/2" toward the wrong side of the fabric.
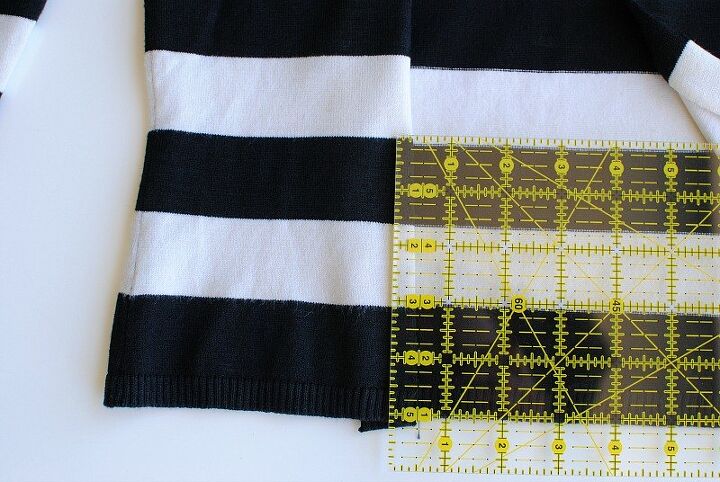
Measure the width of the stripes of your top.
Take that measurement and x 2 + 1/2" for seam allowance. For example mine were 1.5" stripes = 3.5".
Use that measurement as your width for each strip you cut for the back. Tip: Use a 4-way stretch knit. Otherwise makes sure the stretch is lateral for each strip. Now we have the width, the length is trickier. I suggest using a garment that fits how you would want this top to fit and place it underneath inside the top. Then see how much length you'll need for the strips and add 2" or so. I'd start with a length that is longer than you need and before sewing, fit the top on and adjust from there. Mine were 8"-10" in length.
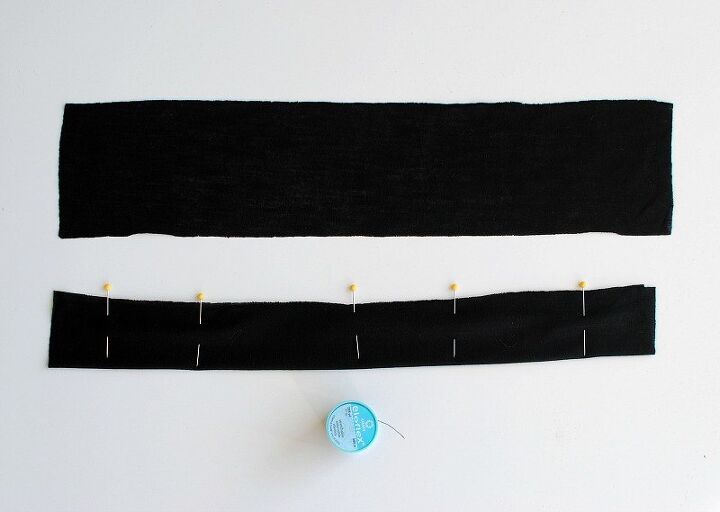
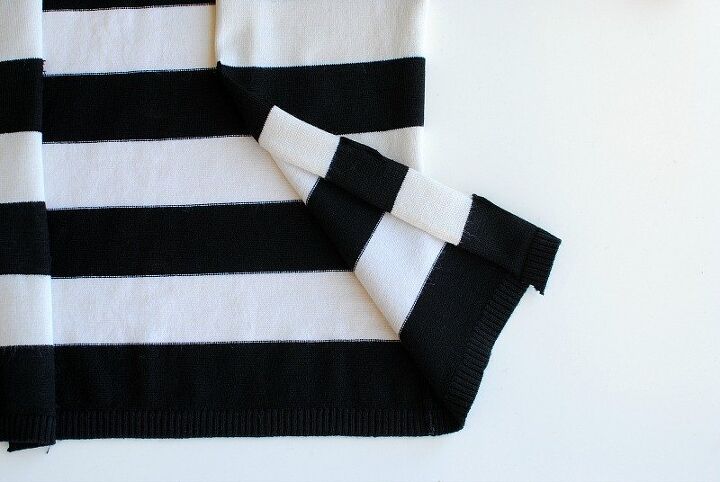
Fold the strips in half so right sides are together and raw edges are aligned, pin. This is where the Coats Eloflex Thread comes in. You will use the Eloflex in your bobbin thread as well. No zig zag stitch necessary!
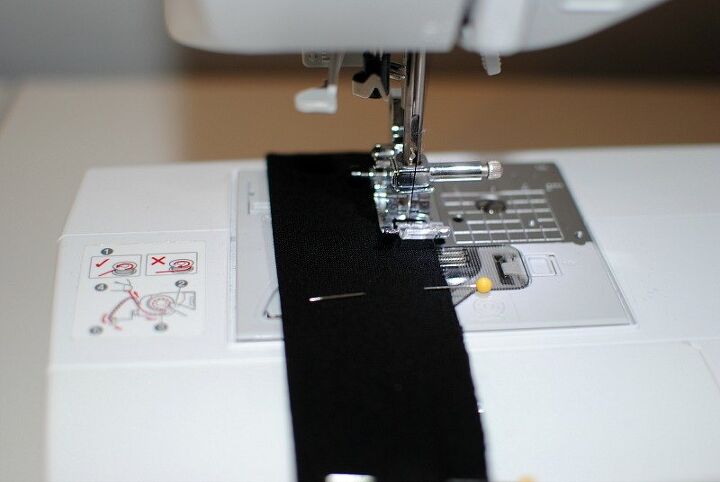
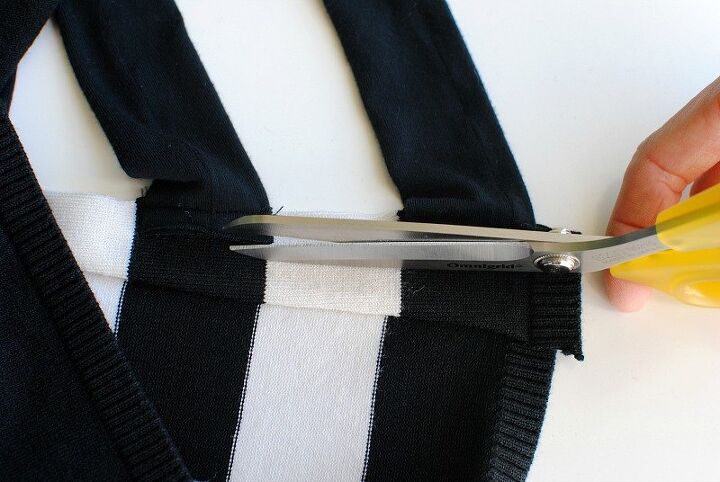
Sew 1/4" seam allowance along the raw edge.

Use a loop turner or safety pin to flip right sides out.
Press so the seams lay in the center back.
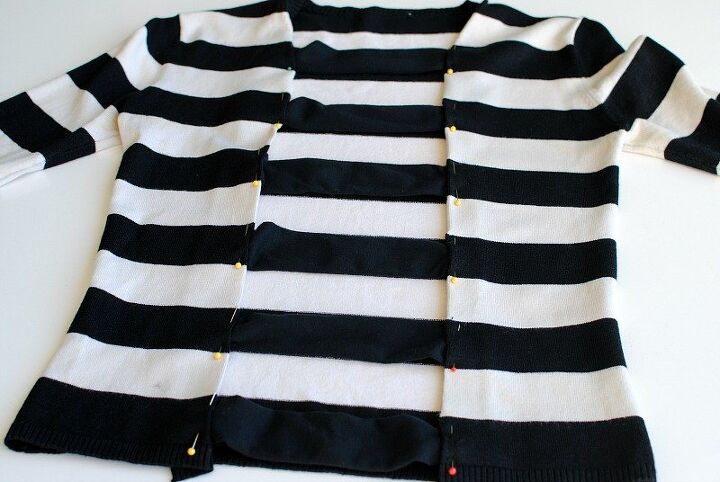
Pin the strips on and before sewing try the top on and adjust if need be. If it fits well, move the pins so they are horizontal now (shown below).
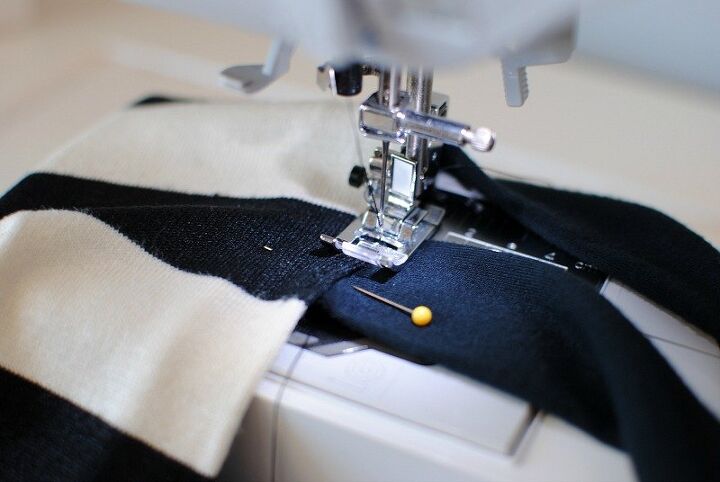
Top stitch each strip into place. It was easiest to start from the bottom and sew up. I did not do one continuous straight stitch from top to bottom. I only sewed along the black strips and skipped over the white. Then I topstitch the white edge to secure the hem as I really wanted that contrast.
Remove any additional fabric/seam allowance from the wrong side.
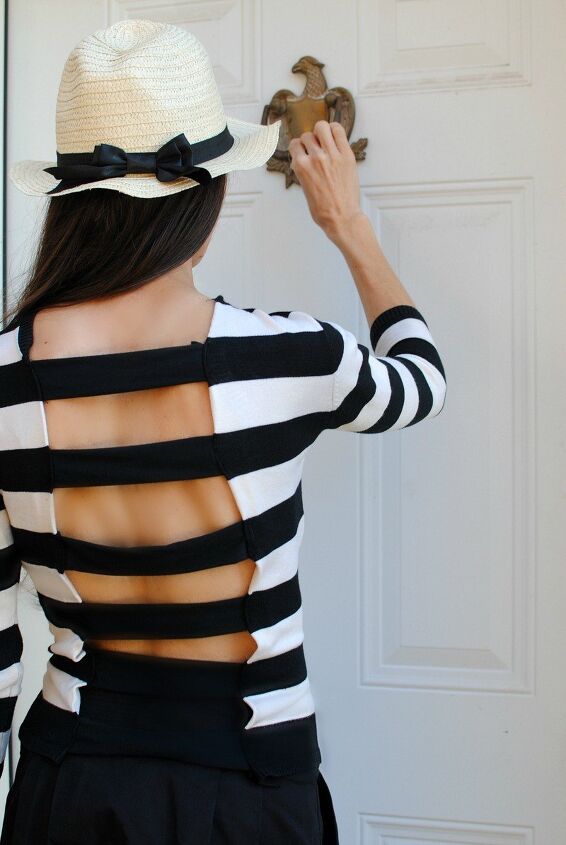
That's all to create such an interesting top. This is one of my most loved DIY's to this day. Try this with other basic tops as well. I want a grey top with a striped set of strips next time. Even try twisting or making the strips into bows could be a cool look as well.
*****In collaboration with Make it COATS****
The author may collect a small share of sales from the links on this page.


Comments
Join the conversation
I realy like this . thanks
Hey what kind of thread do you use on spandex please thanks .