Starry 4th of July Tie Dye T-Shirts
This 4th of July Tie Dye tutorial is sponsored by Tulip. All opinions are ours alone.
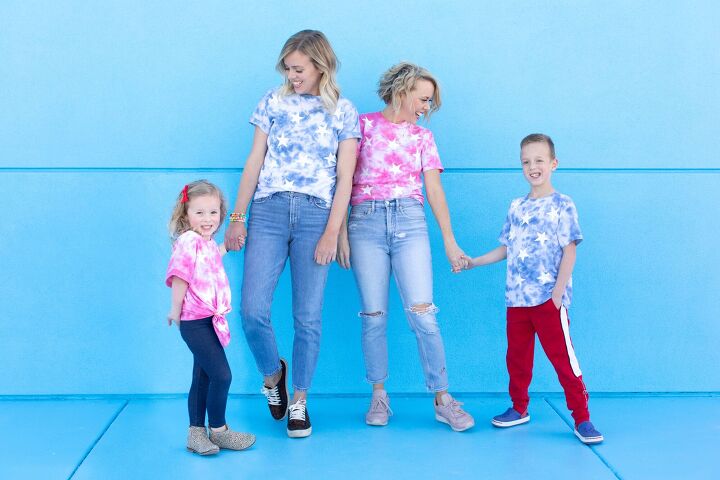
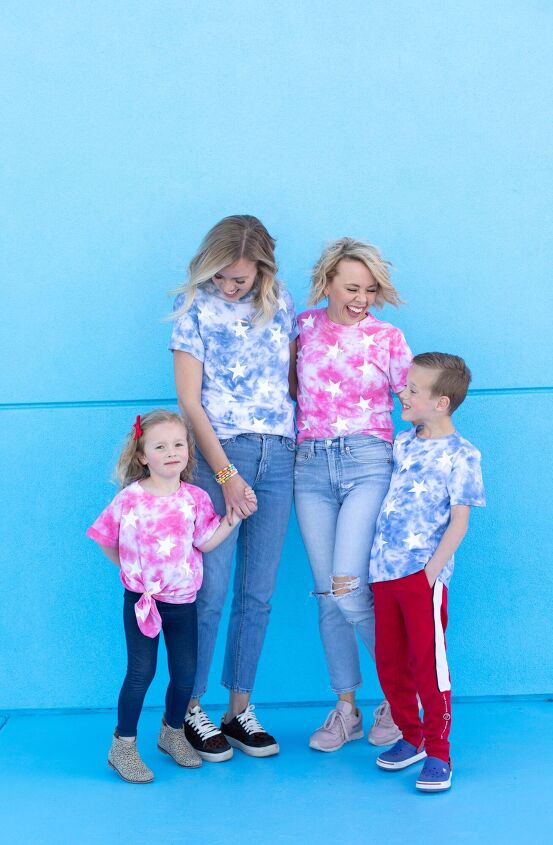
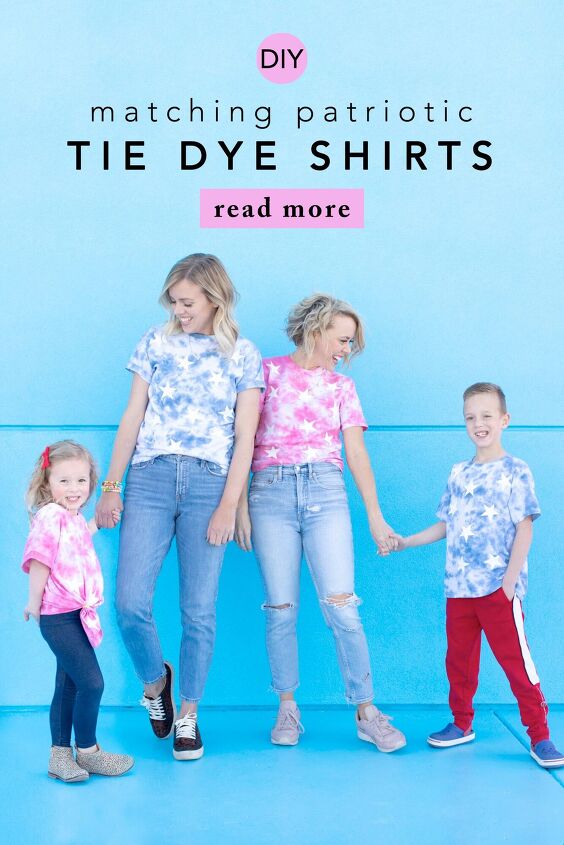
Now that it is May summer is just around the corner which means there are plenty of red, white, and blue holidays are on the horizon! Last year we made these firecracker tie dye tees for the 4th of July and this year we are trying out a different method for getting festive on the fourth–we made matching starry 4th of July Tie Dye T-shirts!
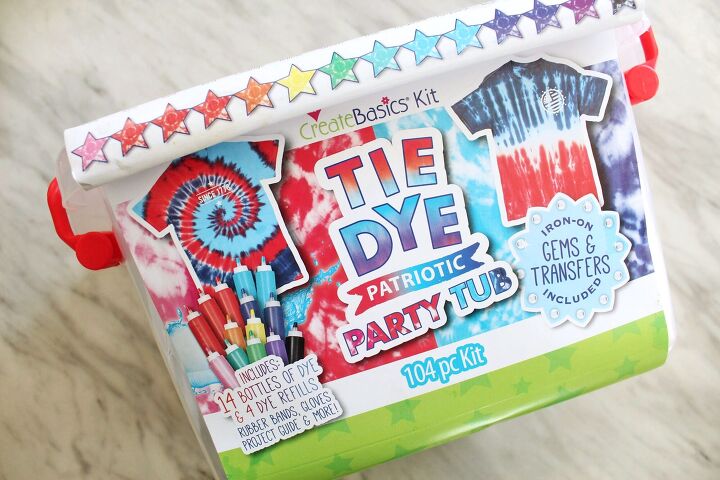
These 4th of July Tie Dye T-shirts are perfect for making with a group because the binding and application methods are simple and you only need this patriotic dye kit from Walmart to get dyeing! Then, to make the shirts even more festive, we cut stars from white heat transfer vinyl and ironed them over the tie dye pattern. The result are a bunch of fun and unique tees for the 4th of July made in a snap.
Here’s what you need to make your own:
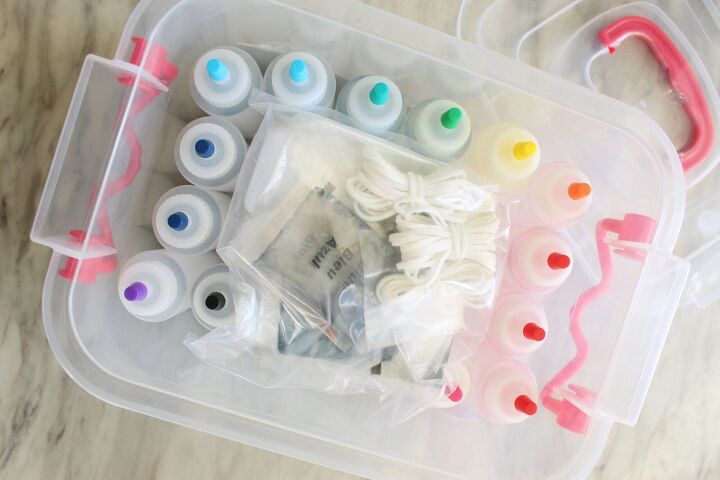
Supplies needed to make 4th of July Tie Dye T-Shirts
How to make 4th of July Tie Dye T-Shirts
Step 1: Wet the shirt to prepare for dyeing, wringing it out so that it is not dripping. Fill the one-step tie dye bottle with water according to package directions and set aside.
Step 2: Prepare a dyeing surface. I usually work in my sink because it is stainless steel, but you could work in a large dye-safe container or on a covered surface.
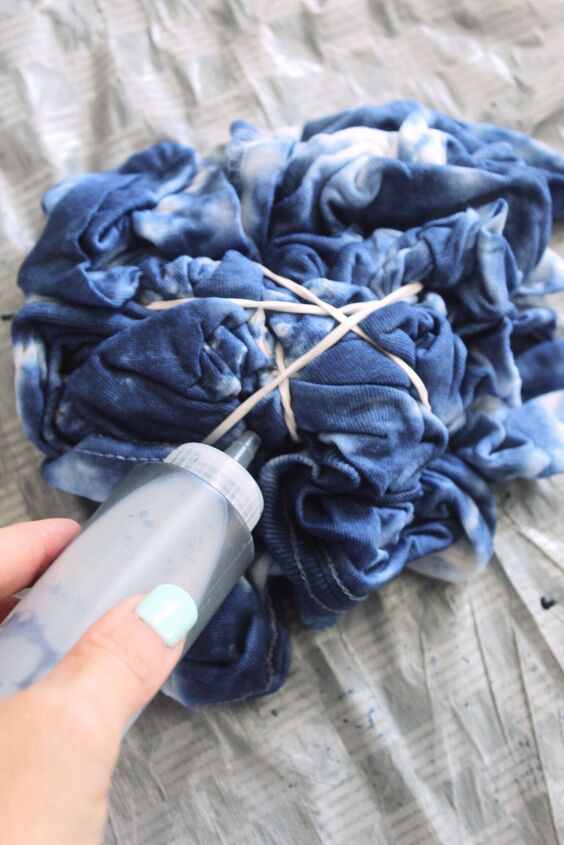
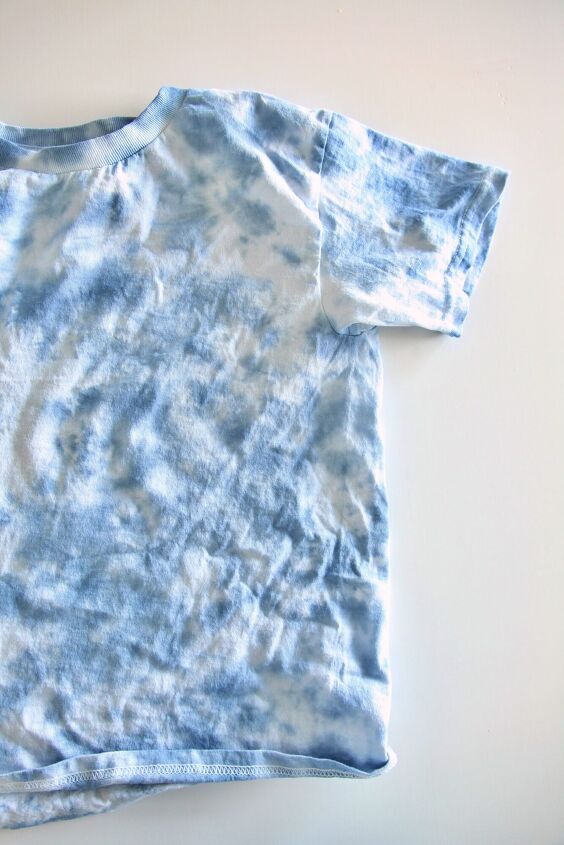
Step 3: Bind your shirt using the bunch technique, which is to simply bunch your shirt together, then bind with rubber bands.
Step 4: Place your bound fabric on the surface you prepared for dyeing and completely saturate the bundle with dye on one side. Then, flip it over and saturate the other side.
Step 5: Once the bundle of fabric has been completely covered in dye, wrap it in plastic wrap to keep it wet while it sets. Let set for 8-24 hours, or according to your dye package directions.
Step 6: Once the dye has set, remove the bundle from the plastic wrap and carefully remove the rubber bands.
Step 7: Rinse the tee until the water runs clear, then wash and dry it by itself.
Step 8: Cut a star design out of vinyl using your craft cutter (If you have never done this before, visit our tutorial here.) and weed the excess.
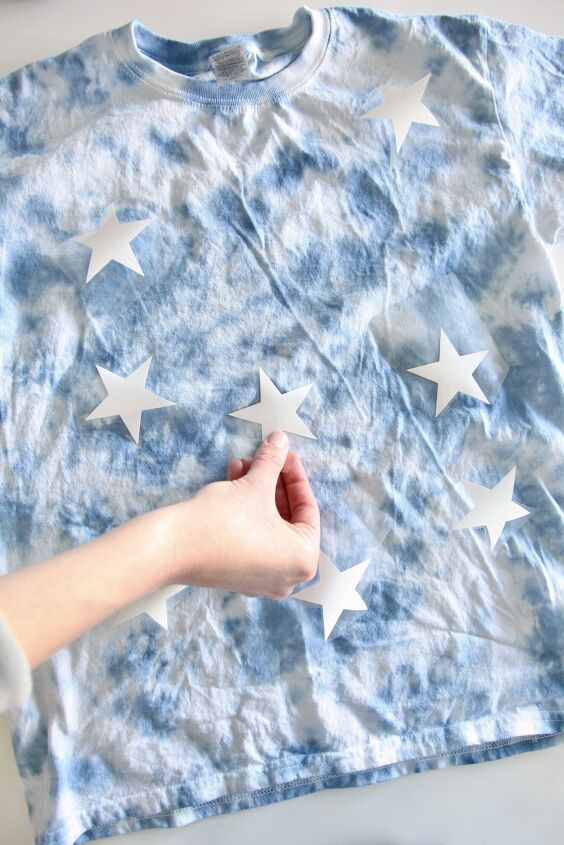
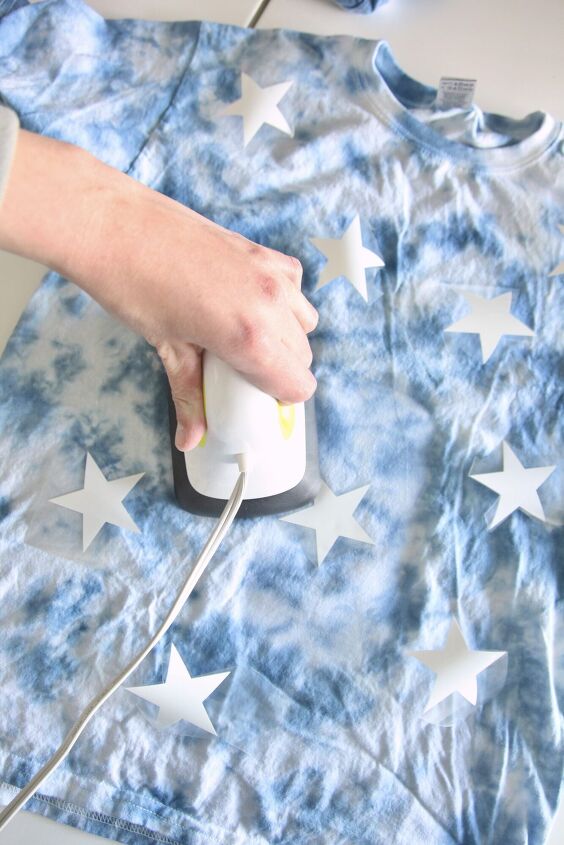
Step 9: Place the starts on your shirt where desired (backing-side up) and iron the design to the shirt using a hot, dry iron or heat press, working in 30 second increments until they have adhered completely. Then, remove the backing from each star.

That’s it! Now all you need are some potato salad and sparklers and you’re ready to party!

Does your family/friends make matching shirts for the 4th? We want to hear about your traditions!

Happy crafting!
-Liz
The author may collect a small share of sales from the links on this page.


Comments
Join the conversation
I will let you know Thanks for sharing.
have a Happy 4th of July.