Quilt to Sapporo Coat Refashion
Say whaaaaa? Yep, you read that right. This post is about how I turned a second hand quilt from Savers into a coat.
You know when you're on instagram and you can see that for some reason everyone seems to be loving on the same thing. Well, that's what was happening with the Sapporo Coat from Papercut Patterns. It's like every single person I was following was either making this coat or talking about making it. So I did what any good self-respecting person would do, gave into peer pressure and bought the pattern.
Must have been in my stash for about 2 months when I had a light bulb moment: I should make this coat out of thrifted materials! Why? Because we were budgeting hard, and I didn't really have enough in the kitty to go splurge on the fabrics I was eyeing, oh, and because I love thrifting and hadn't done so in a while. So, did I make the hubby go out on a cold rainy night to find the thrifted materials I needed. Yes. Yes, I did. Were we successful? Yasssssssss. I wouldn't be doing this post if we weren't.
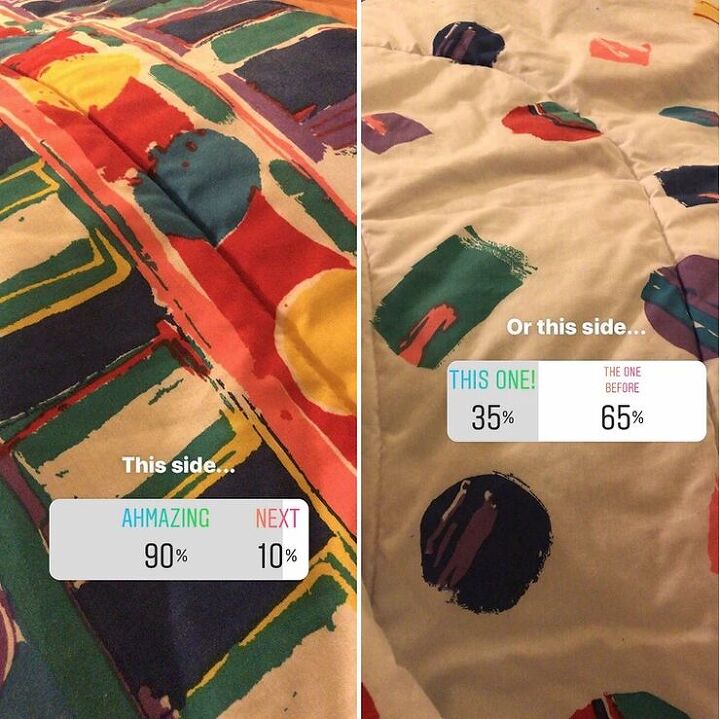
This quilt was amazing on both sides. So I put it up for a vote on instagram to see what side was more popular.
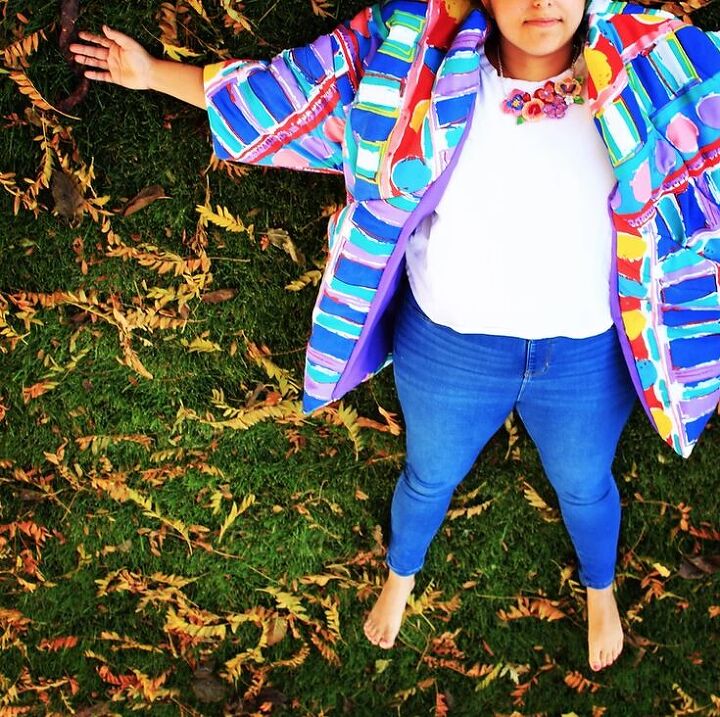
I found the quilt at our local Savers. It was crazy cool and must have never been used. It looked brand new, and didn't have that usual secondhand-smells-like-your-grandma's-old-clothes smell. So, I spent a whopping $9.25, brought it home, stuck it in the wash and started cutting out my Sapporo Pattern pieces. And, yes, I'm one of those people that doesn't trace patterns. Ain't nobody got time for that. Based on my measurements, and massive boobs, I cut out the Large/XL size. NOTE: I enjoy oversized clothing, so I don't stress too much when things are "too big". So I usually opt for cutting out the larger size for myself if i'm in-between sizes.
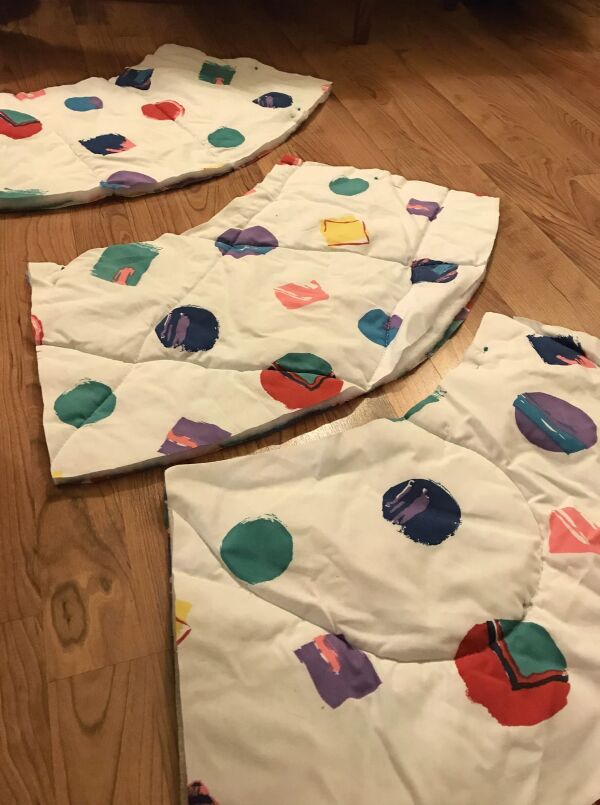
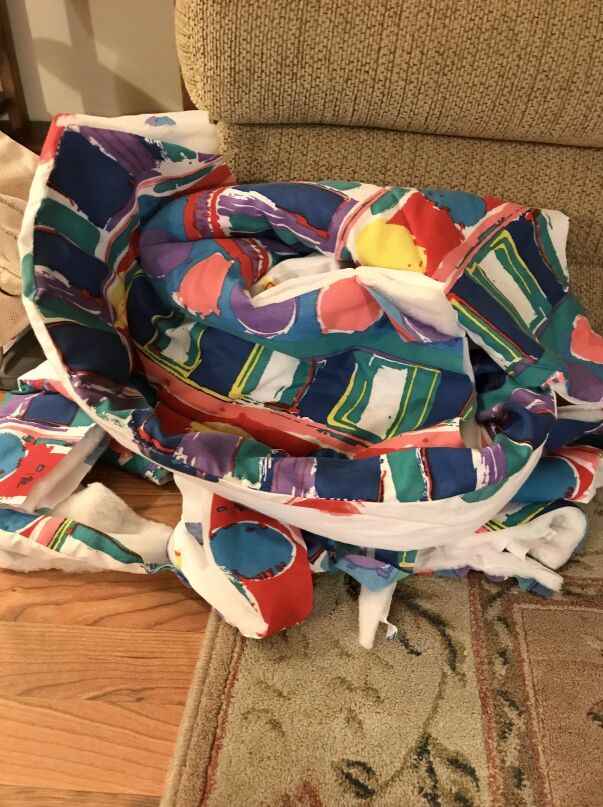
Once the quilt was dry, I got cutting, and man was that an arm workout and a half. I mean, I have mum arms, I can carry 2 hungry kids and make chicken nuggets at the same time, and this was hurting me. Finally, I got it all cut (see pics below) and I barely had any leftovers. Talk about cutting it close...get it...cutting it close. Ok, anywho, after cutting it out I naively told myself, "Well this hasn't taken me long at all. I'll just pin it all together, get a good night's sleep, and get started tomorrow." Nope. Once I pinned it all I immediately started sewing straight away like a mad woman. And let me tell you, so many swear words were involved in this process. I think they were sewn into the coat. Luckily, the kids were asleep.
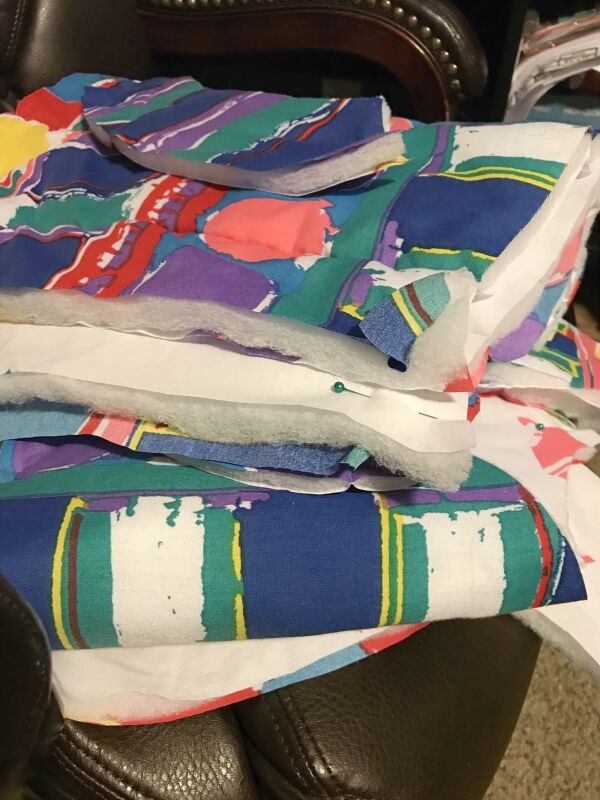
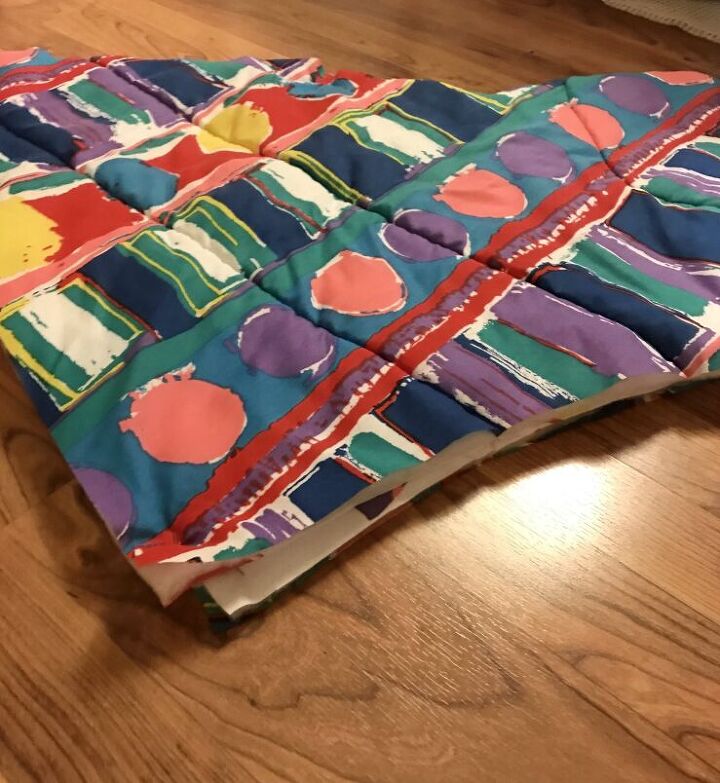
Feeding through a mutilated quilt through my little sewing machine is not my definition of fun. But, guess who completed the whole thing without lining anyway. This girl right here! Nuts, I know, but I was surprised by how fast of a sew up it was. Bear in mind, this is coming from the girl who had never made a single coat in her entire life up to this point. Another thing to be wary about with this pattern are the sleeves. If you're using crazy thick fabric like I did, maybe cut the second lot of sleeve pieces out of a thinner fabric. You're not going to see it at all. I should explain; the sleeve portion isn't lined because you cut out two pieces of the sleeves for each side and they go inside one another to create the sleeves. It does require a topstitch once you do this, but there was NO WAY that I was going to get the quilt through my machine to make that possible. Also my fabric was so thick that it didn't really need to stay in place, but I can see why it would be necessary with a thinner fabric.
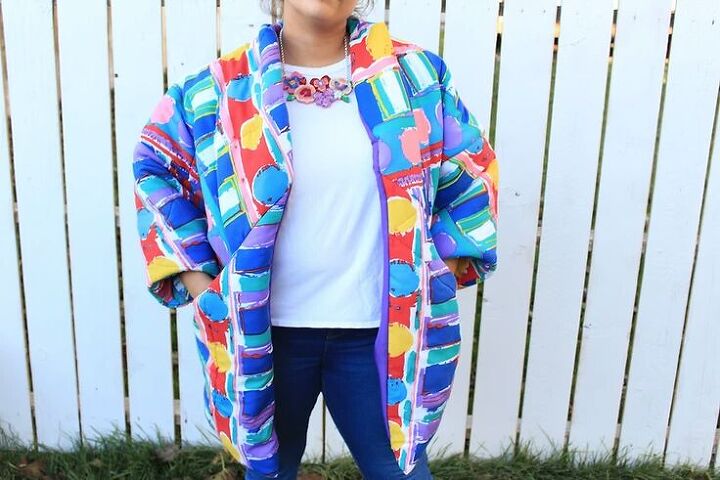
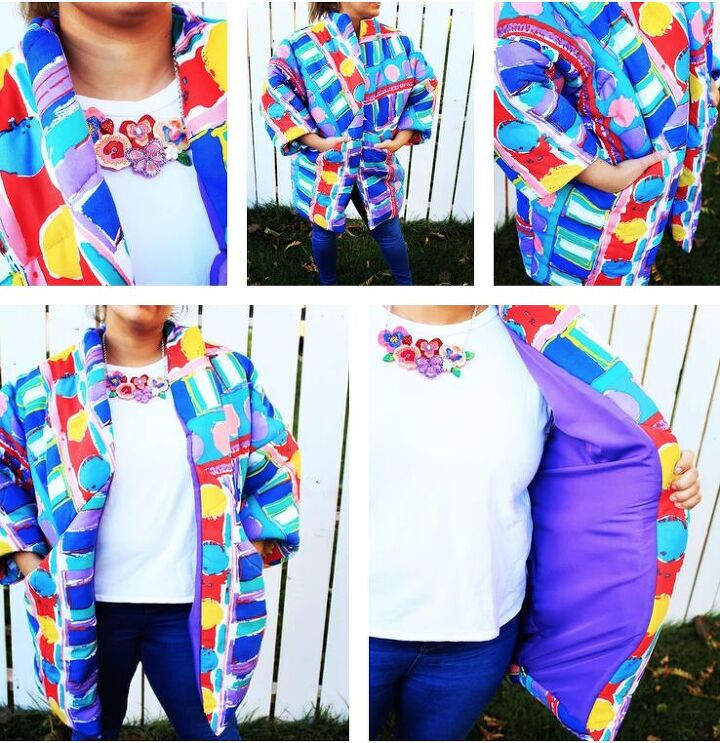
NEXT DAY...Today was the day to finish this thing off, the lining specifically. So I grabbed some lining from Joann since there was a crazy sale and it cost me $3 total for all the lining I needed. I put that all together and then began hand sewing it in, and presto, it was done. Less than a day total, and I had made this crazy coat out of a quilt. Needless to say, I was pretty impressed with myself which is rare because my extreme perfectionism usually makes me a take a couple of days to like what I've made. So, I posted it to Instagram and it went off. I didn't expect it, but I was so glad that everyone loved it like I did.
NOTE: The beautiful necklace I am wearing was a limited released from Mary Bobbin for Girtsquad. A magnificent group of Aussie makers that release limited edition pieces each year. Definitely worth a follow!
What do you think? Let me know below!
The author may collect a small share of sales from the links on this page.


Comments
Join the conversation
Isn’t this clever? Instead of cutting up material to make a quilt reverse the procedure and make a coat out of a quilt..there are some gorgeous inexpensive quilts to be had..make jackets for everyone..ha!
Omg this is amazing. You have inspired me!!! I need to re-learn how to sew. I would absolutely love this in my wardrobe! I sewed as a child with my grandmother and as a young adult because adult clothing in my size was hard to find. Now that the size zeros of the world have so many choices I lost the skill. Time to tackle it again!!! ♥️