How to DIY a Cute and Cozy Cropped Puffer Vest

I found a pair of insulated curtains in my local thrift store and decided this was a good opportunity to do some fabric upcycling and make them into a cropped puffer vest.
To trace the pattern, I used an oversized hoodie, leaving space for the filling and still have it be roomy enough. My hoodie has a dropped shoulder, so I marked on it where I wanted the shoulder of the vest to finish.
Tools and materials:
- Insulated fabric
- Polyfill
- Batting (optional)
- Lining fabric
- Elastic cord
- Plastic cord stops
- Jacket zipper
- Eyelets
- Hole punch
- Oversized hoodie as a pattern
- Paper for pattern
- Pencil
- Scissors
- Pins
- Sewing machine
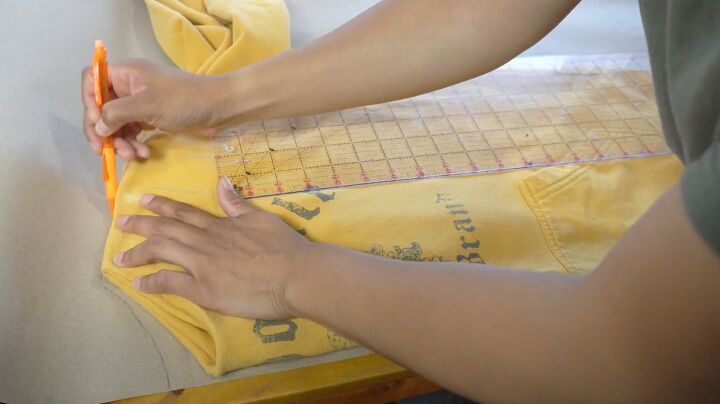
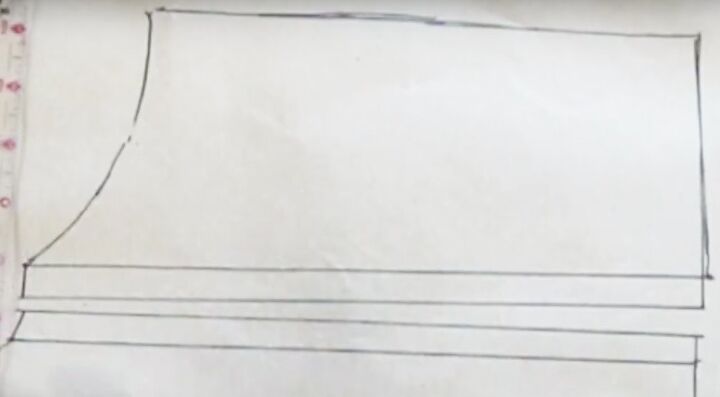
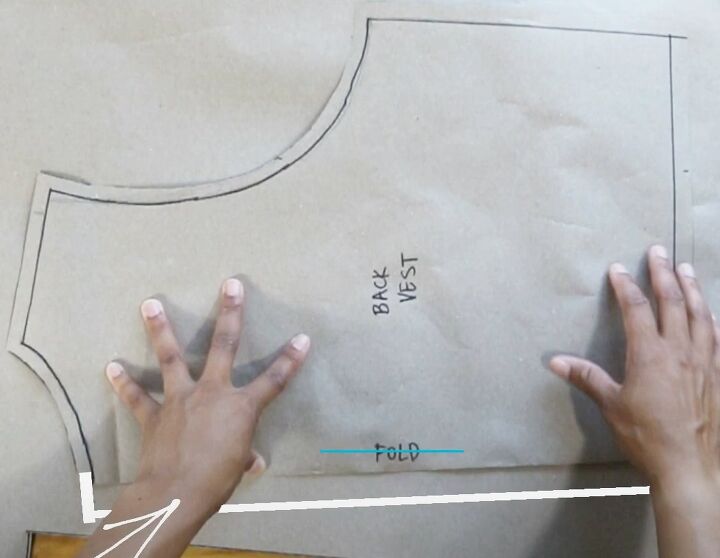
1. Trace the back pattern
Fold the hoodie in half and tuck the hood into the neck. Trace around the hoodie, ending the shoulder at the chalk mark.
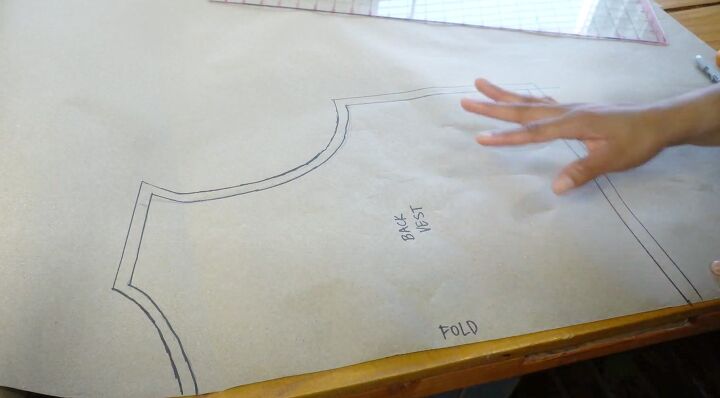
Mark the length where you want it and redraw the armhole to the new shoulder line if necessary.
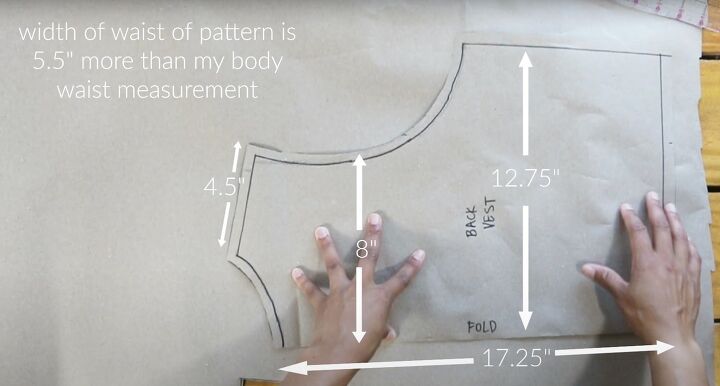
Add 1/2 inch seam allowance, and cut out the back vest pattern.
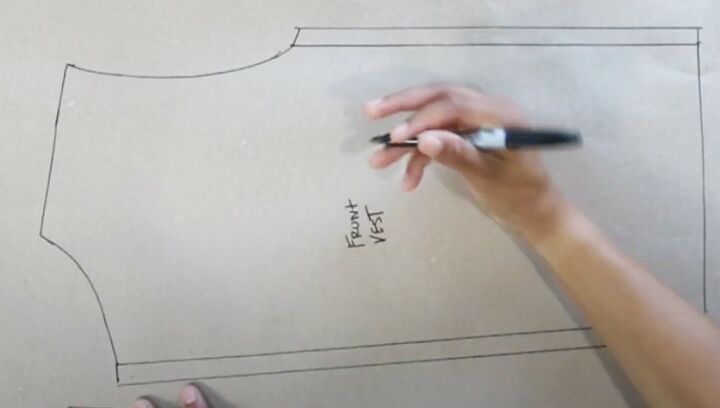
2. Trace the front pattern
I added side pockets to the front, so I made the pattern in two pieces.
Mark where you want to pocket to be and trace around the back pattern to that point. Close the line and add 1/2 inch seam allowance to both sides.
Trace around the front again, from the marks to the side seam. Close both edges and add a seam allowance to the inner edge.
Cut out the two front pieces.
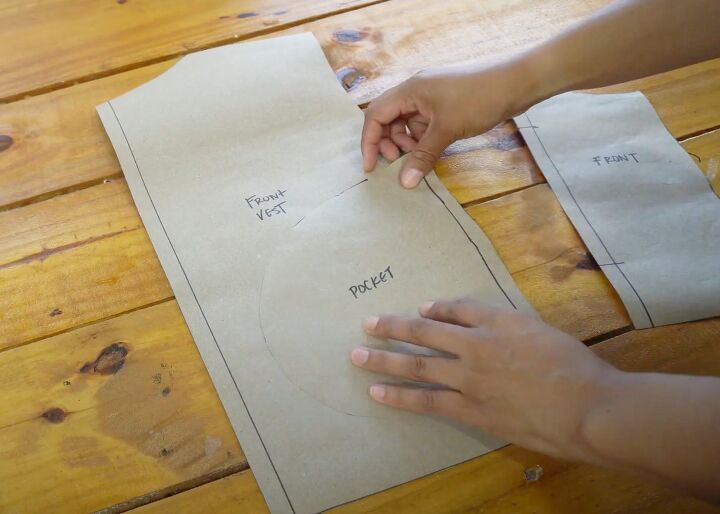
3. Make the pocket pattern
Draw a pocket shape using your hand as a size guide. Check that the pocket fits inside the main front vest.
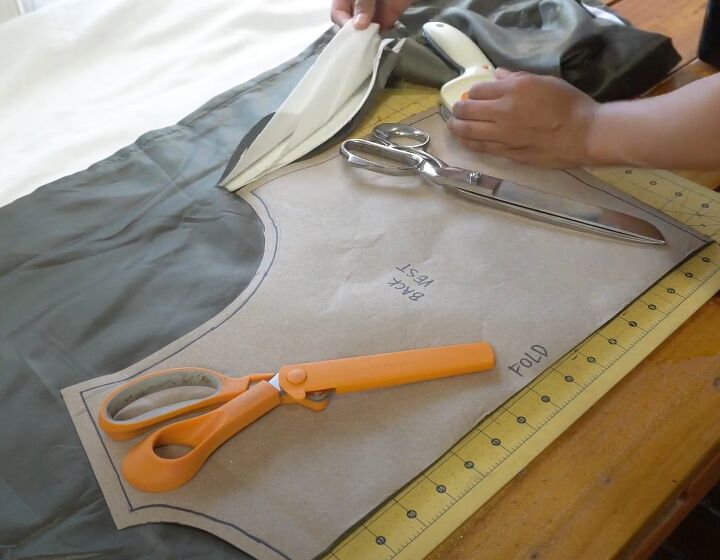
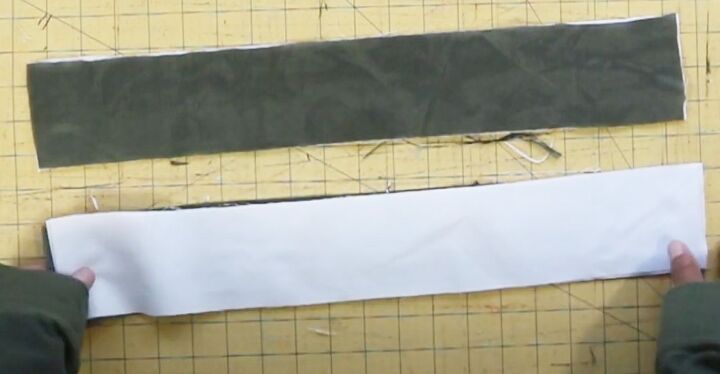
4. Cut fabric
Lay the back pattern on the fabric fold and cut around it. Cut two each of the front pieces and four pocket pieces.
The curtain I used had 3 layers - the main fabric, a thermal layer and a lining. I also added a layer of polyfill. If you want a more structured crop puffer vest, add a layer of batting as well.
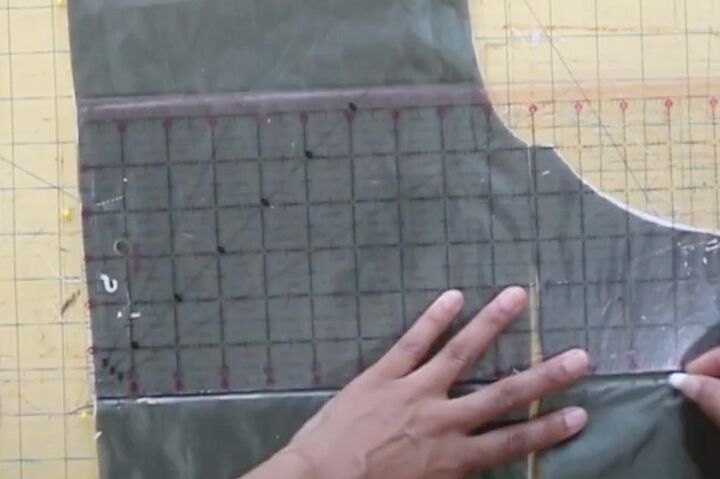
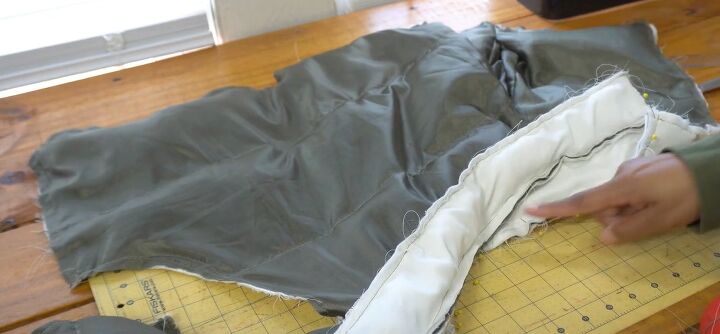
5. Add padding
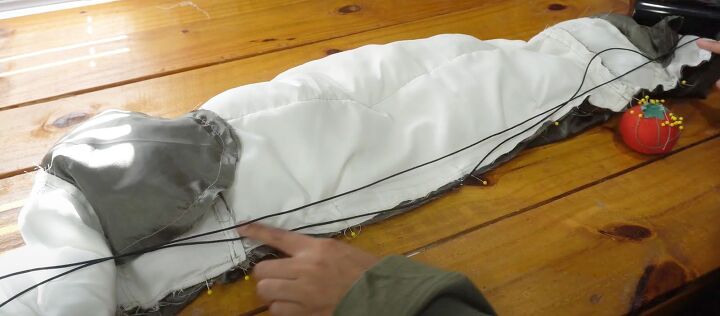
Mark horizontal lines 6 inches apart on the front and back pieces, making sure they line up.
Baste the layers together along 3 sides and stitch along the marked lines.
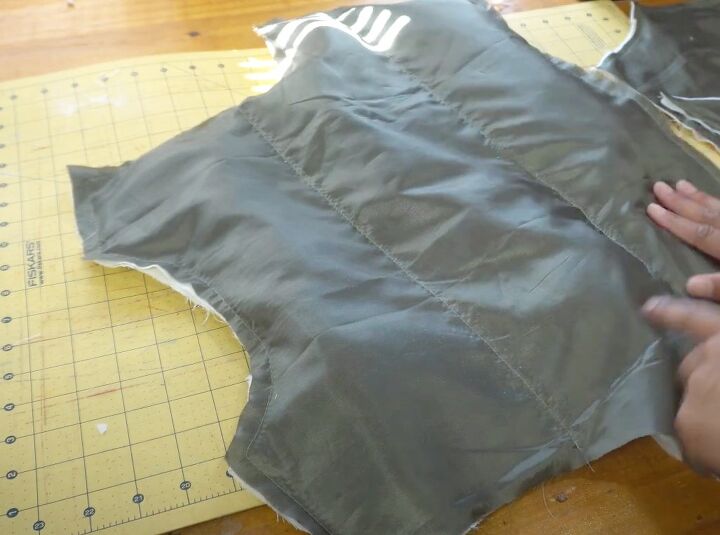
Fill the back and front panels with polyfill and stitch the open sides closed.
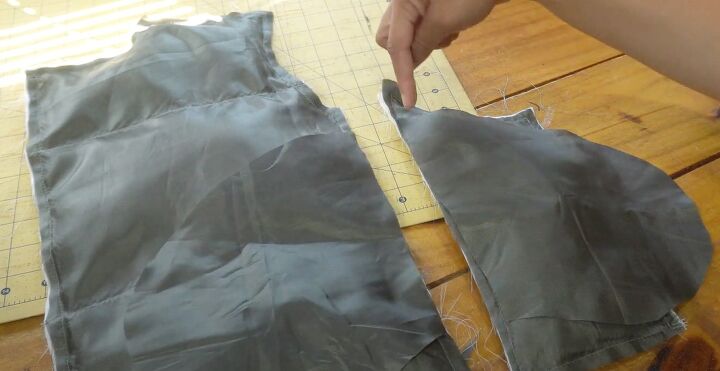
6. Make pockets
Sew one pocket piece to each of the front pieces, an equal distance from the top edge.

Lay the two front pieces on top of each other, right sides together, and stitch from the upper edge around the pocket bags to the lower edge.
7. Shoulder seams
Join the front pieces to the back at the shoulder seams, with right sides together.
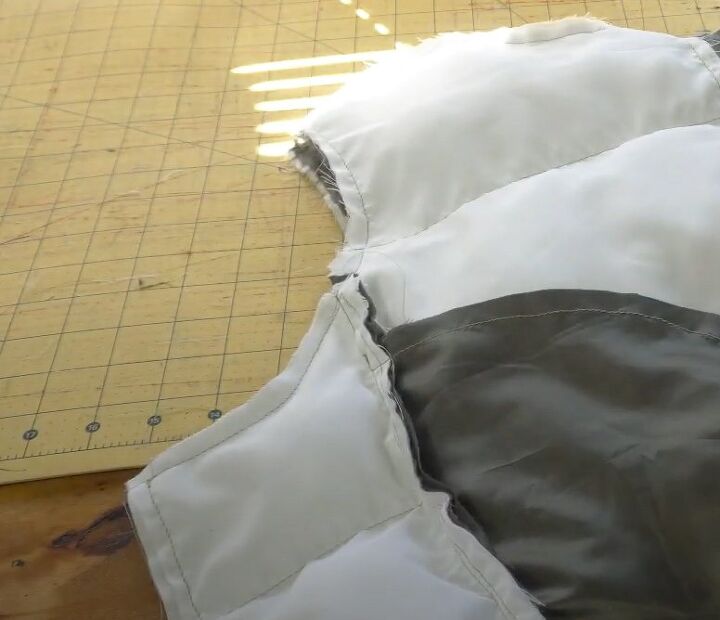
8. Lining
For the front lining, use the back pattern piece with 1/2 inch seam allowance added at the fold line.
Cut out one back piece on the fold and two front pieces, and sew them together at the shoulder seams.
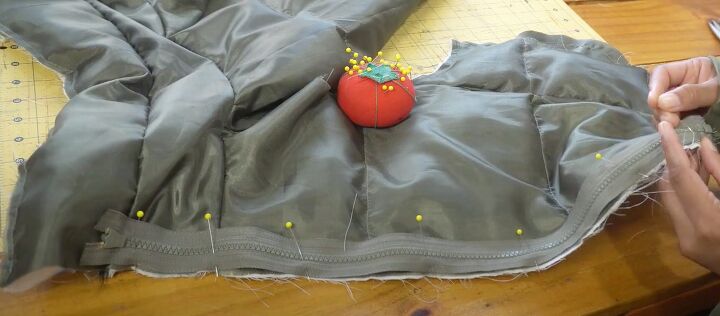
9. Collar
Measure around the neckline of the vest. Cut two rectangles of fabric, the length of the neckline wide and 4 inches deep.
Baste along the long edges of both pieces. Join the two rectangles together along one long edge, with right sides together.
Fill each neckband with a little polyfill and pin and sew one long side to the neck edge, right sides together.
10. Insert zipper
Pin the zipper to the front edges and sew, using a zipper foot.

11. Add lining
Add eyelets to the front corners of the lining 1.5 inches from the lower and side edges, for the elastic cord.
Sew the lining to the collar edge, right sides facing. Pin and sew the vest and lining right sides together along the armholes and zipper edges.
Turn the vest right side out and sew the side seams of the lining and vest separately.
12. Finishing
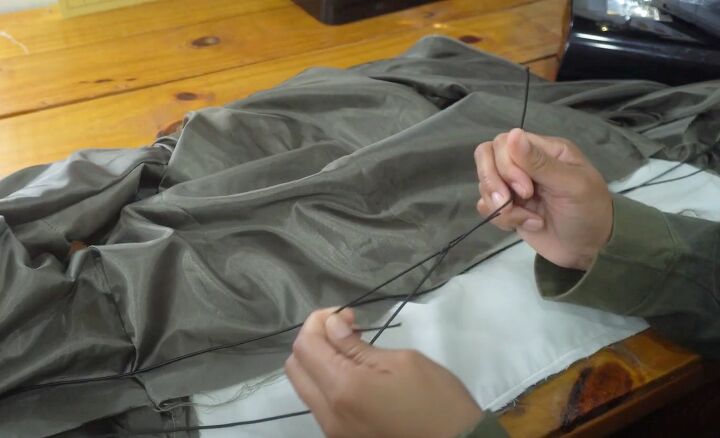
Thread the elastic cord through the eyelets at the front of the lining and add the plastic stops to each side.
Tie the ends of the cord together in the center.
Fold the vest widthways right sides together so the bottom edges of the lining and the vest match.
Sew along the lower edge, leaving a gap to turn the vest right side out. Hand sew the opening closed.
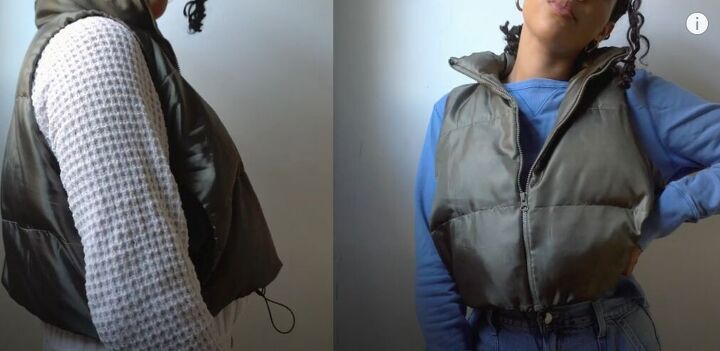
Cropped puffer vest
This makes a lightweight but still warm gilet vest. Batting will give the vest more structure, if you want that look.
You could also add sleeves to make a jacket using the same construction method. I’m very happy with the result of my fabric upcycling.
If you make this cropped puffer vest or jacket, please let me know in the comments how you get on.
The author may collect a small share of sales from the links on this page.


Comments
Join the conversation