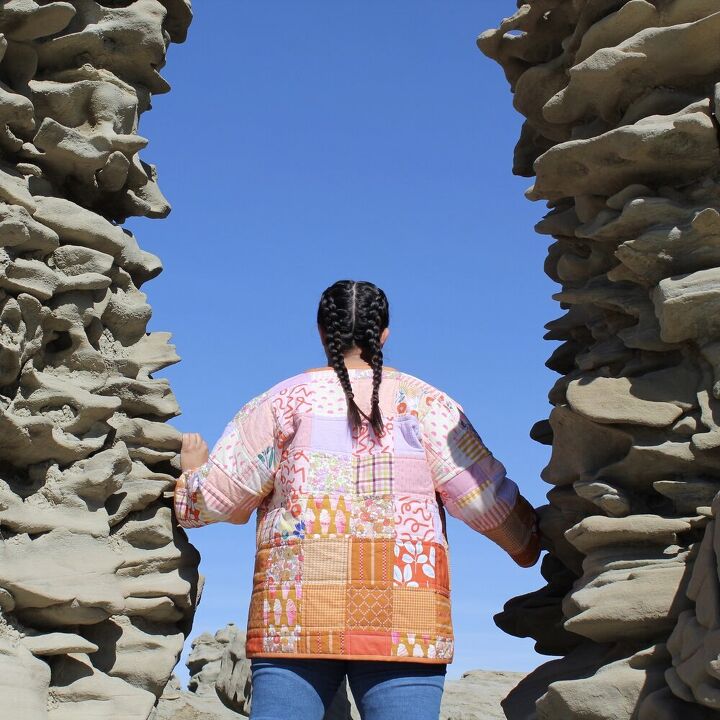
How To: Make a Quilted Coat Out of Fabric Remnants

In today’s blogpost I’ll be taking you through, step-by-step, on the construction of my most recent quilted coat made of remnants from my stash.
I did a decent job of documenting this process on Instagram, but if you’re like me, you may like things on one page so it’s easy to refer to and to read rather than holding your finger down on stories. So now that you’re in the right place, let’s go!
What you’ll need:
- Remnants - how much will vary on the size and style of coat
- Lightweight Interfacing
- Cotton/Wool/Polyester Batting (Either works, this is all about personal preference)
- 3 Packs (12 yards) of ½” Bias Tape
- Sewing Machine
- Quilting Ruler
- Matching Thread
- Pins
- Safety Pins
- Fabric Scissors
- Paper scissors
- Measuring Tape
- Thread Snips
- Hand Sewing Needle
- Coat Pattern
Instructions:
1. Arrange your remnants mess so you know what you’re working with. For this one, I chose to use the pinks and oranges I had in my stash.
2. Cut out the remnants into uniform squares using a quilting ruler. Mine were 5x5 so I could get the most out of the remnants I had.
3. Cut out your chosen coat pattern and then cut out large squares around those pieces using the interfacing. NOTE 1: You don’t need to use interfacing, it’s something I do out of pure laziness. NOTE 2: I eyeballed this for mine, but when you are doing this, make sure that once you’ve attached the squares together that your pieces are going to be big enough for your pattern pieces. You lose seam allowances when combining the squares. I accounted for ⅜” seam allowance around each square.
4. Next you’re going to grab your squares and arrange them onto the interfacing. Once you’re happy with the placement, iron them down.
5. Take these pieces to your sewing machine and fold the squares over one another, right sides together and sew down at ⅜” seam allowance. Do this across horizontally and then vertically.
6. Cut your backing fabric and batting to the same size as your finished square pieces.
7. Assemble the quilt sandwich. Squares on top, batting in the middle and backing fabric on the bottom.
8. Hold the sandwich in place using safety pins.
9. Change your machine thread to quilting thread and put your walking foot on. Proceed to quilt your pieces with your chosen design.
NOTE: For mine I just did simple lines and used the walking foot as reference.
10. Once everything is quilted cut your pattern pieces to size.
11. Construct your coat as per the pattern instructions.
NOTE: If you’re wanting a reversible jacket you will be finishing the inside edges as follows. Finish one edge with bias tape and fold over the edge. Grade ¼” (cut down) the other edge of the seam and then pull over the edge with the bias tape and sew down.
12. Enjoy your new coat!
Enjoyed the project?
The author may collect a small share of sales from the links on this page.


Comments
Join the conversation
Who know something so beautiful from material that just might b laying around. You look amazing in these gorgeous jackets!!!!
Wow! I definitely would not end up with a jacket that was beautiful like yours! Awesome job!