How to Make an Easy Hooded Cape

Today I will show you how to make an easy hooded cape. They are very simple. No sleeves, cuffs, or zippers, no kidding.
Capes seem to come in and out of fashion, but to me, they are classic. Unique and stylish, the bolder, the better. YOLO.
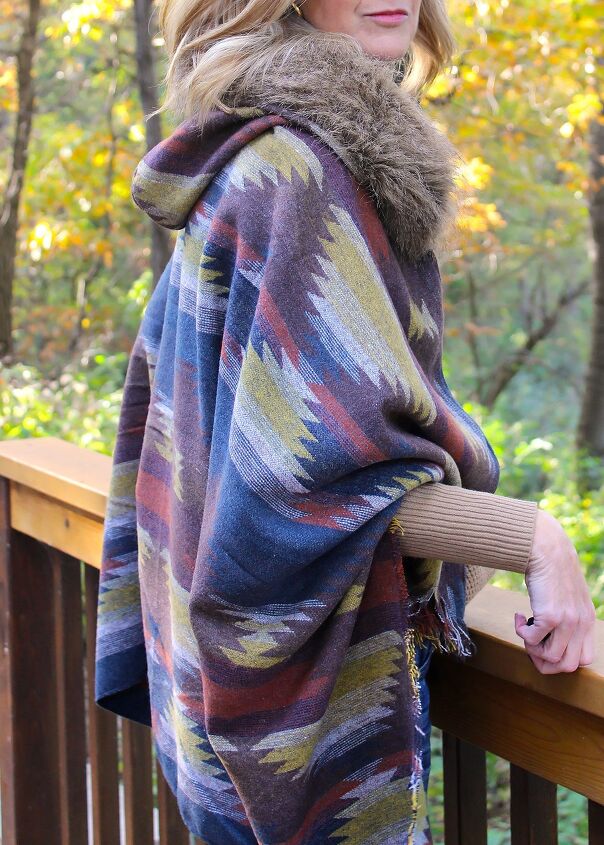
A cape is the perfect blank canvas to have fun with patterns or colors.
I have always loved a good statement piece, a crazy purse, a dramatic coat, or a fun patterned skirt. Focus on just one item to make any outfit special.

Women’s Capes and Ponchos
I’ve gathered lots of beautiful cape inspiration for you from around the web.
The examples below may be from multiple years, but I believe they stand the test of time and do not look dated. Just FUN to wear!
Southwestern Capes
Check out these southwestern-style capes.

source | source | source | source
Simple Capes
I just love the simple solid color capes but look at these awesome stripe numbers too! Yikes, I may need to make that hood cream number next. It’s simple, striking, and beautiful!

source | source | source | source
Beginners Sewing Project
If you’ve never made clothing before, this is a great beginner sewing project to try! I’ve prepared this simple pattern just for you. There are so many different ways to make it your own.

It’s fun to choose your fabric and all your cape’s details. There are many options: go with or without a hood, and add decorative trim or faux fur around the hood. You can add a simple hem, a fringed edge, or decorative trim for the hem. It would also be a nice finishing touch to use colorful buttons or a decorative clasp for the front closure.
Time to Sew
Are you ready to begin? Below are the items you will need to create this project.
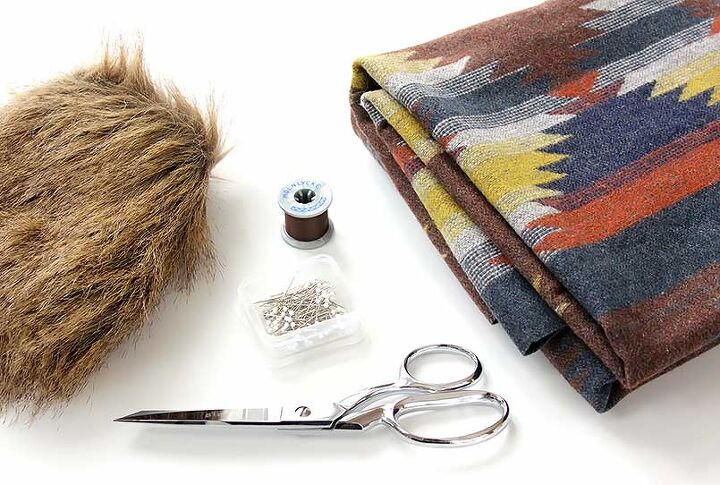
Materials and Sewing Supplies
- Fabric for cape
- Matching Thread
- Straight Pins
- Scissors or Rotary Cutter
- Sewing Machine
- Trim fur, ribbon, or contrasting fabric, optional
- Front Closure optional
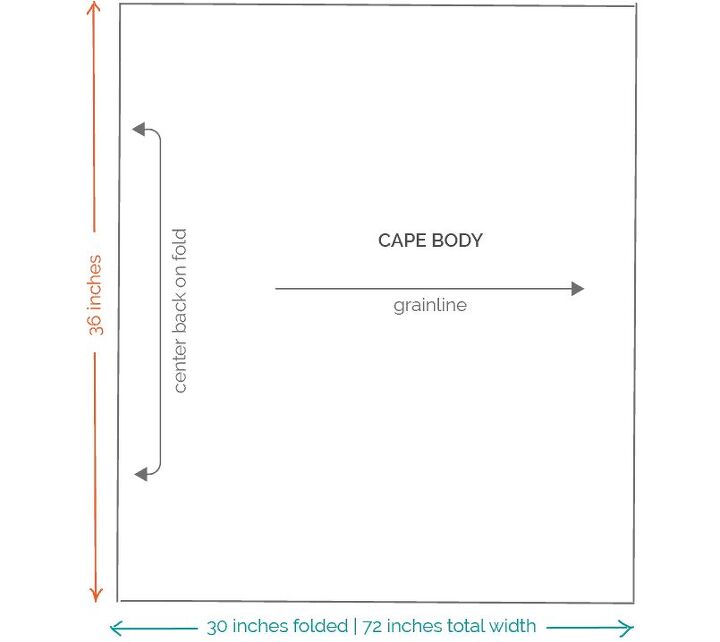
Determine the Amount of Fabric You Need
I used one and a half yards for my hooded cape. There are only three pattern pieces.
Determine ahead of time if you want to change the length or width and then adjust the amount of fabric you purchase.
If you are having trouble, ask your local fabric store employees. They are always ready to help with questions like this!
Women’s Cape Pattern
Here is the basic cape pattern. Feel free to adjust it to suit your size and style!
THE CAPE BODY

Sewing Instructions
1 PREWASH FABRIC
First of all, prewash your fabric to help prevent any shrinkage in future washings that would compromise the fit. After it is dry, press it with an iron.
2 CUT-OUT FABRIC
Next, lay out your fabric on a cutting board or a surface that is safe to cut on. Measure and cut your pieces out. Refer to the drawing and measurements above. You may want a shorter or longer cape, etc.
Feel free to adjust according to your preferences. To help you decide on length and width before you cut your fabric, try wrapping the fabric around you while looking in a full-length mirror.
3 FINISHING RAW EDGES
If your fabric has ends that easily fray, you may choose to finish some of the raw edges before you sew. Some pieces may be easier to finish in this project before you sew. This is optional.
You can finish the raw edges any way you like. There is no finishing necessary for polar fleece or fabrics that don’t fray, but if you have a fabric that frays easily or if you just prefer a clean finish (like I do), see the suggested finishing options below.
These are all great options for finishing raw fabric edges:
– Serge with a Serger or Overlock Machine
– Overcast Stitch on a Regular Sewing Machine with an Overcast Foot
– Zigzag Stitch on a Regular Sewing Machine
– Trim with Pinking Sheers
Refer to your sewing machine’s user manual for these special stitches.
4 HOOD & DECORATIVE HOOD DETAILS
With the right sides together, sew the two sides of the hood together with one straight stitch. Turn. Press the seam open.
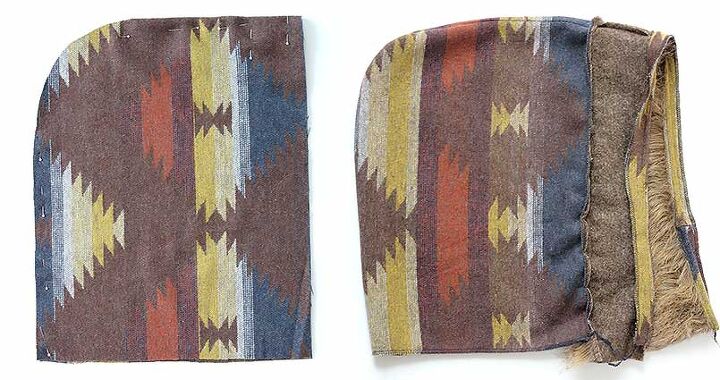
Below, I’ve included instructions for finishing your hood. Choose your favorite design; add fur and decorative ribbon, or keep it plain & elegant.
FUR TRIMMED HOOD
To attach the fur to the hood, with the right sides together, sew the fur facing to the fur. Open up the two pieces you sewed and lay flat. From the backside, press the seam toward the facing. Use a pressing cloth or a clean cotton dish towel to protect the fur from the heat of the iron.
NOTE: If your fur fibers have a distinct direction, decide if you want them to face forward or back. I chose to face mine forward.
Turn the facing over the seam to create a clean banded edge. Topstitch.
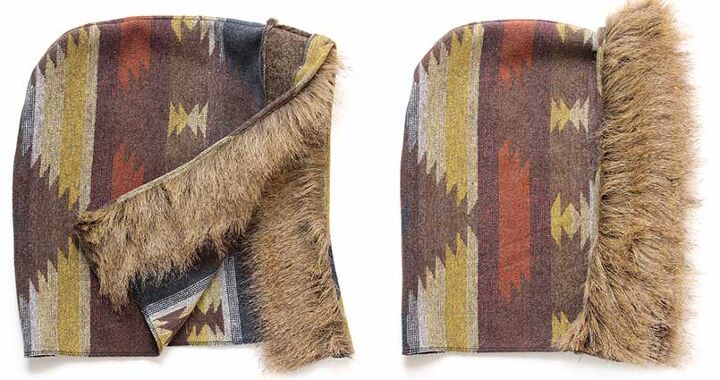
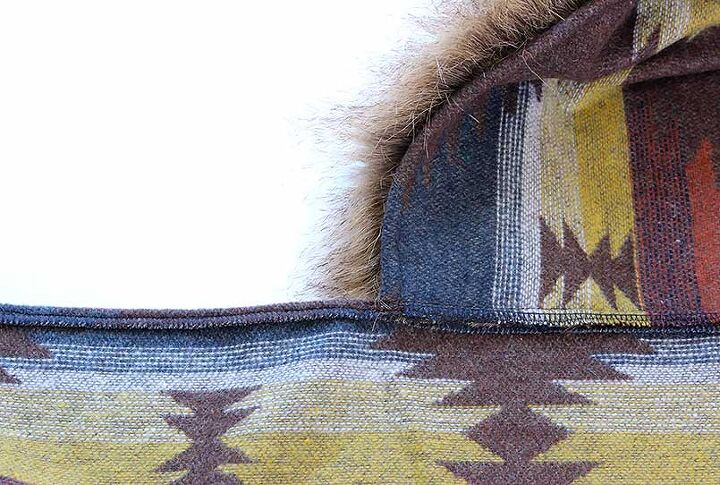
This next step is a bit of a mind-bender and a little counterintuitive. With the right side of the fur facing the wrong side of the hood edge, sew the long side of the fur strip to the front edge of the hood. When you turn the fur out, it will be on the outside edge of the hood. Pin first to be sure you have it correct. 🙂 Optional: Machine or hand tack the fur panel in 3 places, so it stays back.
DECORATIVE RIBBON TRIMMED HOOD
You simply finish the hood's front edge for this design by turning it under. Press first and then topstitch around the front edge of the hood. Next, position your decorative trim in place along the top of the hood where you like it. Pin in place. Topstitch with your machine or hand sew in place on both sides of the ribbon.
PLAIN HOOD
This simple style includes finishing the hood's front edge by turning it under. You can press first and then topstitch around the front edge of the hood.
5 ATTACH HOOD TO CAPE
With the right sides together, sew the base of the hood to the cape body. Press the seam down.

Turn finished sides over on both the left and right sides of the hood and sew all the way across in one continuous stitch. Tuck the hood seam under as you sew through the center section. Finish the bottom edge of the cape the same way. Fold over, press and topstitch all the way across the bottom hem.
6 FINISH FRONT EDGES
I’ve chosen to fringe on the two sides of the cape. These are the ends you actually see in the front. First, decide how long you would like your fringe. I chose to match the approximate length of the fur, so it has a consistent look as the hood.
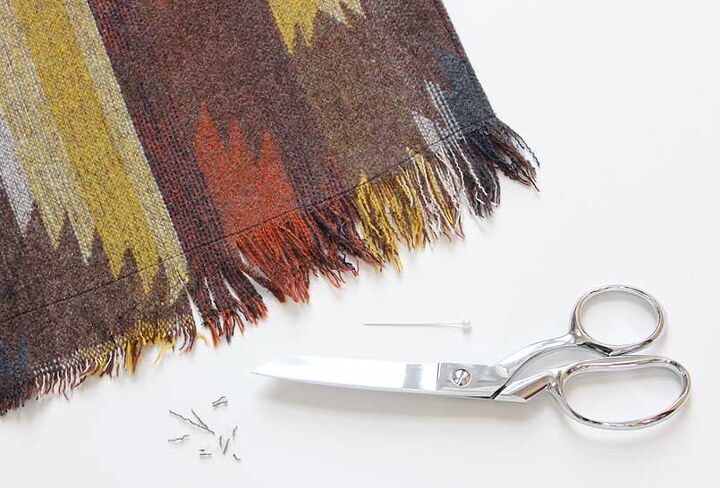
Stitch a straight line across the sides you will be fringing. Using a scissor, take short vertical cuts every 1/4 to 1/2 inch up to that horizontal stitch. Open up the strands with a long pin and unravel them until you have a look you like.
If you like popping tiny bubbles in bubble wrap, you may enjoy this! It’s tedious but therapeutic. You may also hem this edge if you’d prefer a clean edge.
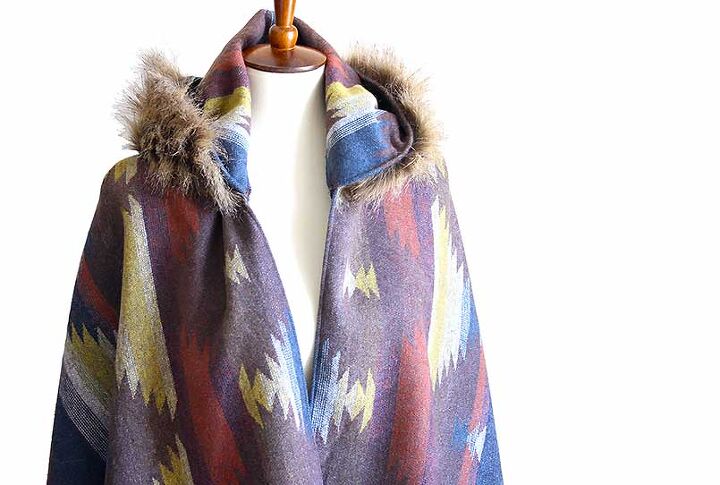
That’s it. Congrats! Your hooded cape is ready to wear! I hope you enjoyed doing this project! Finally, I’d love to hear what you make. Please let me know in the comments below or tag me on Instagram @bebraveandbloom.
Happy Sewing!
xo,
Cindy
Explore More
START HERE for my blog's home page
The author may collect a small share of sales from the links on this page.


Comments
Join the conversation