Rose Tyler Jacket Cosplay
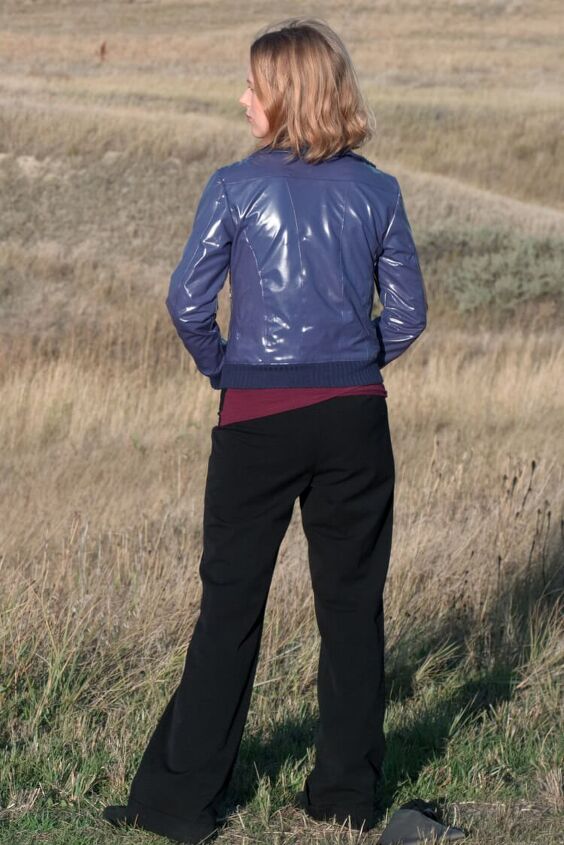
Ever since my husband and I started watching Doctor Who 3 years back, we’ve kicked around the idea of cosplay. Though we’ve enjoyed all the Doctors and companions, Rose and the 10th Doctor have easily been our favorites. Maybe it’s the fact that we both have similarish coloring to Billie Piper and David Tennant that cosplay entered our minds. At any rate, we loved their story and I knew that both her jacket from “Journey’s End” and his suit would be a good sewing challenge for me. My husband’s suit has just finished the muslin stage, but today I’m sharing my Rose Tyler jacket cosplay.
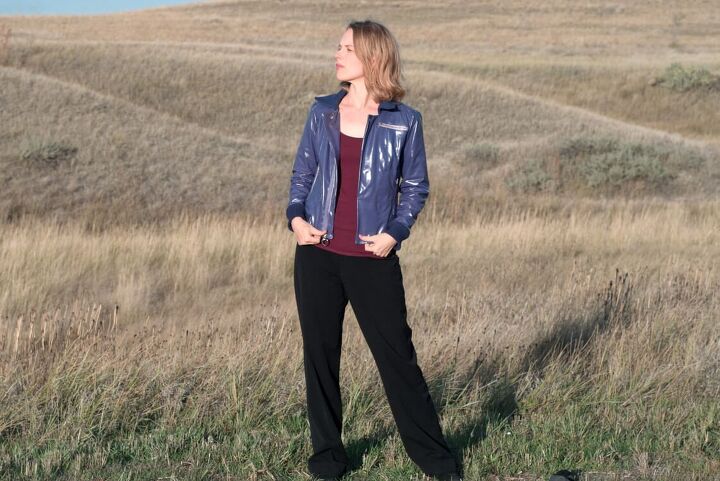
I’m starting to realize that cosplay is all about the details. While there’s times to be super creative and do your own thing, cosplay is about getting the nitty gritty right. Somehow in getting to the end result, there’s a lot of creativity that happens. This project was so so fun in that I had to apply a different side of my creative skills to get to the end. It’s part reverse engineering, part copying, a whole lot of pattern hacking on top of some really challenging sewing. I see now why people love their cosplay! Billie Piper wore a lot of really cool jackets over the course of her run on Doctor Who as did her fantastic predecessor Freema Agyeman. We decided on Journey’s End partly because I loved the purple jacket above all her others. Also, I love that episode because Rose and The Doctor finally get some happiness after suffering without each other through space and time. Being not myself
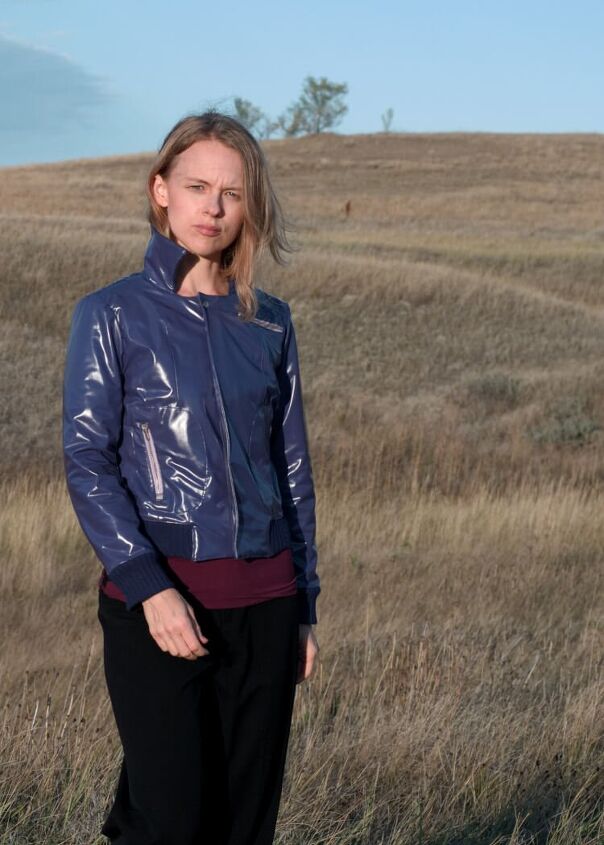
I’ll note that I’m not my cheery self in pictures because Rose is not exactly a ball of sunshine in this episode either. Also my pants are WAY too big–leftover from when I was much heavier and before I sewed. But they’re my only black pants and the style is not bad. And those are not my eyebrows (which disappear mid-arch)! Makeup was necessary as Billie Piper’s eyebrows are much more authoritative than mine LOL!
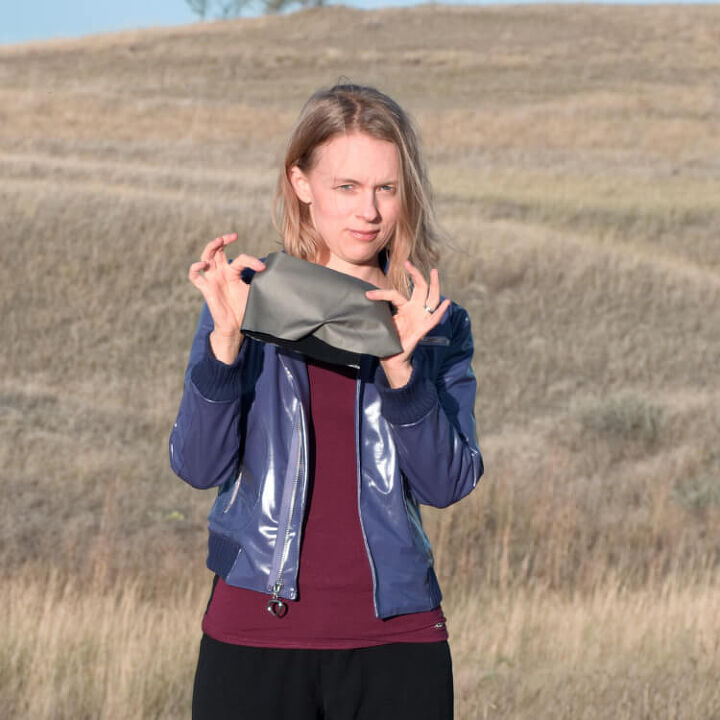
Rose Tyler jacket cosplay pattern: Burdastyle 10-2010-101 leather jacket I kicked around several patterns, but ultimately I decided on Burdastyle 10-2010-101. This pattern was a good base for Rose’s jacket. It has set-in sleeves, the rib knit hem and cuffs, zipper, and rib knit upper collar. But there was a lot of changes that had to be made for the pattern to more closely resemble the Journey’s End jacket. Modifying the pattern After rewatching the episode and coming across this very helpful cosplayer’s blog, I was able to see just what I needed to take away from the pattern and add to it.
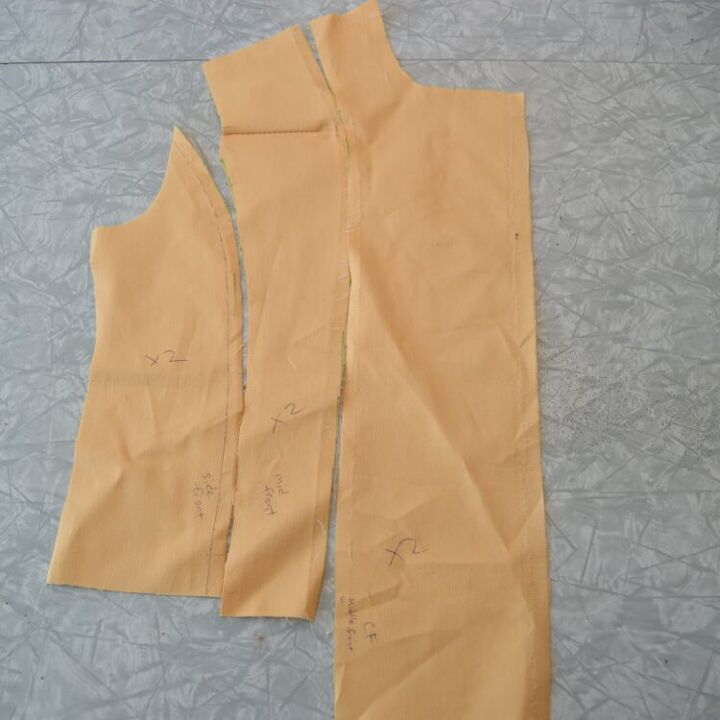
The front of the jacket has a center front, middle front, and side front. The jacket facing line on the pattern was a reasonable spot for the center front/middle front seam. I eliminated the side dart in what would become the side front by rotating into the princess line that I drew for the side front.
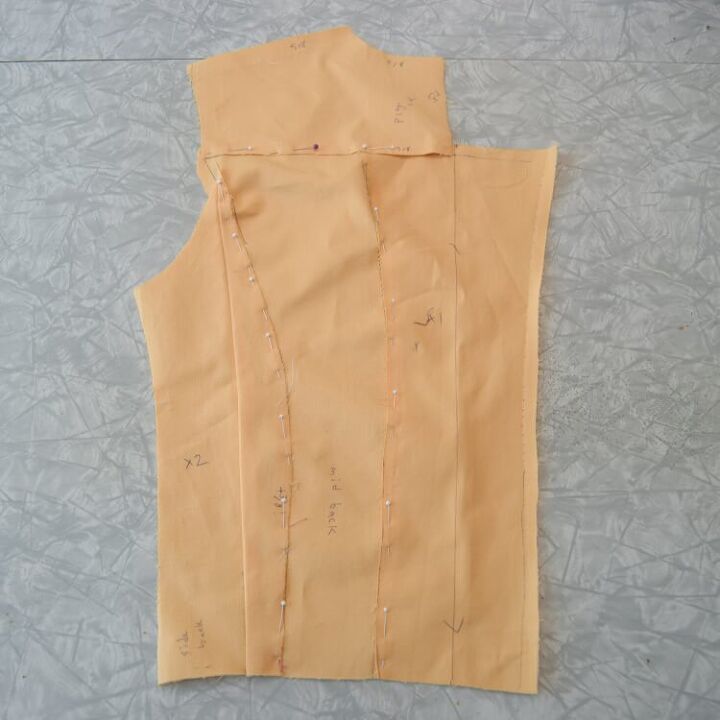
The back of the jacket also has a center back, middle back and side back. The original jacket also has a deep pleat at CB which I eliminated. Using a French curve, I drew the new seamlines for the back and added seam allowance. After a muslin, I realized that my side back piece was far too shallow and didn’t fit my own back very well. It took a little draping, but the new seamline for the middle back/side back seam is much better. You can see where my first try ended up on my muslin.
Pockets

Rose’s jacket features 3 zippered welt pockets. The first one is on the upper part of the left side of the jacket and it crosses the center front/middle front seamline. The other two welts are integrated into patch pockets that then get stitched the fronts near the hem. To make the patch pocket piece, I simply used my own hand as a guide and freehand drew a pocket as I looked at a closeup of the original pockets.Stretch Faux Leather After looking multiple places in LA and San Francisco, I just did not find the right fabric. Then Fabric Mart came along and offered this stretch faux leather for a song. I paid less than $10/yd for it, and it is seriously the nicest faux leather I’ve ever seen. You can actually press it and fuse interfacing to it without it melting! I didn’t press it once I got to the construction, but you’ll see why. The only problem with this fabric is the color. Painting the Rose Tyler jacket cosplay
The original fabric is a deep sharkskin grey, so not Rose’s blue tinged purple. I tried dyeing it to no avail before I came across Angelus leather paints. People use this paint for painting custom basketball shoes, so I figured it was work a try. This paint it turns out is incredible. It doesn’t crack or peel and though it takes time to get to the end, it eventually transforms into a smooth topcoat. The hand of the fabric also doesn’t change at all with the additional paint. I learned along the way that a good quality watercolor brush and some water to thin the paint helped the process. White, then purple
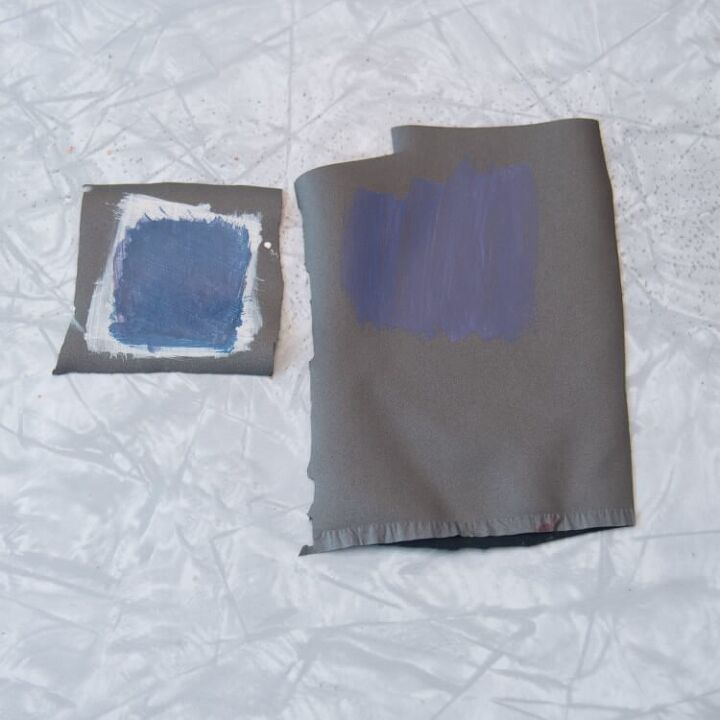
Angelus recommends that if you’re trying to cover a dark color that you prime it with white. I did some test swatches and they were totally right. You can see how the paint without the white base just gets faded out by the grey. It took a solid 5 coats of white before I felt I could add the purple. The purple is a mix of Sapphire and Violet paints. I initially mixed a ratio of 4-1 in favor of the violet, but the sapphire was really dominant. The last couple of coats, I mixed straight violet with just a touch of the sapphire/violet mix with a couple drops of black. The final color is about as close to perfect as I could hope for. Resolene I sealed the paint with 2 coats of Resolene which is an acrylic topcoat recommended by a guy at our local Tandy leather. I didn’t want to admit to him that I was painting faux leather, but anyhow, his advice was excellent. All total I painted 21 pattern pieces I believe over the course of 4 days. Adjusting for stretch and style The pattern calls for regular leather, so I can’t imagine there’s a lot of give in it. The pattern also yields a more boxy jacket. I ended up taking in a few of the seams on my muslin to account for the 20% stretch of my fabric and the boxiness of the pattern. The muslin fabric is a stretch twill and it has the same amount of stretch as the faux leather, so I knew it would be a great choice for a practice jacket. Faux leather is absolutely unforgiving in terms of fit, so there’s no chance I was going to sew it up without the fit being 100%. My muslin revealed that I needed a bit of a petite adjustment. There was a big fat wrinkle that clearly wanted to be a dart right around my upper chest going into the armhole. The 1/2″ I took out in front I also took out horizontally on the sleeve and around the back. I’ve had to do this particular petite adjustment variant on other Burda patterns, most notably this cardigan from the Fabric Mart competition last year. The muslin was cut apart eventually to serve as my pattern, so the dart is gone in the final jacket. Now that I’ve done it and can see the difference in the final garment, I’m seeing the lack of it in a lot of my makes! Lining
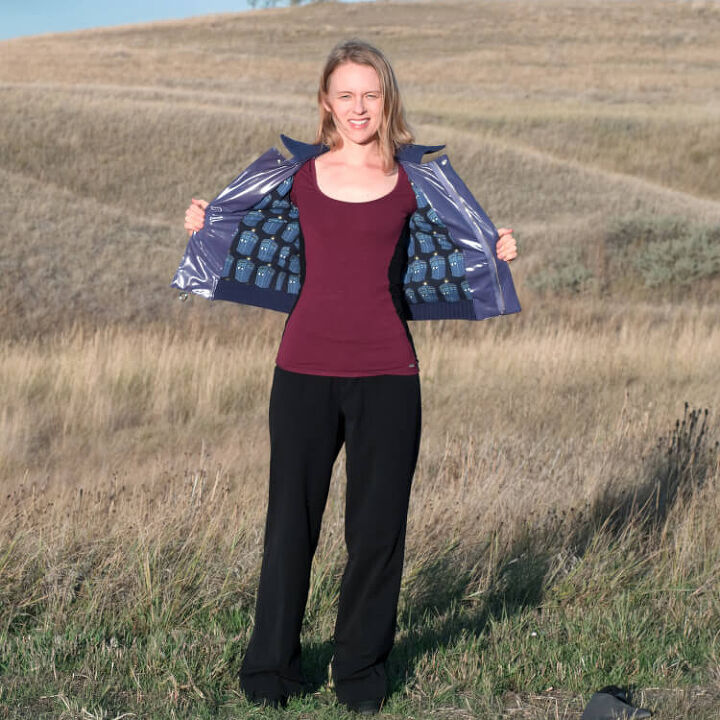
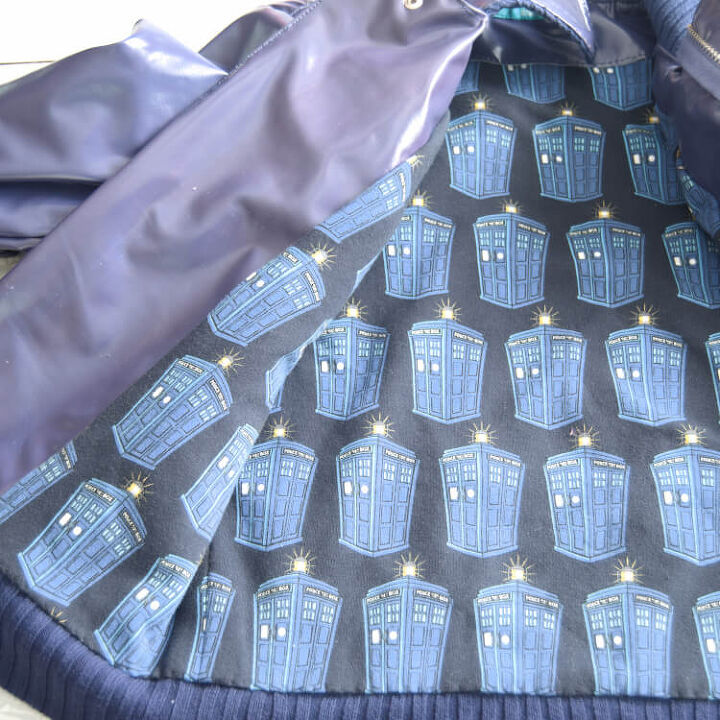
Because I was using a stretch fashion fabric, I knew I’d need a stretch lining. I couldn’t pass up the opportunity of adding this fun TARDIS print knit from JoAnn. What’s a Doctor Who cosplay without the TARDIS? This knit did have more stretch than the faux leather. I tamed it down by adding fusible interfacing to the entire lining. With the interfacing, the knit has just about the same 20% stretch as the outer fabric. The interfacing also lends some support to the faux leather and keeps down some of the wrinkling that it is very prone to in the wearing. I will say that it is incredibly frustrating to see wrinkles in the final fabric that are not there for fitting reasons!
Dye Can you believe there’s more DIY in this jacket? Yes, indeed people. Finding ribbing in the right color is not always easy, but I can almost always find a good quality rib knit sweater at the thrift store. This ribbing started out as a royal blue sweater, and I overdyed it with RIT DyeMore in Royal Purple. The zippers also got the dye treatment. The Riri zips that are on the welt pockets didn’t take the dye as readily as the front separating zipper. They’re still a nice lilac which goes well with the purple. Sewing with faux leather

This post is already too long, so I’ll save my tips for sewing with the faux leather for another day. I will say that all of the seams are topstitched down with the exception of the side and underarm seams which are glued down. Trying to topstitch inside of the sleeve was NOT an option. Also, instead of bagging the lining, I stitched it in place at the hem and the sleeves by hand. Conclusion All total, I’m really pleased with how this jacket turned out and I’m anxious to get to the end of my husband’s jacket so we can look the part. I’m not so sure that my look makes sense without his, but these things are a work in progress right?
Elizabeth Farr is the writer behind the Elizabeth Made This blog where she shares helpful sewing tips, step by step sewing tutorials and videos to help you explore your creativity through sewing. She has written sewing Eguides and patterns, been a featured teacher at Rebecca Page’s Sewing Summit and Jennifer Maker’s Holiday Maker Fest and her work has appeared in Seamwork and Altered Couture magazines. She also created a line of refashioned garments for SEWN Denver. When her sewing machine isn’t humming, she’s playing and teaching violin, and hanging around a good strategic board game with her husband and 4 kids. elizabethmadethis.com
The author may collect a small share of sales from the links on this page.


Comments
Join the conversation