DIY Boho Chic Stacking Bangle Watch
This post may contain affiliate links for products I love and recommend.
It’s no secret that I am an enthusiastic fan of statement jewelry. Because let’s be real- when it comes to jewelry, bigger is always better.
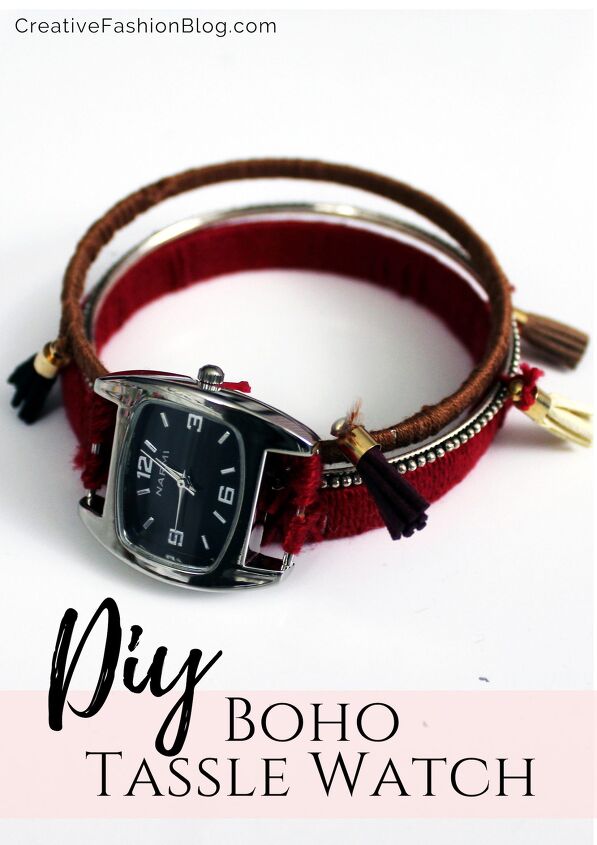
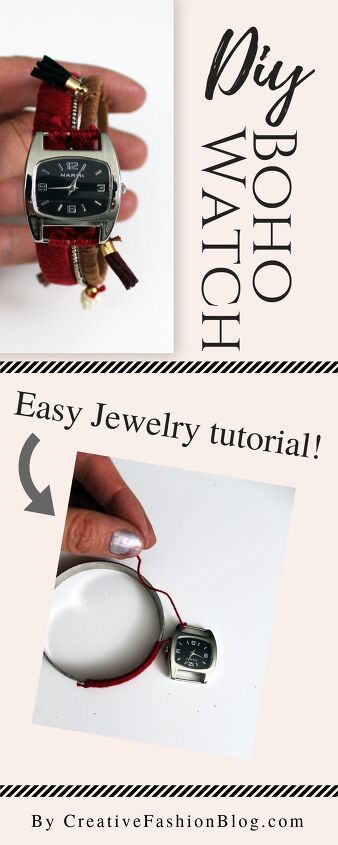
Today I thought it would be fun to take some old, basic bangles and turn them into something truly unique by wrapping them to create a colorful watch. You can make this totally unique and gift-worthy bracelet in about an hour. I love how simple this project is and how fun it turns out!
Upstyle Recommends!
For this boho chic bracelet watch tutorial, I decided to stick with colors I wear often. That’s the fun of DIY right? Deep reds, silver, and brown and pretty “safe” hues but still bring warmth to an otherwise neutral outfit.
I believe that on days when you’re not feeling your best, something magical happens when you put on statement jewelry. They elevate a basic t-shirt to something extraordinary, give you a boost in confidence and make you feel more elevated instantly. Because if you have to get dressed every day, let’s make it fun shall we?
This adorable boho chic bracelet watch is so simple to make and only takes a short list of supplies. Below are the links to items I’ll be using to complete this tutorial but feel free to get creative and come up with something that is entirely your own!
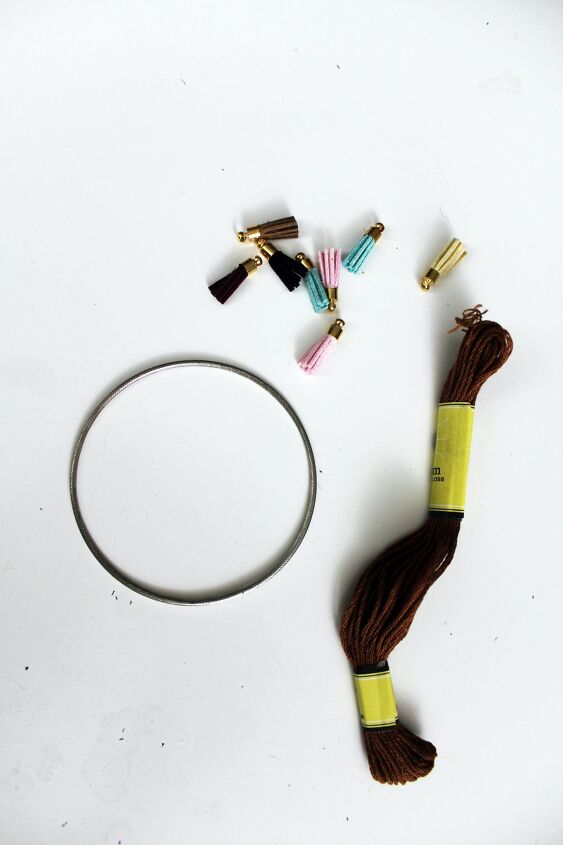
Boho Chic Watch Supplies
How To Make A Boho Chic Watch
To create this stacking bracelet watch, set aside about thirty minutes and gather your supplies above.
Then, pick your first color of embroidery floss and use it to tie a basic knot anywhere on your silver bangle.
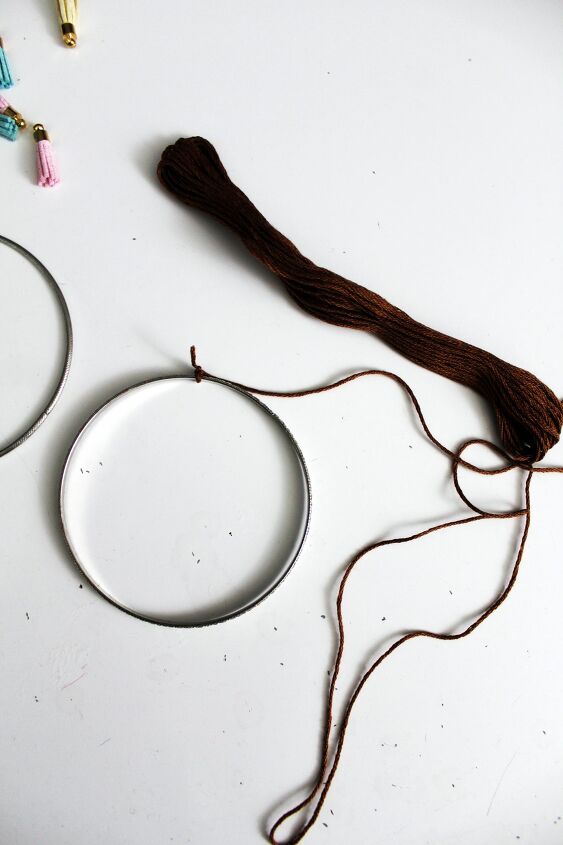
Start tightly wrapping your floss around your bangle, sliding your embroidery floss down to remove any gaps as you go. If you’d like to create a different look, you can always alternate and switch colored threads as you work your way around the circumference of your silver bangle.
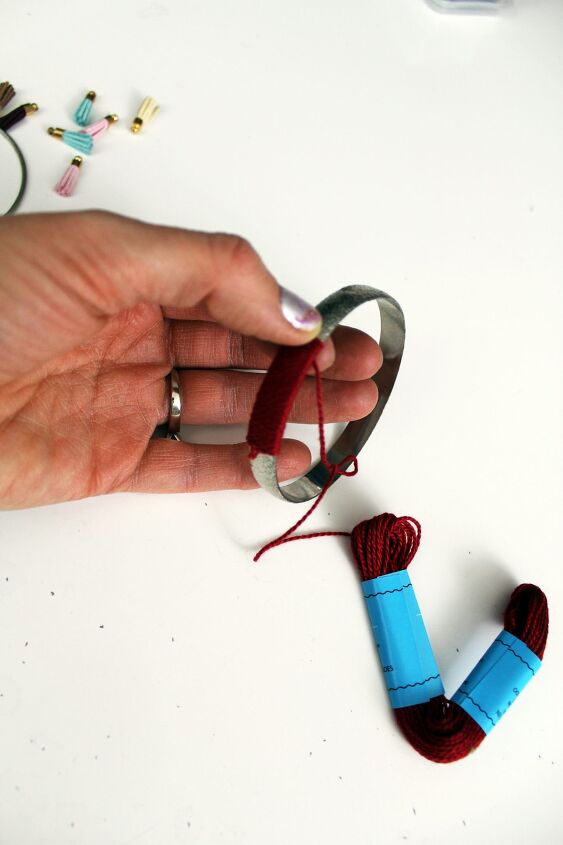
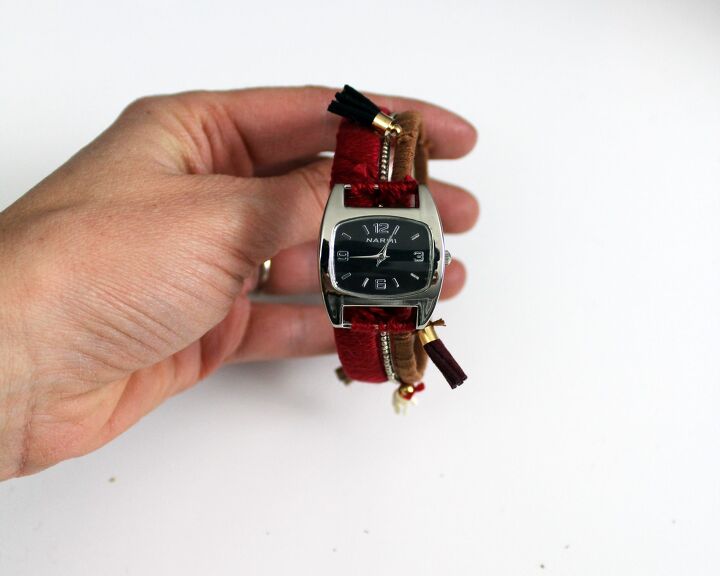
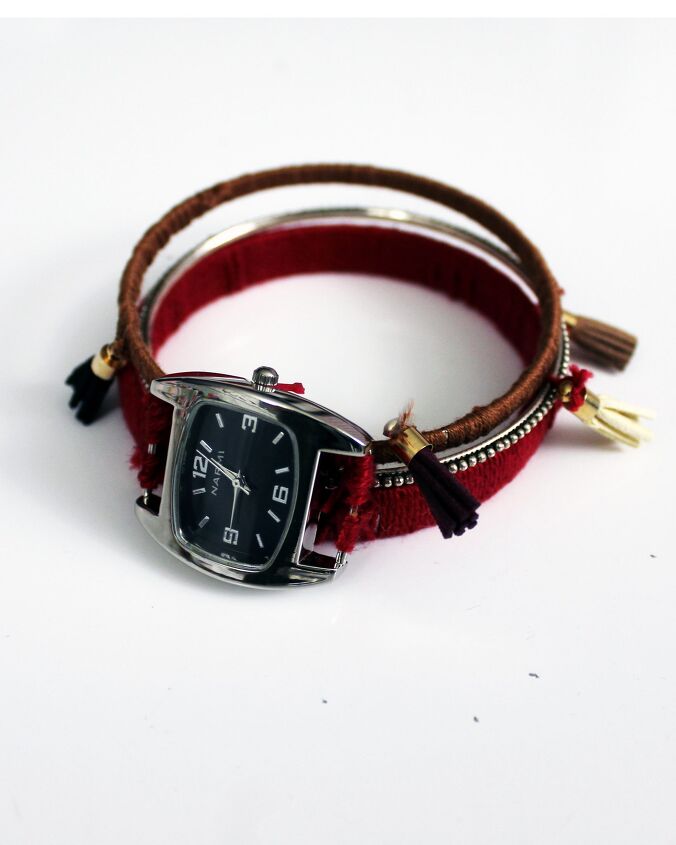
Once you’ve wrapped your embroidery floss around your bangle several times, tie the bar of your watch face securely to your floss. To make it extra secure, I wrapped the floss several times around the bar that runs across the top of the watch face as well.
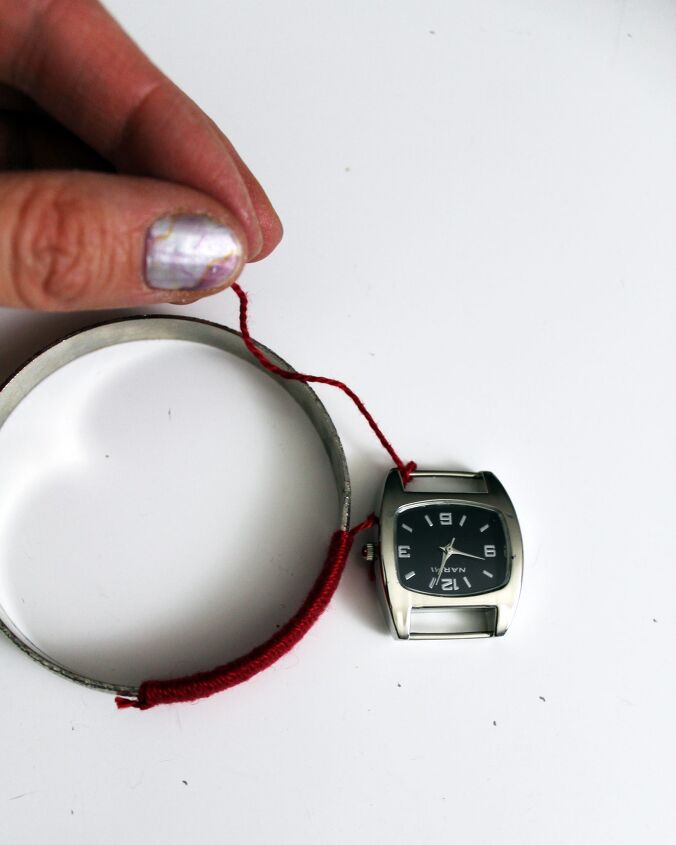
Continue wrapping your bangle until you reach the other side of your watch face and secure it on the other side. From there, continue wrapping your bangle until you have covered the entire silver surface.
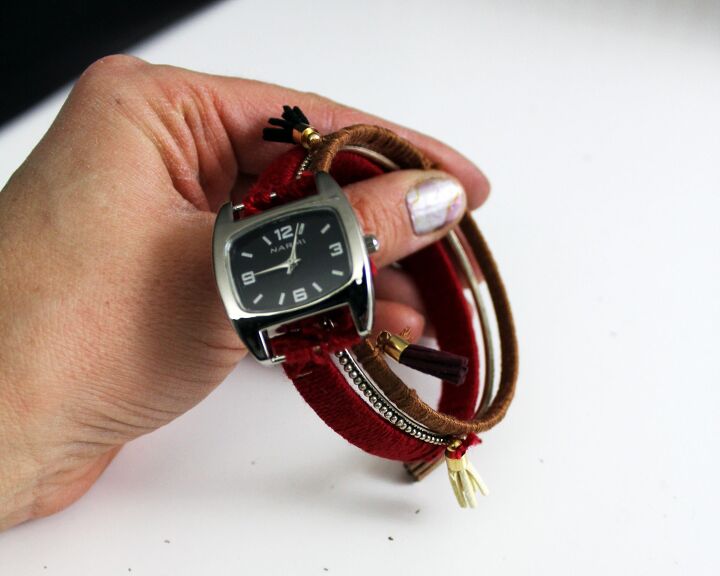
Tip: I liked to add leather tassels occasionally to the embroidery floss at random for extra color and character.
Repeat the same process with your other silver bangles until they reach the width of your watch face and give the overall look you like.
This boho chic watch pairs so well with other bracelets and is perfect for a casual day. I plan on wearing mine with the DIY Crystal Stacking Bracelets we made a few months ago, some basic jeans, and some fringe heels.
If you ever have any questions while working on this or any other project here on Creative Fashion Blog, please don’t hesitate to reach out and let me know in the comments below!
In the meantime, Happy Making and I’ll see you again tomorrow with another project!
Loved The Tutorial? Please Share It!
Other DIY Jewelry Projects You may Like:
The author may collect a small share of sales from the links on this page.


Comments
Join the conversation
Yep I’ve got several older watches (from estate sales )this sounds very inspiring and may get my teenage granddaughter to participate too! Thanks for sharing the idea!
Clever idea, but how do you get past the fact that weight of the watch will cause bracelet to turn on the wrist? Watch will be underneath or inside of wrist instead of on top of wrist where it can be easily seen.