Easy 10-step DIY Facial Routine for Glowing Skin

Hey guys! Follow along for a deep cleaning at home facial for glowing skin. This includes dermaplaning, facial steaming, black head and white head extraction and a skincare routine afterwards.
Tools and materials:
- Facial cleanser
- Headband
- Cold pressed rosehip seed face oil
- Face razor
- Face steamer
- 2 cotton swabs
- Niacinamide zinc serum
- Eye cream with caffeine
- Face moisturizer
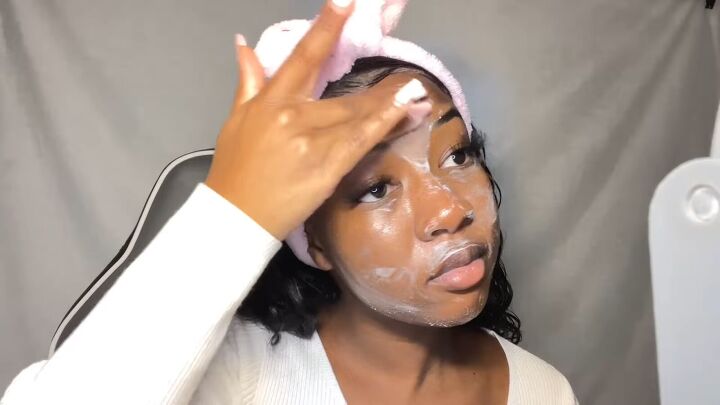
1. Cleanse your face
Use any cleanser that works for you. I tend to go for exfoliating cleansers for a nice, deep clean. Use circular motions to rub the cleanser in to reach every part.
After rinsing, let your skin air dry for a natural glow.

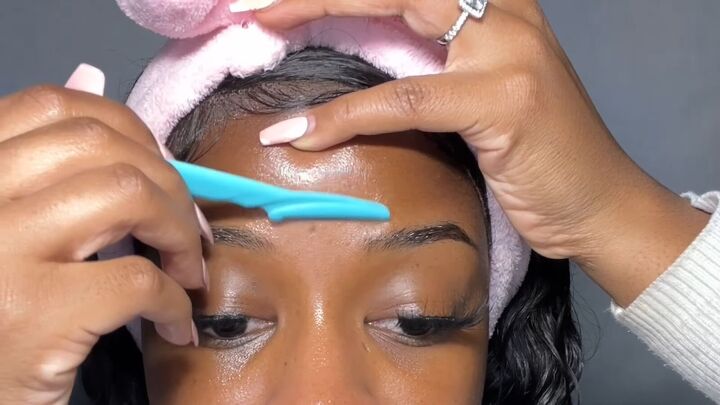
2. Apply face oil before dermaplaning
Next up, apply rosehip face oil because shaving on dry skin means you are more prone to cuts.
Use a few drops of the oil on each section of skin and rub it in with clean hands.

Now that your skin is prepped, start with the face razor, shaving in little motions, one section at a time. Be as gentle as possible.
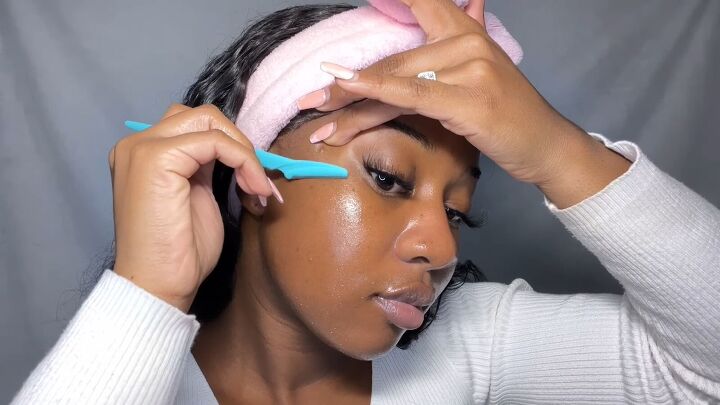
Shaving my face has been a game-changer for me as it makes my skin look so smooth. It gets rid of both the dead skin cells and peach fuzz.

3. Steam
I love to steam my face because it makes my skin feel so soft, it opens up the pores which makes it easier to remove blackheads and whiteheads.
Steam for 5-10 minutes.

4. Extract blackheads and whiteheads
Some people like to use the metal extraction tool but I prefer using cotton swabs because they are gentler on my skin.
Start by gently scraping where the whiteheads are.
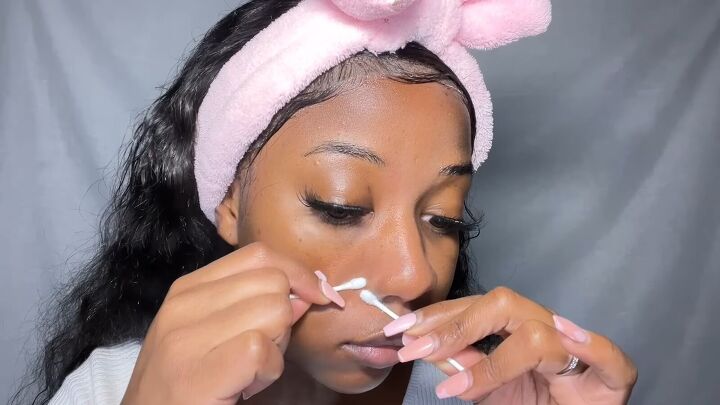
I don’t tend to struggle with whiteheads anymore since I’ve started using facial products with active ingredients like salicylic acid and niacinamide.
My target areas tend to be the nose and chin.

5. Apply a mask
My favorite part of this clean up facial at home is the clay mask because it feels soothing on my skin, especially after the shaving and extraction steps.
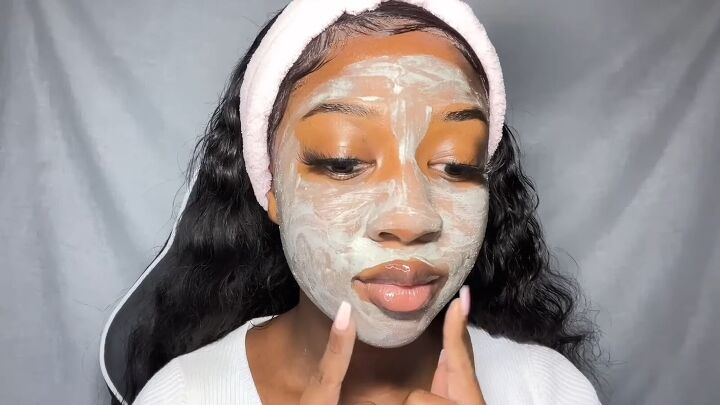
Leave the mask on for about 10 minutes, until completely dry and it doesn’t transfer onto your fingers when you touch your face.
6. Wash off the mask and re-steam
After washing off the mask, steam your face once again. This will make sure your pores are open and better able to absorb the products in the rest of the facial routine.

7. Apply niacinamide zinc serum
Next, apply a few drops of niacinamide zinc serum to each section of your skin and gently rub it in. Once it’s mostly absorbed, dab the rest in gently with your fingers.

I use this product in my daytime and nighttime facial routines.
If you are a new user of the product, start with a patch test to make sure your skin can handle it.
8. Apply eye cream
For a brightening effect, apply eye cream under your eyes. Rub it gently with your finger.

9. Moisturize
Next, use your favorite moisturizer on your face.
I’ve chosen a product with oatmeal to help calm my skin after any redness from the facial process.

10. Apply vitamin E oil
Lastly, add a thin layer of vitamin E oil to your skin. This will seal in the moisture from the previous step as well as lighten any acne marks.

And that’s it for this at home clean up facial. My skin looks glowing and healthy!

DIY facial routine
This routine will give you spa-like results in the comfort of your home, and what better time to treat yourself than in the dry, winter season!
If you try this glowing skin facial at home, let me know in the comments below how you liked it.
The author may collect a small share of sales from the links on this page.


Comments
Join the conversation
Your skin is beautiful! I’m a lot older than you and my peach fuzz is getting pretty fuzzy! I’ve wanted to shave, but worry that I will have stubble. How often do you shave?