How to DIY Super Cute Nude Nails With Swirls

In this video, I will show you how to create an amazing nude gel nail manicure.
This process uses acrylic dip powder for your nude nail base. But then I’ll show you a great technique for creating stunning swirl nail art, over your nude powder base.
Tools and materials:
- Clear gel nail polish
- Acrylic dip powder for nails
- Colored gel polish (for the swirl design)
- Nail powder applicator
- Dotting tool or orangewood stick
- Small nail applicator brushes
- Large fluffy brush
- Manual and e-file nail files
- Clear top coat
- Cuticle oil
- UV lamp
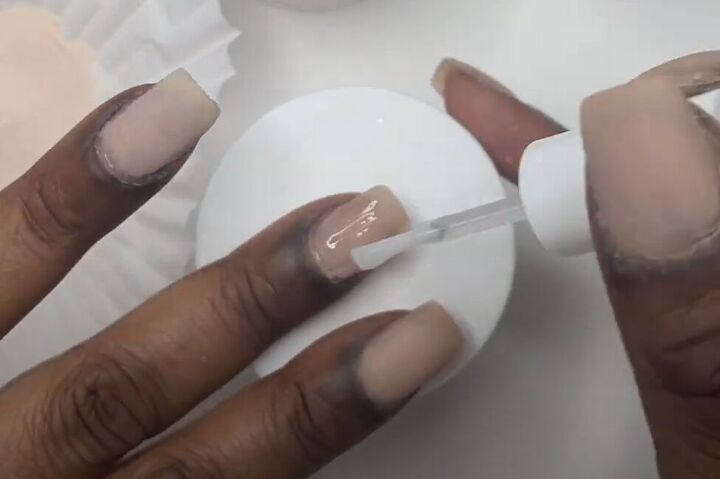
1. Start with a base coat
Begin your nude nail manicure with a coat of clear gel base coat.
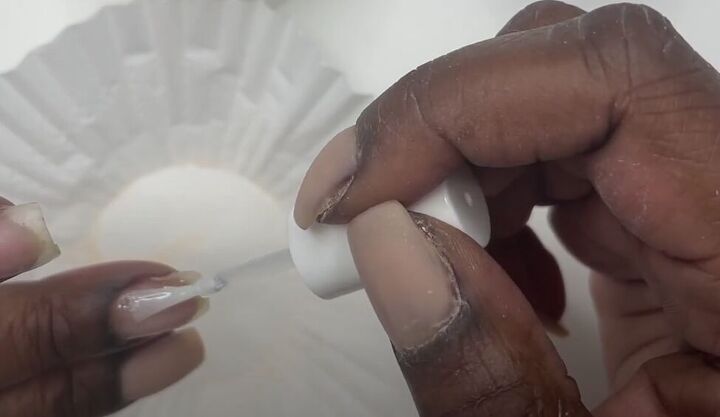
2. Add dip powder
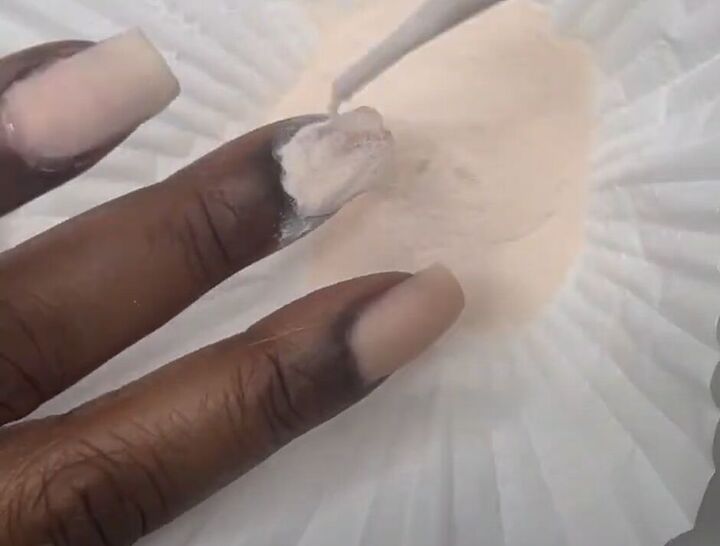
Now use a powder applicator (it’s kind of like a very small baster) to distribute the dip powder generously over your whole nail, while your nail is still wet from the base coat.
You may need to do two applications to ensure your nail is fully coated.
Tip: When applying the powder, have something under your hand to catch the excess powder and limit the mess!
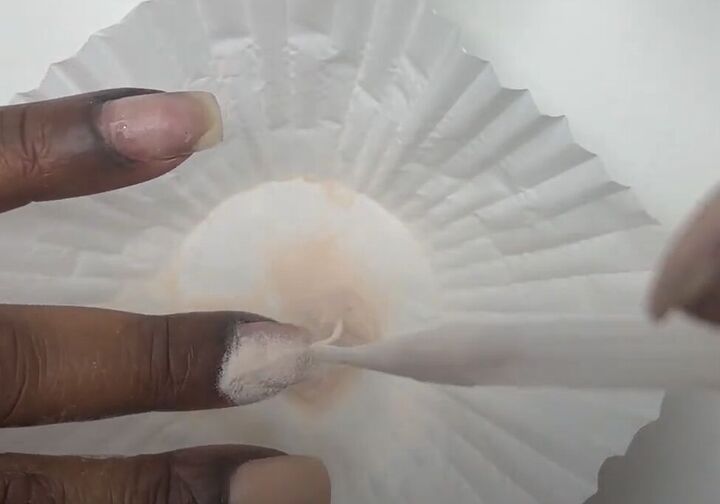
Use a dotting tool or orangewood stick to clean up the edges around the sides of your nail and your cuticle area.
Tap your finger to release the excess powder from your nails.
3. Add a second coat
Repeat steps 1 and 2 with a second coat of clear gel polish.
Add a second coat of powder. Clean the edges and tap off the excess powder as before.
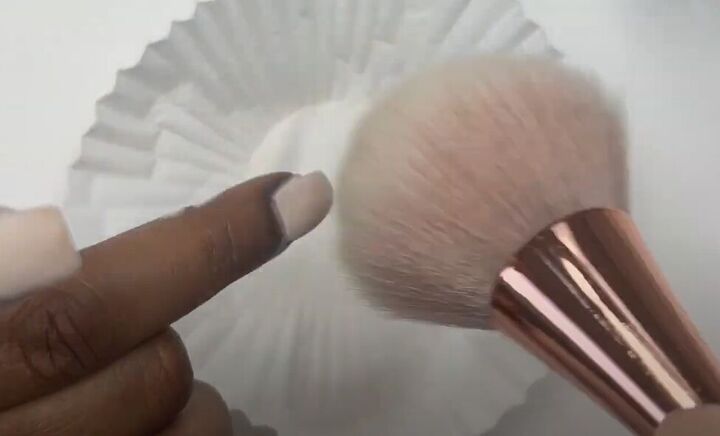
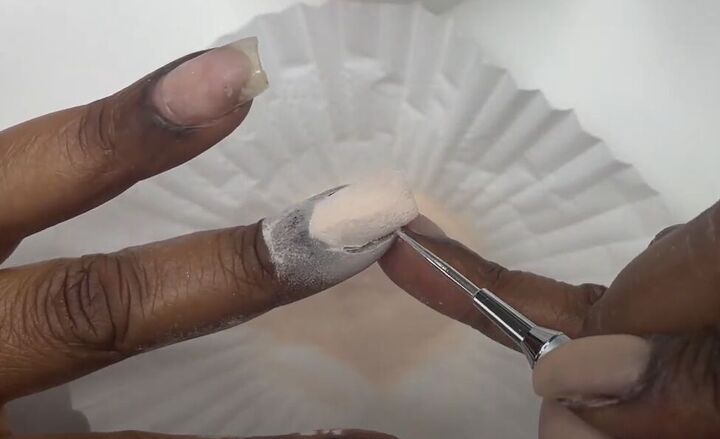
4. Clean off the residue
Use a large, fluffy brush to remove any powder residue for your nails.
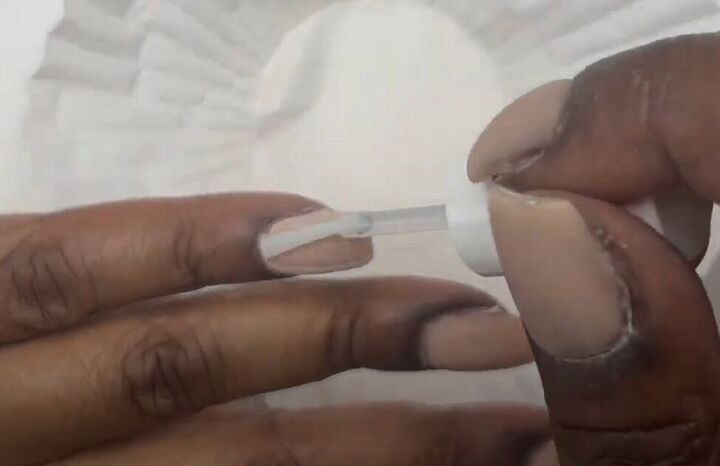
5. Finish with top coat
Use the same clear gel polish for a top coat.
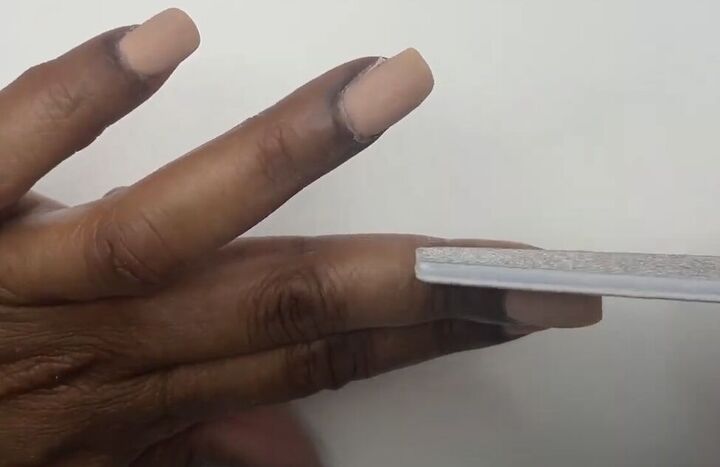
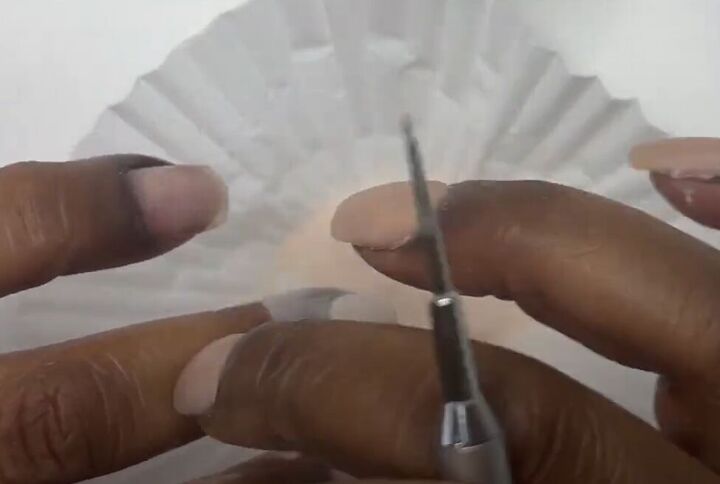
6. File as necessary
Let your nails dry and then clean up the edges of your nails, including the sides, as necessary with a nail file.
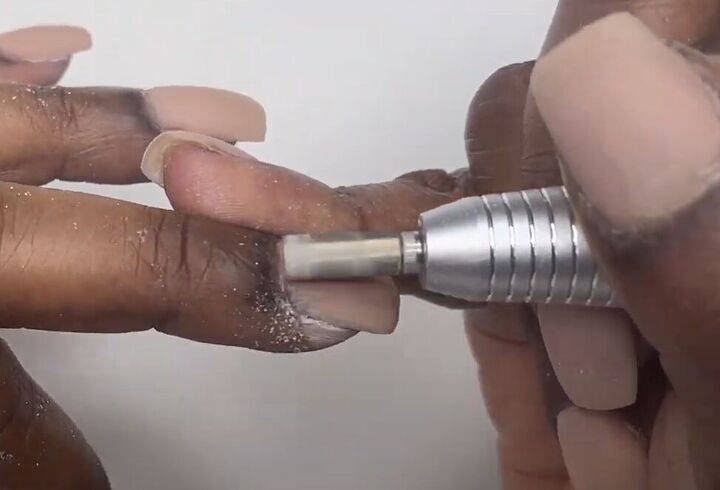
Go around the cuticle area with an e-file, if you have one.
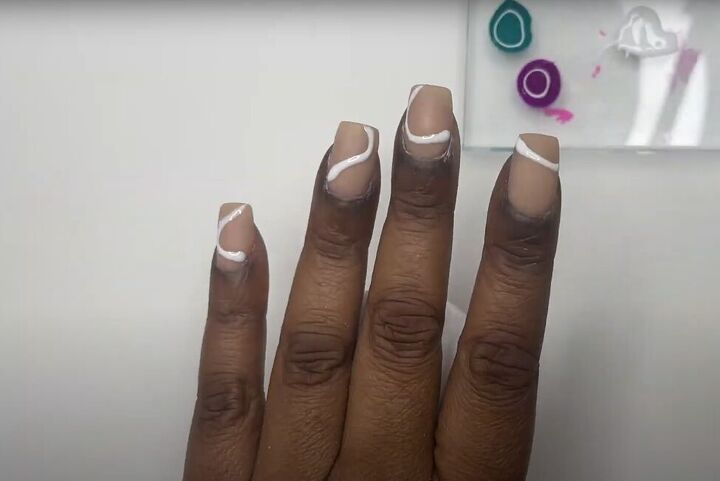
7. Make a swirl nail-art design
Use a fine nail polish applicator brush to apply to make a curved line on each of your nails with white gel polish. They can all be the same, or all different – whatever you choose!
Flash cure by putting your nails under the UV lamp for just 10 or 15 seconds to get that first color set.
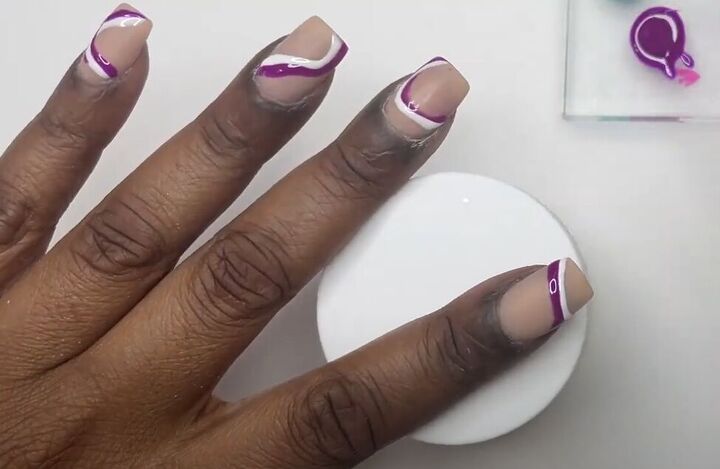
Now add your second color, in the same swirl pattern directly above or below your first color.
Flash cure your nails again.
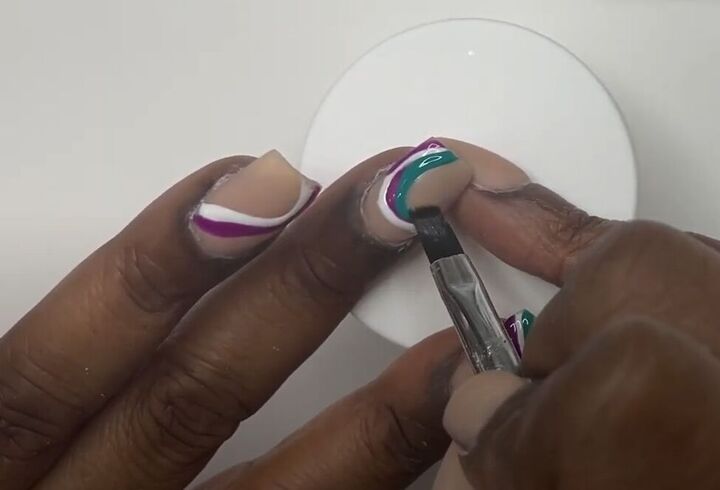
Add your third color, following the same pattern. Use a small clean brush to keep your colored lines crisp and clean.
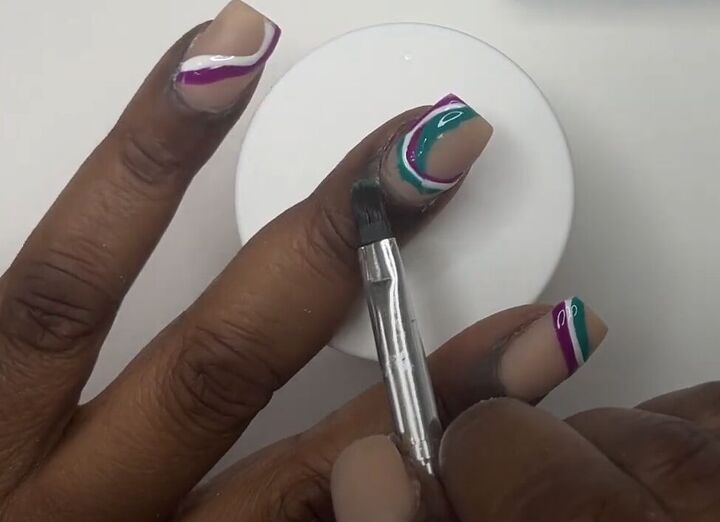
Once all of your colors have been applied, use a small brush dipped into a tiny bit of running alcohol to do a final clean-up up the lines.
Then, do a full 60-second cure of your nails.
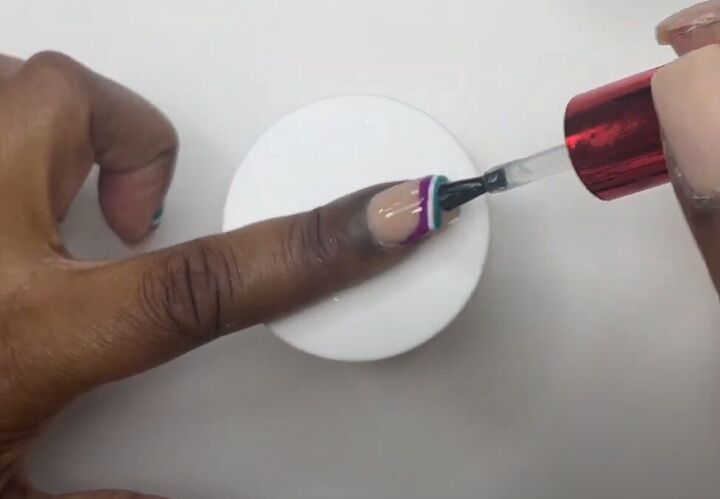
8. Apply a top coat
Use a clear top coat over your swirl nail-art, and cure for one to two minutes, depending on how thick your top coat layer is.
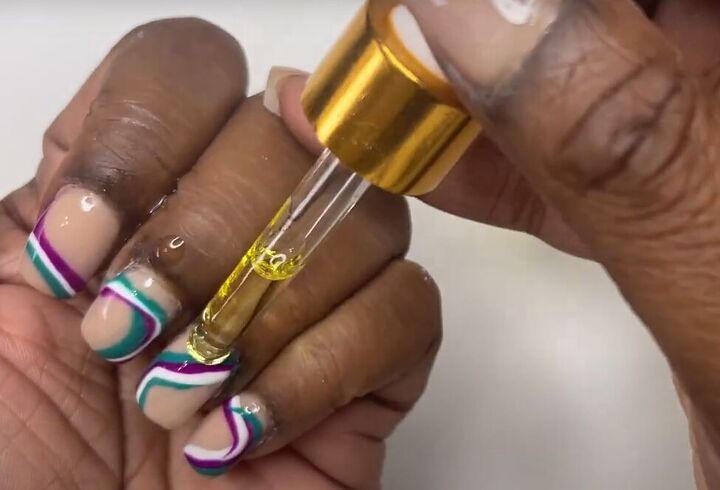
9. Protect your cuticles
The last step is to apply some cuticle oil to your cuticle areas and massage it in.
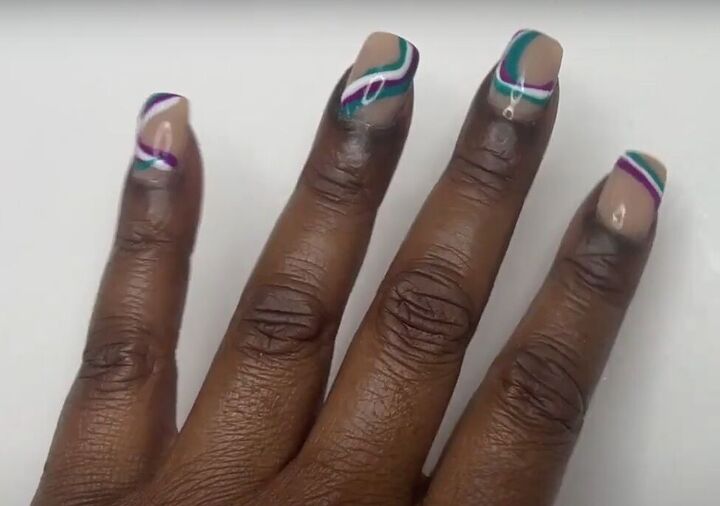
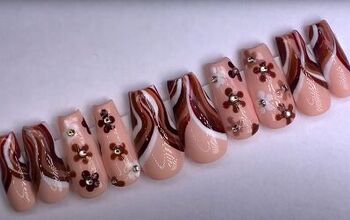
DIY nude nails with swirls
Here is the final look at my nude nails, done with acrylic nail powder, and topped with a gorgeous swirl nail art design completed with gel polish.
If you have never used dip powder for your nails before, give it a try!
Leave a comment to let you know how you liked it, and whether you also tried a swirl design of your own.
For more nail content, check out my post on How to DIY a Sexy Nude and Black Nail Design.
The author may collect a small share of sales from the links on this page.


Comments
Join the conversation
So artistic! Thanks for sharing your talent.