Upstyling a Plain Black Dress With Adorable Embroidered Daisies

In this tutorial, I'll be transforming a plain black corduroy midi dress with some embroidery. I wanted to spice it up, so I will be adding some embroidered daisies so that the dress is more to my style. I’m also going to be shortening the dress as well.
Tools and materials
- Black dress
- Scissors
- Measuring tape
- Pins
- Embroidery hoop
- Embroidery thread
- Embroidery needle
- Embroidery scissors
- Fabric pencil
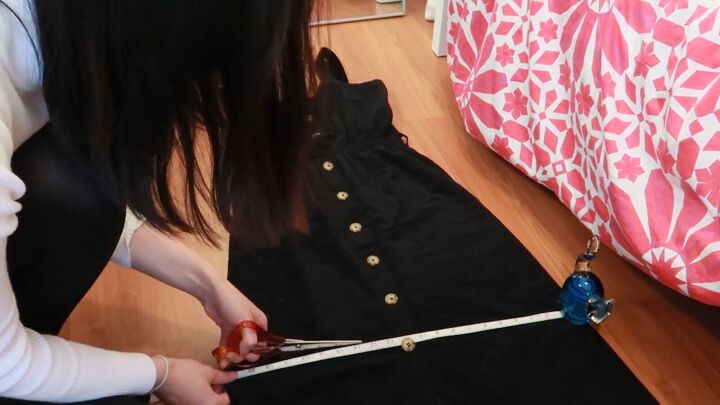
1. Cut the dress
The first step is to cut the dress to the length you want.
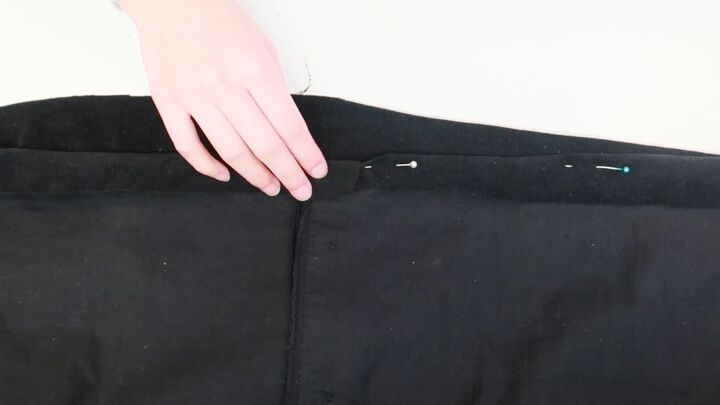
2. Sew the hem
Once you’re done cutting, fold the bottom over, pin it down and sew a straight stitch to hem the skirt.
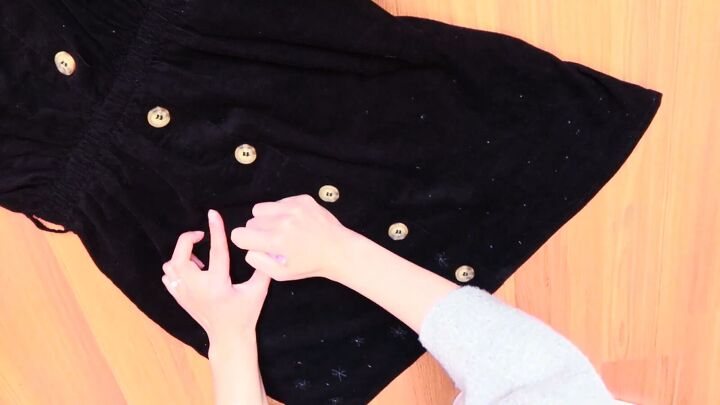
3. Mark the dress
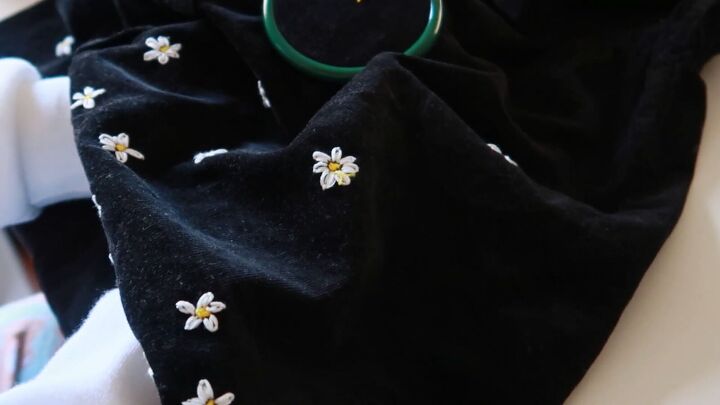
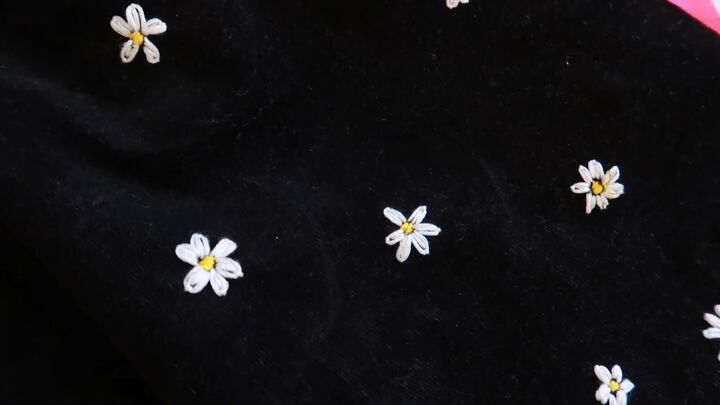
Now we are going to embroider some daisies onto the dress. The style I’m going for here is where there will be a lot of daisies at the bottom, and then slowly, like a gradient, there will be less and less of them up the dress.
Take your fabric pencil and draw out where you want the daisies to be; I used dots to mark where I wanted them to go.
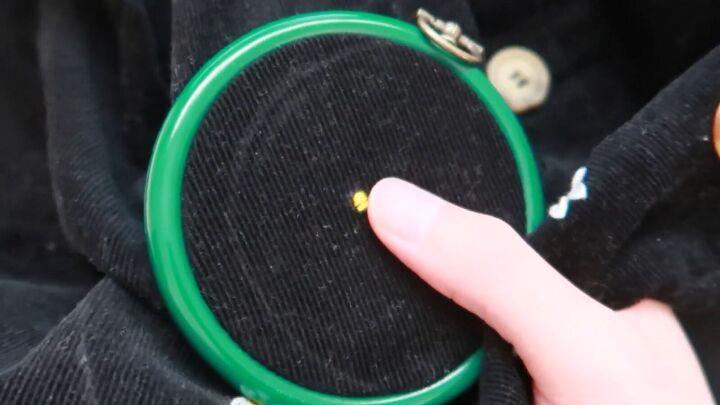
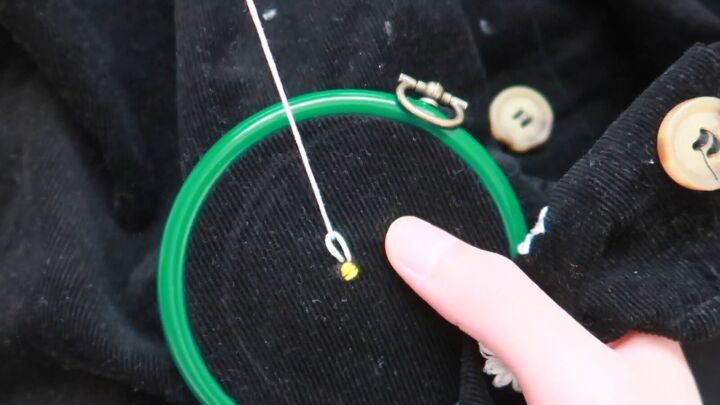
4. Embroider the center of the daisy
Next, grab the embroidery hoop and place it over the area where you want to start embroidering. Then thread your needle; I threaded through six strands because I liked how it looked, but you can also pull them apart and make them thinner if you want.
Tie a knot at one end and ensure it’s big enough so it doesn’t slide through the needle. Then start by poking the needle underneath the area and pulling it up. Do a couple more stitches until you’re happy with the size and the shape of the center of the daisy.

Once you’re happy with that, create a loop with your thread, and then stick the needle through the existing threads to create a knot. Then snip the threads, and there you have it, the center of a daisy.
5. Embroider the petals
Next, we’re going to do the petals. Take the needle from the yellow center, pull it up to the top and then go back down to the hole you just made and create a loop.
Don’t pull it all the way through because you want to make a loop. Then pull your needle back up where you want the petal to be. Now just pull the loop until it’s fairly tight.
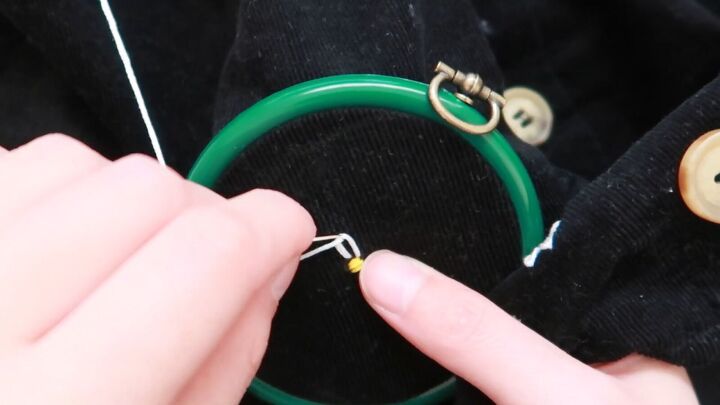
Now, you’ll do a little stitch directly on top of the hole that you came up from to secure the petal in place.
You can leave it as it is if you want, but I wanted my petals to be filled in, so I just did a couple more stitches to fill in that gap. And then you just keep going round, embroidering the petals until you’re done, and the flower is finished. Then tie off your threads and create a knot.
All you have to do now is just repeat that across the whole dress. This is quite a long process, each flower took me around 10-30 minutes to embroider, and the dress took me around 10 hours in total, but the end result is definitely worth the effort.
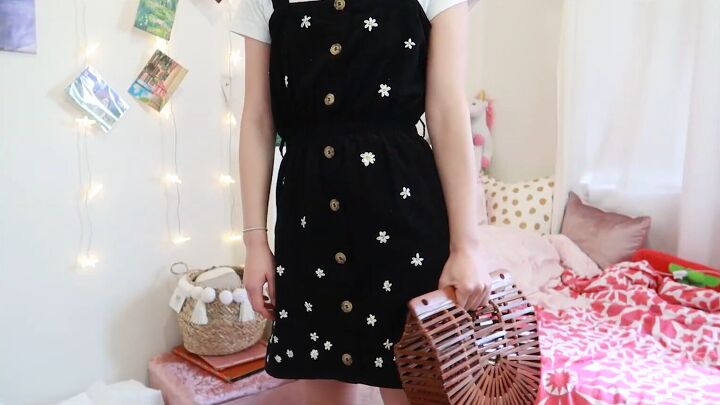
DIY dress with embroidered daisies
Here is the finished dress! I think that the new mini length looks a lot cuter, and the flowers are such a trendy and unique handmade touch. I really like the gradient effect, and overall I know that I’m going to get a lot of wear out of this dress. All the time I spent embroidering it makes me love it all the more.
Let me know what you think of this tutorial and the final product in the comments below.
The author may collect a small share of sales from the links on this page.


Comments
Join the conversation