How to Turn Men’s T-Shirts into a Dress

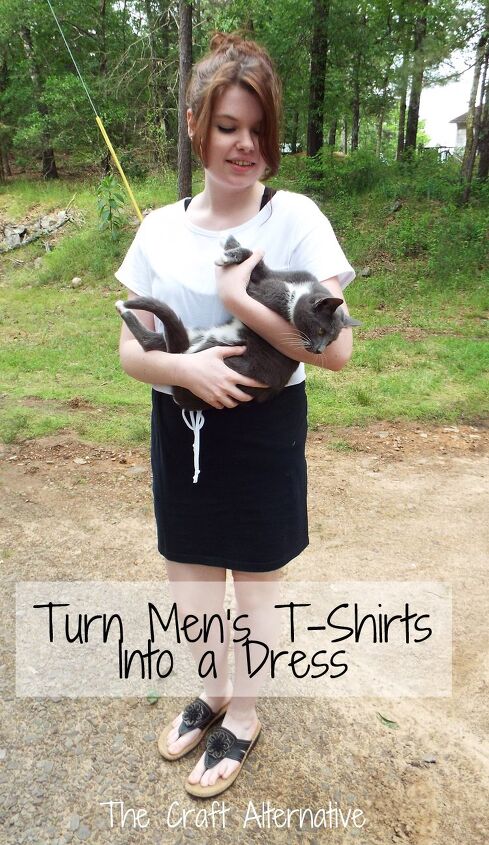
I love creating new garments with men’s t-shirts… They are inexpensive, comfortable, and come in an array of colors. I am always searching for a great t-shirt dress that is long enough for me and my long legs, so I came up with the idea to use two men’s t-shirts to create the most comfortable dress I will probably ever own! These dresses can be made in one solid color (which is what I prefer) or using two contrasting colored shirts, like the example in this post.
Two shirts are used for each dress – one shirt is sewn to the bottom of the other, with a casing and drawstring so that the dress can be cinched at the waist or hips.
Start by washing and drying the shirts. Press any wrinkles out, if necessary.
Try on the shirt that will be used for the bodice and determine how long it will need to be… In other words, when the dress is cinched at the waist or hips, there needs to be enough of the bodice to sort of blouson or hang over the casing and drawstring – just slightly! My shirts are extra large and my daughter’s shirts are medium, and I found that cutting 5″ off of the bottom of the shirt used for the bodice worked equally well for both sizes.
Cut the second shirt across the body just under the sleeves and pin it to the bottom of the shirt used for the bodice.
Sew the two pieces together using a serger or a stretch stitch on a regular sewing machine.
Cut two 1-3/4″ strips from the piece that was cut off of the bodice. One piece is for the casing and the other piece is for the drawstring. (Contrasting colors can also be used!)
Pin the casing on the lower edge of the bodice just above the seam line for the skirt and stitch in place. There is no need to hem the casing. Stitch it in place using a stretch stitch on a regular sewing machine. (I used a coverstitch machine to sew the casings.)
Cut the neckband out of the bodice t-shirt, and cut approximately 1-1/2″ off of each sleeve. Press a 1/2″ hem in each sleeve as well as in the neckline, then stitch with a stretch stitch on the sewing machine. (I used the coverstitch machine, again!) A decorative stitch and contrasting thread can also be used!
Take the piece that was cut for the drawstring and pull it – this will cause it to stretch and curl in on itself. Use a safety pin to thread it through the casing.
That is it! Super-simple and easy, right? Not to mention that the dresses look great and are so inexpensive!
Enjoyed the project?
The author may collect a small share of sales from the links on this page.










Comments
Join the conversation