How to Make a Gorgeous DIY Wrap Dress Out of 2 T-Shirts

In this refashion tutorial, I’ll show you how to make a dress from two t-shirts. It’s such a lovely transformation. This DIY ruffle wrap dress is the perfect addition to your summer closet without the expensive price tag! All you’ll need is two t-shirts for this DIY: one your size and the other that’s bigger. Let’s get started!
Tools and materials:
- 1 oversized t-shirt
- 1 t-shirt in your size
- Pins
- Scissors
- Sewing machine
- Iron
- Thread
- Measuring tape
- Chalk
1. Make the top pattern
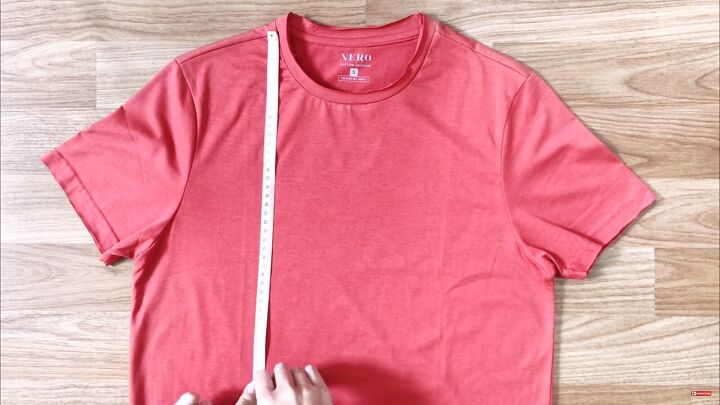
Using the t-shirt in your size, measure the length from the shoulder to your belly button. Mine is 40cm (15.74”).
Draw a horizontal line at that mark and cut across.
Measure and mark the middle of the bottom edge.
Connect the bottom center mark to both sides of the neck. You should have a deep v-shape.
Cut along the lines and the back of the neck.
2. Make the bottom pattern
Moving to the bigger t-shirt, draw a horizontal line under the armholes and cut across.
Measure 20cm (7.87”) from the bottom right edge.
Connect the mark to the top right corner.
Draw a curve right below and cut.
3. Make the ruffles
With the excess fabric from the first t-shirt, measure the width of the fabric and divide it into three parts. In my case, it’s 9cm (3.54”) per segment, which will be the width of the ruffle.
Cut through both layers and the edges on one side.
Connect the short ends and sew to make one long piece.
Sew a gathering stitch on one end of the fabric, then pull the upper thread to create the ruffles.
4. Attach the ruffles
Pin the ruffles to the edge of the dress, then sew down.
Cut a curved line along the top ends of the ruffles to give them a nice finish.
5. Make the dress ties
Measure 18cm (7.08”) up from the bottom of the cut t-shirt (use the one that fits you), and draw a line across.
Measure 9cm (3.54”) from the top line and draw another line. You should have two equal rectangles to cut.
Pin and sew the short ends to make one long piece.
6. Make the short ties
Using the sleeves from the t-shirt, measure 9cm (3.54”) across and cut. Try to get the maximum length for this.
Pin and connect the short ends to make the short tie for your DIY ruffle wrap dress.
7. Prep the ties
Fold both the long and short tie in half and pin at the edge.
Sew along the edge to secure and curve one of the short ends of each tie.
Use a long stick to turn the fabric inside out.
Then, press.
8. Create the neckline facing
Measure three 2cm (0.78”) rectangles from the neck area of the t-shirt and cut.
Pin and sew the short ends to make one long piece.
9. Finish the neckline
Pin the end of the long fabric to the end of the main bodice piece and sew to secure.
Fold the raw edge of the long fabric inside your top piece and pin.
When sewing, ensure the second seam is bigger than the first seam; this will hide the first seam.
10. Assemble the DIY ruffle wrap dress
Connect the top and bottom of the dress together at the waistline. Then, sew all around.
Pin the short tie to one end of the waistline.
Then, pin the long tie to the other end. Sew to secure.
Since the long tie is on the right side of the dress, seam rip a small hole on the left seam of the dress so that the long tie can go through.
Tip: Sew the two corners of the hole to prevent the fabric from pulling.
Make a dress from a t-shirt
Here’s my final transformation! This DIY ruffle wrap dress has a vintage feel and I can’t wait to wear it out! I hope you enjoyed this tutorial on how to make a dress from a t-shirt. That t-shirt-to-dress transformation was really fun, and I hope you do this for your next DIY.
Enjoyed the project?
Suggested materials:
- 1 oversized t-shirt
- 1 t-shirt in your size
- Pins
- Scissors
- Sewing machine
- Iron
- Thread
- Measuring tape
- Chalk
The author may collect a small share of sales from the links on this page.


Comments
Join the conversation
Great job!!!
Super cute and very clear and detailed instructions!!