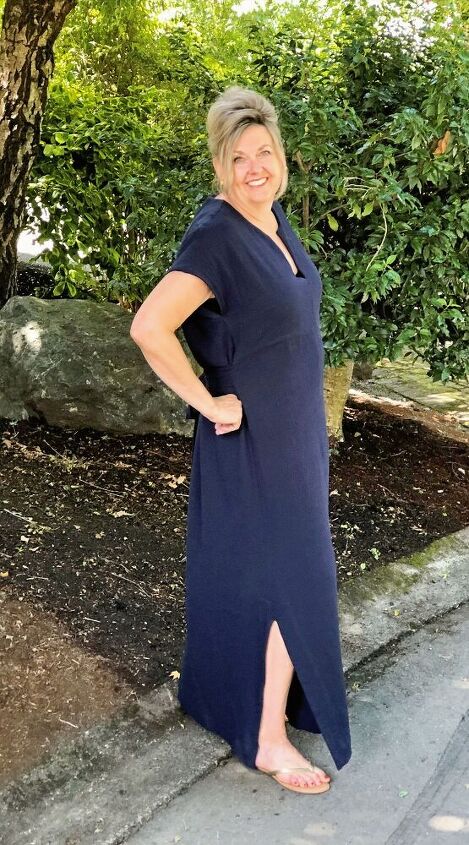
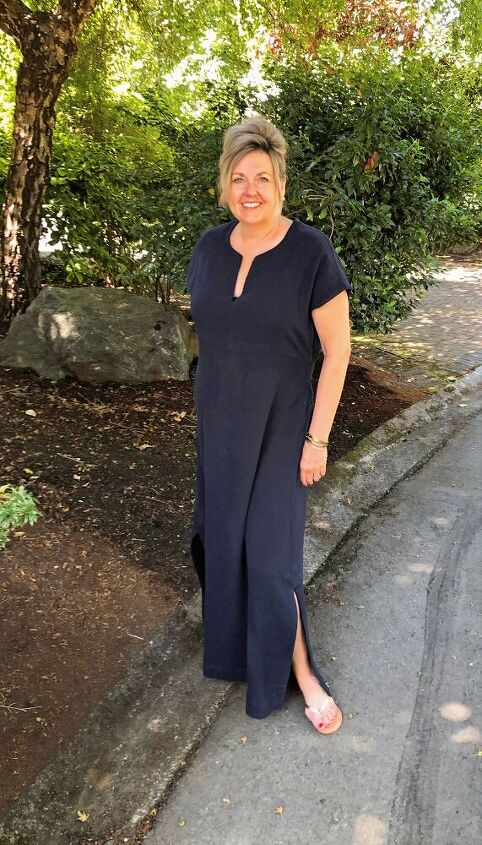
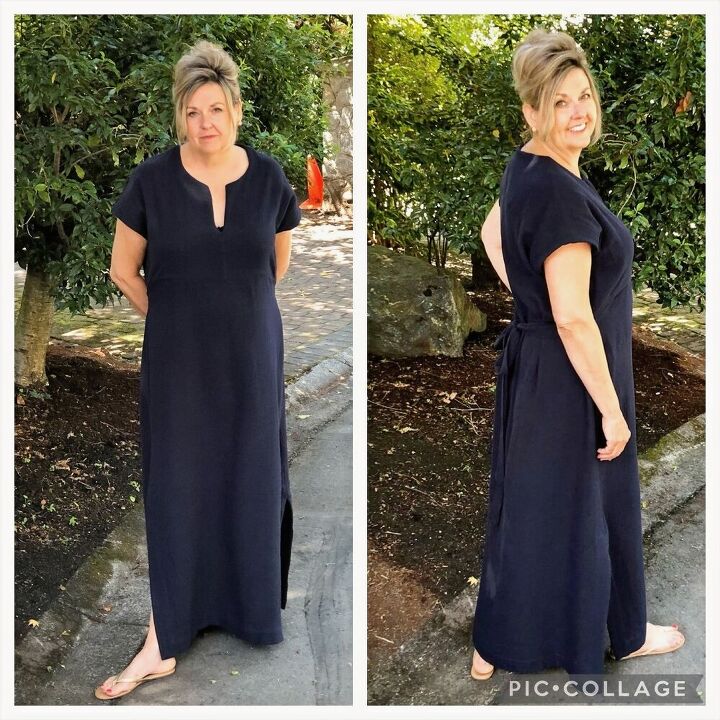
A Damn Good Dress: A Modern Maxi-Length Masterpiece
I am excited to share my Damn Good Dress from Forest & Thread with you. Forest & Thread is a slow fashion brand that offers sewing patterns, and all-in-one sewing kits. I used the PDF for the Damn Good Dress and created a maxi-length dress using a stunning navy cotton double gauze from GK Fashion Fabrics. It is loose fitting dress pattern with a
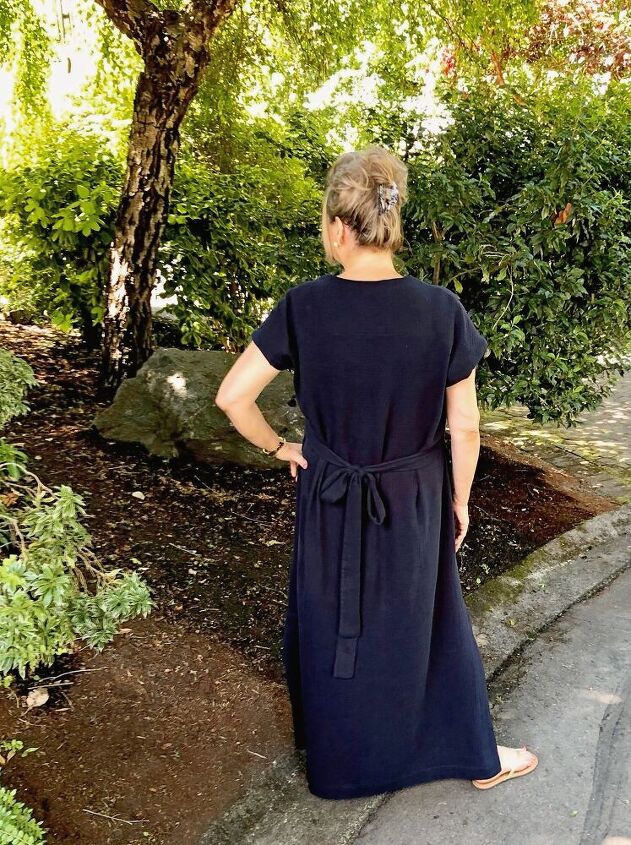
flattering empire waist that features a tie belt at the back.
To begin with, I created a wearable muslin top because I knew I would need to experiment with the design of the elastic belt that comes with the pattern. The instructions to create the belt are very straight forward and easy to follow, making it was not the issue for me. I needed to see if an elastized belt would work with my body shape. I don't really have a defined waist- partly due to my tall build, partly due to my age, so a waist defining feature is not always a comfortable fit for me. But, I was intrigued by the design of the belt so I wanted to try it.
For the top, I used a vintage cotton linen and lined it with a contrasting cotton fabric. The top went together really nicely and the pattern instructions and illustrations are clear and easy to follow. As predicted, the elastic belt design didn't work for me, so I simply unpicked the side seams, took them in to reduce the amount of extra fabric and created a simple top based on the original design. It was a good exercise to create the muslin and helped me to prepare to make the dress. The navy gauze fabric from GK Fashion Fabrics was not something that I wanted to experiment with as it is such nice fabric. By creating a wearable muslin first, I could now confidently create the dress. There are several elements to this pattern that call for careful pressing, flipping of pattern pieces and french seams. The pattern is rated for "Confident Beginners", I would suggest that this is a project for Intermediate sewers unless you have already created a garment with French seams and a double yoke.
If you have never sewn with a double gauze fabric before I suggest that you do a little bit of research first. There are several suggestions that will help you to sew your fabric successfully. Tilly & the Buttons has a great tutorial video that outlines sewing with gauze so you will be completely prepared.
The design for the top features two sets of front panels that created a polished neckline and a beautifully finished garment on both the inside and outside. All of the seams are encased within this design element. Make sure to carefully cross reference all of your measurements with the finished garment measurements as it is difficult to adjust the fit of the bodice after you have sewn it together. The top also features a double back yoke that adds interest to the back of the dress. Follow the directions carefully and make sure you mark one of the yokes as a back yoke facing and one as your outer back yoke. I chose to use Tailor's chalk for this as it is easy to see on the navy, there is no second guessing and it marks your fabric pieces really clearly when you are flipping the pieces back and forth during construction of the top. I found this especially important when working with this gauze as the right and wrong side are difficult to tell apart. I mark the wrong sides with a large X as soon as I cut out the pieces.

The original design of the dress offers a larger arm hole that may be too revealing for some, especially if you plan on wearing it to work as a dress not a cover up. There is a YouTube available that gives you all of the instructions you need to close the arm hole up so that you can wear a bra and feel comfortable with a more conservative fit. I chose this option so that the dress would be a more versatile addition to my wardrobe.
I made a size 14 top based on my bust measurements and graded the skirt to a size 10 through my hips. I am 6 feet tall so I added 6" to the length of the dress. The only other modification that I made was to add 1/2" to the length of the top so it would hit me on my upper waist. When I made the top I originally added 2" to the bodice which made it too long so the fit that I wanted for the dress. Even though the elastic belt didn't work for me, I still wanted a tie belt to maintain the style of the dress so I cut out the belt but shortened the length by 11" and just skipped through the steps for adding the elastic.
I am pleased with the final product and I do feel like it is a Damn Good Dress! I like the simple lines of the dress and the mitered hemline adds a sophisticated finish to the side slits. This will be a great dress to wear casually with sandals or to add some sparkly jewellery and a dressier shoe for a dinner out.
I know that I will wear both the top and the dress throughout the summer.
After all.... there is Sew Much To Design
Happy Sewing,

The author may collect a small share of sales from the links on this page.


Comments
Join the conversation
I have the same problem of tops and bottoms not hitting where they should I'm 5'11 with a 1x top and a med bottom so things always have to be revised. This is a good idea to make a preview piece.
I find it really helps. I often use thrifted fabric or sheets so that I am not worried about using expensive fabrics. This wearable Muslin was made from a linen tablecloth!