A Simple Dress Without a Pattern
About 2 years ago I bought some green jersey to make a dress and last week I finally got round to making it.
I’d decided not to bother with a pattern as I was planning on making something very simple and I already had an idea in my head of how I wanted it to look. I often have issues with patterns anyway and I end up with clothes that don’t fit well.
The dress was very easy to make. It is made up of only 6 pieces and because it is made from jersey, it doesn’t require a zip.

I wore it at the weekend and not only did people admire it, it was so unbelievably comfortable it was like wearing pyjamas!
How to Make a Simple Dress Without a Pattern
You Will Need: 3 m of jersey fabric ( 2.5 m would probably be enough), 1 m of bias binding, an old t shirt, some scrap fabric (a plastic bag, greaseproof paper or newspaper might work but consider an old shirt, curtain or tablecloth) a pen, a piece of chalk.
Cutting Out
1. Put on the old t shirt. Pin the piece of scrap fabric to yourself, ensuring that your have covered the shoulder and side seams. Using the seams of the t shirt as a guide, draw on the shape you would like 1 of the front pieces to be. If you need gathering in the under boob area, gather the fabric so that it fits and either pin or tack the gathers in place.
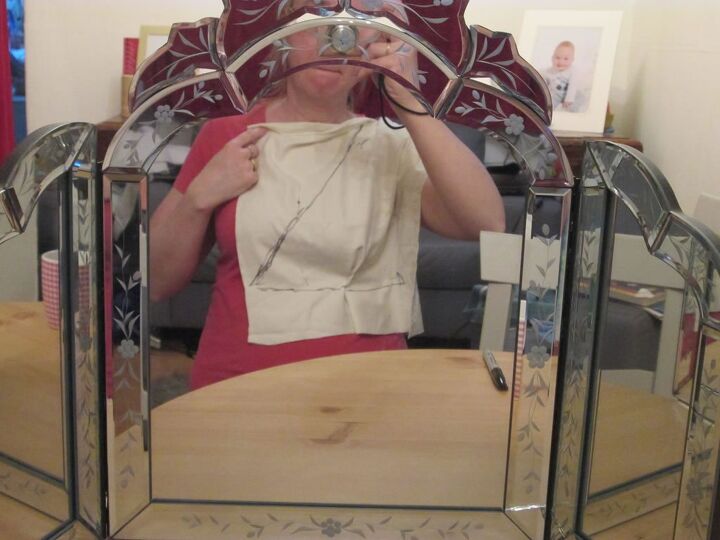
2. Take the t shirt off with the fabric still attached. Using the seams of the t shirt again, draw on armholes and check the other seams.
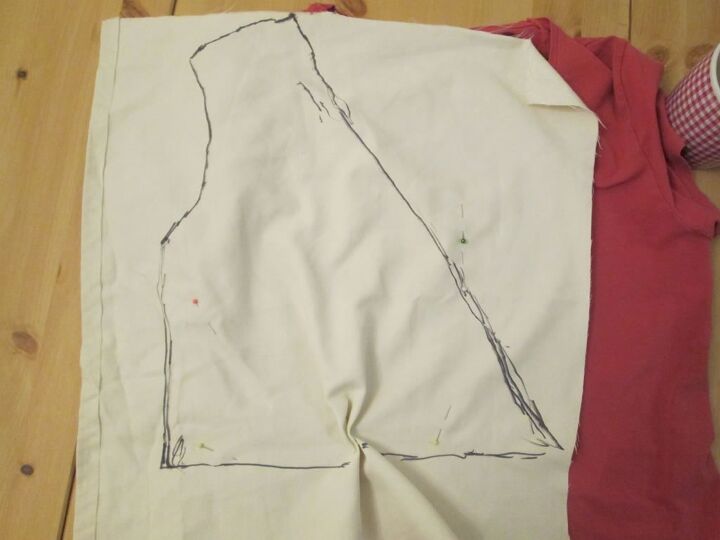
Mark where the gathers begin and end.
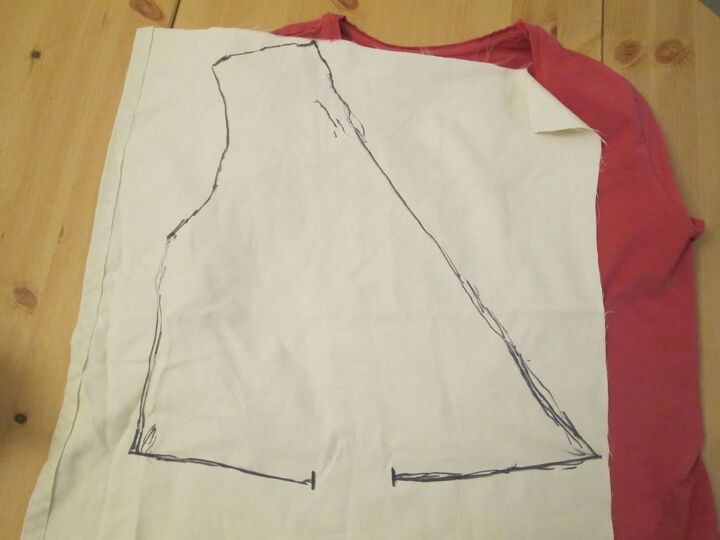
On the side seam of the t shirt, mark with a pin where the bottom of the top piece is.
3. Remove the fabric. Cut out along the pen lines. Pin to your dress fabric checking that the side seams run parallel with the grain. Add a 1 cm seam allowance and cut out 2 front pieces. Make notches where you will need to gather.
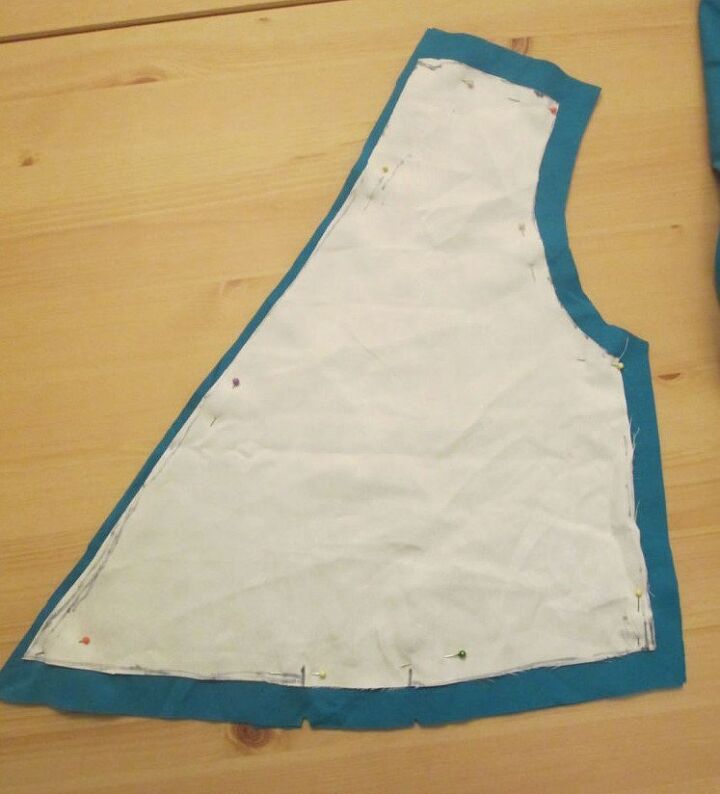
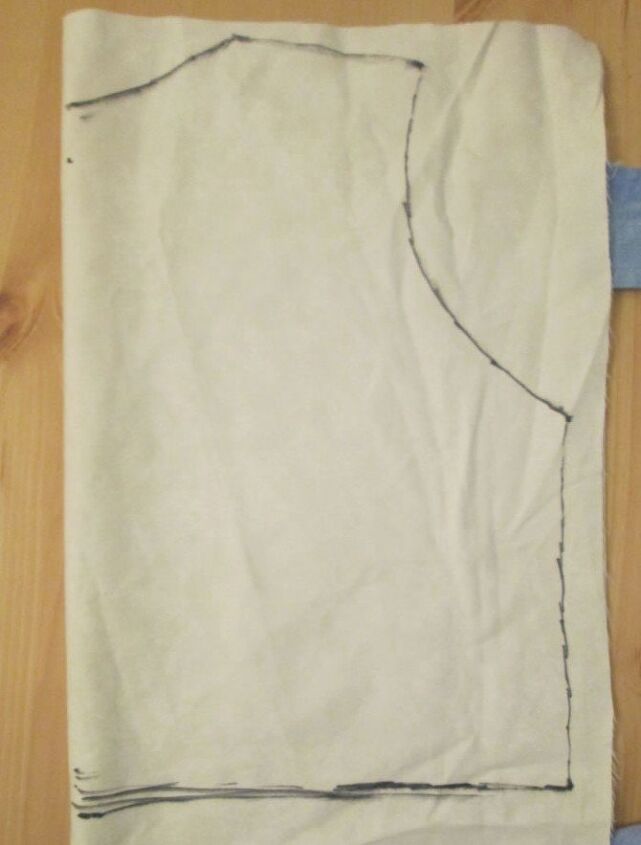
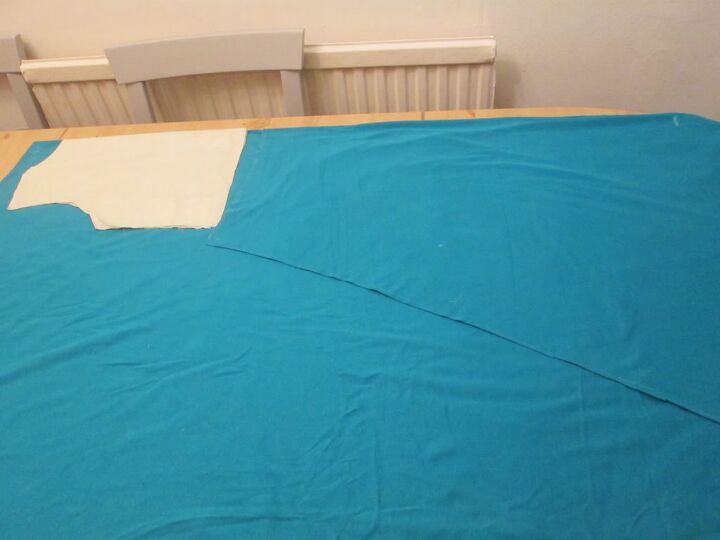
4. Pin another piece of scrap fabric to the back of the t shirt. Using the seams and neckline as a guide, draw a piece for half of the top of the back of your dress.
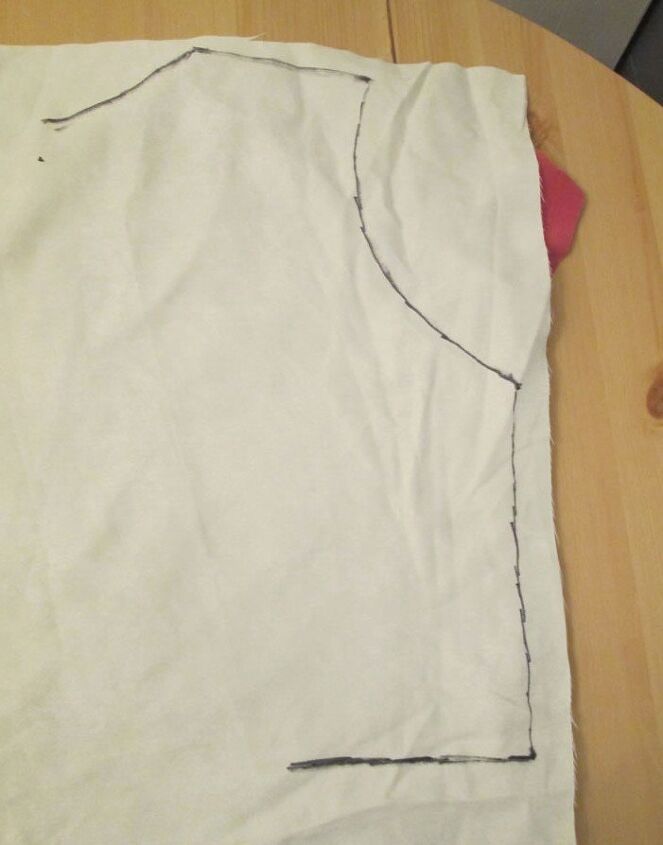
Fold it in half. Cut out along the pen line but do not cut it out in your dress fabric yet!
5. Now you need to take some measurements for the skirt. Measure from where the top of your dress will end to where you want the hem to be. Add 5 cm for seams and hem and record this somewhere.
Next, measure around where the top part of your dress will end. Divide by 2, add 5 cm and divide by 2 again. Record.
Then measure around your hips. Divide that measurement by 2, add 5 cm, halve it and write it down.
Then measure the distance between these two points and record that as well.
6. Fold your dress fabric in half so that the selvedges are together. Using a piece of chalk, mark on the folded edge:
- where the top of the skirt will be
- where the bottom of the skirt will be
- where the widest part of your hips will be
Mark on your waist measurement by measuring out from the mark indicating the top of the skirt and make another mark level with it. Do the same with your hip measurement.
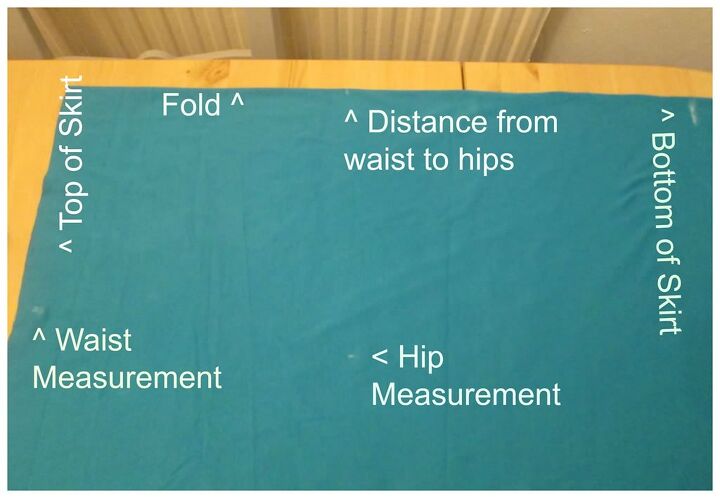
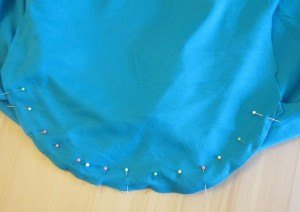
Draw a line through the marks indicating your waist measurement and hip measurement. The line needs to be as long as you want the skirt to be. Join the bottom of your line to the bottom mark on the fold. The line will need to curve gently.
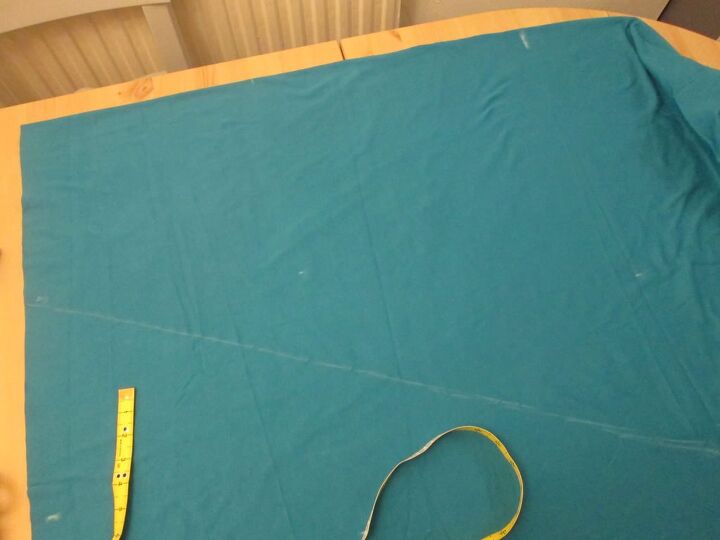
Cut out. This piece is for the front skirt.
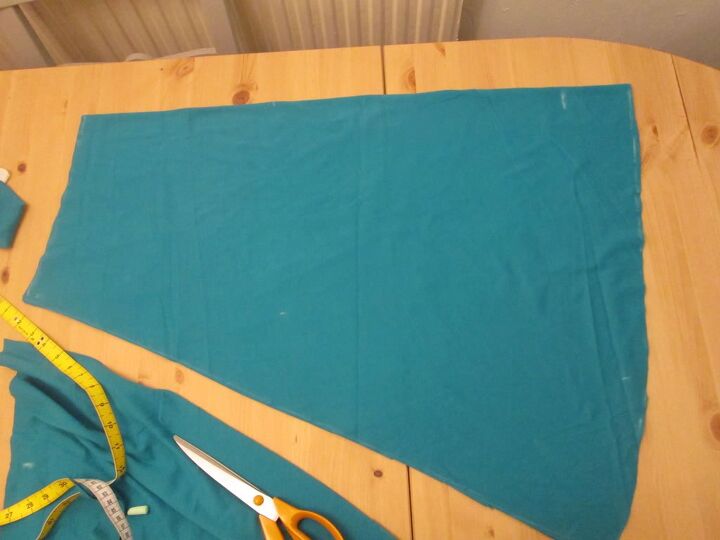
7. Back section next! Take the pattern piece you made for the top back, folded in half, and the skirt piece you made in the previous step, also folded in half. Place the pieces on the dress fabric so that the folds are lined up with the fold of the fabric.
Pin them to the fabric and cut out.
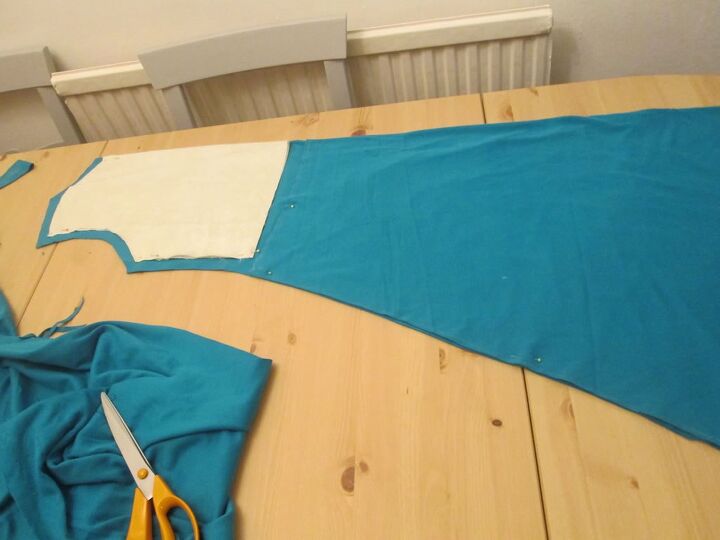
That’s most of the cutting out done. Phew! Tricky part over!
Making Up
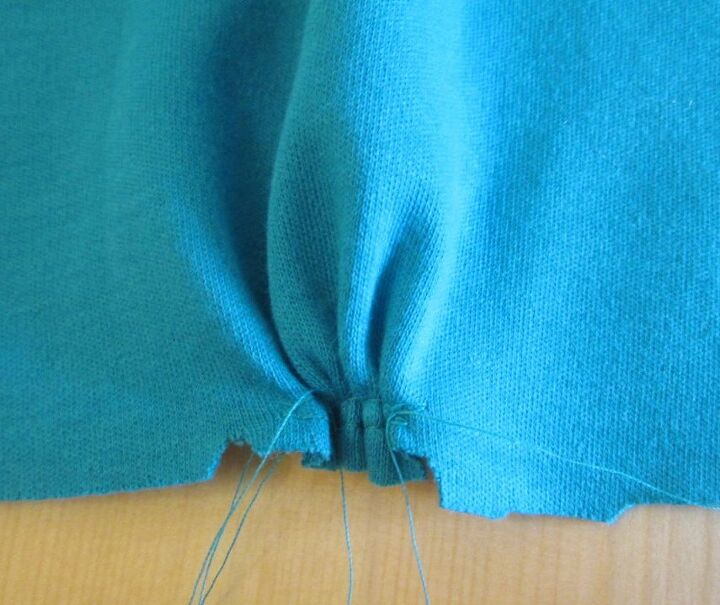
1. On the front pieces, sew two rows of long stitches between the notches and close to the edge.
Pull the threads tight to gather.
2. With the right sides together, pin the front pieces to the back piece at the shoulders. Sew the shoulder seams.
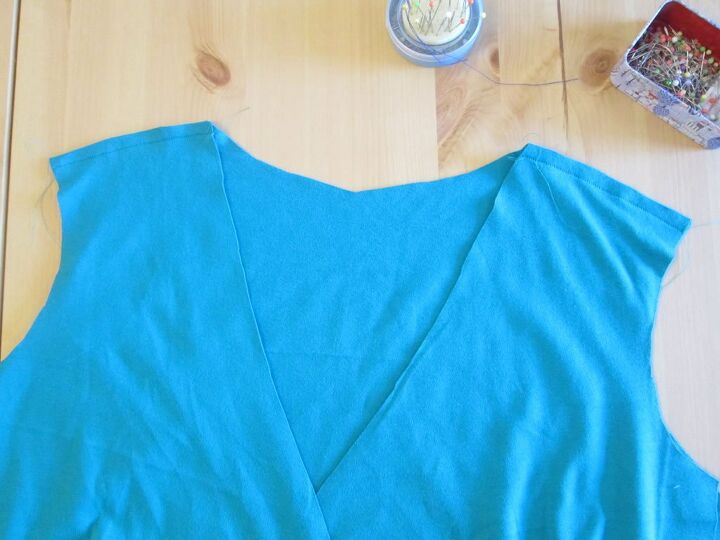
Trim and press.
Tip Many sewing machines have a stitch for sewing stretch fabrics. If not, use a zig zag stitch instead as straight stitches might cause the fabric to pucker.
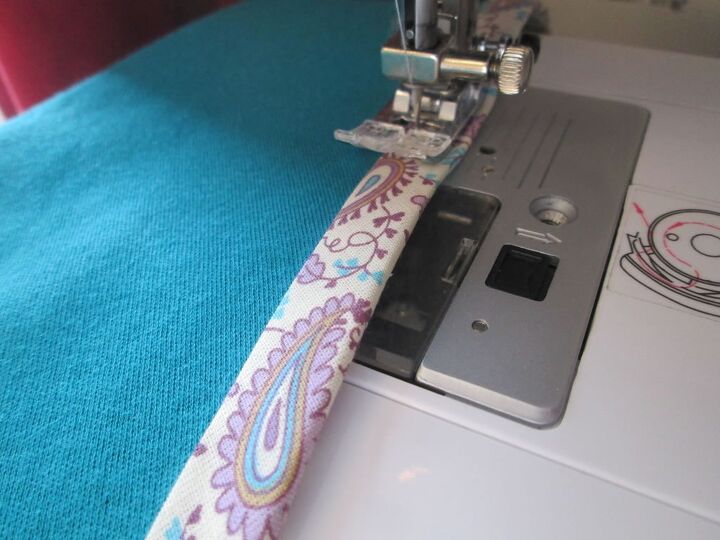
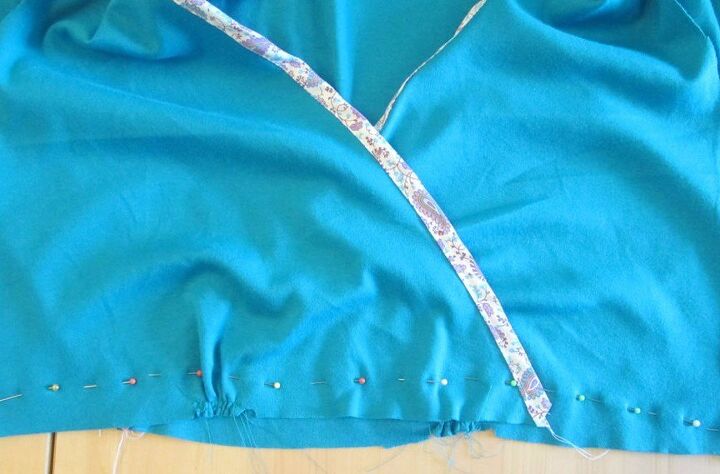
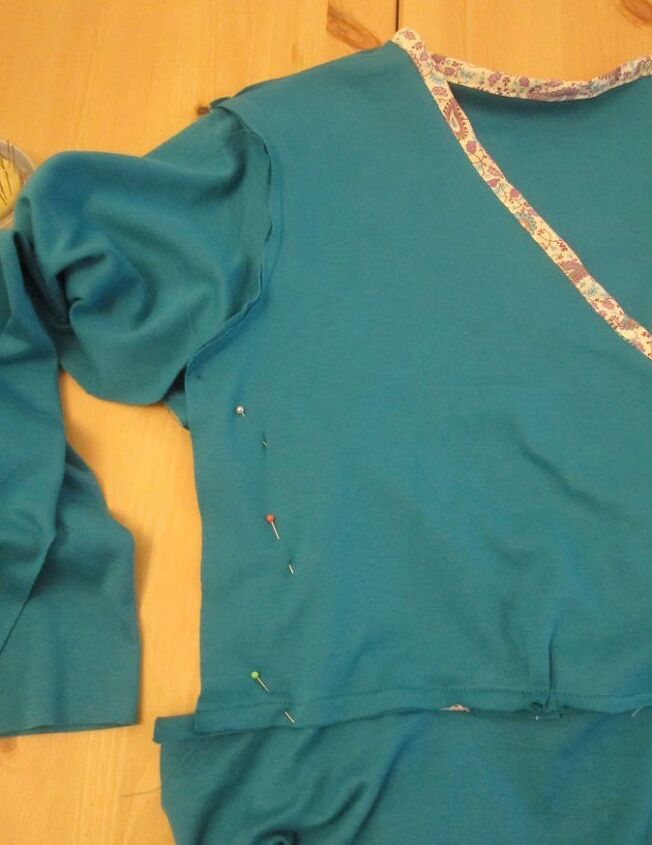
3. Starting at the bottom corner of one of the front pieces, attach the bias binding right the way round the neckline to the bottom corner of the other front piece.
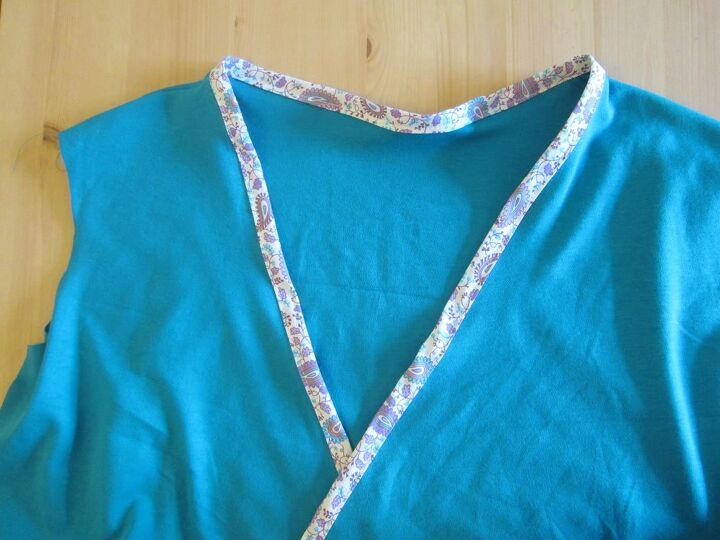
The way I attach bias binding is to fold it hard lengthways. Then I unfold it and pin it onto the wrong side of the fabric so that the right sides are together and the raw edges are aligned. Next I sew it on, keeping close to the raw edge.
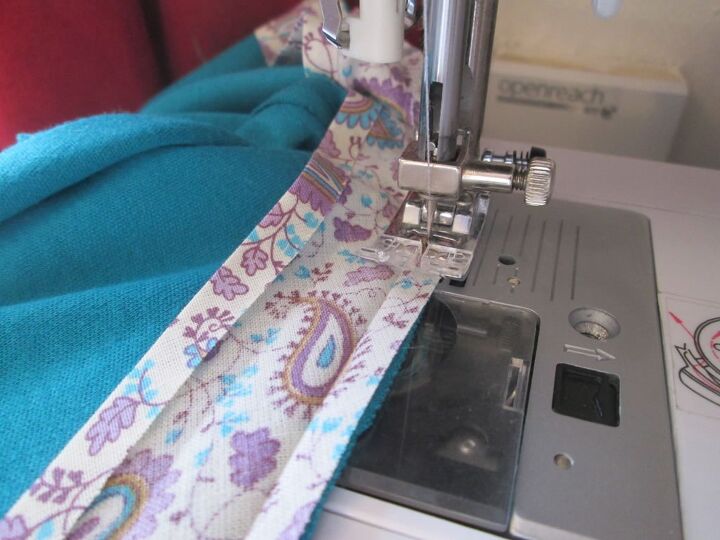
Then I fold it over the raw edge of the fabric, making sure the other edge of the bias binding is tucked underneath. I pin it in place (sometimes!) then top stitch all the way round.
4. Pin the side seams and put the dress on. Pin the front pieces together.
Take the dress off. You might want to unpin the side seams first!
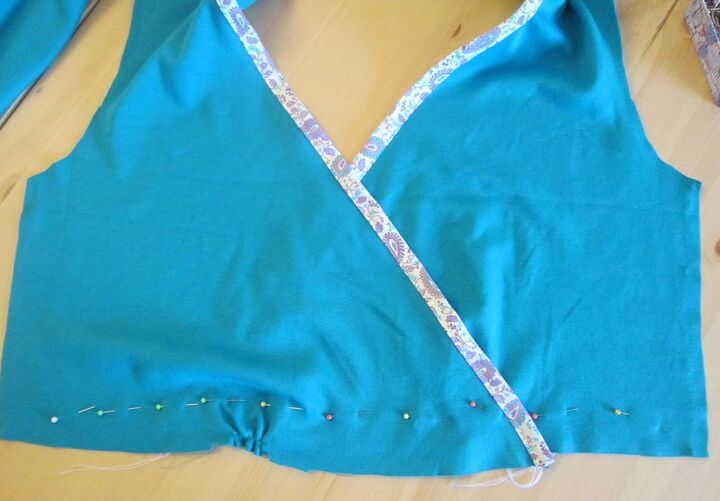
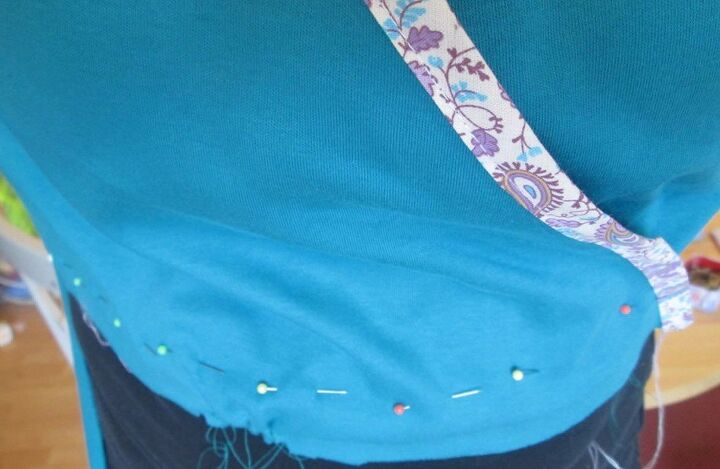
5. With the right side together, pin the top piece to the skirt.
Keep the front sections pinned together! Sew the skirt to the front.
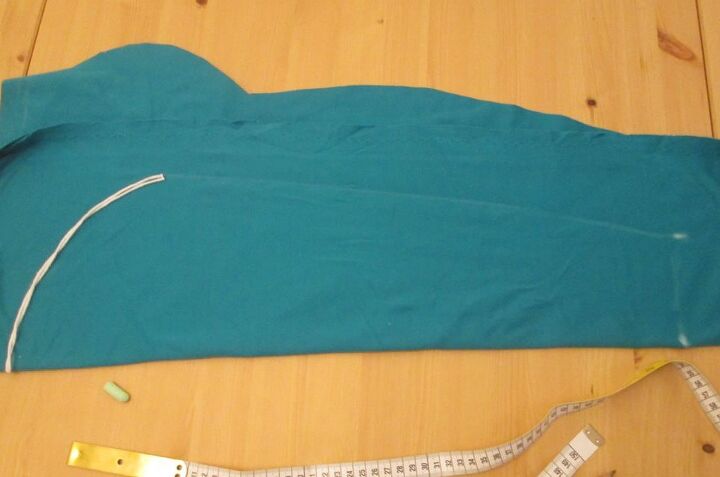
6. To make the sleeves, measure the armhole of your dress using a piece of string.
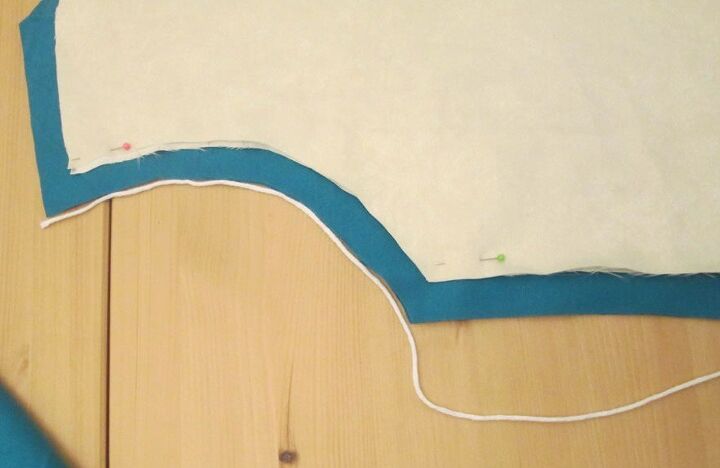
Write it down (or you could just remember it if your memory has not been ruined by too many babies!).
Measure the length from your shoulder to your wrist. Measure the circumference of your wrist, add 3 cm and divide in half.
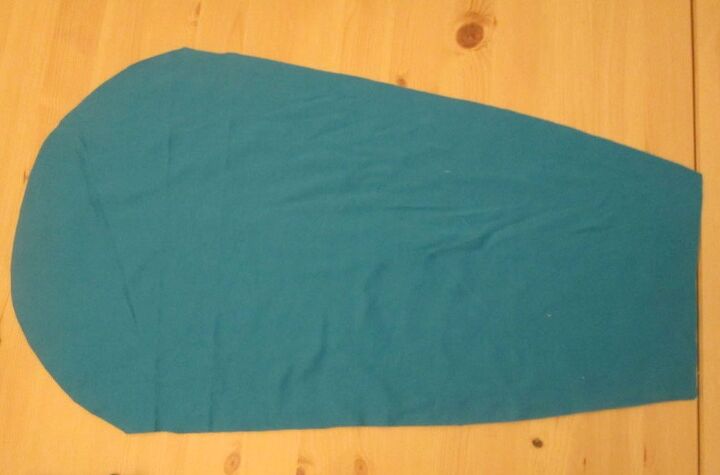
On the fold of your dress fabric, mark how long you will need your sleeves to be. At one end, make a mark outwards for how much you need to allow for your wrist. At the other end, using the piece of string, draw a curved line for your shoulder. Join the outer shoulder mark to the outer wrist mark. Cut out 2.
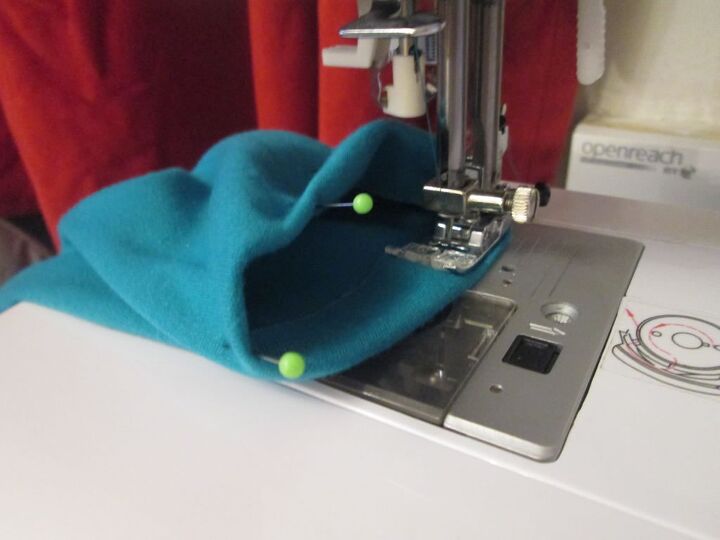
7. With the wrong sides together, pin the sleeves to the armholes. Sew. Trim the seams.
8. With the wrong sides together, pin the armpit seams, then pin the rest of the side and arm sleeves.
Sew side seams from wrist to hem. Trim seams.
9. Hem sleeves.
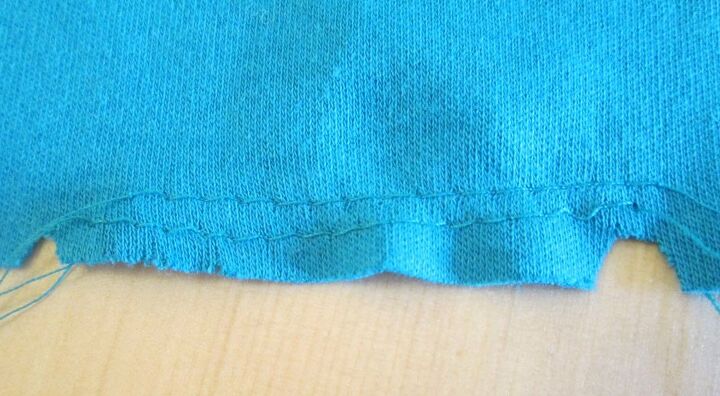
10. Hem the skirt.
If you have enough bias tape, you might like to use that instead of hemming. I didn’t because the tape I had was left over from another project.
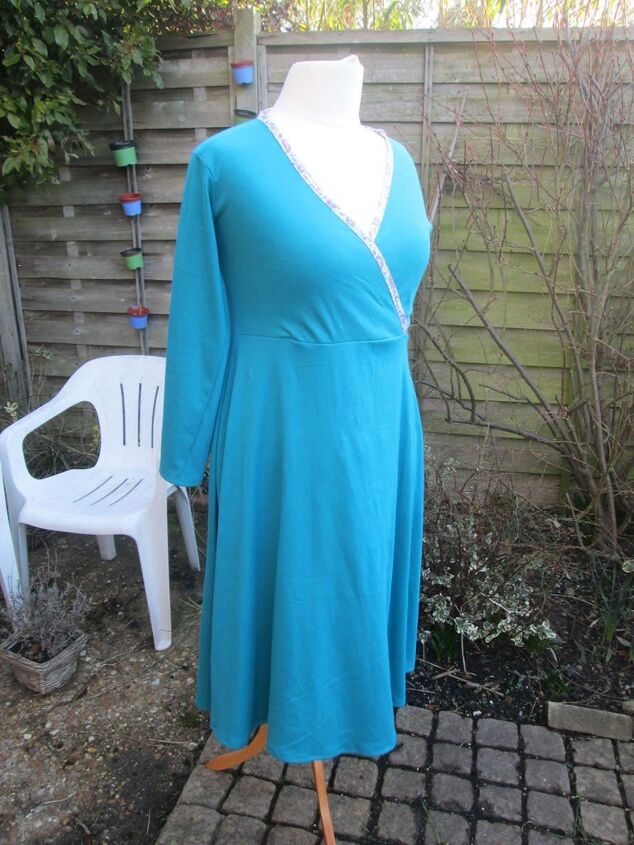
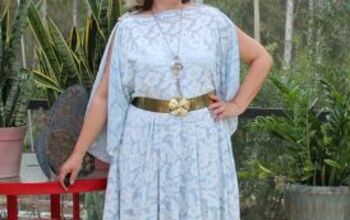
Here is the finished dress, modelled by Betty the tailors’ dummy.

PS If you want to sew clothes without using a pattern, you might like my ebook!
The author may collect a small share of sales from the links on this page.


Comments
Join the conversation