DIY McCalls 7717 Laura Ashley Dress Pattern Review
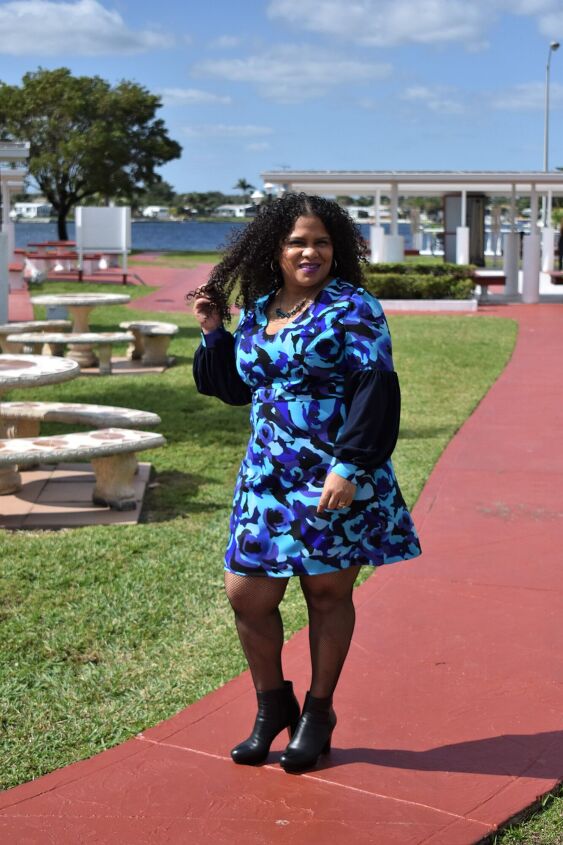
I recently made this McCalls Laura Ashley dress and figured I would do a review for it. I made it using this beautiful Watercolor Floral Crepe fabric I purchased from Fabric Mart a while ago. Sorry, it is no longer available as I purchased it by the piece. I decided to change it up a bit and used a navy colored crepe fabric I purchased at the Loft in LA last summer. Initially, I was concerned about the length because it looks pretty short on the model and I don’t where short dresses. I was prepared to have to lengthen it, but it turned out I didn’t have to. The fact that I’m only 5’2″ might have had something to do with it.

Pattern Description:
Early Spring Laura Ashley Misses’ Dresses
Pattern Sizing:
I cut out a size 20 for the bodice pieces and I then graded the pattern to a size 22 for the waist. For the sleeves I cut a size 22 because I needed a larger size for my arms. I did not know that you could do a bicep adjustment when I made this dress. I would have gone with an adjustment instead of the larger size. Doing so gave me a puffy sleeve, which I liked, but it was not what the pattern called for.
Did it look like the photo/drawing on the pattern envelope once you were done sewing with it?
With the exception of a little bit of a puffy sleeve, yes, the dress I made looked like the dress on the pattern.
Were the instructions easy to follow?
Yes, the instructions were easy to follow.
What did you particularly like or dislike about the pattern?
I loved the sleeves the most. I did not like the fact that I had to make several muslins because I was having fit issues.
Fabric Used:
Grape/Indigo/Aqua/Black 100% Polyester Watercolor Floral Crepe de Chine from Fabric Mart. I picked up this Pre-Cut 4 yards of fabric for $3.20 during a sale!
Pattern alterations or any design changes you made:
When I made my muslin I noticed that I had bunching in the back and I realized I needed a swayback adjustment, which I had never done before. I had to do some research on how to accomplish this and even reached out to one of my sew sisters, Brittany J Jones, who greatly helped me out with my swayback adjustment. She was a godsend. Brittany pulled out he pattern and even did a mini tutorial for me on how to do a swayback adjustment! If you don’t follow her, you need to do it now! Doing a swayback adjustment sounds scary, but it’s not as bad as it sounds. What you need to do is pinch out and pin the extra fabric in the back of your dress so that the back is now smooth. Then measure how much fabric you pinched. Continue to pin the fabric horizontally across until you taper to the side seams creating a horizontal dart. This should take care of the extra fabric. Using the measurement I recorded for how much fabric I pinched out I transferred the dart to the bodice back and bodice side back pattern pieces. Once I had made the sway back adjustment, I then graded the pattern out to a size 22 for my waist.
Would you sew it again? Would you recommend it to others?
I would not sew it again. I did learn a lot while making this dress, so I’m glad I made it.
Even though I wouldn’t make this dress again, I would recommend this pattern. I think the dress is very cute and I especially love the sleeves. The dress is not difficult to make, but it took me longer than I anticipated because of the fit adjustments I had to make. Practice makes perfect and now I know how to do a swayback adjustment which I’m sure I’ll be needing to do again in the feature.
Conclusion:
When making this pattern, make sure you use the pattern cutting instructions and keep track of which fabric pieces are for your lining and which are for the actual dress. This will save you from a headache later on. I promise. I would also suggest making a muslin to ensure you get the fit correct.
Besides making a muslin, I would suggest getting familiar with hand sewing, which I had never really done before either. Whenever a pattern called for hand sewing, I would always find a way to machine sew whatever I needed to hand sew. Also, if you have never done buttons before make sure that you practice a few on a piece of scrap fabric.
Have you made this pattern yet? What do you think of my dress? Let me know in the comments section.

The author may collect a small share of sales from the links on this page.


Comments
Join the conversation
This looks absolutely great on you :-)