How To Make A Mini Ruched Dress With Drawstrings

In this tutorial, I'm going to show you how to make a ruched bodycon dress. When I came across the mini ruched dress style on Pinterest, I was blown away by how cute and at the same time technical the dress was.
Technical, because of its adjustable features. The drawstrings make it easy to gather up the bodycon dress into pleats and also pull it into its full size lengthwise. The pleats give the dress a sexy illusion, making you fall in love with it even more.
Today, I'll share how to make a ruched dress using the Alex DIY dress sewing pattern. Or, you can use this guide to modify and add drawstrings to any bodycon dress you already own. Let's get started!
Tools and materials:
- Jersey fabric (medium weight knitted): I made use of jersey fabric, consisting of 95 percent cotton and 5 percent spandex. It has to be stretchy, so this fabric is the best choice. Such fabric is easy to get in any fabric shop.
- Thread
- Pins
- Sewing machine
- Pattern
- Scissors
The pattern
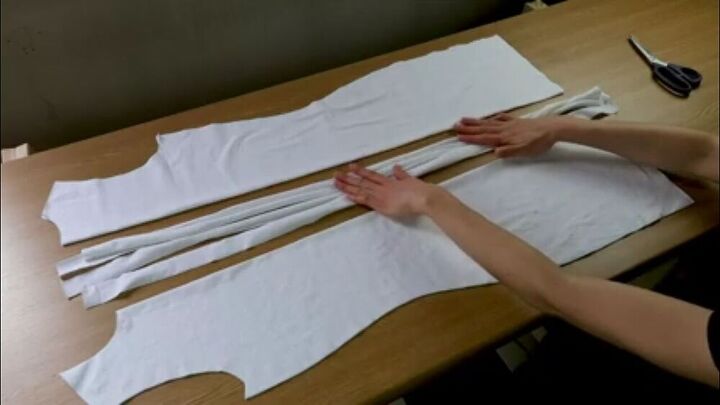
As shown in the picture below, there are 7 pieces in all; the front, the back, and the four pieces of the drawstrings (four strings of fabric - you could also use ribbon or some tape).
1. Hems
I started with the hems of the cut-out dress pieces. They have 2cm (0.8 inches) of seam allowances for folding the hems. To fold the hem, you can pin if you like, so the fabric stays in place, and then sew with a zigzag stitch.
2. Shoulder and side seams
Next, I laid the front and back pieces on top of one another, right sides together, and sewed the shoulders with a straight stitch while respecting 1cm (0.4 inches) of seam allowance.
3. Side seams
Moving on to the side seams, keeping 2cm (0.8 inches) of seam allowance on both sides, I sewed using a zigzag stitch because my fabric is a 4-way stretch.
If your fabric isn’t stretchy vertically, you can just use a straight stitch to sew when joining the front and back pieces.
4. Sew the drawstring channels
Opening the side seam allowance which I’m going to be making use of in order to create the drawstring channels, I pinned them open into place.
I used only a few pins because it was actually all that necessary. So, using the pins here is optional.
I sewed along the edges of the sewing allowances until I reached the hem of the dress (still with a zigzag, but again you can use a straight stitch if your fabric is not stretchy vertically).
This is how it turned out after I sewed the tube closed.
5. Sew the drawstrings
Next, with the four strips of fabric (this is also based on preference, you can use woven tape or ribbon). I folded my strips, sewed them right sides together, and then used a loop turner to turn them inside out.
This is what the strings looked like after turning it inside out.
6. Insert the drawstrings
Using the loop turner again, I inserted it through the side channel of the dress and pulled them up to the armhole.
7. Pin and sew the drawstrings
I pinned them into place and then, sewed the string to the dress.
This is a close up of the dress at the armhole after inserting and sewing the strings in the tube.
8. Finish the neckline and armholes
I moved on to the arm and neckhole hems, respecting the 1.3cm (0.5 inches) wide seam allowance. I folded the wrong sides together and then sewed using a zigzag stitch.
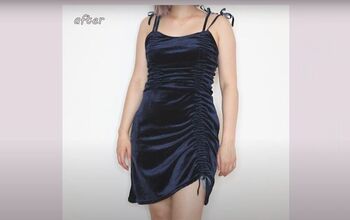
Voila! Here is the final result of the ruched dress. Pretty, isn’t it?
Looks sexy enough to wear on a dinner date!
How to make a ruched bodycon dress
Easy like I said, right? Also, watching my Youtube video during the step-by-step process while making yours is a nice trick too! I really hope to see you replicate this.
Check out my other isa in stitches patterns here and don’t forget to use the hashtag "alexdiydress" when you're done with making your own drawstring mini dress and you decide to post on Instagram.
Let me know what you think!
Kiss!
Enjoyed the project?
Suggested materials:
- Jersey fabric (Any fabric store)
- Thread
- Pins
- Sewing machine
- Pattern
- Scissors
The author may collect a small share of sales from the links on this page.







Comments
Join the conversation