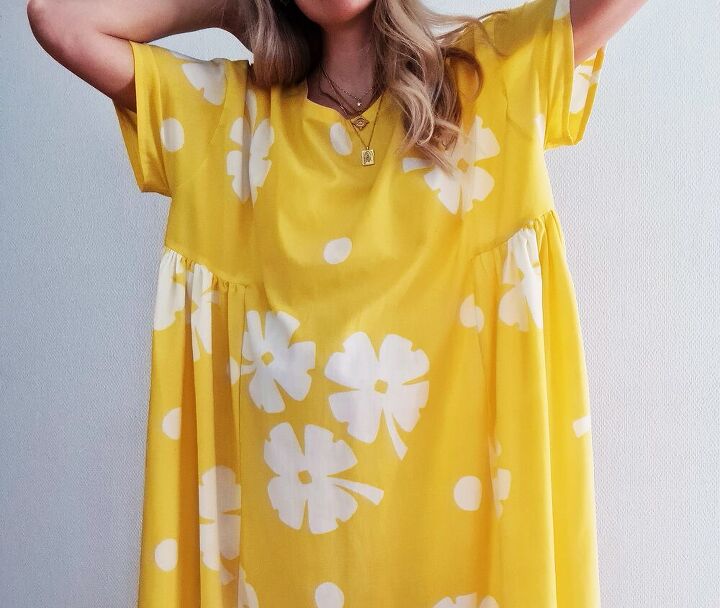
How To: Oversized T-Shirt Maxi Dress With Gathered Sides
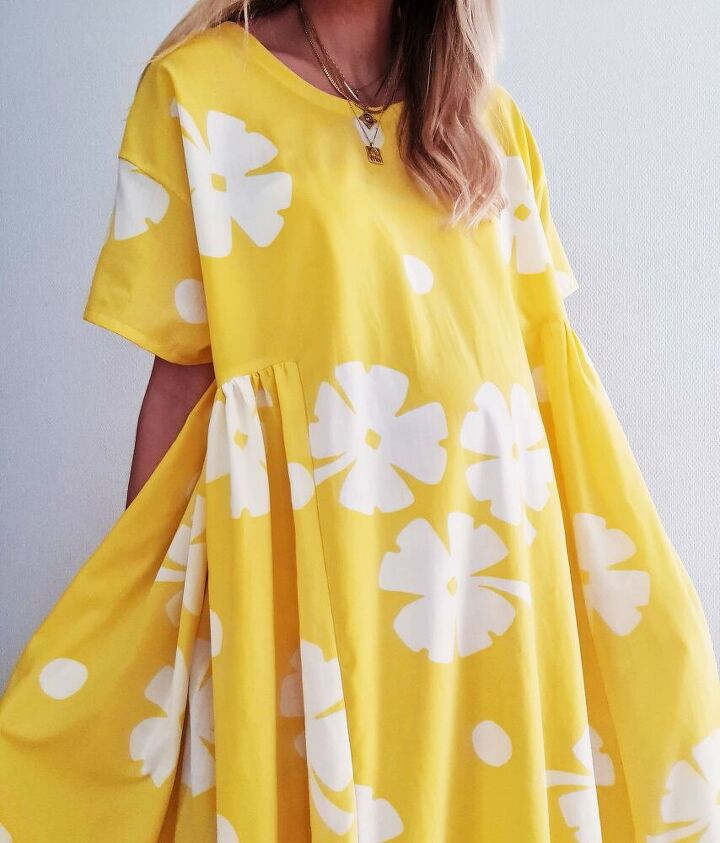
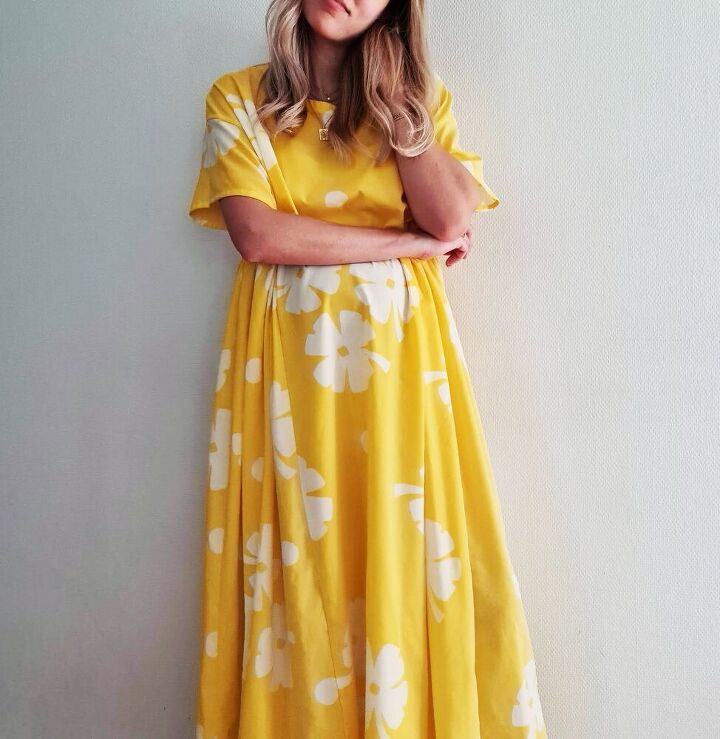
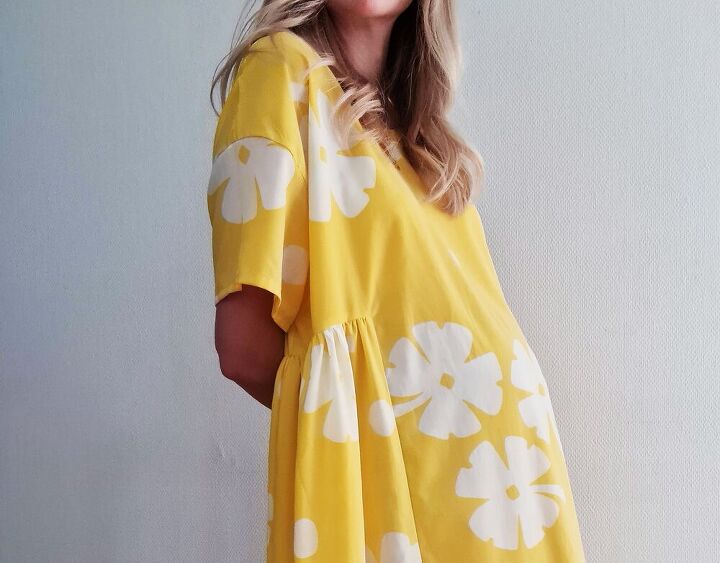
Ever since I made this dress in '18, I've been wondering about another version done in reverse - having the gathers on the sides, instead of the front and the back. Here it is, and I think I like it more this way! You get amazing volume and movement in the hem, but the front and back have a simpler look (and also showcase a pattern better).
I went for a fabric that's a bit more hippie than usual for me, but this retro bedsheet I found in a secondhand shop was too soft not to be worn. NOTE: I'm conscious when buying bedsheets from charity shops to sew with, since I know those shops are an important source for lower cost household items for many people. So I focus on bedsheets/curtains/tablecloths that either have stains or holes in them, making it more likely they'll end up in the trash. That was the case with this one - it was ripped in a few places, but I could easily cut around those areas.
In terms of fit, this dress is super flexible - I'm EU36/US4 but currently 37 weeks pregnant, and you can see there's plenty of space for the bump. These measurements would easily work for up to EU40/US8, still maintaining a pretty loose fit.
TOOLS:
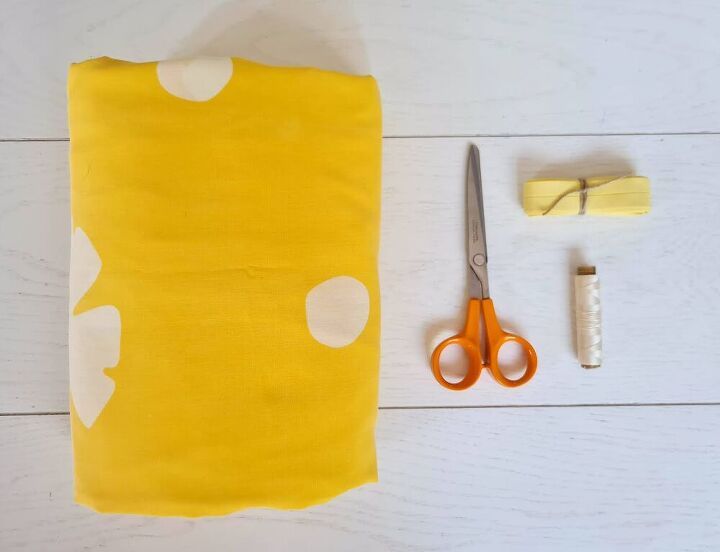
Fabric (I used a secondhand single duvet cover, size 1.5 m by 2.1 m and had some leftover, so equivalent to 2.5-3 m of full-width fabric) | Bias tape | Pins | Scissors | Thread & Sewing machine (+also used my serger but not necessary)
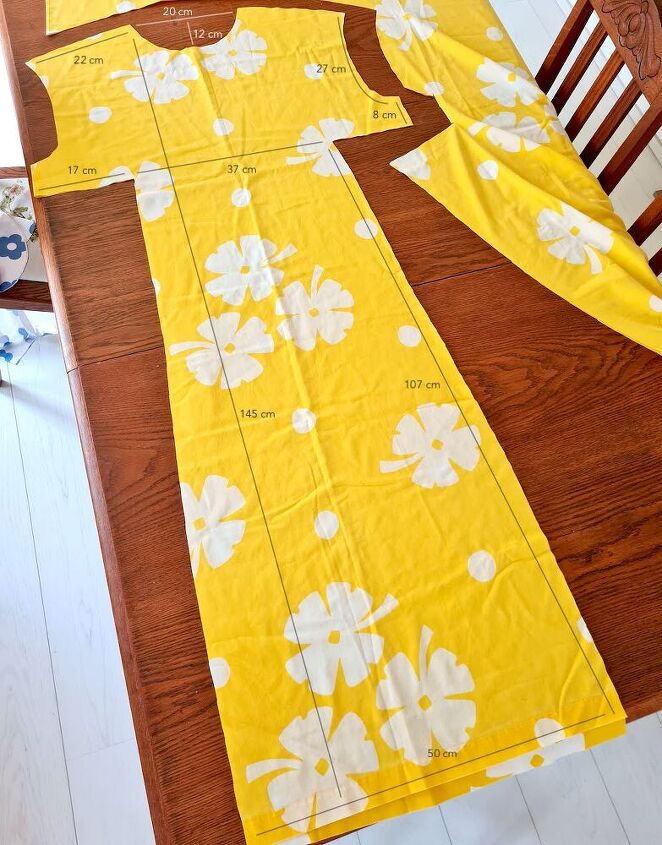
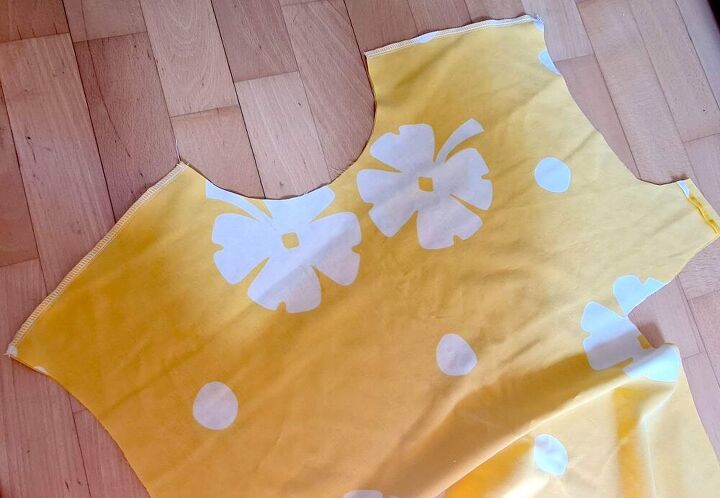
I. Here's my cut main dress pieces - the shape looks odd but stay with me:) Identical front & back pieces - I only adjusted the front neckline to be a bit deeper later on. (And yes, I was lazy not picking apart the folded duvet seam at the hem, I did that later..)
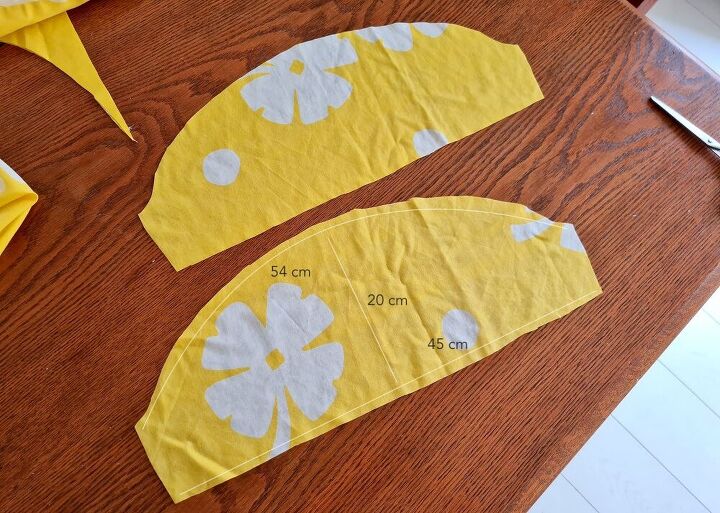
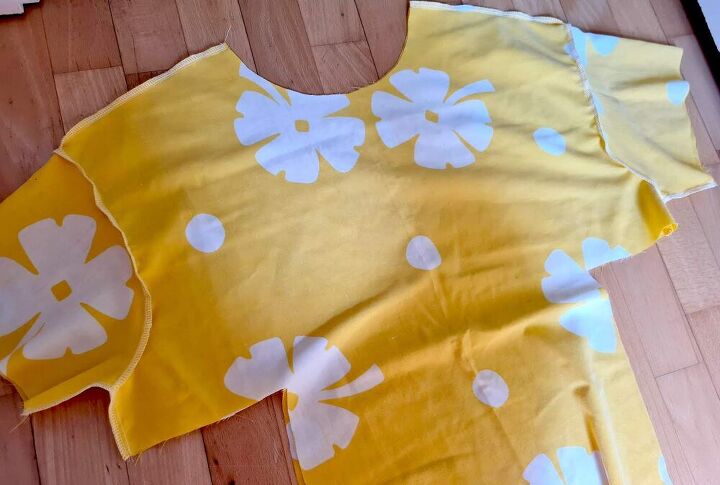
Next I cut out my sleeves:
And - I forgot to photograph - but for the sides I cut out two rectangles: Length corresponding to the cutouts on the dress + seam allowance (107 cm + 1cm = 108 cm) - and width about 2.5 times the width of the cutouts (17 cm x 2 = 34 cm, 34 cm x 2.5 = 85 cm, which I rounded to 90 cm).
II. Started construction by pinning the dress pieces together at shoulders, right sides facing, and sewed those (if you don't have a serger, you can do French seams, zig-zag the edge, or use your computer's serger-imitation stitch if it has one).
III. Next pinned my sleeves in place and sewed them..
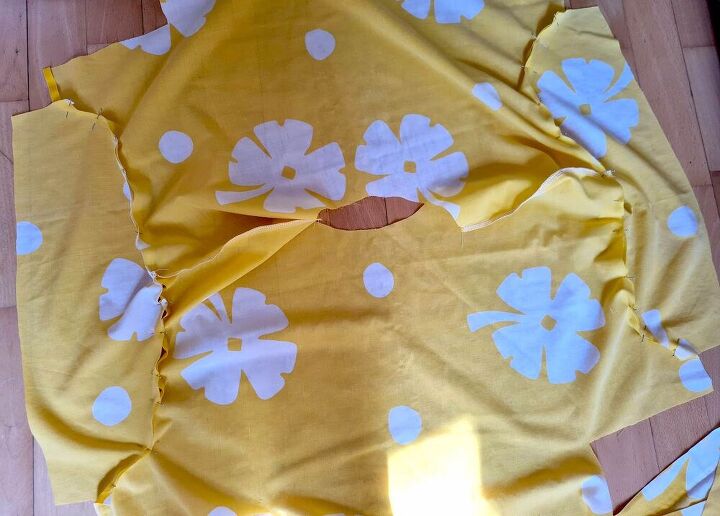
IV. .. And then the sleeve underseams and sides.
V. Now it was time to fill in the cutouts on the sides. I took my two rectangles, and on one short edge of each, did a basting stitch (longest stitch on your machine) with highest thread tension, to gather the fabric, then pulled on the bobbin threads to adjust the gathers to match the width of the cutout. I forgot to take photos at this point, but here's a good video on gathering if you're new to it.
Once I had the gathering done, I pinned the pieces in their spots in the cutouts, right sides facing, and sewed the horizontal seam:
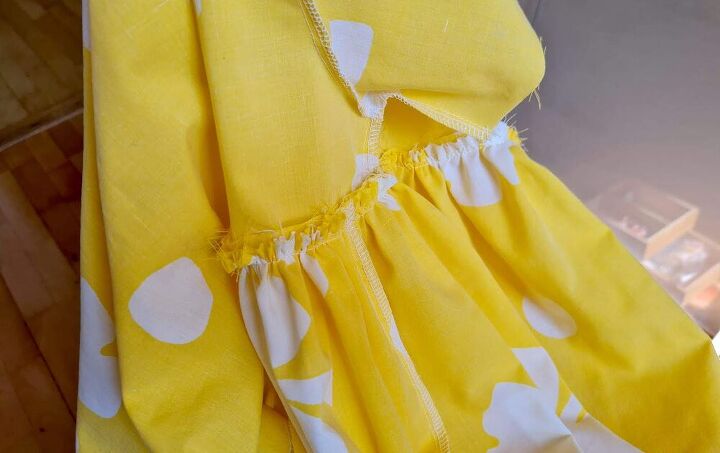
.. And before sewing the vertical seams, very important to clip a notch in the dress piece at the corners, to remove tension and turn the fabric so the long edge of the rectangle aligns with the vertical edge of the cutout. Then just sew down both sides of the rectangles, and finish either with your serger or zig-zag.
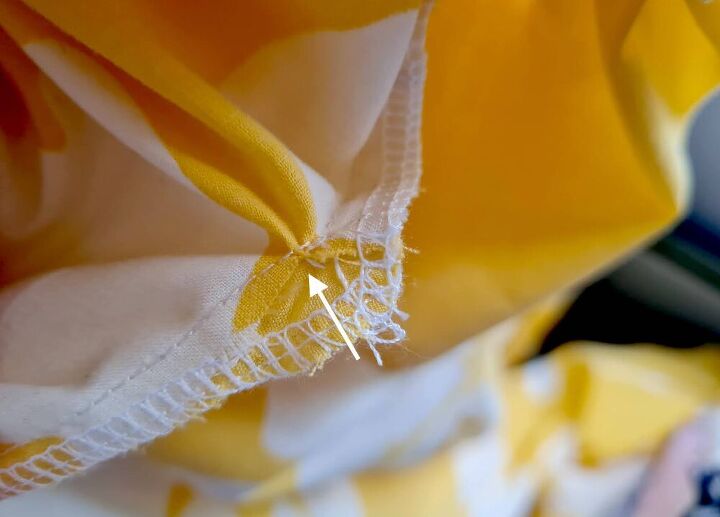
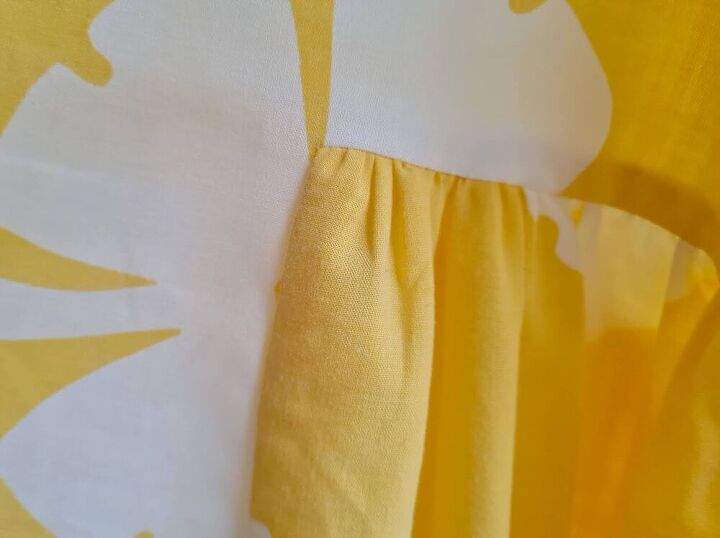
VI. After pressing, you should have a nice & clean corner on the right side.
The rest of the finishes were nothing new - I did the neckline with bias tape like with this dress, and finished the sleeves and the hem of the dress with a double fold.

The author may collect a small share of sales from the links on this page.


Comments
Join the conversation
Shame you forgot to photograph a few pieces I found just the description confusing
Thank you that is so simple