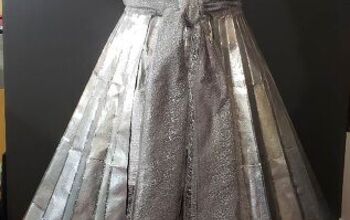
Trash Fashion Wedding Dress - Bodice - Episode 2
Welcome to my crazy world of haute couture! 🤣🤣🤣
If t-shirts and pajama pants graced the cover of vogue well, I would be a fashion diva. So perhaps it is not that surprising that I would be intrigued by making a dress out of trash.
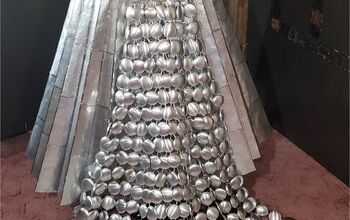
I recently embarked on this frivolous and silly escapade, and so far, the results have turned out better than the completed design in my head. But, of course, I am only just starting, so maybe I should check my ego because something will go awry before it ends. Still, it would be a lie not to say that I am pleased with the results, particularly my aluminum can sequins.
I am planning to have several installments for this project. You can check out where I am heading in the introduction video.
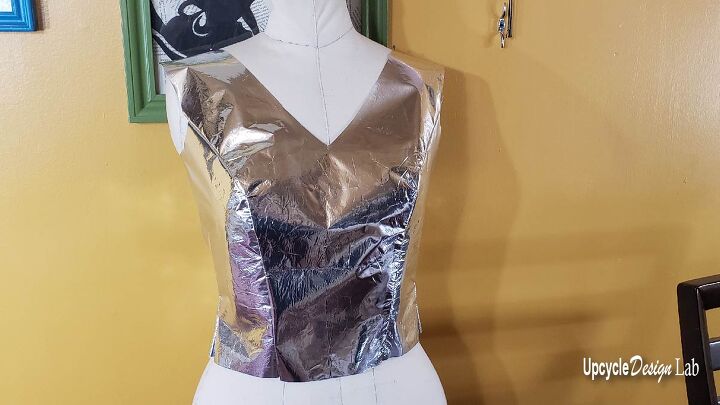
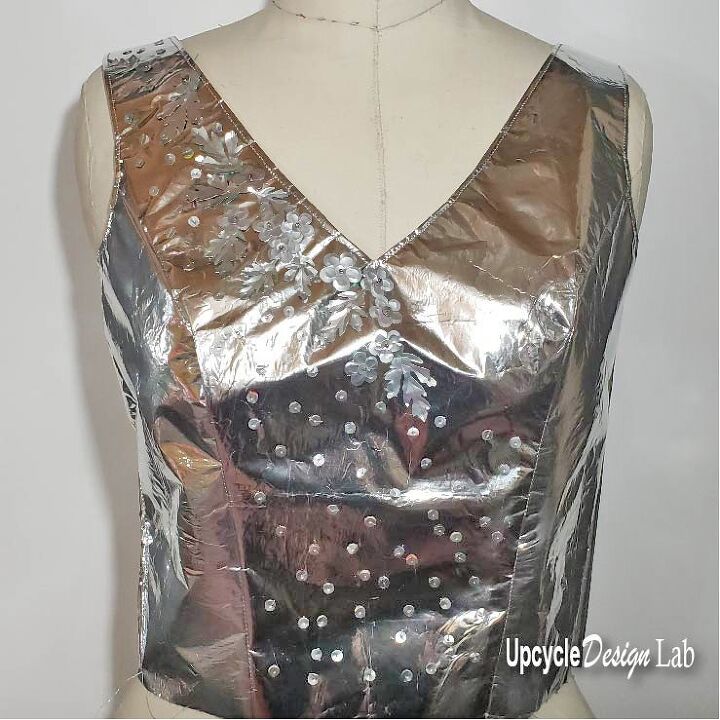
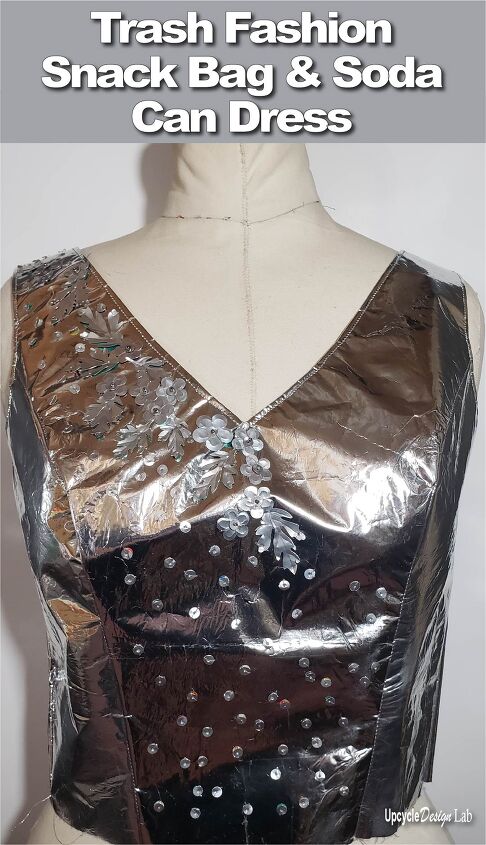
But for today, I am focusing on the bodice made primarily from empty snack bags. 😁

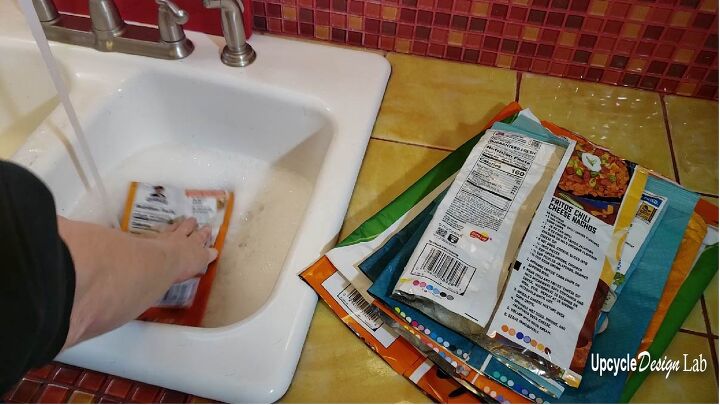
The first step is to cut the bags open, wash them in soapy water, rinse, and then dry them off.
Next, I used an old sheet and some adhesive spray to attach the printed side of the snack bag to the fabric.
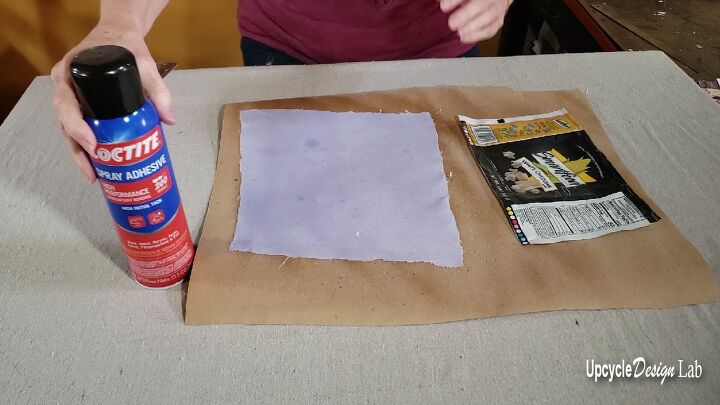
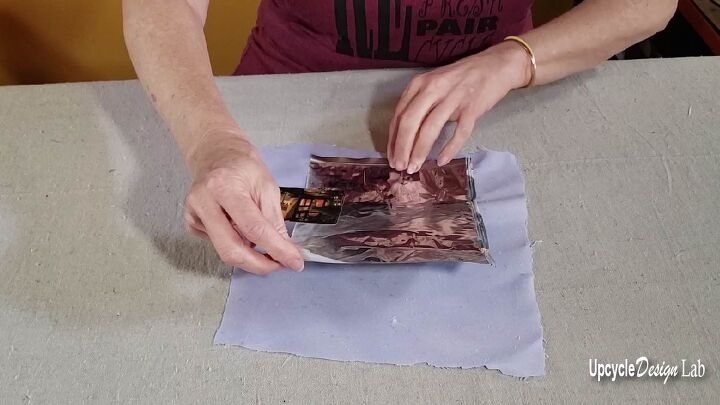
The video below shows you more details and additional ways to make chip bag fabric.
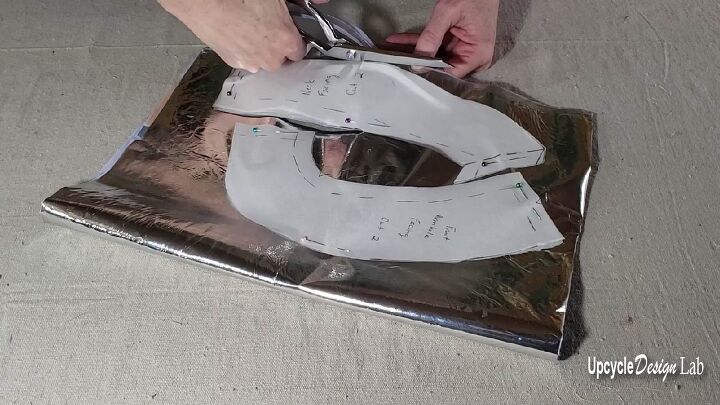
The next step was to cut out the pieces. I started with a basic wedding dress pattern and then made some alterations. One note is that the cut pieces can only be as large as the snack bags, so I recommend buying the family-size snacks. Or maybe that’s just my stomach talking. 🤪
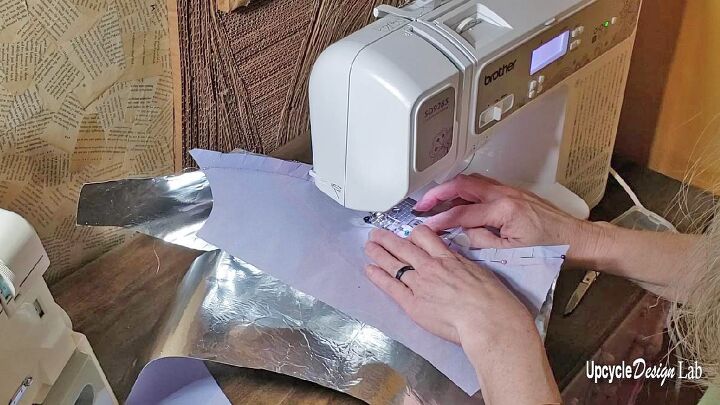
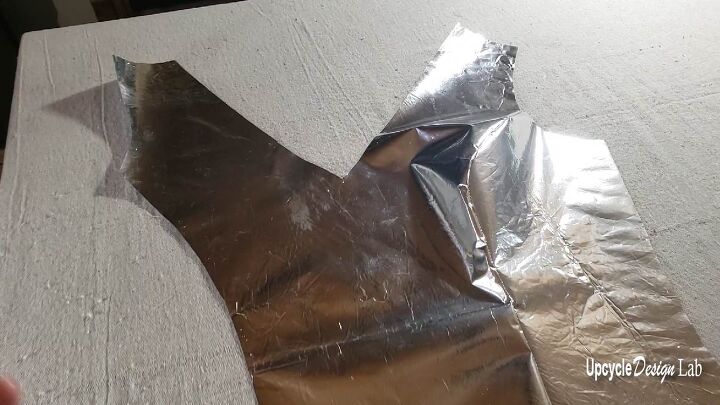
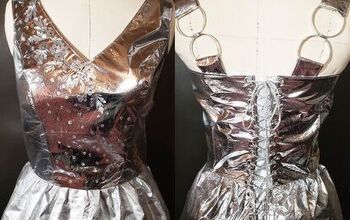
The next step was to sew the pieces together, which is tricky for two reasons. The first reason is that the material is slightly stiff and more rigid to fit than typical fabric.
And the second reason this fabric is tricky to work with is that it shows all the puncture holes, so pinning is tough, and there is no letting out of the seams.
But I am stubborn, so I persisted and eventually got all of the pieces assembled.
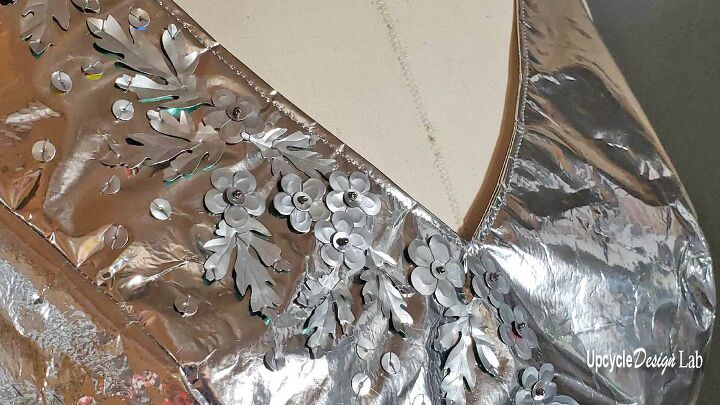
Here is where this gets fun and, of course, even a little crazier. At first, I planned to decorate the neckline with sequins made from aluminum cans made using a hole punch.
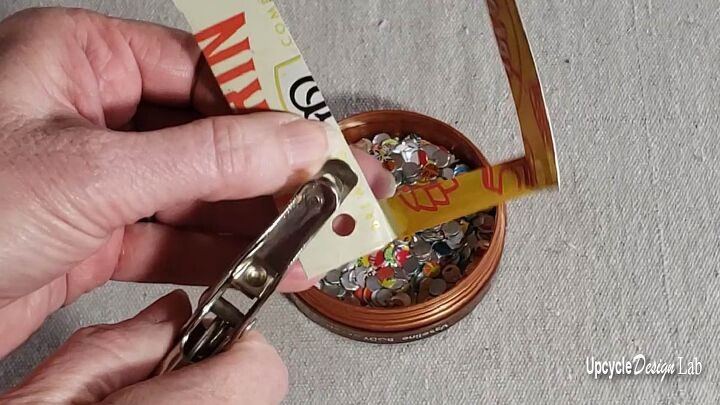
But the design of only sequins didn’t come together, so I expanded my options by cutting different shapes out of the aluminum using my Cricut cutting machine.
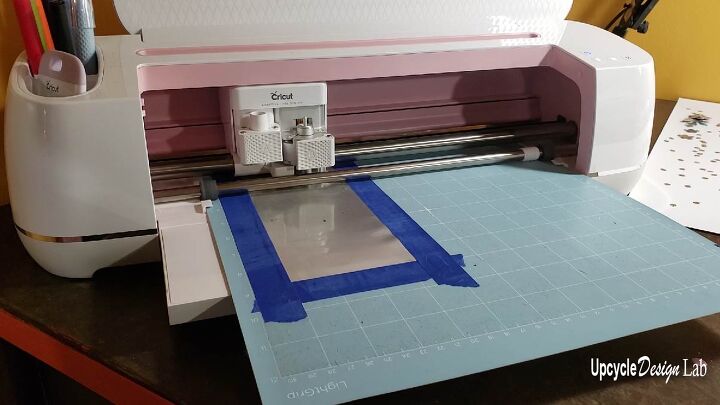
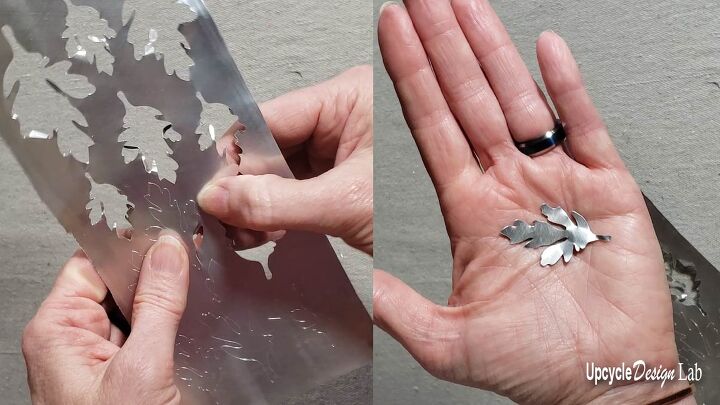
The cutting machine allows you to cut intricate shapes like these leaves.
Watch this video if you want more information on cutting aluminum beer and soda cans with a Cricut cutting machine.
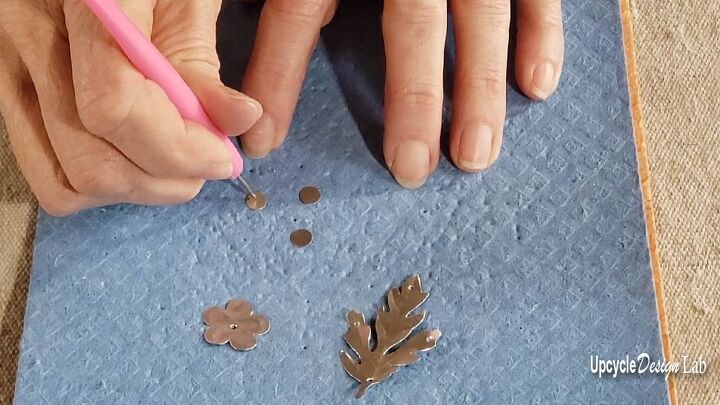
I used an embossing tool to add texture and dimension to the cutout leaves and petals.
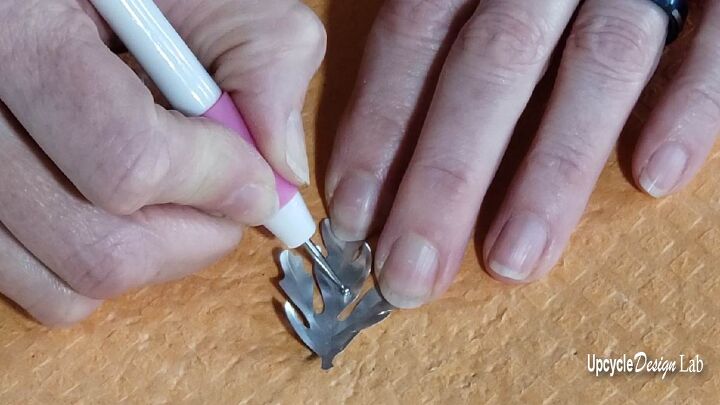
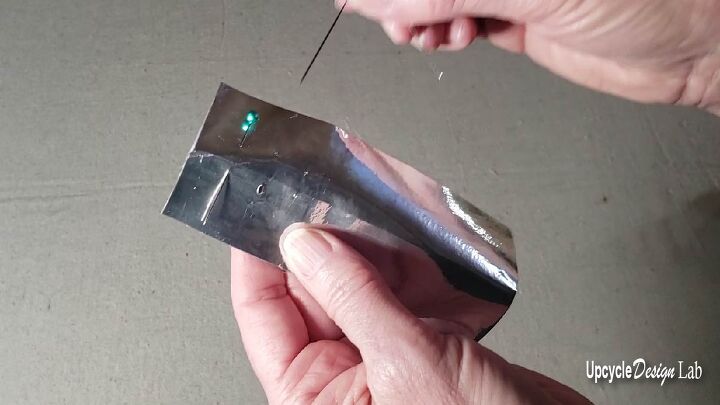
And then used a stylist to punch holes in the aluminum pieces.
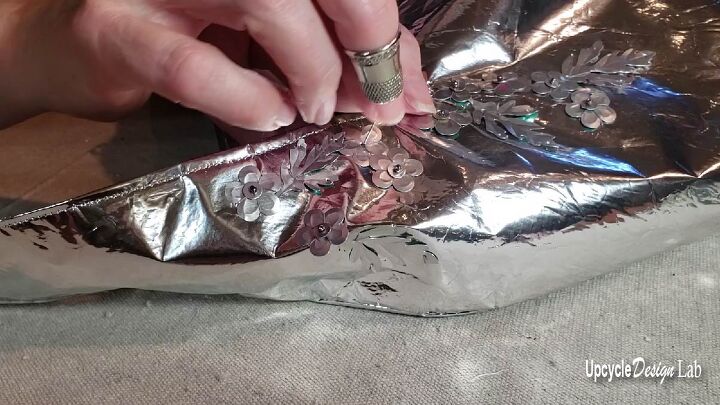
The final step is to sew the design to the dress bodice. But first, I needed to decide on a plan, so I made a couple of different layouts and then asked my youtube family to vote. They overwhelmingly chose the asymmetrical design, so I began attaching the metal pieces with a needle and thread to complete the dress bodice.
Stay tuned for more on this project in the weeks to come.
Happy Upcycling,
Cindy
Advertising Disclosure: Upcycle Design Lab may be compensated in exchange for featured placement of certain sponsored products and services or your clicking on links posted on this website.
The author may collect a small share of sales from the links on this page.


Comments
Join the conversation