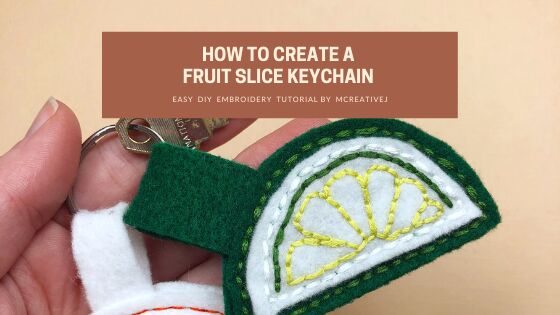
Easy Embroidery Tutorial- Fruit Slice Keychain Project
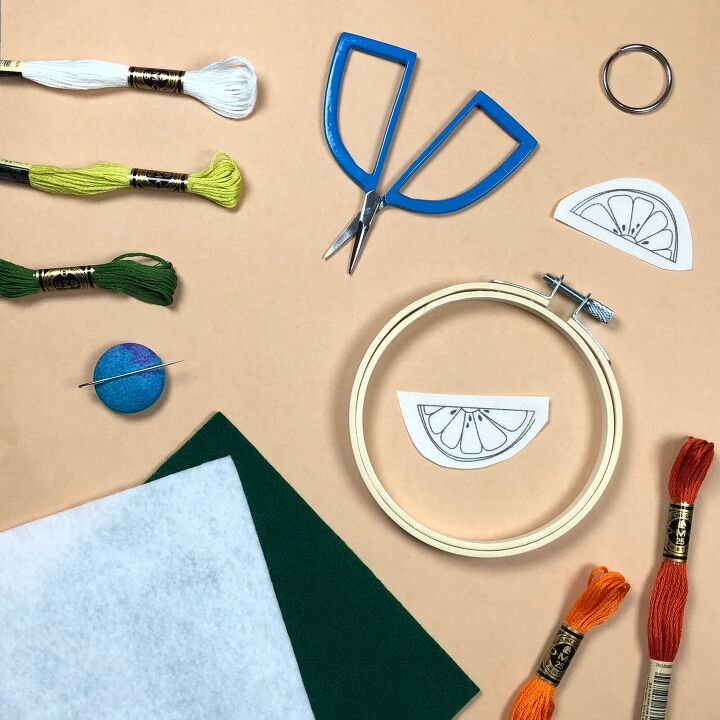
Gather Your Materials
- Craft felt
- Embroidery needle
- Scissors
- 4-inch embroidery hoop
- Assorted embroidery thread
- Summer Fruit Peel Stick and Stitch designs or water-soluble transfer paper to draw your own fruit patterns
- Keychain ring
- Warm water
- Hair dryer (optional)
Let's get crafty!
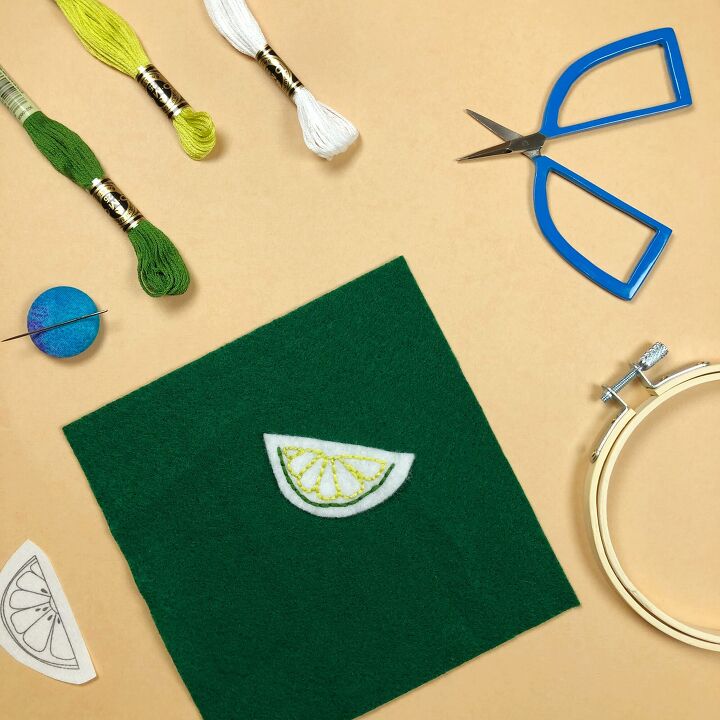
Step 1: Cut Your Felt
Cut a 5x5 inch square of craft felt and place it inside the embroidery hoop.

Step 2: Place your transfer
Gently peel away the water-soluble transfer paper backing. Place the design, sticky side down, onto the felt.
Step 3: Stitch your fruit slice
Starting with the outline color, thread the embroidery needle and knot the end. Use the back stitch to fill in the rind of the fruit slice.
Next, thread the embroidery needle with the inner fruit color. You can outline each fruit section using the back stitch or fill in the pattern using the long and short satin stitch.
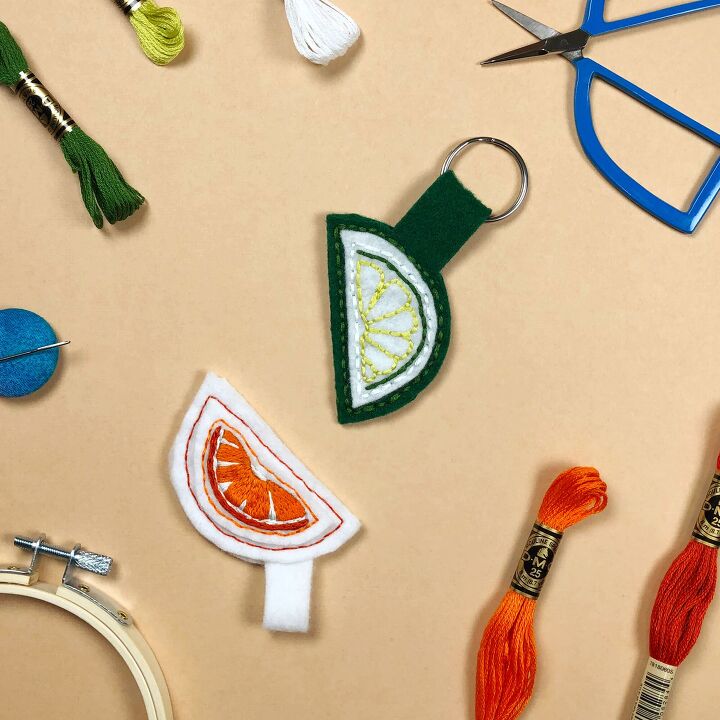
Step 4: Cut out your design
When you are done stitching, remove the felt from the embroidery hoop. Trim the felt ¼ inch away from the stitching.
To remove the water-soluble transfer design, run the felt under warm water. The transfer paper should dissolve. Let the embroidered felt air dry or dry with a blow-dryer (this is much faster if you don’t like waiting, like me).
Step 5: Assemble the pieces!
Sandwich the sewn end of the rectangle between the two half circles of felt. Using the threaded embroidery needle, sew the back stitch, around the outer edge of the three pieces so they are all sewn together.
Finally, attach the keychain ring to the loop and enjoy!
I hope you enjoy this project!
On April 25, I’ll teach a Zoom Class how to make an embroidered fruit keychain.
I would love to see you there!
Want to stitch together?
Find upcoming embroidery workshops with Jenny Lemons here.
This DIY tutorial was originally posted on JennyLemons.com Read the original post here.
***This post contains affiliate links. Should you purchase something listed, I may receive a small portion of the sale. Thank you for checking out my recommendations.***
0 views
The author may collect a small share of sales from the links on this page.


Comments
Join the conversation